Files and Folders Sync
What is File Sync?
File Sync is a feature that allows you to synchronize files/folders to other locations, such as an external hard drive, NAS, or removable USB flash drive, etc. File Sync copies the individual files/folders similar to a Window's "copy" command and therefore does not create an image file. Instead, files and folders are copied to the specified destination and can be easily accessed.
How to run File Sync in AOMEI Backupper
Here are the detailed steps about how to set file sync:
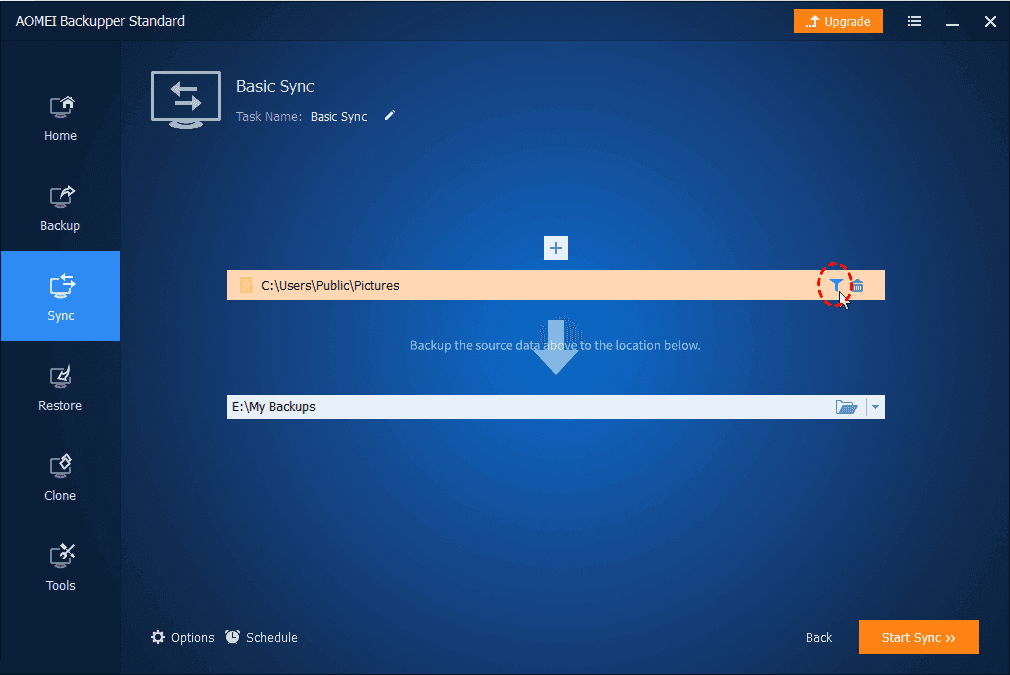
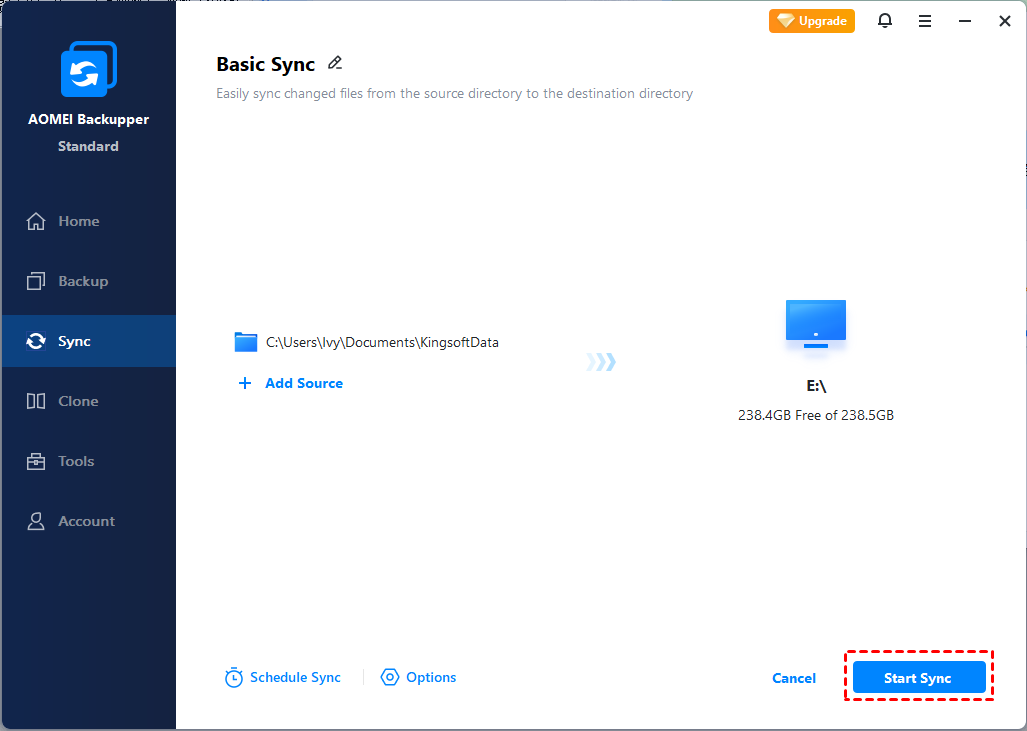
1. Click the "Sync" tab on the left sides and then select "Basic Sync".

2. You can name this sync task using the Task Name field to help you distinguish it from other sync tasks. Click "Add Folder" to select the folder which you want to synchronize.

3. You can click the "funnel" icon to open the "Filter Settings" after you add the source folders.
The feature "Filter Settings" can be set after you add source folders. (Only available for paid versions)

1) The File Inclusion Mask can specify the files that you need to sync. Wildcards are supported and separate multiple masks with semi-colon (*.doc;*.xls;*.ppt ).
With this mask, you can configure including sync according to file extensions, such as .doc, .xls, .ppt and so on. So, only files with the same extensions will be synced to the target path.
For example, you would like to only sync .doc files in the selected source folders. You can just configure "*.doc" in the mask. (If you would like to include more extensions, please separate the formats with semi-colons).
2) The File Exclusion Mask specifies the files that you need to exclude. Wildcards are supported and separate multiple masks with semi-colon (*.temp;*.tmp;*.bak;*~*).
With this mask, you can configure to exclude according to file extensions, such as .temp, .tmp, .bak and so on. As a result, all files with the same extensions will not be synced to the destination location.
For example, you would like to only exclude .temp files in the selected source folders. You can just configure "*.temp" in the mask. (If you would like to include more extensions, please separate the formats with semi-colons).
3) The Folder Exclusion Mask specifies the folders that you need to exclude. Wildcards are supported and separate multiple masks with a semi-colon (*temp;temp*).
With this mask, you can configure to exclude folders with the same name. Therefore, all folders with the same name will not be synced to the destination location.
For example, you would like to only exclude folder "A" in the selected source folders. You can just configure "*A" in the mask. (If you would like to include more folder names, please separate the names with semi-colons).
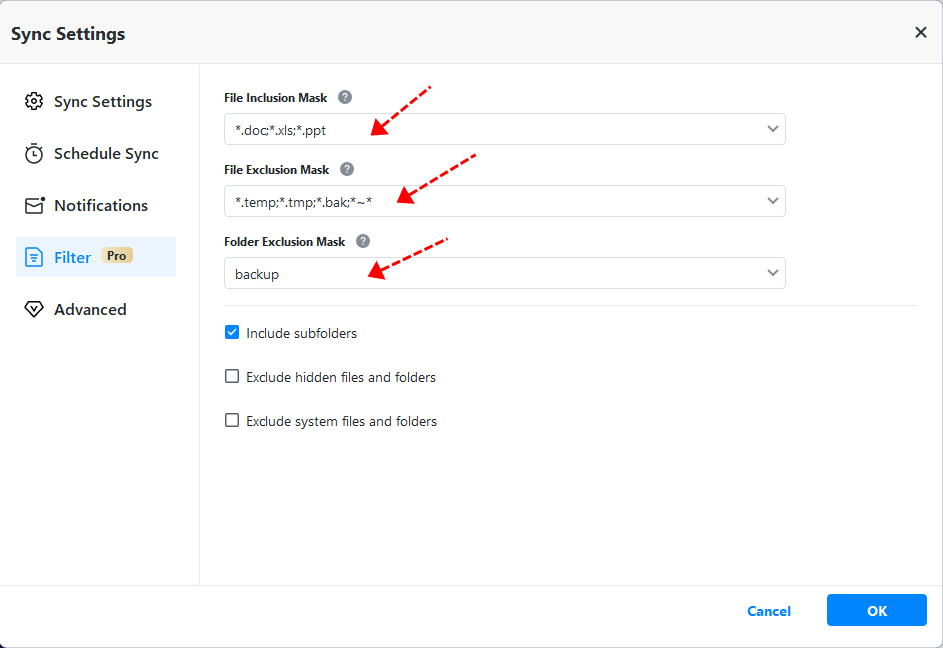
You can also tick the bottom three boxes as you need. After the "Filter settings" option is set, please click "OK".
4. Select a destination location to store the folder, and then click "Start Sync" to perform the operation.
While a sync is running, you can click an icon in the lower-left corner to set to Shut down/Restart/Hibernate/Sleep PC after sync completion. (available in paid versions)

When the sync is running, you can also click the underlined sentence to check the sync process in detail.
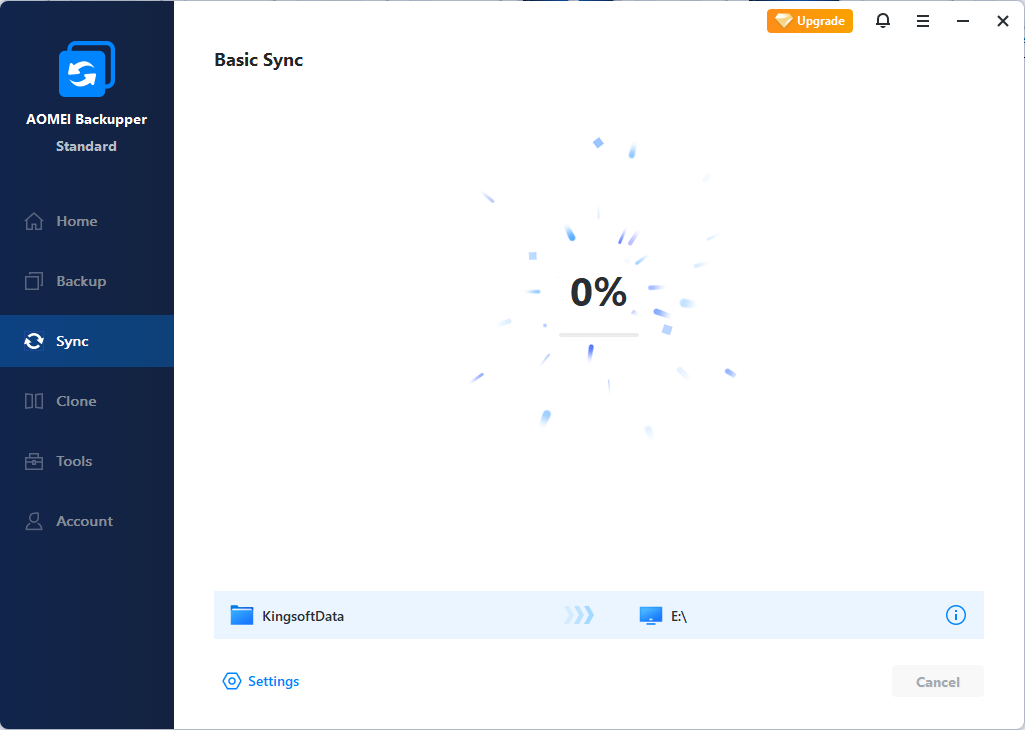
5. Please kindly wait for the sync process to complete and then click the "Finish" button.
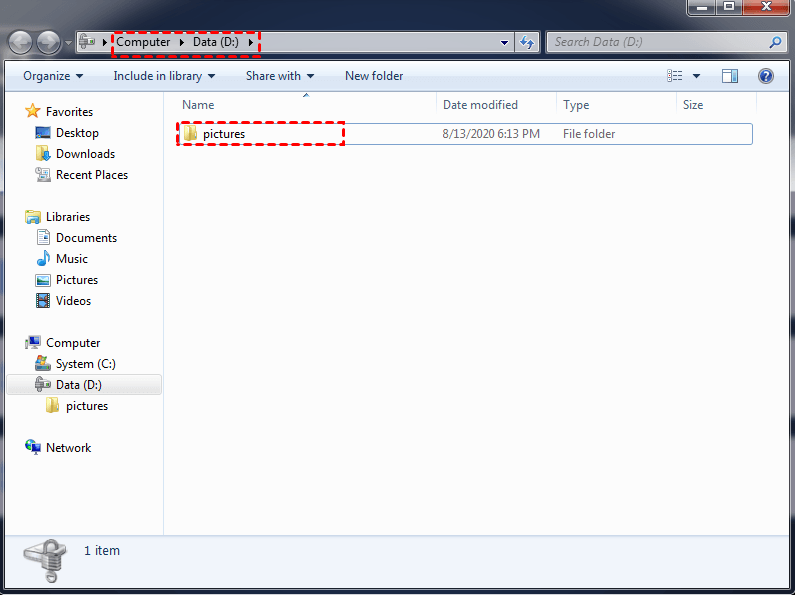
As a result, you can check if the folder you added is now in the destination location.
If you want to create a folder with the same name as the task in the target location, you can click Options > Advanced > Automatically create a folder with the same name as the task in the target location before you click "Start Sync".
Notes:
1. The File Sync feature will copy the whole source folders by default (including subfolders and files) to the destination directory unless you configure to include or exclude some files and folders in the "Filter Settings".
2. Please don't modify the folder name of the source folder(s) once file sync has been set up; otherwise, the sync process can not function properly.
3. For a new sync process, if the source file name is the same as one of the destinations which have been synced before, the destination copy will be overwritten. There is no way to keep a different version of a file using the same name.
4. The maximum file path of file sync is restricted by the maximum path length allowed by the Windows API to 256 characters. So, please check the names of the folders you are going to synchronize and shorten them when it's necessary. AOMEI Backupper can't synchronize folders that have special characters in their names.
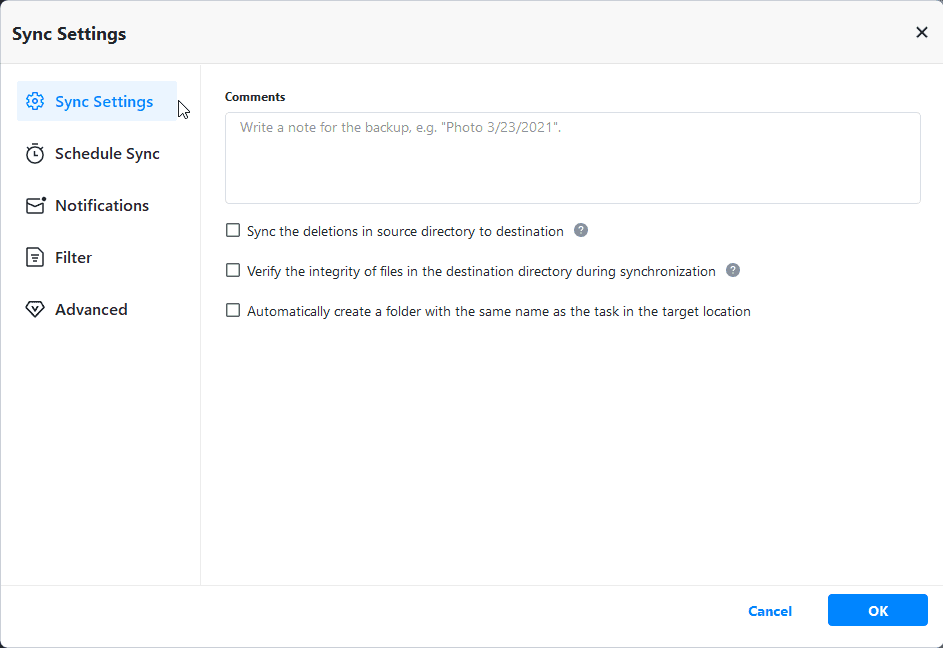
5. By default, if you delete a file in the source folder, the file won't be deleted in the destination because AOMEI Backupper only synchronizes added or changed files to the destination location. If you need the files to be deleted from the destination location when they are deleted from the source folder, please click Options > General and then check Sync the deletions in source directory to destination.
6. When performing the File Sync operation, AOMEI Backupper can only sync the contents of folders that have not been renamed or moved. If you wish to change the name or location of the source folders(s), then you must modify the sync task to reflect this.
7. If you synchronize the C drive to another disk, it is impossible to boot from the disk you sync to because AOMEI Backupper only copies all data under C: drive to another disk and it does not copy the special boot configuration of your system.
8. File Sync supports VSS (Volume Shadow Copy Service). This allows files that are being used by other programs to be synchronized. However, you need to make sure that the "Volume Shadow Copy" service on your computer is enabled. If some files are in use by other programs exclusively, they are not synchronized.
9. If there are some special system files or folders with special security attributes in the source folders, they won't be synchronized and the program will prompt you to skip them.
10. The main function of File Sync is to help you to synchronize working files and user data files. Thus, if there are some special system files or files with special security attributes in the source folders (e.g. C:\boot\bcd, C:\Windows\CSC), they are not synchronized.
11. If the target path is located on a FAT/FAT32 partition, any files larger than 4 GB won't be synced to the target path because a single file larger than 4 GB cannot be stored on FAT/FAT32 partitions.
12. After synchronizing files, any changes made directly by the user to the files or folders stored under the destination location will cause inconsistencies between source and destination data.
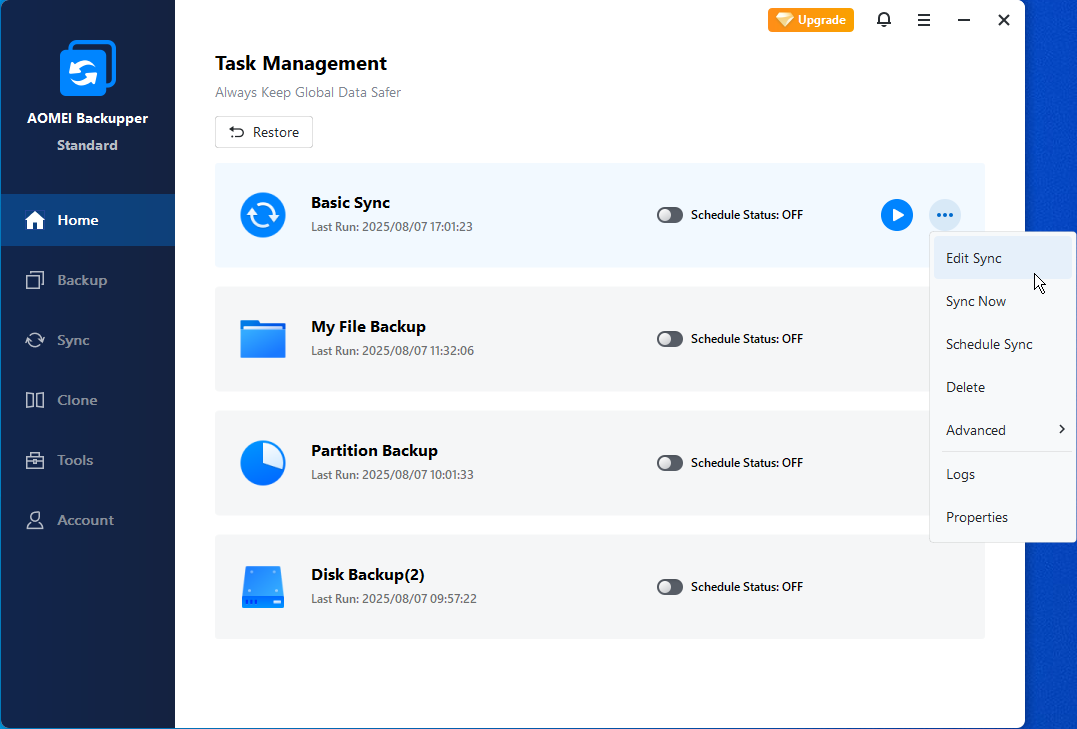
How to create a scheduled File Sync task for your folder
Method 1: If you have not created any scheduled file sync task, click "Sync", and select"Basic Sync" to bring you to the file sync interface. From here, you can select which folders you want to synchronize. Here is where you will also find the "Schedule Sync" option.

Method 2: If you have created a sync task but you have not enabled the "Schedule Sync" feature, you can enable it by clicking the more options button and choosing "Schedule" to make it a scheduled task.
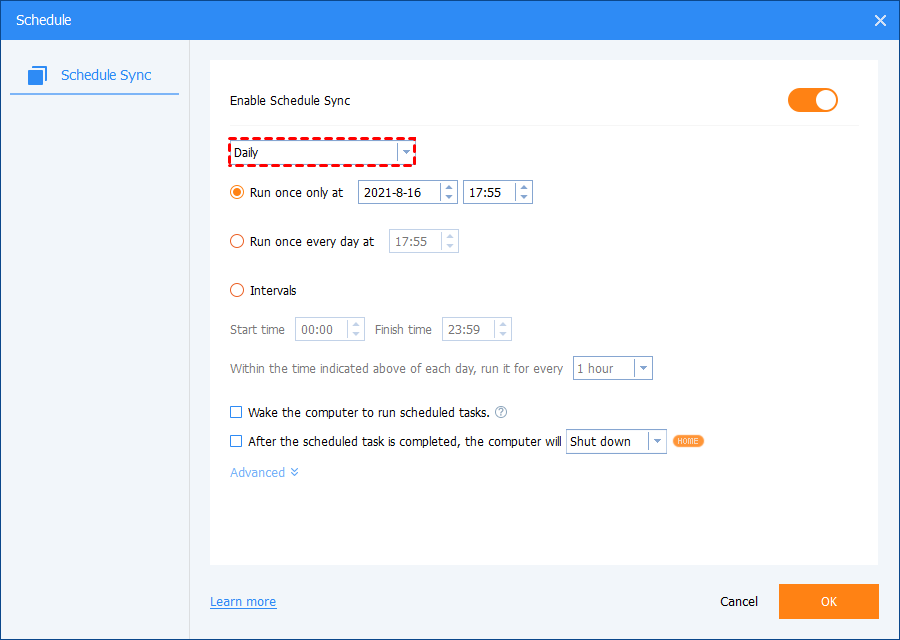
About schedule mode
Daily Mode
-
Set a time point in the future to perform the backup task only once.
-
Set a time point to perform the backup task once a day.
-
Set a time range in a day first, then choose the time interval between the start time and finish time and the program will perform the backup at intervals of 1, 2, 3, 4 or 6 hours within this time range every day.
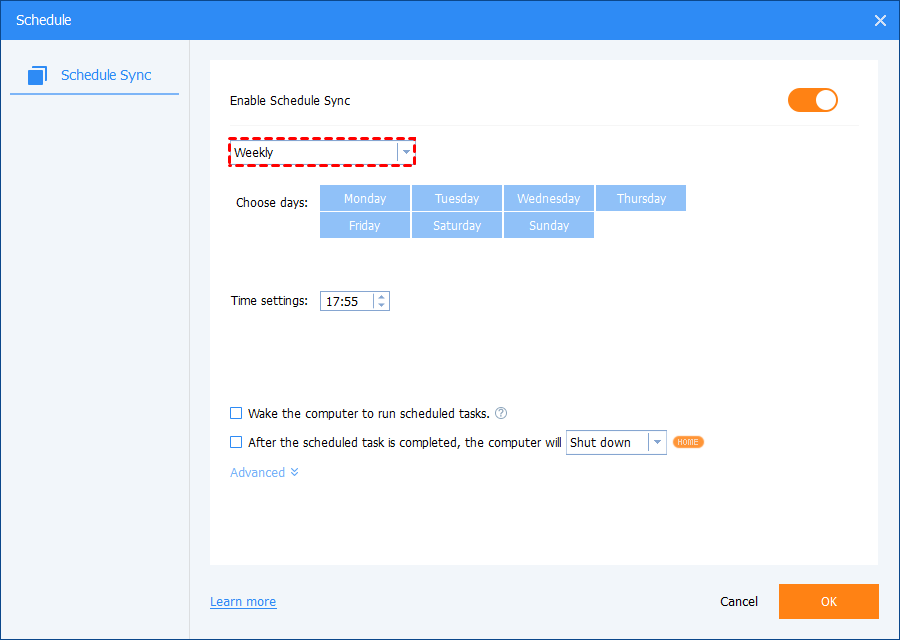
Weekly Mode
-
Choose a specific day for the backup task from Monday to Sunday.
-
Set a desired start time and the program will automatically perform the backup at this time on the chosen day(s) every week.
Monthly Mode
-
Choose a start time on a specific day(Monday-Sunday) of each month to perform the backup task.
-
Choose a start time on a specific day from the calendar to perform the backup task every month and you can select multiple days on the calendar.

Event Triggers
There are four event trigger types offered by AOMEI Backupper: User logon, User logoff, System startup, and System Shutdown. Please note that Event triggers mode is available in paid versions only, such as AOMEI Backupper Professional. Please upgrade to professional if necessary.

1. User logon: Set up to perform a sync task automatically when the user logs in. Once you log into any user account (administrator or standard), the sync task is performed immediately. If you log on as an administrator account, you will see a small AOMEI Backupper system tray icon which shows the sync progress in the right bottom corner of the desktop. However, if it is a standard account, the sync task is performed in the background without the aforementioned system tray icon visible.
2. User logoff: Set up to perform a sync task automatically when the user logs off. Once you log off any user account (administrator or standard), the sync task is performed in the background immediately. If the sync task has not been completed by the time you log on again, it still continues to run. If you log on as an administrator account, you will see a small AOMEI Backupper system tray icon showing the sync progress. If you shut down the PC before the sync task has been completed, AOMEI Backupper will prevent the system from shutting down and then continue to complete the sync task first. After that, the system will shut down automatically.
3. System startup: Set up to perform a sync task automatically when a system startup occurs. Once the system has started, even though you have not yet logged on to reach the desktop, the sync task will run in the background immediately. If the sync task hasn't been completed after you reach the desktop, it will still continue to run and you will see a small AOMEI Backupper system tray icon showing the sync progress if you logged in via an administrator account. If you shut down the PC before the sync task is complete, AOMEI Backupper will prevent the system from shutting down and then continue to complete the sync task. After this, the system will shut down automatically. In addition, you can set a time to delay performing the sync task. For instance, you could set up a 5-minute delay, so the sync task starts to run 5 minutes after system startup.
4. System shutdown: Set up to perform a sync task automatically when the system shuts down. When you click “shut down", AOMEI Backupper will prevent the system from shutting down and perform the sync task first. Sync status information is displayed. Once the sync is complete the system will shut down automatically. Please note that if a system update is running after clicking "shut down", the sync task will run after the system update has been completed.
Sync Options
When creating a Sync task, you will see "Options" in the lower-left corner. Click it and in the pop-up window, you will see there are two options, one is "Comments", and the other is "Email notification". You can write comments for this task to help you distinguish it from other sync tasks and you can also enable email notifications for this task to receive an email informing you of the sync result.
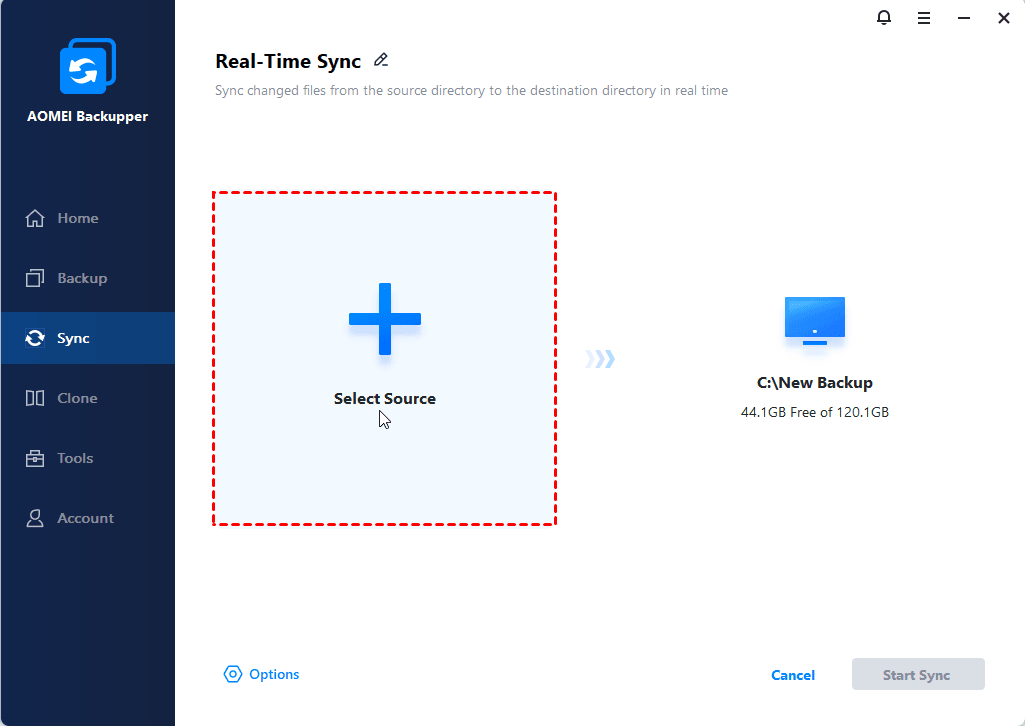
How to create a Real-time Sync task
For Real-time Sync tasks (available in AOMEI Backupper Professional editions and above only), AOMEI Backupper will monitor the contents of the source folder(s) specified and reflect any changes or newly created files in real time to the destination folder. In addition, you can select to optionally remove any files in the destination if they are removed in the source locations as part of the real-time monitoring process.
Here are the detailed steps about how to set a real-time sync:
Click "Sync", and select "Real-Time Sync". Then, click "Add Folder" to select the folder which you want to synchronize, choose the destination path, and then click "Start Sync".
When you select a Real-time Sync feature, the "Sync the deletions in source directory to destination" option is ticked by default, so there is no need for you to manually delete these files from the destination location.

For more detailed info about how Real-time Sync works, please refer to real-time file sync.
Notes:
1. For Real-time Sync, AOMEI Backupper does not support Email Notifications.
2. For the real-time sync feature, selecting a NAS as the source is not supported.