HP SMART Hard Disk Error 301 - Solved Now!
Have you encountered hard disk 301 error in your HP computer? Find quick fixes to the error from this page.
by Lily Updated on May 12, 2023
Quick Navigation:
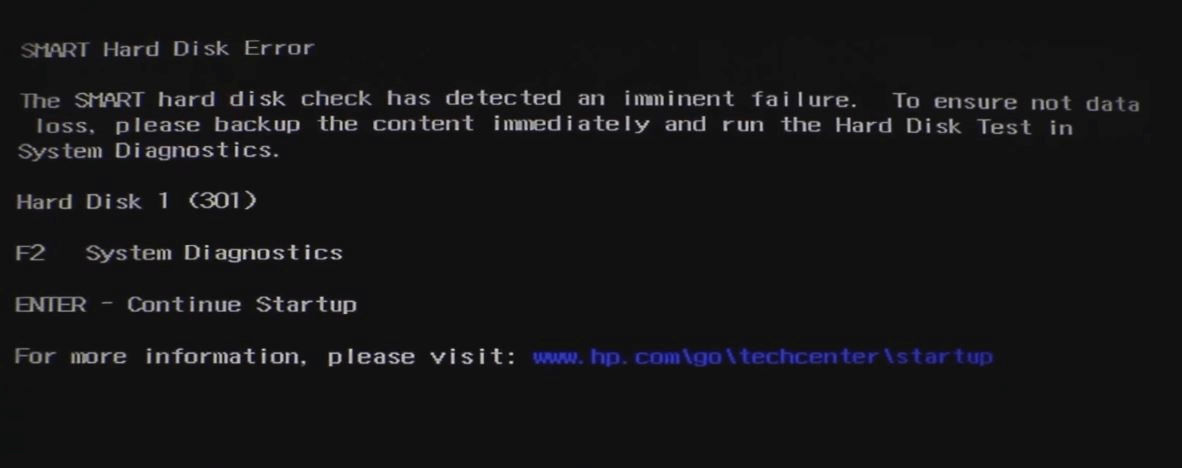
An error occurs: Hard Disk 1 (301) HP
Many HP computers have SMART (Self-Monitoring Analysis and Reporting Technology System) hard drives, which use predictive failure analysis to indicate when a hard drive failure is imminent. The SMART hard disk test scans hardware for issues when you boot the system and displays error codes if issues are found. Hard disk 301 error is one of the common issues.
If you are confronted with Hard Disk 1 (301) in your HP computer, following things may account for it:
-
Outdated or misconfigured BIOS
-
Loose connection
-
File corruption
-
Virus infection
-
Unexpected shutdown
-
Physical damage to the hard drive…
Then, how to solve hard disk error 301 efficiently?
4 Effective HP SMART Hard Disk Error 301 repair solutions
As the on-screen prompt says, the first thing you should do is to make a backup. Press Enter to continue startup and do file backup for your crucial data. Then, you can try the SMART hard disk error 301 fixes offered below:
Fix #1: Run Hard Drive Quick Test
1. Restart your computer and when you receive the error message again, press F2 to open HP PC Hardware Diagnostics.
2. On the main menu, click Component Tests. And then click Hard Drive > Quick Test > Run once successively.
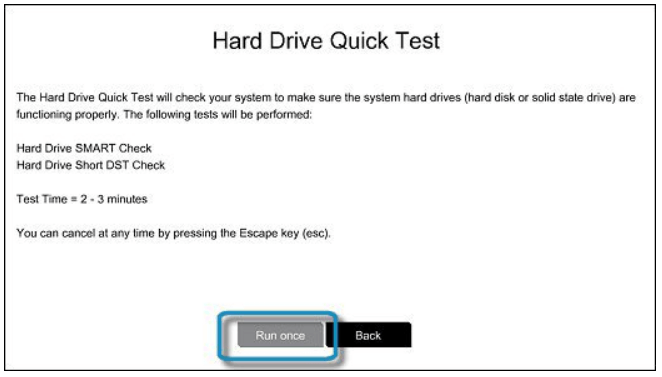
3. The Hard Drive Quick Test begins. If the computer has more than one hard drive, select the drive you want to test. To test all the hard drives, select Test All Hard Drives.
4. When the test completes, the results are displayed on the screen and also in Test Logs on the main menu.
5. If the hard drive passes the Quick Test, but there is still a problem with the hard drive, run the Extensive Test. This test includes the SMART Check, Short DST, Optimized DST, and Long DST. To run these tests individually, select them from the Hard Drive Tests menu.
6. If the hard drive fails one of the tests, write down the failure ID (24-digit code) so you have it available when you contact HP Customer Support. The information is also available in Test Logs on the main menu.
Fix #2: Perform a hard reset
1. Turn off the computer. Unplug all devices from your computer, including printers, scanners, media card readers, USB flash drives, CDs and DVDs, etc.
2. Unplug the AC adapter, remove the battery from the battery compartment (if applicable) and hold the Power button down for approximately 15 seconds.
3. Insert the battery (if applicable), and plug the AC adapter back into the HP computer.
4. Press the Power button to turn on the computer. If a startup menu opens, use the arrow keys to select Start Windows Normally and press Enter.
Fix #3: Restore BIOS default settings
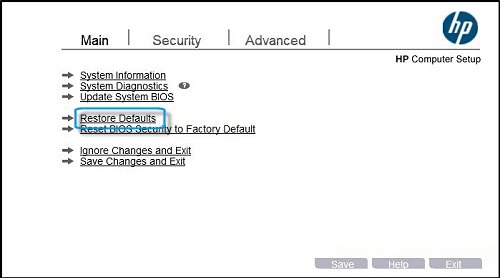
▶ On HP Notebook PCs using UEFI BIOS:
1. Turn off the computer and wait five seconds.
2. Press the Power button to start the computer and repeatedly press F10 to enter the BIOS setup menu.
3. Under the Main tab, use the up and down arrow keys to select Restore Defaults.
4. Select Yes to load default settings.
5. Under the Main tab, use the up and down arrow keys to select Save Changes and Exit and then select Yes.
6. Follow the prompts to restart your HP laptop.
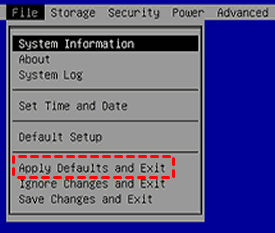
▶ On HP and Compaq desktop computers:
1. Turn off the computer and wait five seconds.
2. Turn on the computer and press the Esc key repeatedly until the Startup Menu opens. Then, press F10 to open the BIOS Setup Utility.
3. In the BIOS Setup utility, select the File tab and then select Apply Defaults and Exit. The BIOS setup utility closes, and the computer boots into Windows.
Fix #4: Recover lost files with data recovery software
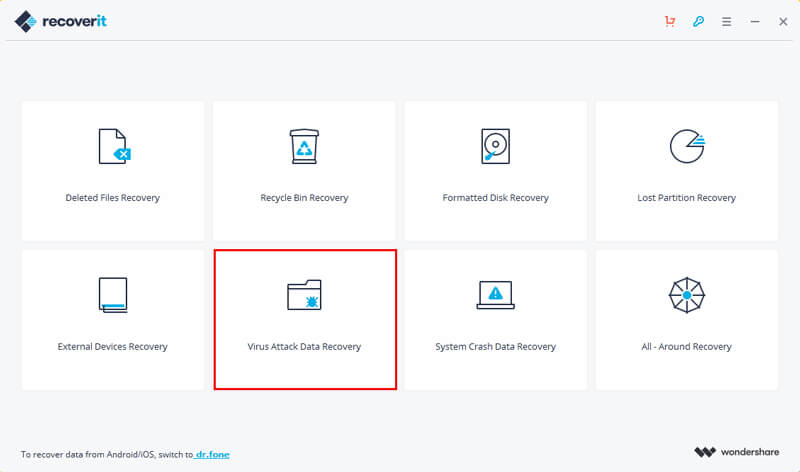
Here I’d like to recommend a specialized data recovery tool—Recoverit Pro. It enables you to recover all kinds of lost files from your computer, including videos, pictures, documents and emails, etc. You can use the “Virus Attack Recovery” mode to fix hard disk 301 error. Follow the instructions below:
1. Start the computer normally. Install and run Recoverit. Please don’t install the program on the partition/drive where your files are lost.
2. Select the “Virus Attack Recovery” mode and click “Next” to start.
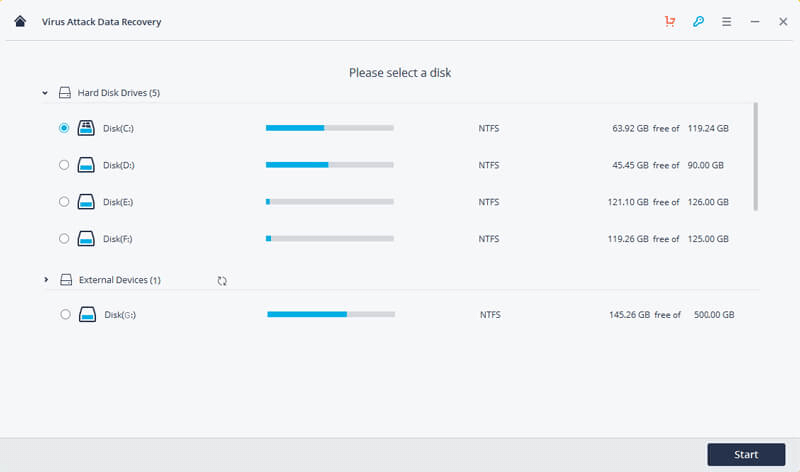
3. Select a location where you lost your data and click “Start” to scan for the data.
4. Wait for the scanning process to be done. Tick the files you want to retrieve and click “Recover”. It is recommended not to save the files into the hard drive where you lost your data.
Tips: If you cannot find your lost files, you can click “All-Around Recovery” on the left-bottom from the screen to do a deep scan, which will consume additional time.
More efficient way of hard disk error 301 repair
Although you can fix hard disk error 301 with one of the solutions offered above, the whole process is complicated and time-consuming, especially for those who are not much of a computer person. Is there a time-saving and simple solution? Disk clone is the answer.
If you have cloned the hard drive in your HP computer when it’s in good condition, you can fix the hard disk 301 error by a simple hard disk swap. Then, you can go back to your work immediately. What you need is reliable disk cloning software—AOMEI Backupper Professional.
With the Disk Clone feature in AOMEI Backupper, you can replace HP laptop hard drive or desktop hard drive without losing data. Download and install it on your computer. Launch AOMEI Backupper and go to Clone > Disk Clone. Follow the wizard to finish the cloning process.

Summary
There are four quick fixes provided in this article to help you solve the hard disk error 301. You can pick one that works for you. To make hard disk error 301 repair simple, you can clone the original HP hard drive to another drive via AOMEI Backupper and use the cloned drive for replacement. Apart from disk clone, AOMEI Backupper can also help you with the issues of external hard drive freezes when copying files and Windows backup freezes at 97%. Don’t hesitate to give it a try!