Ultimate Guide: ASUS ROG Zephyrus G14 SSD Upgrade
Discover the benefits of upgrading the SSD on your ASUS ROG Zephyrus G14 laptop and follow our detailed guide to perform the upgrade using the best tool and method. Learn how to enhance storage capacity and boost performance with ease.
By Sebastian Updated on April 25, 2024
Benefits for ASUS ROG Zephyrus G14 SSD Upgrade
The ASUS ROG Zephyrus G14, renowned for its sleek design and powerful performance, offers the added advantage of being user-upgradeable, notably in the areas of SSD and RAM. This attribute becomes a critical feature for those looking to enhance their laptop's storage capabilities. Emphasizing the importance of compatibility and the choice between external and internal storage solutions, an ASUS ROG Zephyrus G14 SSD upgrade becomes a pivotal consideration for gamers and professionals alike who seek to elevate their computer’s performance without compromising on speed or efficiency.
Embarking on an ASUS ROG Zephyrus G14 SSD upgrade not only promises improved storage capacity but also ensures a noticeable boost in load times and system responsiveness. The forthcoming sections will methodically guide you through preparing for an ASUS ROG Zephyrus G14 SSD upgrade, executing the upgrade with precision, and reinstating your system with enhanced storage capabilities, thereby making the ASUS G14 SSD upgrade an essential read for optimizing your laptop's functionality.
Understanding Your ASUS ROG Zephyrus G14 Specifications
Compatibility and Dimensions
-
Model Compatibility: Ensure that SSD is compatible with the ASUS ROG Zephyrus G14, focusing on size, interface, and thickness specifications.
-
SSD Size and Interface: The laptop supports M.2 PCIe 4.0 NVMe SSDs, ideal for upgrades aiming for increased storage and speed.
-
Physical Dimensions: Check the physical space available for SSD upgrades, especially if considering larger capacity drives up to 2TB.
Memory and Storage Options
-
Maximum Memory Support: The ASUS ROG Zephyrus G14 supports various memory configurations, with some models allowing up to 40GB of RAM. It has a standard 8GB non-removable and additional slots for memory expansion.
-
Supported SSDs: Crucial’s PCIe SSDs are confirmed compatible, with a focus on maximizing the storage capacity up to the supported 1TB.
Step-by-Step Guide to Upgrading the SSD
Once all the necessary preparations have been made, you can proceed with upgrading the SSD of the ASUS ROG Zephyrus G14.
Required Tools: A size 0 Phillips head screwdriver is necessary for RAM upgrades, and a plastic spudger or guitar pick is recommended for safely handling SSD upgrades.
Accessing Components: To upgrade, you'll need to remove 11 Phillips head screws from the back panel. The internal layout includes one M.2 PCIe X4 slot compatible with Gen 4 SSDs, facilitating straightforward upgrades.
Clone OS and Data to the New SSD
If you want to swap out your ASUS ROG Zephyrus G14SSD without losing any data, cloning it is the way to go. AOMEI Backupper Professional is the perfect tool for this job. It's super easy to use and works with all sorts of computers, not just ASUS. With this software, you can clone your ASUSSSD in no time, keeping all your files safe and sound.
1. Clone Effortlessly: AOMEI Backupper's "Disk Clone" tool makes it super easy to clone your SSD to a larger one and even make it bootable. If you just want to clone the operating system, use the "System Clone" feature instead.
2. Optimize Disk Space: This software helps you maximize SSD disk space usage and can convert disk types from MBR to GPT, ensuring efficient storage management for your system.
3. Boost Performance: With advanced 4k technology, AOMEI Backupper enhances SSD disk performance, leading to faster system operation and a smoother user experience overall.
4. Compatible with All Brands: No matter what brand of disks you have – whether it's Samsung, Toshiba, WD, or others – AOMEI Backupper has you covered, ensuring compatibility with various hardware configurations.
Download AOMEI Backupper Professional now and follow our simple step-by-step instructions to get started with cloning your SSD hassle-free.
1. First, connect the new SSD to your ASUS ROG Zephyrus G14 using an external enclosure to get started.
2. Then, open up AOMEI Backupper and head to the "Clone" section. From there, simply click on "Disk Clone" to begin.

Note: It's important to note that the Professional version of AOMEI Backupper offers the flexibility to clone both system disks (MBR/GPT) and data disks across various Windows versions, including 11, 10, 8, 7, XP, and Vista. For those using servers, the AOMEI Backupper Server is also available.
3. Next, select your current SSD as the source disk, and choose the new SSD as the destination disk for the cloning process.
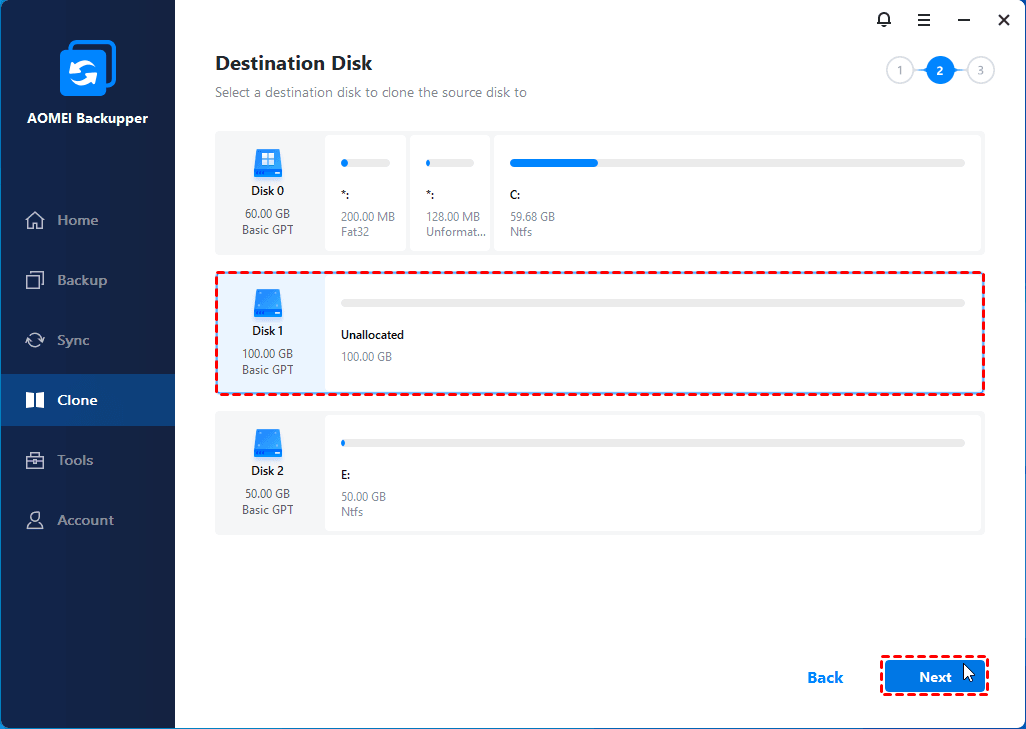
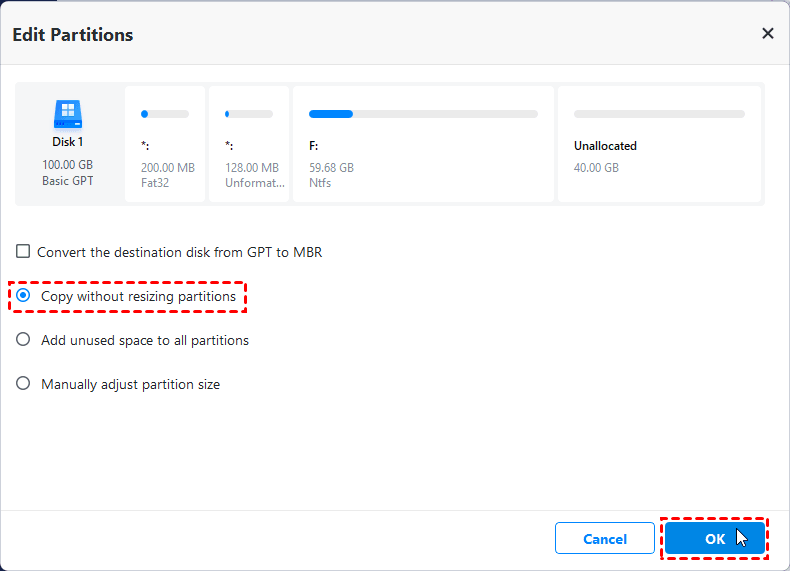
4. To ensure optimal performance for your new SSD, be sure to check the SSD Alignment option. Additionally, to avoid any leftover unallocated space after cloning, click on "Edit Partitions." From there, you can choose to add unused space to all partitions or Manually adjust the partition size to suit your needs.
5. Once everything is set up, simply initiate the cloning process and wait for it to complete.
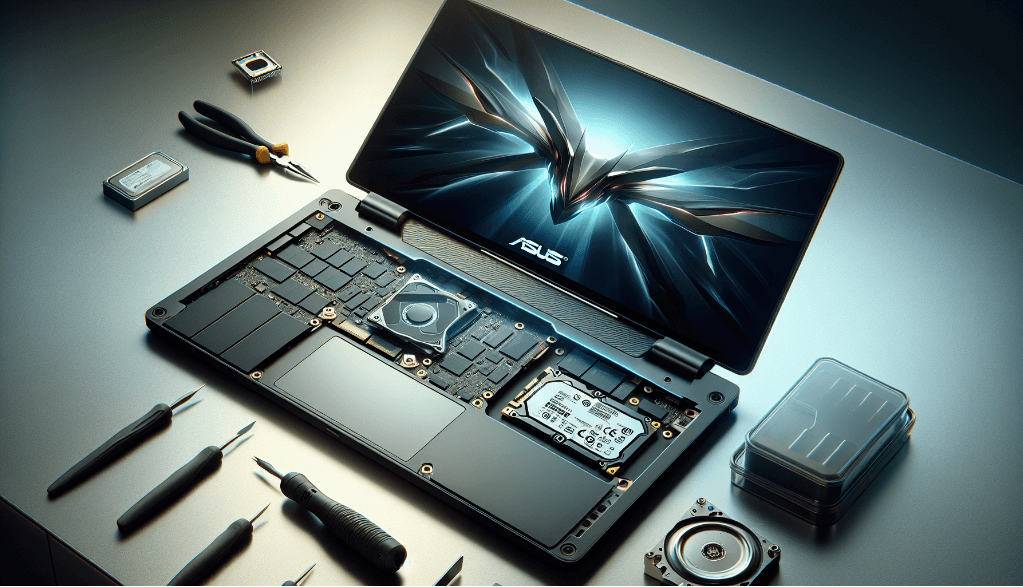
Disassemble and Change the New SSD on the ASUS ROG Zephyrus G14
Now, it is time for you to disassemble your computer and change the new SSD physically.
1. Power Down and Prepare: Ensure the ASUS ROG Zephyrus G14 is fully shut down and disconnected from any power sources. Discharge the battery to 25% or below for safety during the upgrade process.
2. Remove the Back Panel: Use a Phillips #0 screwdriver to remove the eleven screws securing the bottom case of the laptop. Note that three screws are hidden under rubber pads, so remove these pads carefully to access the screws.
3. Access the Internal Components: Gently lift the bottom case using a plastic spudger or guitar pick. This will expose the internal components, including the battery and SSD.
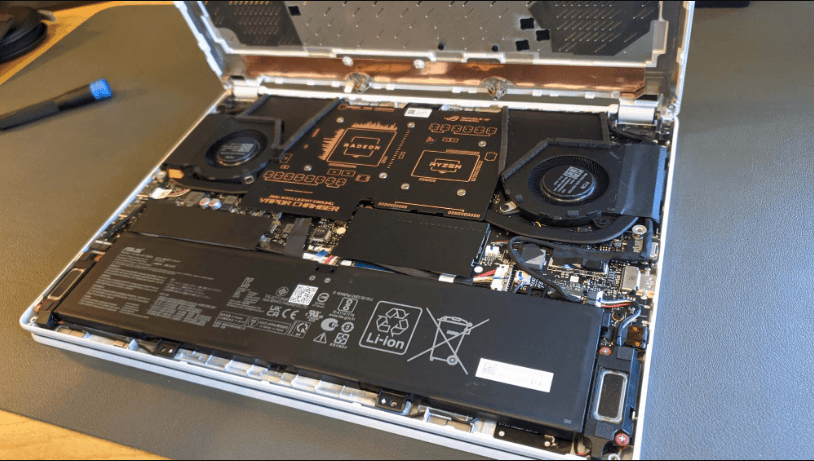
4. Disconnect the Battery: Before proceeding with the SSD upgrade, disconnect the battery to ensure safety. This prevents any electrical damage to the laptop components while handling.
5. Remove the Existing SSD: Locate the M.2 SSD slot under the longer black strip. Remove the screw holding the SSD in place, and carefully slide out the existing SSD.
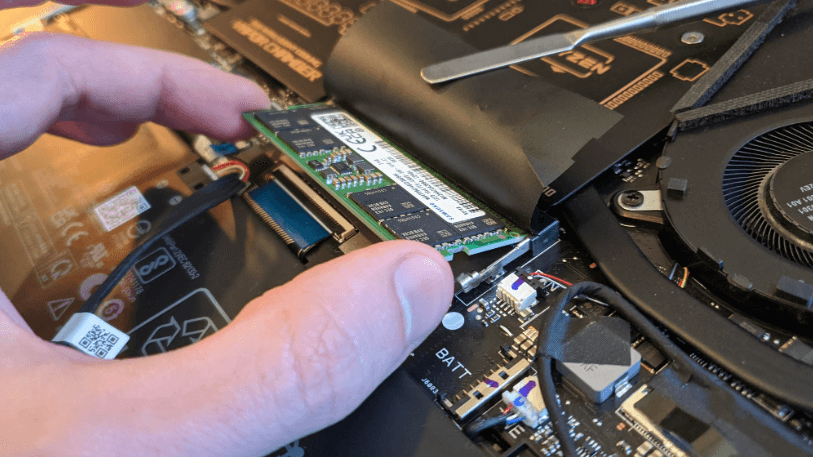
6. Install the New SSD: Align the new SSD with the slot, and slide it in gently until it is securely connected. Replace the M.2 screw to secure the new SSD in place. Then you can connect the battery and test it.
Boot Your ASUS ROG Zephyrus G14 from the New SSD
1. To start up the laptop, simply press the power button located in the upper right corner.
2. Without delay, press and hold the F12 key until the Boot Menu is displayed on the screen.
3. Use the arrow keys to choose the new SSD as the boot option.
FAQs about ASUS ROG Zephyrus G14SSD Upgrade
1. Is it possible to upgrade the SSD on the Asus ROG Zephyrus G14?
Yes, you can upgrade the SSD on the ASUS ROG Zephyrus G14 GA401II. By installing RAM and SSD upgrades from providers like Crucial, you can significantly enhance your laptop's speed and storage capacity, improving your overall gaming experience.
2. How many SSD slots are available in the Zephyrus G14?
The Zephyrus G14 is equipped with a single NVMe slot. To upgrade, you will need to clone the existing SSD and then replace it with the new SSD.
3. Can the storage in the ASUS ROG Zephyrus G14 be expanded?
The ASUS ROG Zephyrus G14 does not support multiple storage drives simultaneously. If you wish to increase the storage, you will need to remove the existing 512 GB M.2 SSD and replace it with a larger capacity SSD.
4. Is it possible to upgrade the RAM on the Zephyrus G14?
Yes, you can upgrade the RAM on the ASUS ROG Zephyrus G14 GA402. Compatible RAM and SSD upgrades are available from Crucial, which can help achieve faster load times and enhance the responsiveness of your laptop, providing a smoother computing experience.
Bottom Line
Upgrade your ASUS ROG Zephyrus G14 SSD seamlessly with the techniques detailed in this comprehensive guide. Whether you opt for a manual upgrade or utilize AOMEI Backupper for cloning, you can swiftly enhance both performance and storage capacity. Don't delay - elevate your gaming and productivity experience today! Additionally, if you require Windows backup solutions, AOMEI Backupper offers the option to create a Windows 8.1 image backup. Why not give it a try now?