7 Fixes: There Was a Failure in Preparing the Backup Image
When you see the error message Windows backup ‘0x807800c5’ during the preparation stage, you can find solutions in this article!
By Maggie Updated on December 8, 2023
User case: Getting error message "There was a failure in preparing the backup image of one of the volumes in the backup set. (0x807800C5)" while doing System Image Backup
I am running Windows 8.1 pro, and about 2 weeks ago my Windows System Image Backup started failing. Each time I get the message "There was a failure in preparing the backup image of one of the volumes in the backup set. (0x807800C5)". I am running the backup image to a network drive that the laptop has full access to. I have other Windows 8.1 (not pro) machines that create a backup image to the same place without any issues. This started after some of the recent Windows updates. I called Microsoft and they said they do not support the "backup image" as part of their software.
- Question from Microsft Community
If you have the same frustrating problem, then you are in the right place! In this article, we will explore the reason why ‘there was a failure in preparing the backup image’ and offer feasible troubleshooting issues to address the error.
Something about Windows 10 Backup Error 0x807800C5
The occurrence of the Windows backup error code 0x807800c5 can be attributed to conflicts arising from identical folders. Specifically, when the Windows File History is run, it creates an image backup that is stored in a designated location on the hard drive. If a subsequent attempt is made to create a system backup with the same image and save it to the same location, an error message may appear, indicating that the system encountered an issue (error code 0x807800c5). This issue arises because attempting to store two identical images in the same folder or partition is not supported.
Other factors contributing to this error include:
1. Corrupted files or damaged system protection settings.
2. Disabling the system protection setting.
3. Inability to access backup data.
4. Concurrent execution of another processor command by the system.
5. Unsupported file format for the device version.
These various factors may collectively lead to the Windows backup 0x807800c5 error code.
What should you do when stuck on preparing backup?
Since there are various probabilities to cause failure in preparing the backup images, fixes are various.
Method 1. Use free alternative----AOMEI Backupper Standard🔥
The most time-saving way is to use the best freeware----AOMEI Backupper Standard, which supports Windows 11/10/8/8.1/XP and Vista. This software has some wonderful features as below:
▶ Multiple backup options: you can backup files and folders separately, or you can backup disk and partition, and backup the entire OS system as well.
▶ Auto backup: it gives schedule backup feature to allow you backup in daily/weekly/monthly/event triggers and USB plug-in mode.
▶ Incremental and differential Backup: to save more storage locations and improve the backup efficiency, you can use this feature to back up the changes. (Differential backup is available in Pro version)
Now download this software and install it on your computer, you can have reliable File Backup with only several clicks.
Best free Windows backup software for personal use.
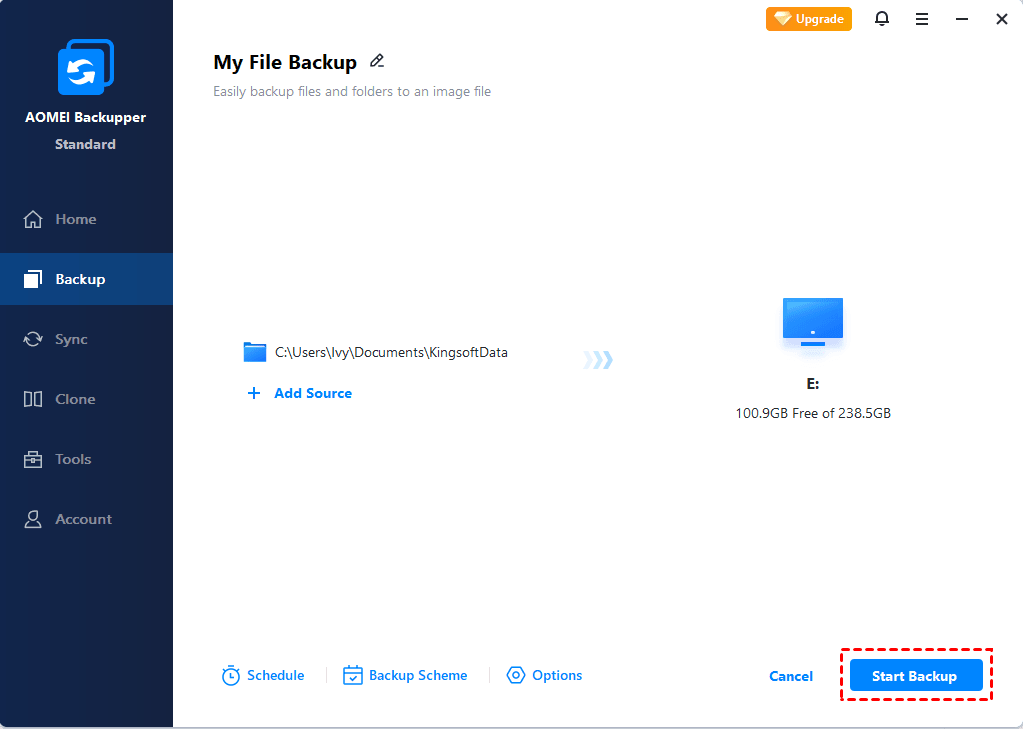
Step 1. Open this software and go to Backup > File Backup.

Step 2. Click Add File or Add Folder according to your needs. Choose the files or folders that you want to backup.

Step 3. Click the second box to select backup destination. You can backup files to external hard drive, NAS network location, or other locations as long as it can be detected by Windows.

Step 4. Click Schedule Backup to automate the file backup task. You can schedule backup in daily/weekly/monthly/event triggers/USB plug in mode.

✍✍There are two more options at the lower location, namely, Options, and Backup Scheme, which can help you customize the file backup task.
>> Options: You can comment, enable email notification, set compression level, create pre/post-command, etc. as you need.
>> Backup Scheme: 3 different backup schemes are supported and you can use them to delete old backups to free up disk space while keeping the latest backup versions. But they are available on at least AOMEI Backupper Professional.
Step 5. Confirm everything is OK and click Start Backup to backup files.
Method 2. Free up space on the destination disk and format it to NTFS
Insufficient space on the target drive can result in a failure to back up, accompanied by the specified "backup disk not found" error. To address this issue, it is recommended to free up disk space on the target drive. You can run Disk Cleanup in Windows or use Disk Wipe utility in AOMEI Backupper Professional to erase data securely.
If the destination disk contains no crucial data, consider formatting it to the NTFS file system and then proceed to create a system image
Method 3. Run SFC Scan🔥
If the destination partition or the target USB/external hard drive becomes inaccessible or corrupted, the Windows system backup process may fail. To ensure a successful completion, it is advisable to create a new partition or format the USB/external hard drive for Windows system backup.
Additionally, you can use the System File Checker, a utility in Microsoft Windows designed to scan and restore corrupted system files. Follow these steps to resolve the "mounted backup volume is inaccessible 0x807800C5" error:
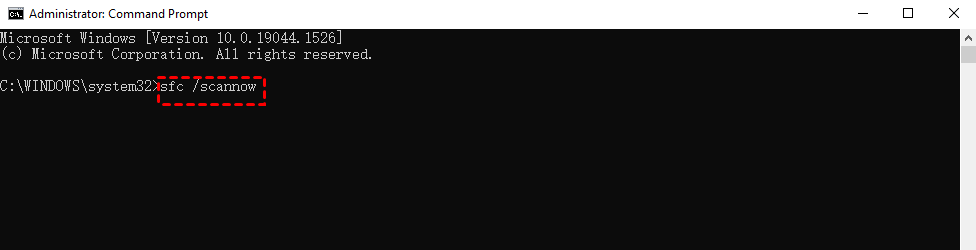
Step 1. Type cmd in the search bar and Run Command Prompt as an administrator.
Step 2. Type sfc /scannow and press Enter. Wait for the operation to complete patiently.
Method 4. Disable the security software
Disabling antivirus software is generally not recommended, as it leaves your system vulnerable to potential threats. However, if you are troubleshooting the Windows system image backup error code 0x807800C5 and 0x80780081, you can temporarily disable the antivirus software to check if it is causing the issue.
Keep in mind that disabling the antivirus should be a temporary measure for diagnostic purposes only. After testing, make sure to re-enable your antivirus software to maintain the security of your system. If the issue persists, proceed to the next troubleshooting step.
Method 5. Delete the old backup
It is possible that old and obsolete backup files on the network drive are causing the issue. Deleting or moving these outdated files can help resolve the problem. Here are the steps to follow:
Step 1. Press Windows + I to open the Settings menu and go to Update & Security.
Step 2. On the left sidebar, choose Backup. and scroll down and click on Manage backup space under Backup using File History section.
Step 3. You'll see a list of backups. Click on the one you want to delete.
Step 4. Click the Remove button to delete the selected backup.
Method 6. Rename the old backup folder🔥
To resolve Windows backup error code 0x807800c5, you can rename the old backup folder to avoid conflicts when creating a new backup for the same folder. Here are the steps to rename the old backup folder:
Step 1. Navigate to the main window menu and select the Control Panel.
Step 2. In the Control Panel, select the File History option.
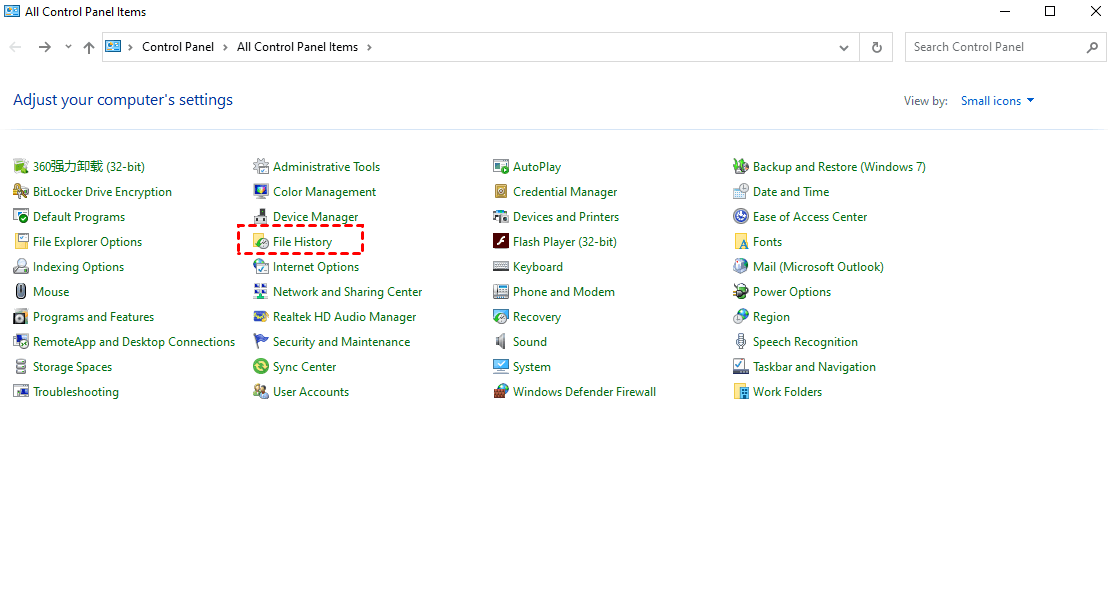
Step 3. In the File History dropdown menu, choose Backup and Restore. This will take you to the location where all the backed-up data (images) are stored. Look for a folder named Windows Image Backup.
Step 4. Right-click on the folder and select the Rename option from the dropdown menu.
Step 5. Assign another suitable name to the folder to avoid conflicts and prevent Windows backup error code 0x807800c5.
By renaming the old backup folder, you can create a new backup without encountering conflicts. Ensure that the new name is distinct to prevent any issues during the backup process.
Method 7. Restart Volume Shadow Copy service🔥
To address the "specified backup disk cannot be found" issue, some users suggest restarting the Volume Shadow Copy service. Follow these steps:
Step 1. Press Windows+R to open the Run dialog box.
Step 2. Type services.msc in the textbox and press Enter.
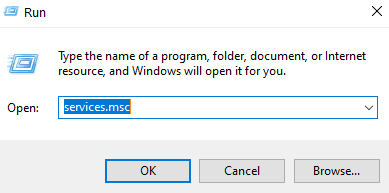
Step 3. In the Services window, locate the Volume Shadow Copy service.
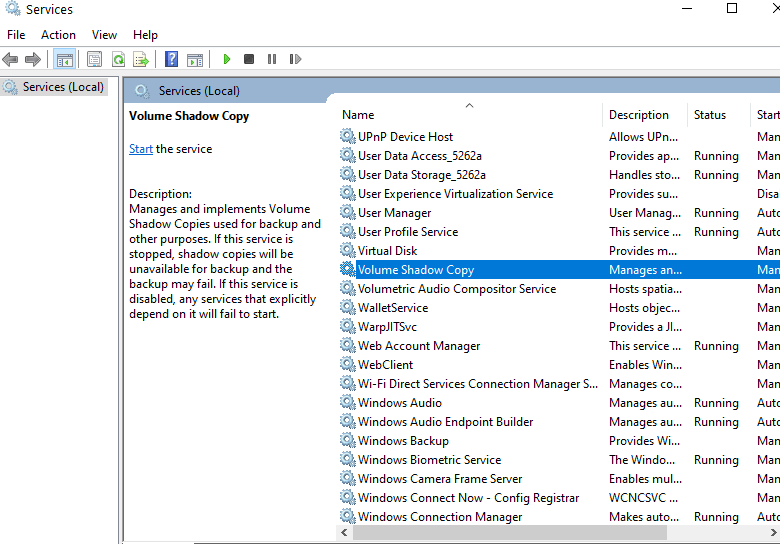
Step 4. Right-click on the Volume Shadow Copy service and choose the Start option.
Restarting the Volume Shadow Copy service may help resolve issues related to backup disk detection. After restarting the service, attempt to perform the backup again to check if the problem persists.
Conclusion
In this article we have 7 ways to deal with ‘there was a failure in preparing the backup image’. Notably, the backup software I mentioned above is not only powerful backup and restore software, but also offers users more wonderful functions. For example, there’s a trend to sync files on Windows to cloud services like Dropbox, OneDrive, Google Drive and so on. You can use this software to help you as well! Now download and have a try!