System State vs Bare Metal Backup And Restore: Full Guide
This article describes in great detail how to use azure backup for system state vs bare metal backup. It also recommends a simple method at the end.
By Miya Updated on April 26, 2024
What Is System State vs Bare Metal Backup?
Azure Backup Server offers both system state vs baremetal backup and recovery (BMR) protection.
✍System state backup involves backing up operating system files. This type of backup allows for recovery when a computer fails to start due to loss of system files and registry. A system state backup includes various elements depending on the system's role:
- Domain member: Boot files, COM+ class registration database, registry
- Domain controller: Windows Server Active Directory (NTDS), boot files, COM+ class registration database, registry, system volume (SYSVOL)
- Computer running cluster services: Cluster server metadata
- Computer running certificate services: Certificate data
✍Bare-metal backup encompasses the backup of operating system files and critical volumes' data, excluding user data. It provides comprehensive protection in scenarios where a computer fails to start, requiring a complete recovery. Notably, a BMR backup inherently includes a system state backup.
So how do we choose between these two backup options? Read on to find out!
How to Choose Between System State And Bare Metal Backup?
Choosing between a system state backup and a bare metal backup depends on your specific needs, requirements, and the scenario you are facing. Here are some factors to consider when deciding between the two:
- Recovery Scope: System state backups focus on critical system components and settings, while bare metal backups provide a complete system snapshot for full recovery.
- Time and Resources: Bare metal backups are more time-consuming and resource-intensive, while system state backups are quicker and require fewer resources.
- Disaster Recovery: Bare metal backups are recommended for scenarios requiring complete system restoration, such as hardware failures or system crashes.
- Flexibility and Granularity: System state backups allow for selective restoration of specific components, while bare metal backups offer greater flexibility by encompassing the entire system.
- Storage Capacity: Bare metal backups result in larger file sizes, so ensure sufficient storage capacity for frequent or long-term backups.
- Compliance Requirements: Consider any specific regulations that may influence backup strategies, including the need to include specific components or recover the entire system. Align your backup approach accordingly.
Well, whichever backup you choose, there's no need to agonize over it. This article will show you how to do system state vs bare metal backup and restore in detail.
How to Perform System State vs Bare Metal Backup
This section shows in detail how to perform a system state vs bare metal backup via Azure Backup. Before you start the backup, you need to do the following preparations. If you find this method too complicated, you can slide directly to the end of this article to use third-party software to perform this operation!
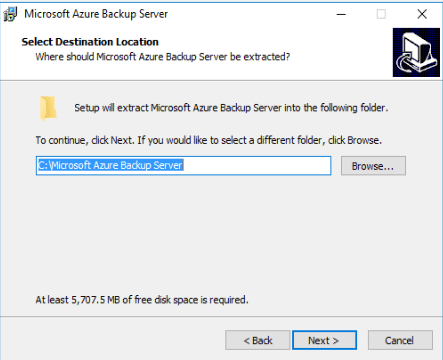
![]() Preparations: To deploy Azure Backup Server, follow these steps:
Preparations: To deploy Azure Backup Server, follow these steps:
◉Deploy and verify Backup Server. Refer to system requirements and protection matrix for details.
◉Set up storage options: disk, tape, or cloud storage with Azure. See documentation on preparing data storage.
◉Install protection agent on the target computer. Follow instructions in deploying the DPM protection agent documentation.
By following these steps, you can successfully deploy Azure Backup Server.
To back up system state and bare metal, follow these steps:
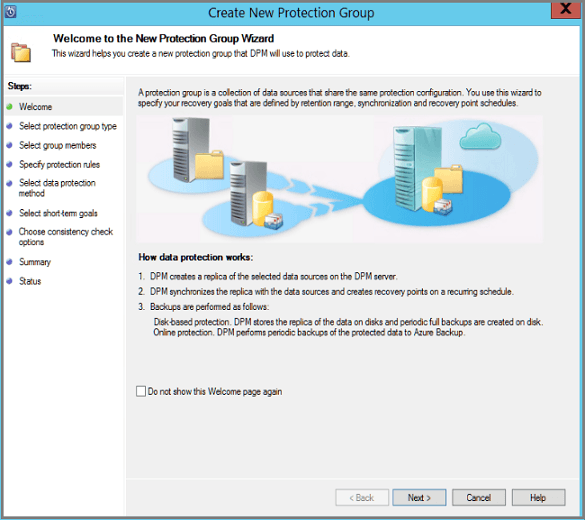
Step 1. In the Backup Server Administrator Console, go to Protection> Actions> Create Protection Group.
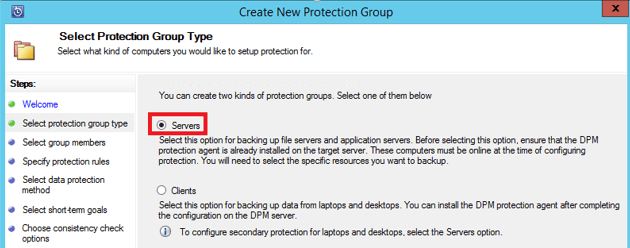
Step 2. Select Servers>next on the Select Protection Group Type page.
Step 3. In the Select Group Members section, you can expand the computer options and choose either BMR or system state.
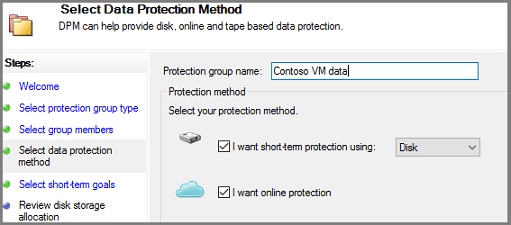
Step 4. On the Select Data Protection Method page, choose the short-term and long-term backup options.
Notes:
Short-term backup goes to disk first, with the choice to back up from disk to Azure using Azure Backup (short or long-term).
Instead of long-term cloud backup, you can use a standalone tape device or tape library connected to the Backup Server for long-term backup.
Step 5. Selecting Short-Term Goals:
- Determine the Retention range to specify how long the data should be stored on disk.
- Choose the Synchronization frequency to determine how often incremental backups should be performed to disk. If you prefer not to set a backup interval, you can select "Just before a recovery point." In this case, Backup Server will execute an express full backup right before each scheduled recovery point.
Step 6. If desired, set up long-term backup to tape or cloud storage, specifying the retention range and backup frequency.
1. On the Frequency of Backup option, select how often to perform tape backups based on the chosen retention range:
●Retention range of 1 to 99 years allows for daily, weekly, biweekly, monthly, quarterly, half-yearly, or yearly backups.
●Retention range of 1 to 11 months allows for daily, weekly, biweekly, or monthly backups.
●Retention range of 1 to 4 weeks allows for daily or weekly backups.
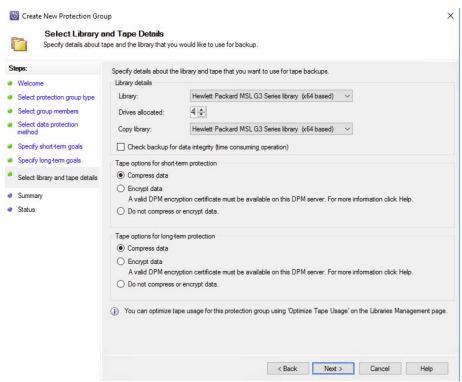
2. On the Select Tape and Library Details page, choose the tape and library for backup. Also, specify preferences for compression and encryption of data.
Step 7. Review the available disk space on the Review Disk Allocation page.
Step 8. Select the method for initial full-data replication on the Choose Replica Creation Method page.
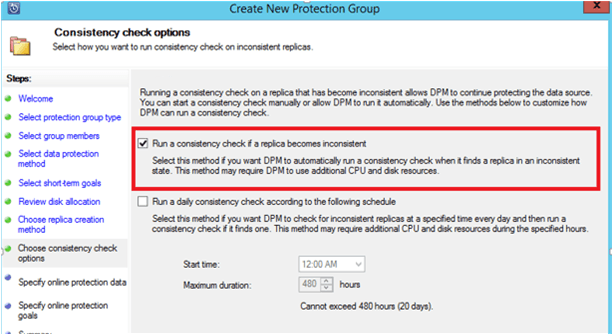
Step 9. Configure automatic consistency checks or choose to run manual checks on the Choose Consistency Check Options.
Step 10. If using Azure Backup for cloud backup, select the workloads to back up on the Specify Online Protection Data page.
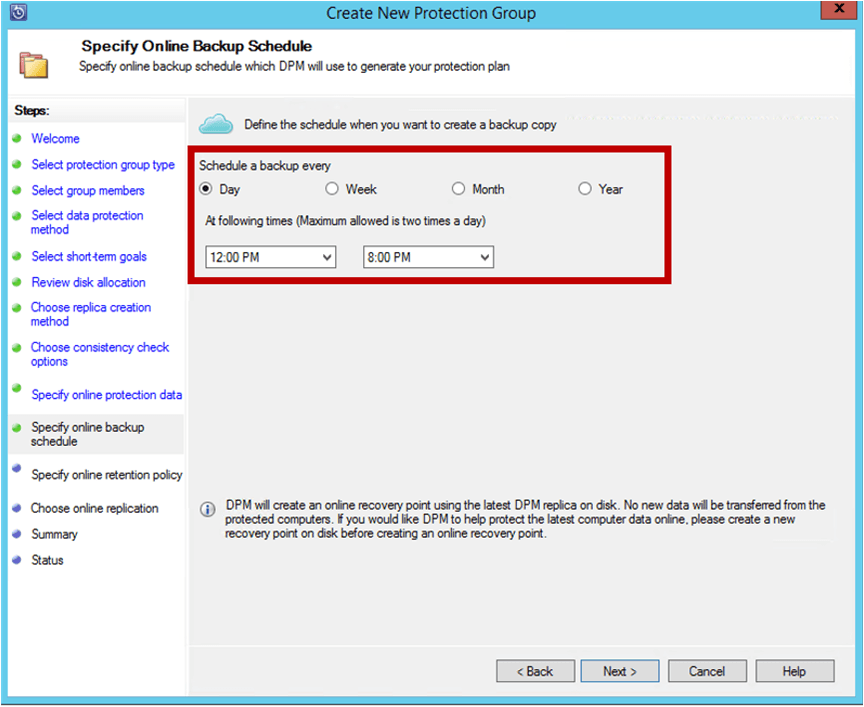
Step 11. On the Specify Online Backup Schedule page, choose the frequency of incremental backups to Azure. Options include daily, weekly, monthly, or yearly backups. Set the preferred time and date, with up to two backups per day. Each backup creates a recovery point in Azure from the data stored on the Backup Server disk.
Step 12. On the Specify Online Retention Policy page, specify how Azure retains the recovery points from daily, weekly, monthly, and yearly backups.

Step 13. On the Choose Online Replication page, select the method for the initial full data replication. Choose between network replication or offline backup (using Azure Import) on the Choose Online Replication page. Refer to the Offline backup workflow in Azure Backup for more details.
Step 14. On the Summary page, review settings. After creating the group, initial data replication begins. Once replication is complete, the Status page shows OK. Backups will follow the group's settings.
How to Perform System State vs Bare Metal Restore
You can recover BMR or system state to a network location. For BMR, start your system using Windows Recovery Environment (WinRE), connect to the network, and use Windows Server Backup for recovery. For system state, use Windows Server Backup directly for recovery from the network location. Okay, let's take a look at how to use Windows Server Backup performing bare metal vs system state restore.
1. Restore BMR
▶To run recovery on the Backup Server computer:
Step 1. Go to the Recovery pane and choose the desired computer for recovery, specifically for Bare Metal Recovery.
Step 2. Bold entries on the calendar indicate available recovery points. Select the date and time of the desired recovery point.
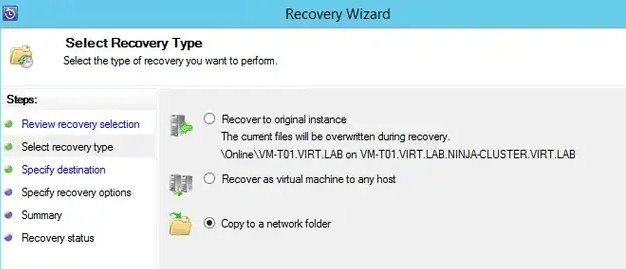
Step 3. On the Select Recovery Type page, opt for Copy to a network folder.
Step 4. Choose the destination for the copied data on the Specify Destination page. Ensure sufficient space and consider creating a new folder.
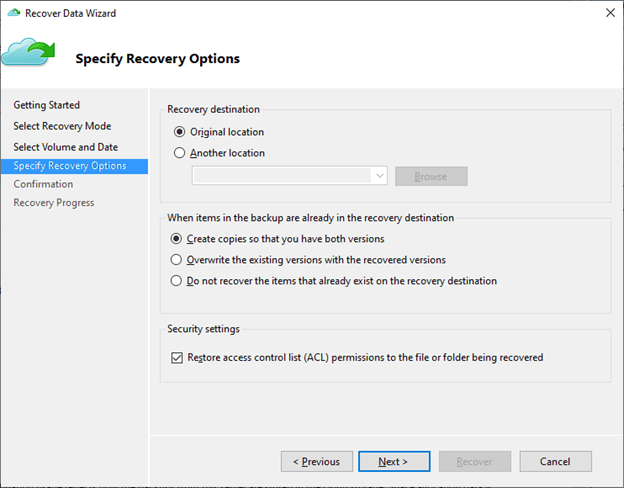
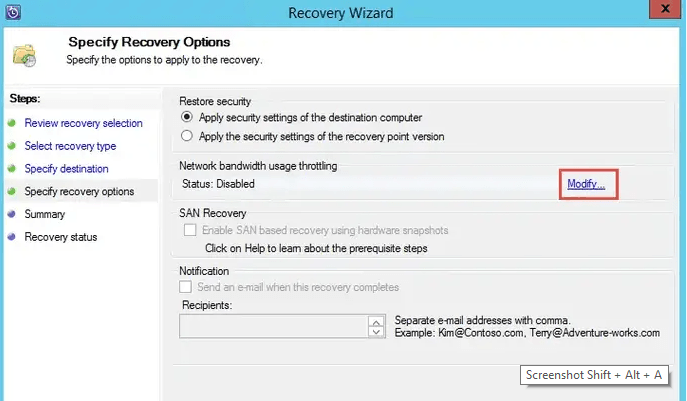
Step 5. On the Specify Recovery Options page, select security settings and decide whether to use SAN-based hardware snapshots for faster recovery. This option requires a compatible SAN and a network connection between the protected and Backup Server computers.
Step 6. Configure notification options.
Step 7. Confirm the settings on the Confirmation page and proceed with the recovery by selecting Recover.
▶To configure the shared location:
Step 1. Access the restore location and navigate to the folder containing the backup.
Step 2. Share the folder located one level above the WindowsImageBackup folder, ensuring that the root of the shared folder is the WindowsImageBackup folder.
Failure to share this folder will result in the restore process being unable to locate the backup. To establish a connection using WinRE, you require a shared folder accessible in WinRE with the appropriate IP address and credentials.
▶To initiate the system restoration process, follow these steps:
Step 1. Boot up the computer you wish to restore the image on using the Windows DVD corresponding to the system you're restoring.
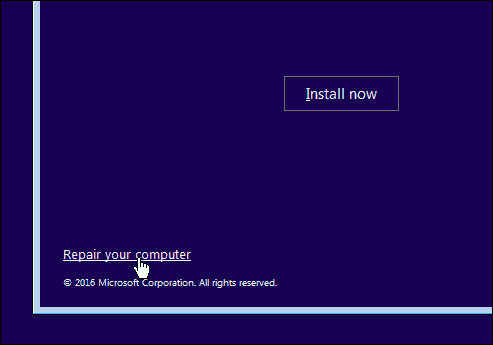
Step 2. On the initial page, ensure the language and locale settings are accurate. Then, proceed to the Install page and choose the "Repair your computer" option.
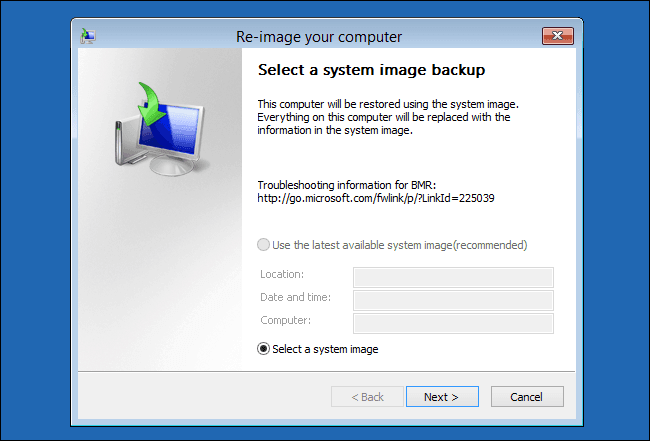
Step 3. On the System Recovery Options page, select "Restore your computer using a system image that you previously created".
Step 4. On the "Select a system image backup" page, click on "Select a system image", then go to "Advanced" and choose "Search for a system image on the network". If a warning message appears, select "Yes". Enter the share path, provide the necessary credentials, and select the desired recovery point. The system will scan for available backups within that recovery point. Choose the specific recovery point you wish to utilize.
Step 5. On the "Choose how to restore the backup" page, opt for "Format and repartition disks". Review the settings on the following page to ensure their accuracy.
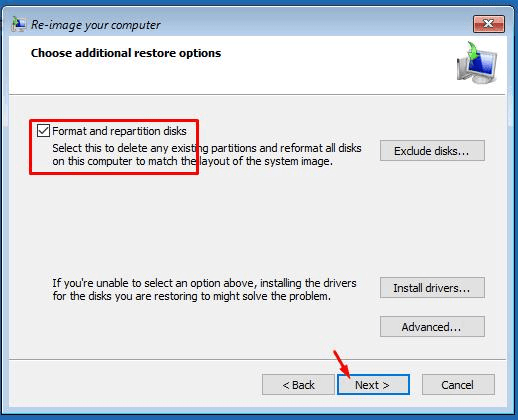
Step 6. To commence the restoration process, click on "Finish". A restart of the system will be required.
2. Restore system state
►To perform a recovery in the Backup Server, follow these steps:
Step 1. Go to the Recovery pane and locate the desired computer for recovery. Choose "Bare Metal Recovery".
Step 2. The calendar will highlight available recovery points in bold. Select the date and time corresponding to the desired recovery point.
Step 3. On the "Select Recovery Type" page, opt for "Copy to a network folder".
Step 4. Proceed to the "Specify Destination" page and indicate the location where the data should be copied.
Ensure that the selected destination has sufficient space to accommodate the data. It is recommended to create a new folder specifically for this purpose.
Step 5. On the "Specify Recovery Options" page, select the desired security settings and decide whether to utilize SAN-based hardware snapshots for faster recovery. Please note that this option is only available if:
- You have a SAN that supports this functionality.
- You can create and separate a clone to make it writable.
- Both the protected computer and the Backup Server server are connected to the same network.
Step 6. Configure the notification options as per your preference.
Step 7. Finally, on the "Confirmation" page, select "Recover" to initiate the recovery process.
►To initiate Windows Server Backup, follow these steps:
Step 1. Click on Actions, then select Recover, followed by This Server. Proceed by clicking Next.
Step 2. Choose Another Server, then on the Specify Location Type page, select Remote shared folder. Enter the path to the folder containing the recovery point.
Step 3. On the Select Recovery Type page, opt for System state.
Step 4. On the Select Location for System State Recovery page, choose Original Location.
Step 5. On the Confirmation page, select Recover to confirm the recovery process.
Step 6. Once the restore is complete, restart the server.
►To perform a system state restore using the command prompt, follow these steps:
Step 1. Launch Windows Server Backup on the computer you wish to recover.
Step 2. Open a command prompt and retrieve the version identifier by entering the following command:
- wbadmin get versions -backuptarget \{ervername\sharename\}
Step 3. Utilize the obtained version identifier to initiate the system state restore. In the command prompt, enter the following command:
- Wbadminstart systemstaterecovery -version:{versionidentified} -backuptarget:{servername\sharename}
Step 4. Confirm your intention to begin the recovery process. The Command Prompt window will display the ongoing process, and a restore log will be generated.
Step 5. After the restoration is complete, restart the server.
Easier Way to Make System vs Bare Metal Backup And Restore
Creating and recovering system state vs bare metal backups with Azure Backup can be complex and time-consuming for regular users. It often requires extensive knowledge of dos and don'ts, which can be exhausting.
Fortunately, there is a simpler solution available for achieving the same goal: AOMEI Backupper Professional, the best Windows bare metal backup software. It is compatible with various Windows operating systems, including Windows 11, 8, 8.1, and 7. The steps involved are straightforward, requiring only a few clicks. After performing a bare metal restore using this software, you can continue using your computer as usual, as all your software and personal data will remain intact.
When using AOMEI Backupper Professional for bare metal backup, you can enjoy the following advantages:
✸Schedule backups for Windows OS: The software offers three backup frequencies (daily, weekly, monthly) and two special features—Event trigger (for specific situations like system shutdown) and USB plug in (automatically backing up the system to a USB flash drive when plugged in).
✸Backup only changed files: By default, the software employs the Incremental Backup method, which only backs up files that have changed since the last backup, be it a full backup or incremental backup. You also have the option to switch to differential backup, and it does not require all backup files in a set to be intact during the recovery process.
✸Regular deletion of old backup images: Scheduled backups can accumulate over time, potentially filling up the backup disk. However, AOMEI Backupper Professional offers a feature called Backup Scheme, allowing you to automatically delete backup files and free up disk space for new backups.
✸Various backup options: You can enable email notifications to verify the smooth execution of backup tasks, adjust the compression level (normal or high), and choose backup services, among other options.
For bare metal restore, simply enable the Universal Restore feature during the recovery process, and AOMEI Backupper will take care of the rest.
Prepare a temporary storage device to store the backup image. Download and install AOMEI Backupper Professional on your computer. For server users, consider using AOMEI Backupper Server.
Step 1. open AOMEI Backupper Professional. Then, navigate to the Backup tab and select System Backup.
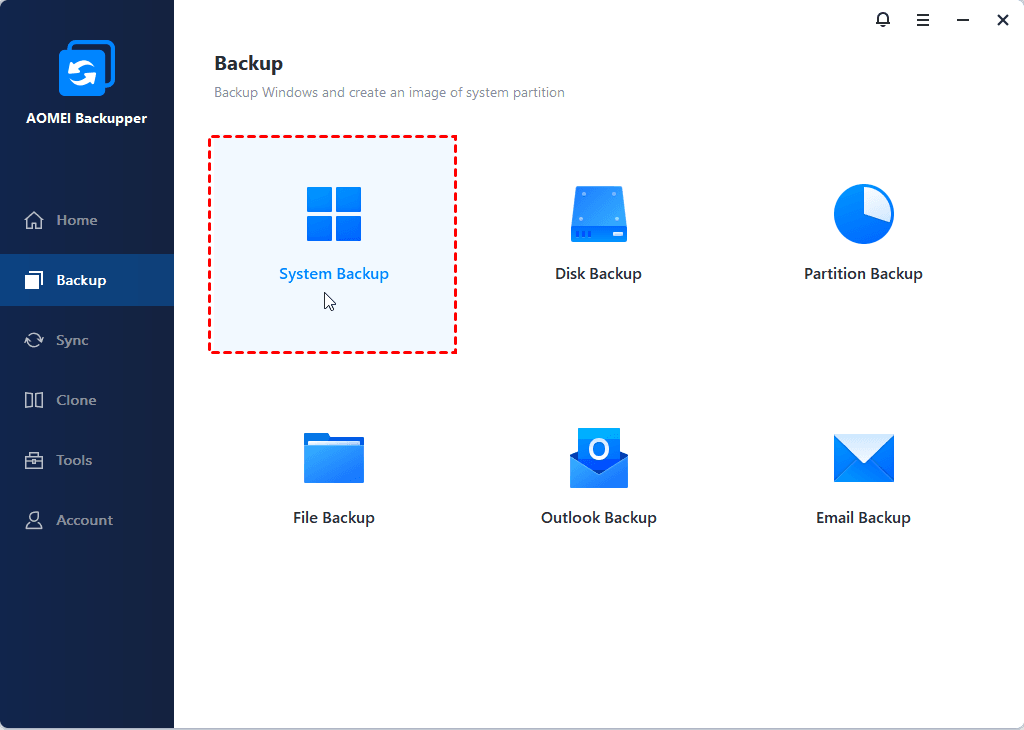
Tip: In addition, if you wish to include all partitions on the hard drive, you can choose Disk Backup. AOMEI Backupper provides the capability to restore both system backups and disk backups to another computer with different hardware configurations.
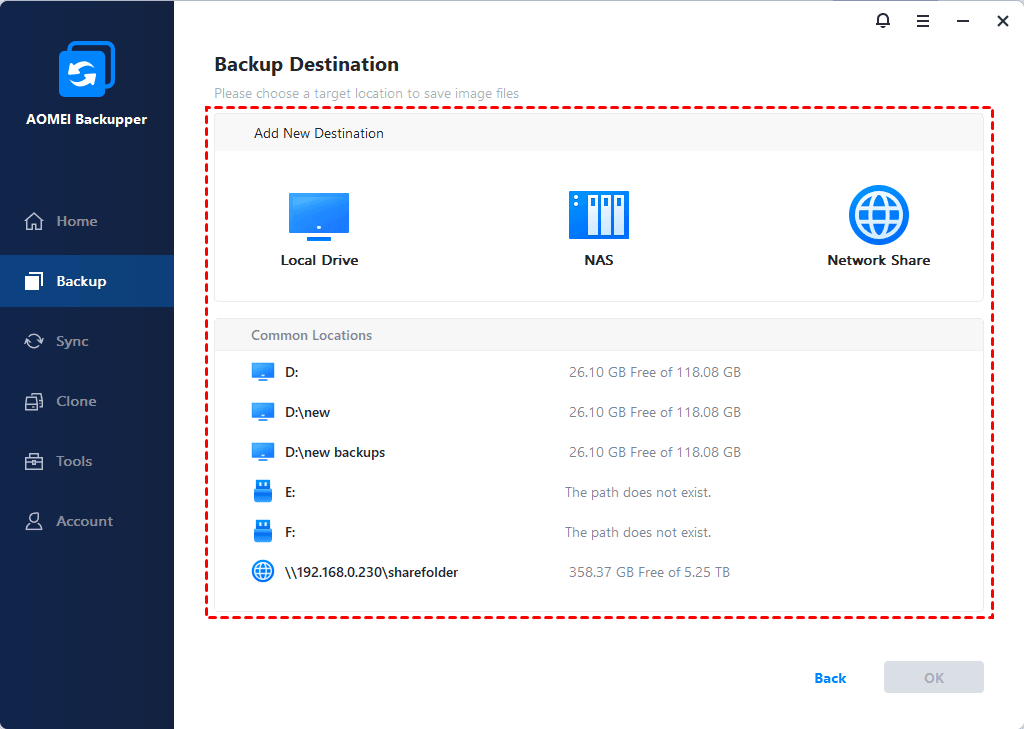
Step 2. Now, proceed to specify a path on the prepared storage device as the backup destination. The program will automatically select the system partition(s) that require backup.
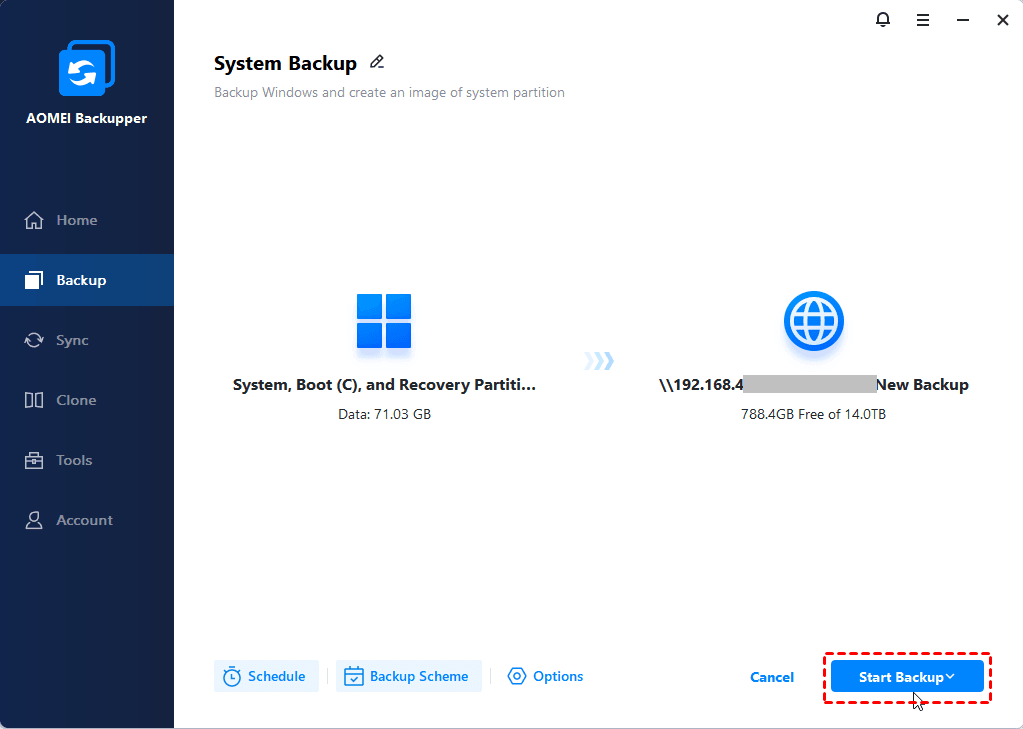
Step 3. To initiate the bare metal backup, simply click on the Start Backup button.
✬Perform dissimilar hardware restore to another computer
To restore the backup to a new computer with varying hardware, you will need to prepare a bootable media such as a USB or CD/DVD. Alternatively, you can utilize the AOMEI PXE Boot tool to load a micro-system over the network, which is particularly beneficial for multiple computers.
Once you have the bootable media ready, launch the AOMEI Backupper software and follow the steps below to perform a dissimilar hardware restore:
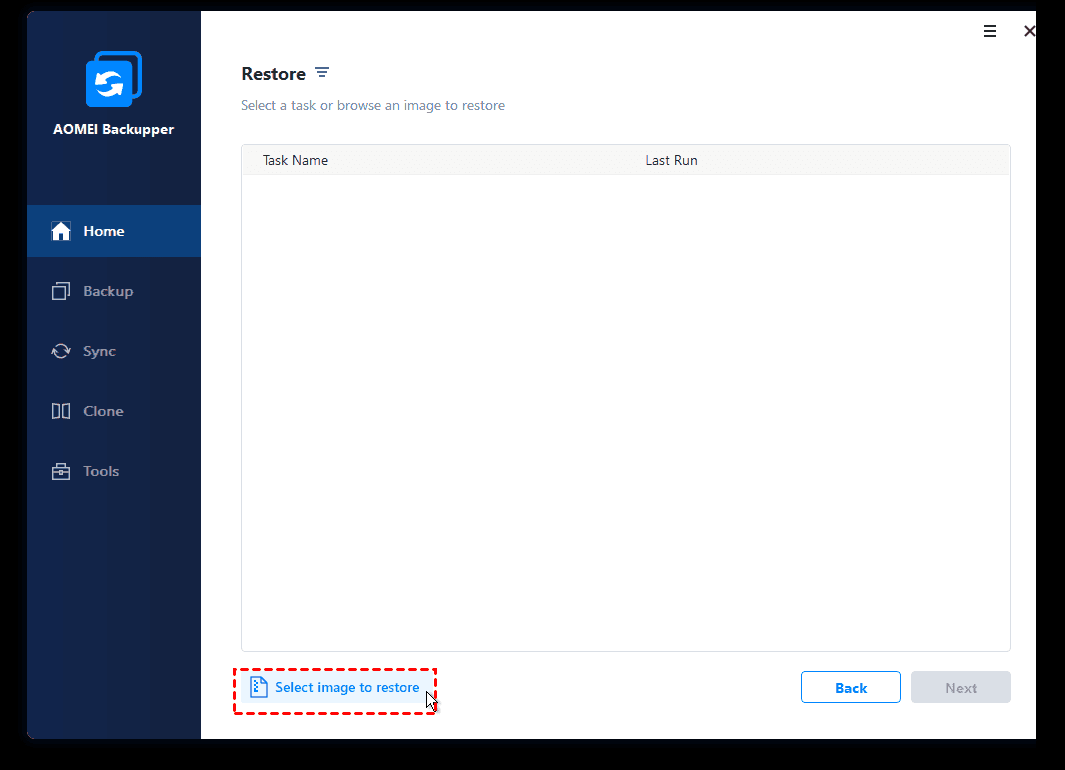
Step 1. Click on the Restore option and then select Select Image File to locate the backup image.
Step 2. Check the boxes for Restore this system image backup and Restore system to other location. Then, click Next.

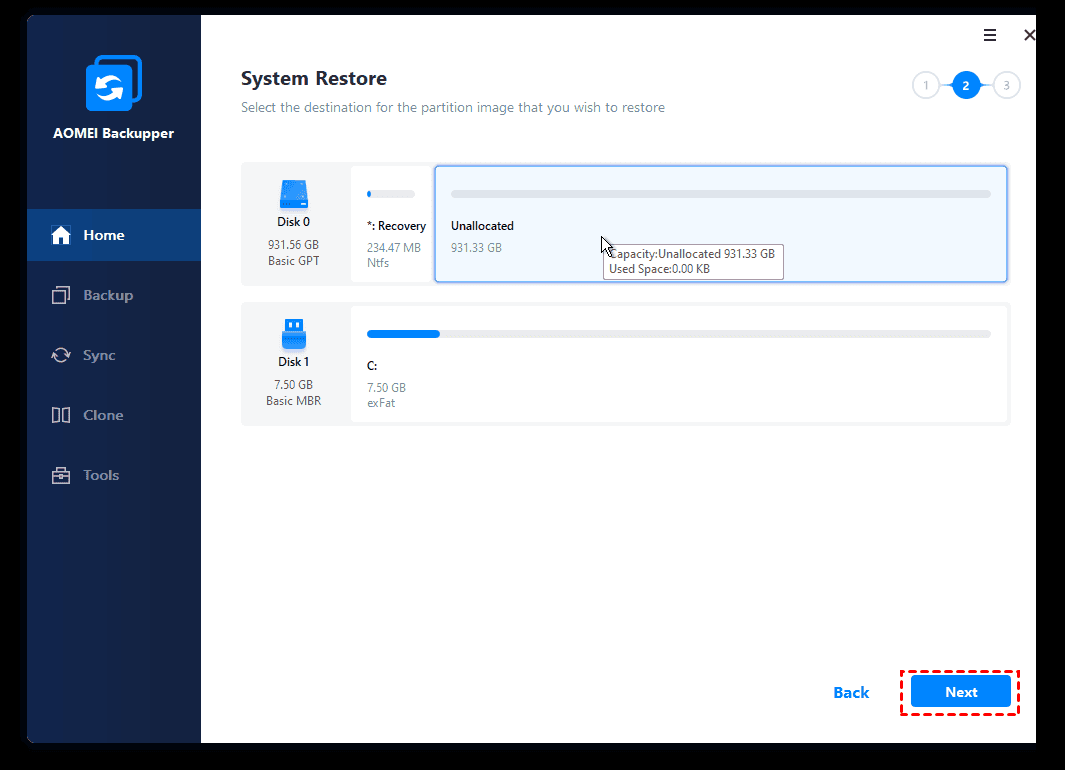
Step 3. You will be prompted to select a destination location to store the backup image. Follow the suggested instructions and click Next.
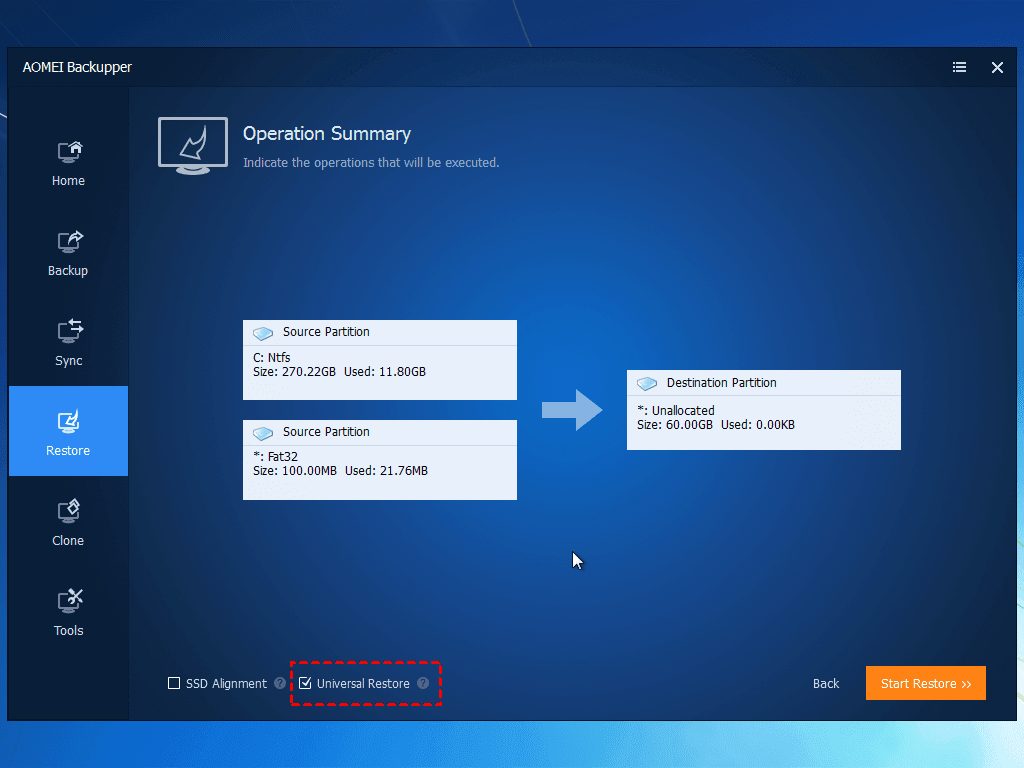
Step 4. In the Operation Summary window, ensure that the Universal Restore option is selected. Then, click Start Restore to initiate the system restoration process to a computer with disparate hardware.
Summary
Azure Backup is a valuable tool for performing system state vs bare metal backup and recovery in Windows. However, it can be quite complex for home users, and the recovery process entails various limitations.
To simplify this task, consider using AOMEI Backupper Professional, the best bare metal backup software for Windows. It offers a range of robust backup features, including email notifications, incremental or differential backup options, backup schemes, and more. Additionally, the software's Recovery Environment feature proves invaluable for restoring a crashed system on the same computer.
Moreover, AOMEI Backupper includes a Clone function, allowing you to transfer the Windows system to identical hardware or upgrade the hard drive. By cloning the hard drive and installing it on the new computer, you can seamlessly accomplish your goals. Why not give it a try and experience its benefits firsthand?