What Is Synology Immutable Backup? How to Perform It?
This article describes in detail how to implement Synology immutable backup to provide strong backups for your backups through immutable snapshot technology.
By Miya Updated on October 20, 2023
Information About Synology Immutable Backup
Synology immutable backup is a feature provided by Synology, a company specializing in network-attached storage (NAS) devices. Immutable Backup refers to a data protection mechanism that ensures the integrity and immutability of backed-up data. It prevents accidental or malicious alterations or deletions of backup files, providing an additional layer of security.
With Synology immutable backup, once a backup task is completed, the backed-up data becomes unchangeable and cannot be modified or deleted through normal means. This safeguard helps protect against ransomware attacks and accidental data loss. Even if an attacker gains access to the backup storage, they cannot tamper with or delete the backed-up data.
Synology NAS immutable backup is typically implemented through features like immutable snapshot-based WORM (Write Once Read Many) technology. This technology ensures that once data is backed up, it remains secure and unalterable, providing peace of mind for data protection and disaster recovery scenarios.
How to Perform Synology Immutable Backup with Immutable Snapshots
Immutable snapshots employ WORM (Write Once, Read Many) technology, which safeguards your data by preventing any modifications or deletions within a designated timeframe. It also prevents the deletion of shared folders, LUNs, volumes, or storage pools that encompass these immutable snapshots. This protective feature effectively safeguards your data against tampering and unintended actions.
This article provides a step-by-step guide on how to create immutable snapshots to perform Synology immutable backup.
≈What you need:
- DiskStation Manager (DSM) 7.2
- Synology NAS models that support immutable snapshots
✍Create Immutable Snapshots on a Remote Server
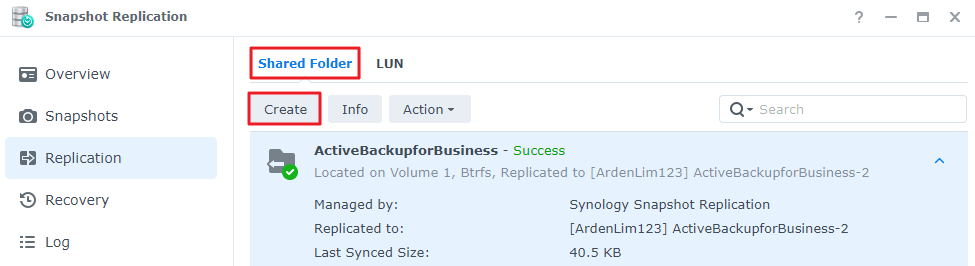
- Navigate to Snapshot Replication > Replication > Shared Folder or LUN in the user interface.
- Click on Create to initiate the Create Replication Task wizard.
- On the Set Replication Schedule page, choose the option for Immutable snapshots and specify the desired Protection period.
- Verify your settings and click Done to create the replication task.
✍Create Immutable Snapshots on a Local Server
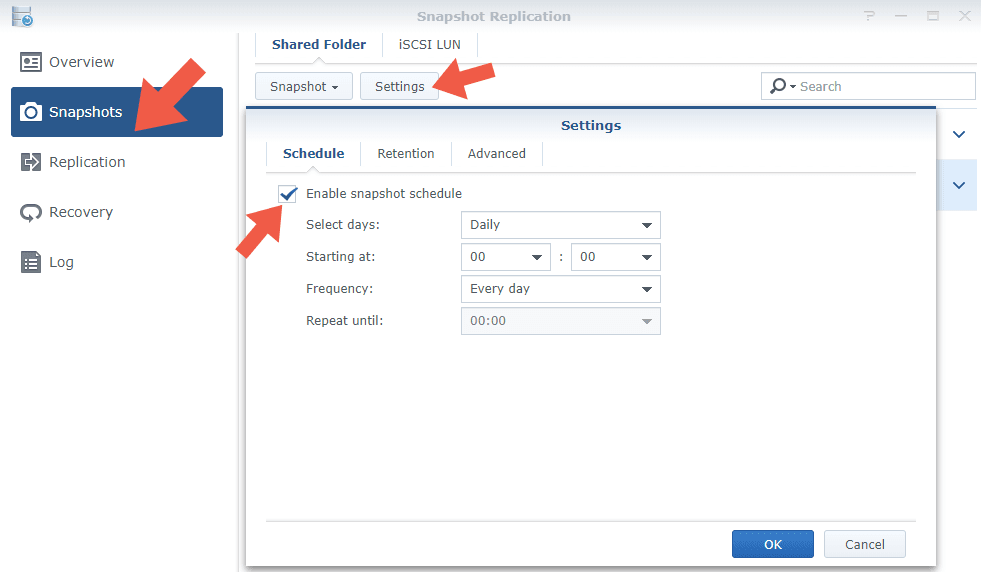
- Navigate to Snapshot Replication > Snapshots > Shared Folder or LUN in the user interface.
- Choose a shared folder or LUN and click on Settings. You can select multiple items by pressing and holding Ctrl/⌘ or Shift.
- In the Schedule tab, enable the snapshot schedule and configure the desired settings.
- Select the option for Immutable snapshots and specify the desired Protection period.
- Click OK to save your settings.
- A confirmation message will appear. Click OK to complete the process.
✍Make a Specific Snapshot Immutable
- Access Snapshot Replication > Snapshots > Shared Folder or LUN in the user interface.
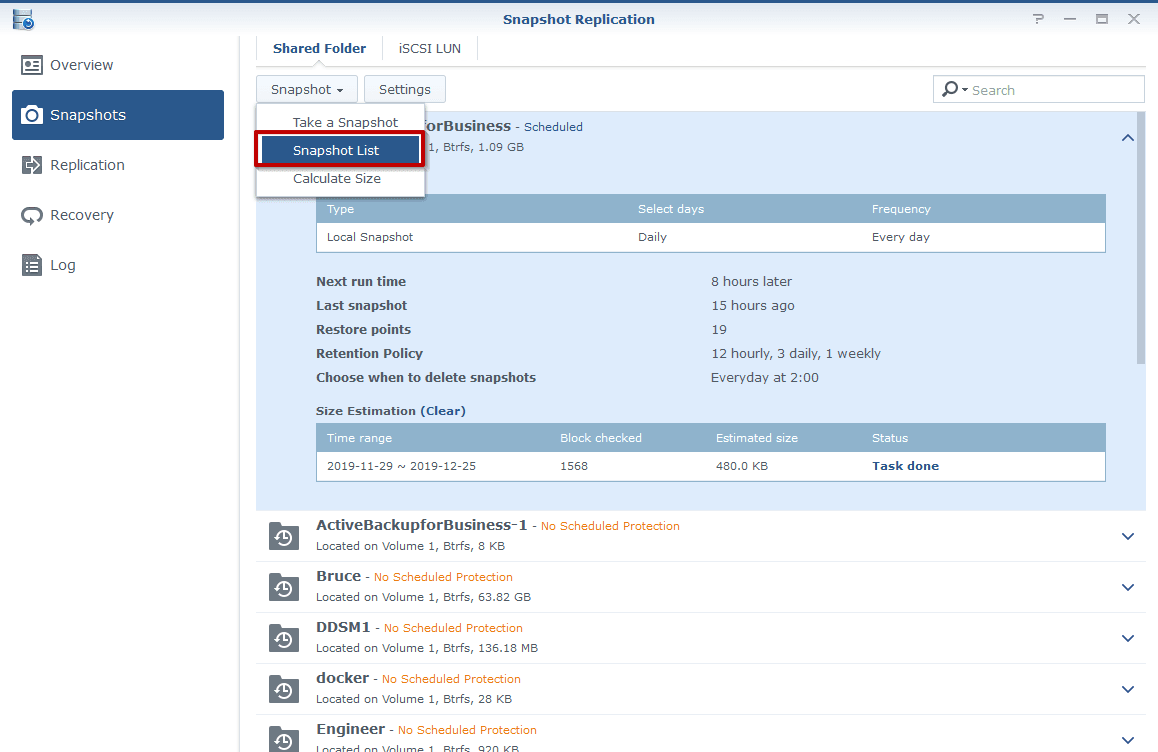
- Choose a shared folder or LUN, then click on Snapshot followed by Snapshot List.
- Select a specific snapshot from the list and click on Edit.
- Enable the option for Immutable snapshots and define the desired Protection period. Please note that once selected, this option cannot be changed until the system automatically removes it after the protection period expires.
- Save your settings by clicking OK.
✍View the Remaining Protection Period of an Immutable Snapshot
- Access Snapshot Replication > Snapshots > Shared Folder or LUN in the user interface.
- Choose a shared folder or LUN that includes the immutable snapshots.
- Click on Snapshot followed by Snapshot List.
- To check the remaining protection period, hover over the shield icon labeled "1.png" or select a specific snapshot and click on Edit.
Now you have successfully implemented immutable backups for Synology.
Please note the following recommendation:
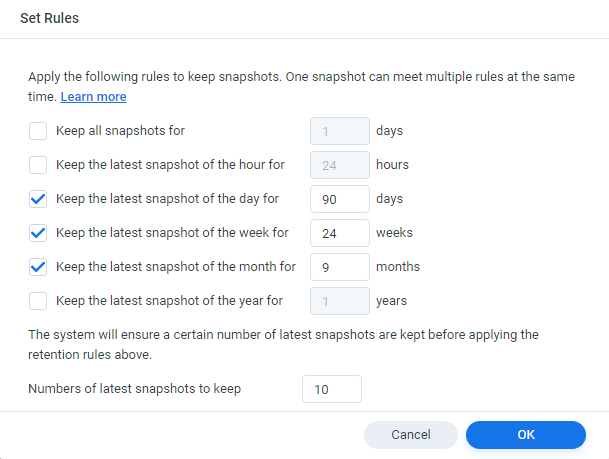
It is advised to set the protection period to a duration of 7 to 14 days.
Bonus Tip: Best Encryption Backup Software - AOMEI Backupper
If you are looking for a backup encryption software that is simple to operate and has a high level of confidentiality. You might as well consider AOMEI Backupper.
AOMEI Backupper is a comprehensive Windows backup and restore software that offers a wide range of features to safeguard your important data.
✬With AOMEI Backupper, you have the flexibility to perform File Backup, Partition Backup, Disk Backup, and System Backup based on your specific requirements.
✬You can choose from various backup destinations, including internal/external hard drives, USB devices, NAS (Network Attached Storage), cloud drives, and more.
✬The software also provides practical options such as backup comments, email notifications, and image compression to enhance your backup experience.
✬For added security, AOMEI Backupper Professional offers backup encryption functionality. You can protect your image files with a password through the options menu.
Feel free to download AOMEI Backupper Professional and give it a try!
Let me guide you through the process of creating an encrypted backup using Partition Backup as an example.
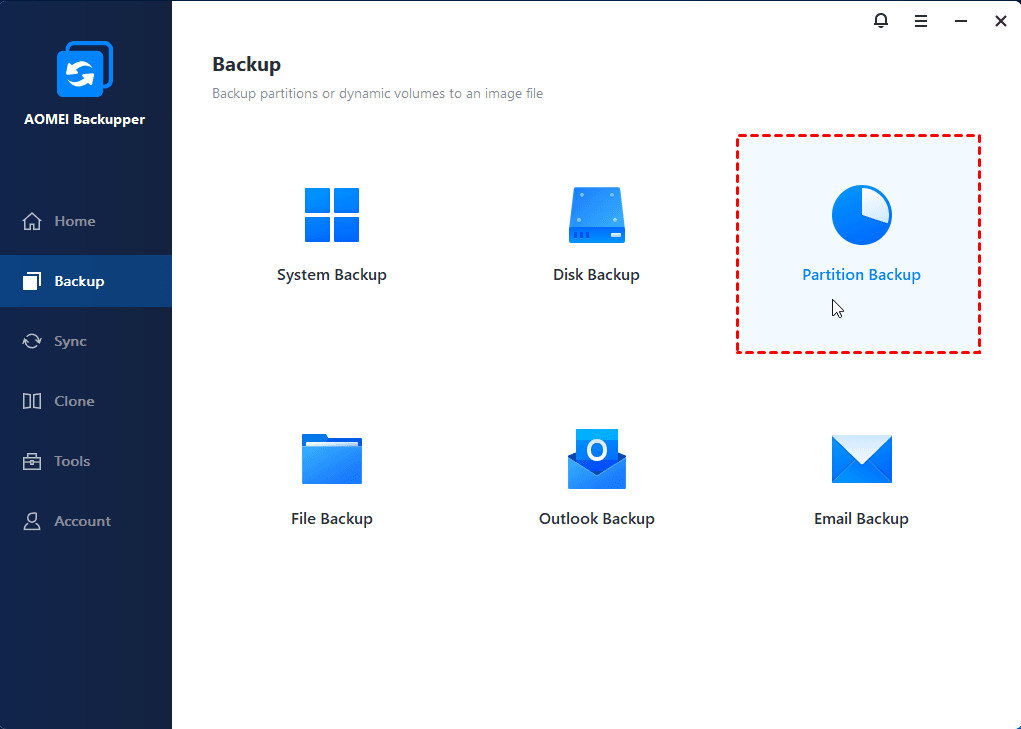
Step 1. Open AOMEI Backupper and navigate to the Backup section. From there, select Partition Backup.
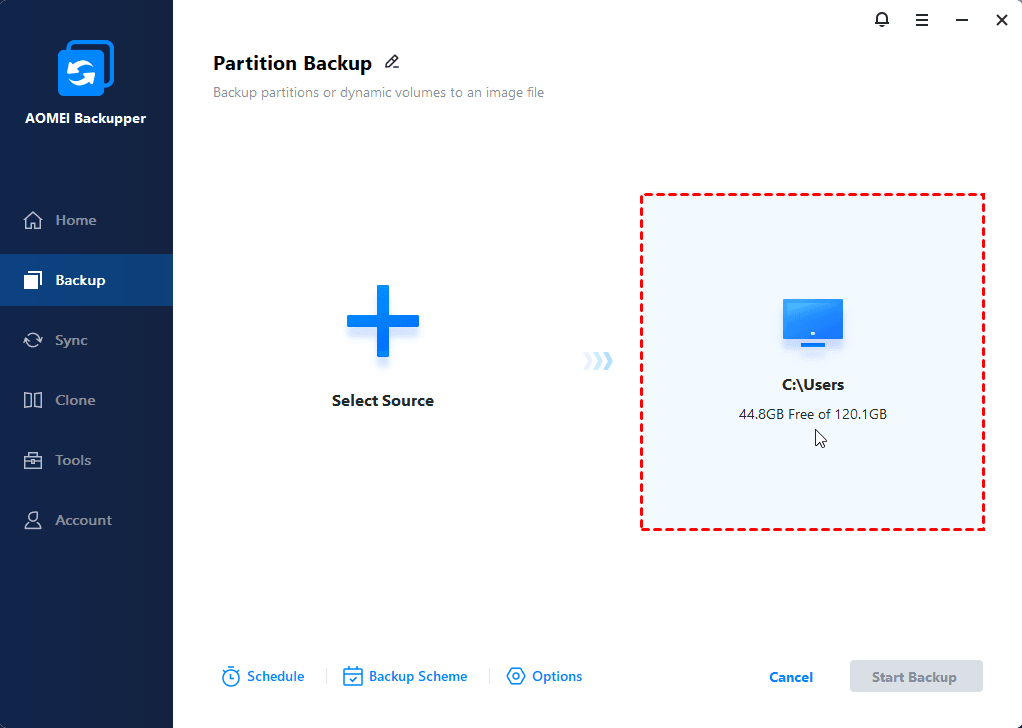
Step 2. Click on Add Partition or Volume to choose the source data that you want to include in the backup. Afterward, specify a destination where you would like to store the backup.
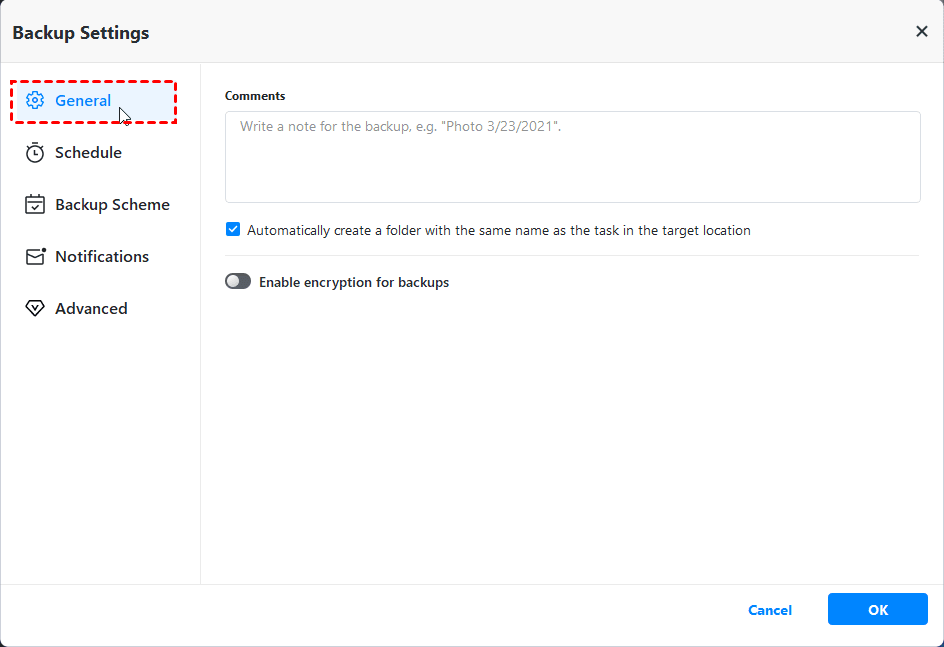
Step 3. To apply password encryption to the backup, simply click on Options at the bottom. Then, under the General tab, enable the encryption for backups. Once toggled on, you can enter a password of your choice, confirm the password, and click OK to proceed.
In Options, you can customize various settings in addition to encryption:
Backup mode: Choose between sector-by-sector backup (exact backup of all sectors) or intelligent backup (backing up used sectors to save storage).
Compression: Adjust the compression level to determine the image file size and backup time.
Splitting: Split large image files into smaller ones during the backup process.
Comment backup: Add comments to backups for easy identification.
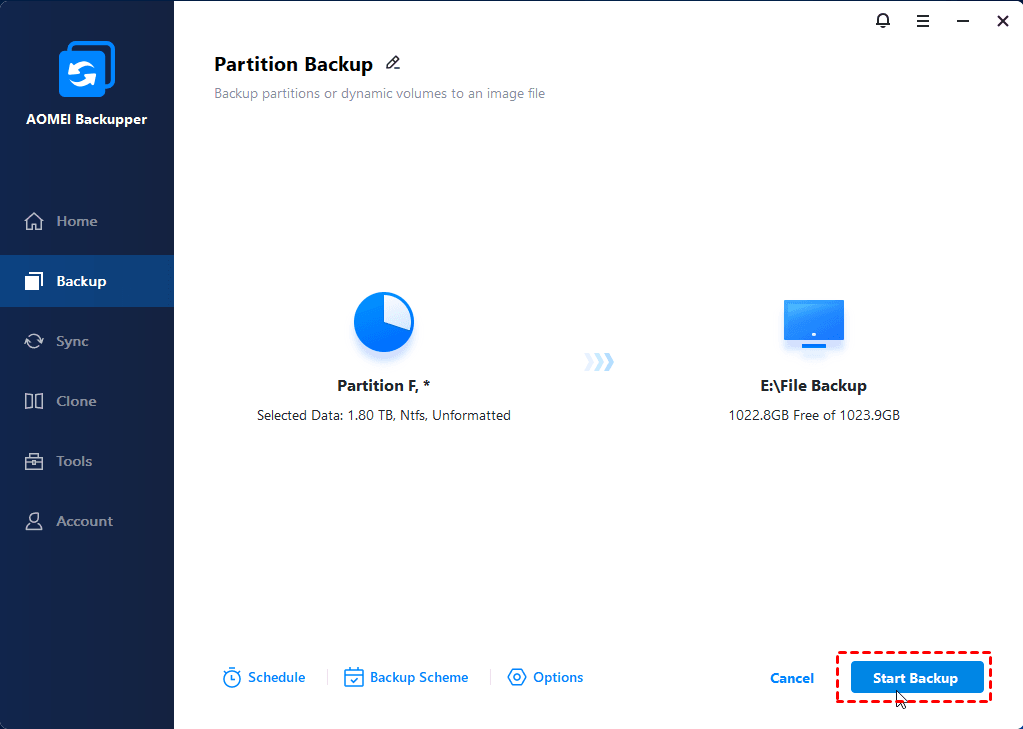
Step 4. Verify your settings and initiate the backup process by clicking on Start Backup.
Schedule Backup: Keep your backed-up image file up to date by setting up a schedule for automatic backups. Choose from options such as Daily, Weekly, Monthly, Event triggers, or USB plug in.
Backup Scheme: Maintain ample storage space by implementing a rule to automatically delete old backups. Additionally, you can select between full backup, incremental backup, or differential backup methods.
Summary
This article describes in detail how to implement Synology immutable backup to provide strong backups for your backups through immutable snapshot technology.
You can also try AOMEI Backupper, the top Windows backup and encryption software. It provides an easy way to encrypt and backup to the cloud, external drives, USB, and more. With AOMEI Backupper, you get a comprehensive solution that includes backup, restore, cloning, synchronization, and other useful features such as performing Windows Server file encryption. Experience the benefits firsthand by giving it a try.