2 Ways: Perform QNAP Rsync Backup to Another NAS
It’s a good idea to sync your original QNAP NAS to another NAS via Rsync. Additionally, there is another easy way for you!
By Maggie Updated on October 23, 2023
The reasons backup NAS to another NAS
Despite the distinctions between NASs, creating a QNAP Rsync backup is a common practice in effective data management and disaster recovery.
1. Redundancy: This setup offers redundancy, ensuring data accessibility even if one device fails or becomes unreachable due to hardware issues.
2. Disaster Recovery: In the face of cyberattacks or accidents, having data backed up on another NAS enables recovery in cases of loss or damage to the primary device.
3. Off-site Backup: Storing an additional backup on a different NAS, located elsewhere, safeguards data from theft, fire, or other disasters that might impact both the primary device and its backup.
4. Data Synchronization: Moreover, performing Rsync QNAP NAS backup can serve as a means to synchronize data between multiple devices. This ensures uniform availability of files and data across all devices.
How to perform Rsync QNAP to Synology
Usually, you can backup your QNAP to another NAS, but the majority may choose Synology. Now see how to backup QNAP to Synology.
Part 1. On Synology NAS: Configure Rsync on Synology NAS
Step 1. Install Hyper Backup on Synology NAS and create a shared folder in the File Station.
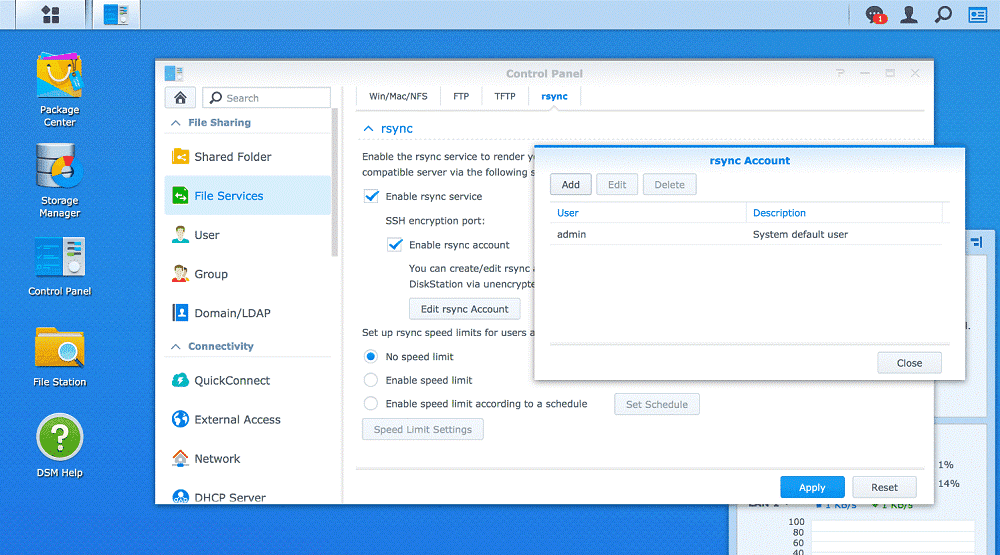
Step 2. Go to Control Panel > File Services > rsync > Enable rsync service > Enable rsync account in the DSM.
Step 3. Click Edit rsync Account to set up the account as admin.
Part 2. Create a Sync Job on QNAP NAS
Step 1. Install Hybrid Backup Sync in the app center.
Step 2. Create a shared folder in the File Station.
Step 3. On the search bar of QNAP NAS, type rsync and click Backup Server to access the window straightly. Or in the Hybrid Backup Sync, go to Backup Server > Rsync Server.
Step 4. Note the port number here, tick the desired options and set up the username and password. Click Apply OK.

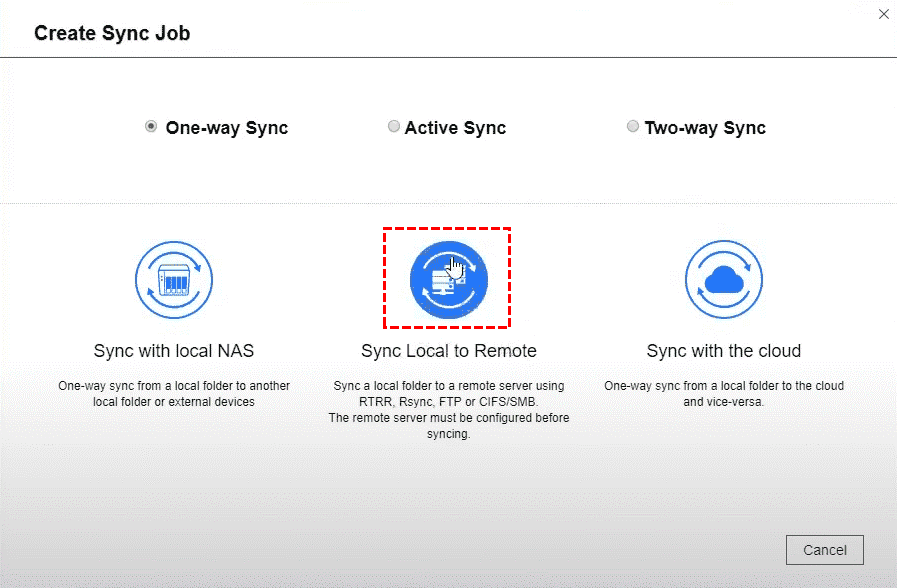
Step 5. Go back to the Overview, click Create Sync Job > One-way Sync > Sync Local to Remote.
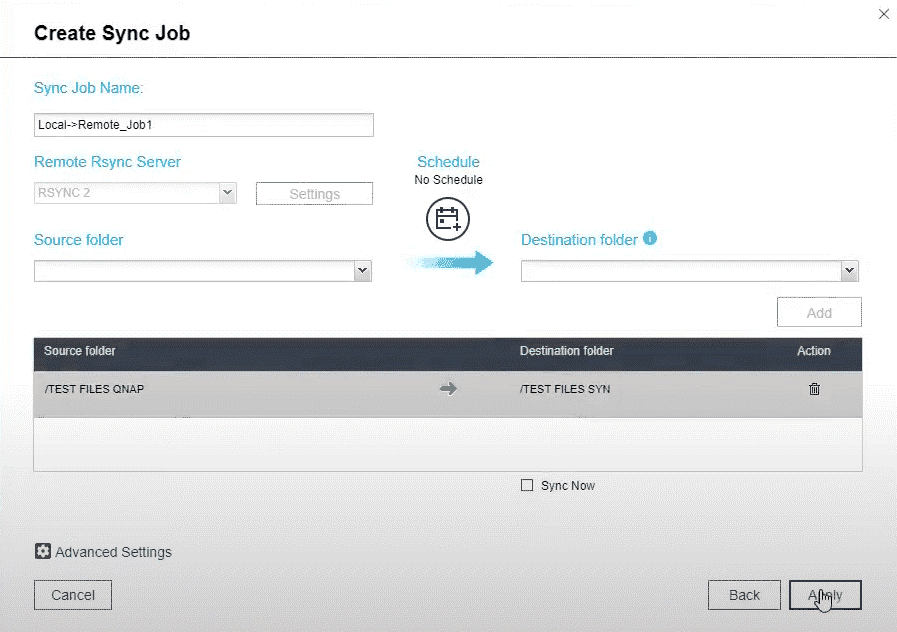
Step 6. Select Rsync Next New Profile from the Remote Rsync Server downward menu.
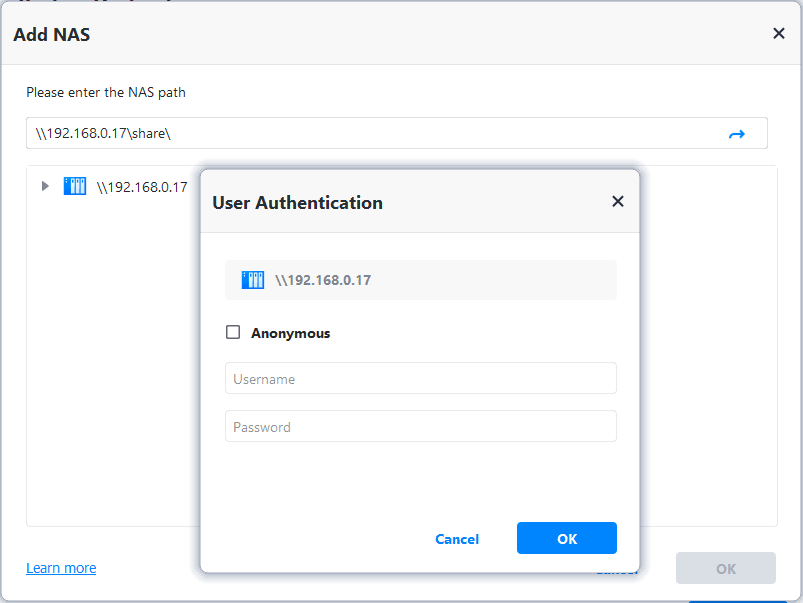
Step 7. Click Settings next to the button, specify the Synology IP and login details, and Test the connection.
Step 8. Under the Source folder, select the QNAP shared folder created earlier.
Step 9. Click the downward arrow of the Destination folder to select the shared Synology folder and click Add.
Step 10. Click the Schedule icon or Advanced Settings in the bottom left to customize the setup or tick Sync now.
Step 11. Click Apply.
Now you end the backup process. If you find it complicated and laborious, you can try another easy and free way. Please continue to see how to perform QNAP Rsync backup via AOMEI Backupper.
Easier alternative to backup or sync files from QNAP to another NAS
AOMEI Backupper Standard is a backup freeware working on all Windows PCs. It offers a straightforward method to accomplish data protection and disaster recovery tasks through an intuitive interface. The functional benefits are also clearly evident.
☎It supports various storage such as internal/external drives, USB, NAS and Cloud. You can also backup QNAP NAS to Synology NAS, backup Synology NAS to USB drive, etc.
☎You are able to backup or sync regularly so that you won’t forget to save the changes. Its schedule backup/sync feature will auto backup/sync your files in daily/weekly/monthly/event trigger and USB plug-in mode.
☎In addition to schedule backup, there are many other backup options allowing you to do intelligent or exact backup, compress or split the backup image, choose backup modes among full/incremental/differential.
This freeware can support both backup and basic sync to transfer data among NAS. Now you can download this software and then I will show you how to backup and sync step-by-step.
Full guide: backup QNAP NAS to another NAS
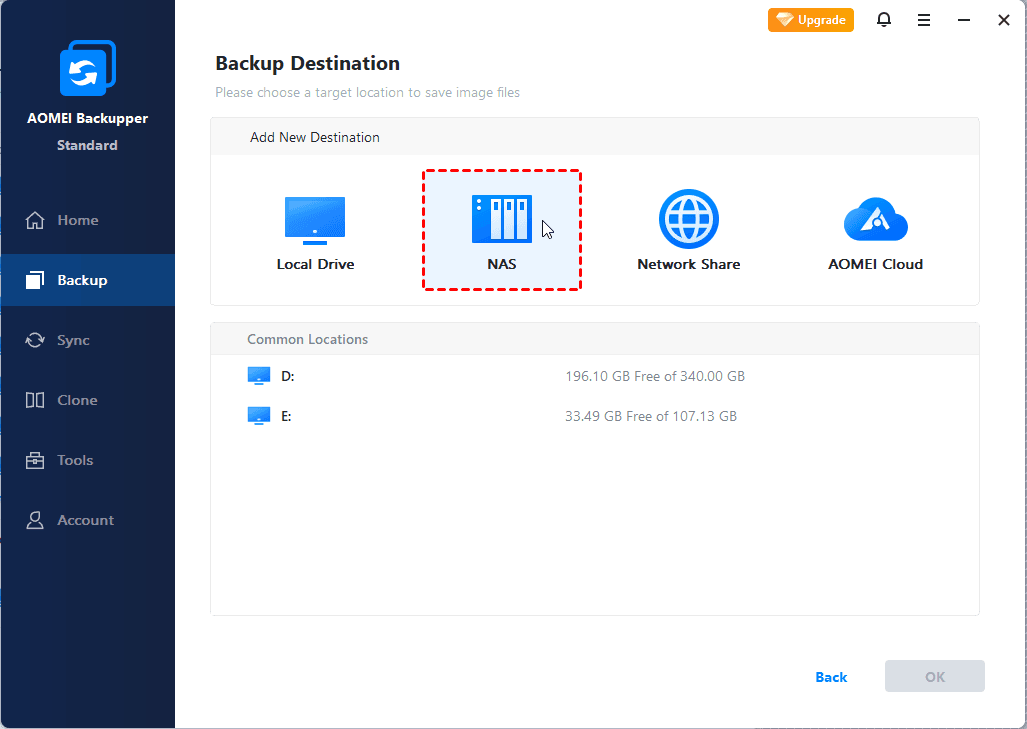
Step 1. Go to Backup tab and choose File Backup.

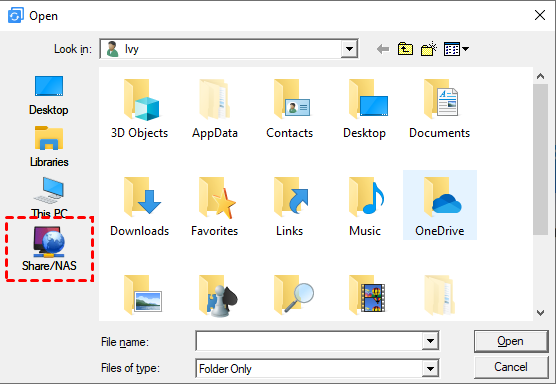
Step 2. Choose Add File or Add Folder according to your need. Click Share/NAS in the popping-up window and hit Add Share or NAS Devices to enter the required information of the source NAS.
Step 3. Click on the destination select box, add the target NAS in the same way, and then click Start Backup.
✍Other helpful features:
◆Options - choose intelligent or exact backup mode, specify compression level, split image file, comments, email notifications, etc.
◆Scheme - set up backup methods (Full Backup or Incremental Backup or Differential Backup.) and delete older backups automatically. Differential backup and automatic backup cleanup are vailable in advanced editions.
Full guide: sync QNAP NAS to another NAS
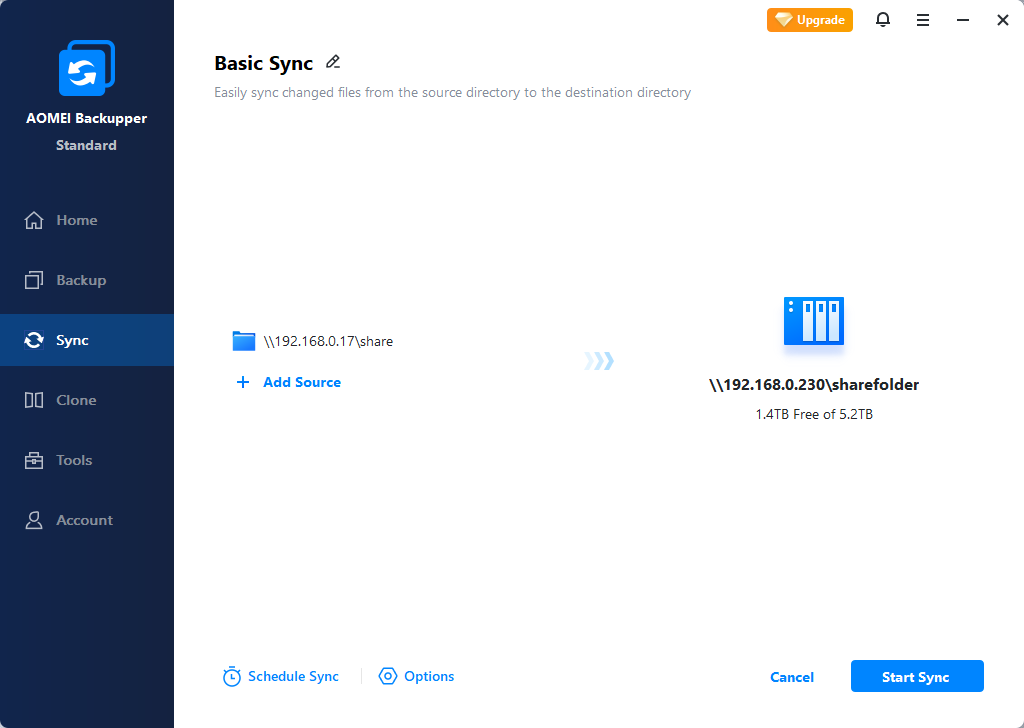
Step 1. Open this software and go to the Sync tab and choose Basic Sync.

Step 2. Click Add folder > Share/NAS > Add Share or NAS Device to specify the source NAS.
Step 3. Click on the destination select box, add target NAS in the same way, then click Start Sync.
✍Bonus: If you have an AOMEI account, you are able to backup files to AOMEI Cloud. You can enjoy 1TB free storage for 15 days after you sign up for an AOMEI account.
Conclusion
So here is the full guide to perform QNAP Rsync backup. but I have to admit it’s a little bit complicated. Another easy way is professional sync software like AOMEI Backupper.
In contrast to Rsync, AOMEI Backupper offers a more compatible and straightforward solution for NAS-to-NAS backup or synchronization. It allows you to effortlessly back up or sync data between QNAP to QNAP, Synology to Synology, different brands of NAS, and even various types of storage devices.
The free version of AOMEI Backupper already fulfills most of your practical requirements. If you need more powerful and convenient features, you can consider upgrading to higher editions. Even if you are a Server user that need to backup Windows Server to NAS device, the Server edition can perfectly suit your situation.