How to Perform Buffalo Cloud Backup: Step-by-Step Guide
This article describes what Buffalo cloud backup is and provides specific graphic tutorials. Finally, it is recommended that you backup Buffalo NAS to prevent data loss.
By Miya Updated on October 19, 2023
What Is Buffalo Cloud Backup?
Buffalo cloud backup is a service provided by Buffalo, a brand specializing in computer storage and networking solutions. It is a cloud-based backup service that allows you to securely back up and store your important data in the cloud.
With Buffalo cloud backup, you can protect your files, documents, photos, videos, and other digital assets by storing them on remote servers maintained by Buffalo. This cloud storage solution offers several benefits:
- Data Protection: By backing up your data to the cloud, you create an additional layer of protection against data loss. Your files are stored off-site, reducing the risk of losing them due to hardware failure, theft, or other unforeseen events.
- Remote Access: Buffalo cloud backup enables you to access your backed-up files from anywhere with an internet connection. This means you can retrieve or restore your data even if you're not physically near your storage devices.
- File Synchronization: Some cloud backup services, including Buffalo cloud backup, provide file synchronization capabilities. This means that any changes or updates made to your files on one device will be automatically synced with the cloud and other connected devices.
- Scalability: Cloud storage offers scalability, allowing you to expand your storage capacity as your data needs grow. You can typically purchase additional storage space as required, ensuring you have enough room to accommodate your expanding data.
- Security: Buffalo cloud backup typically employs encryption protocols to secure your data during transmission and storage. This helps protect your files from unauthorized access and ensures the privacy of your information.
Below we will give you a detailed description of how to implement Buffalo cloud backup on Buffalo TeraStation.
How to Perform Buffalo Cloud Backup on Buffalo TeraStation
Here's how to configure backup on a Buffalo TeraStation.This method applies to the TeraStation 5000/3000/7000 series. To access the settings for Buffalo cloud storage on your TeraStation device, follow these steps:
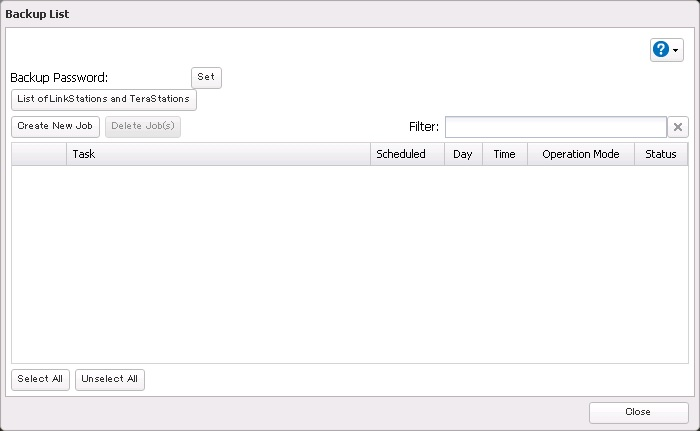
Step 1. Open the TeraStation GUI (Graphical User Interface). Locate and click on the Backup tab situated on the left-hand side. Next, click on the configuration icon located on the right side of the Backup option.

Step 2. To initiate a new backup job, simply click on the Create New Job button.
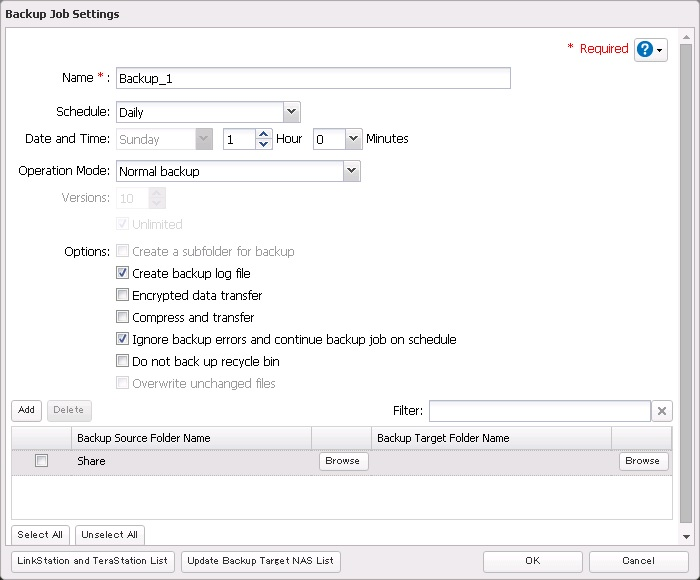
Step 3. Provide a name for the job and choose a schedule for it.

Step 4. Choose the desired Operation Mode (backup type).
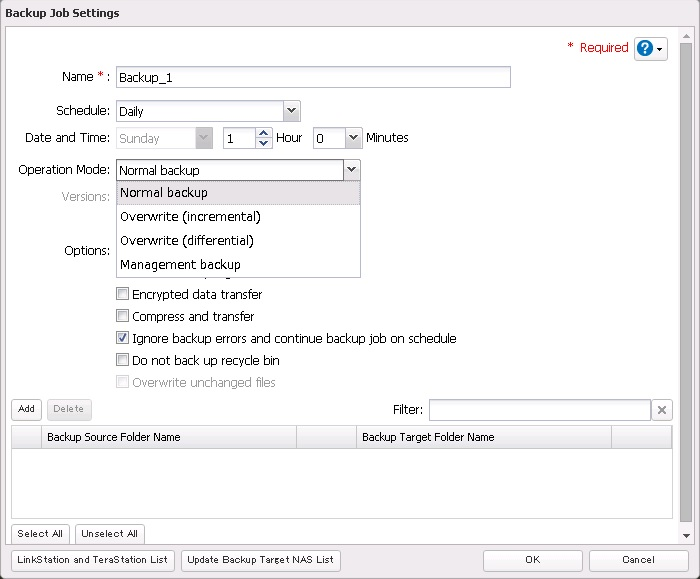
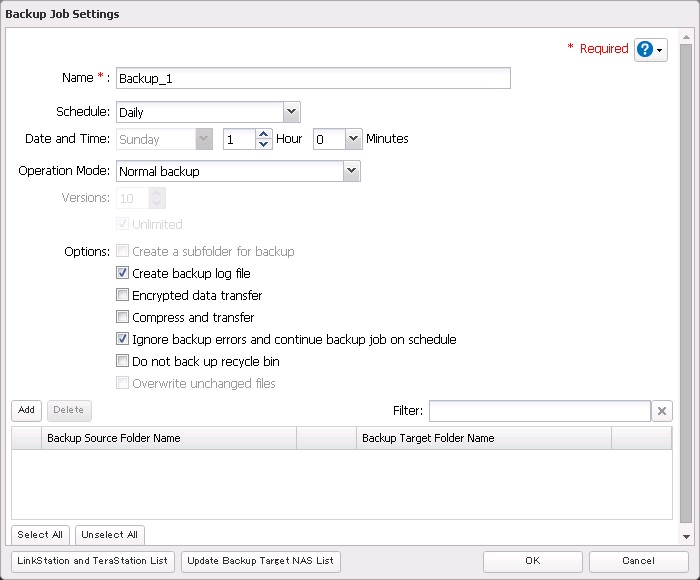
Step 5. Customize the additional options according to your preferences. The default settings will be displayed. To add a source and destination folder for the backup, click on Add.
Step 6. To select the folder that you want to back up, click on the Browse option under Backup Source Folder Name.
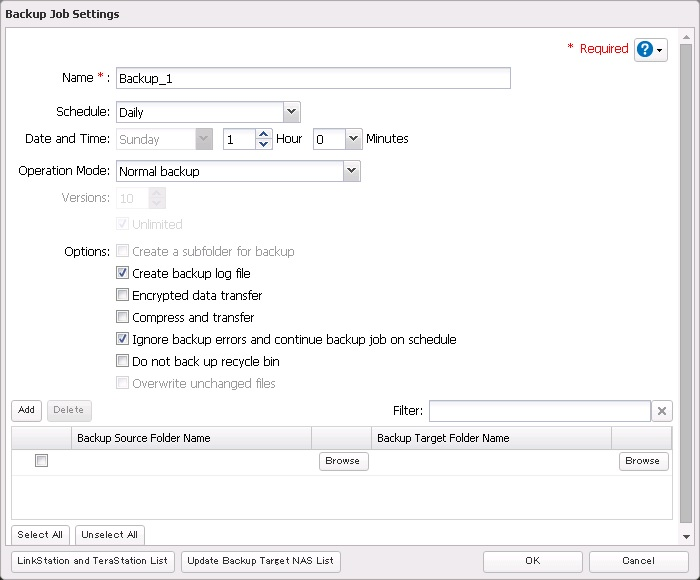
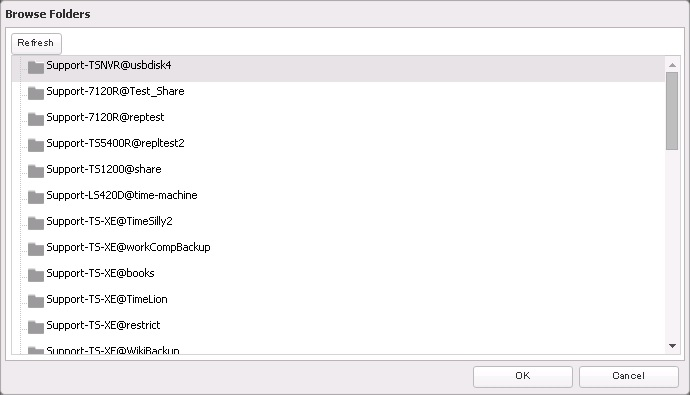
Step 7. Choose a local folder to be backed up, such as the default share, by selecting it.

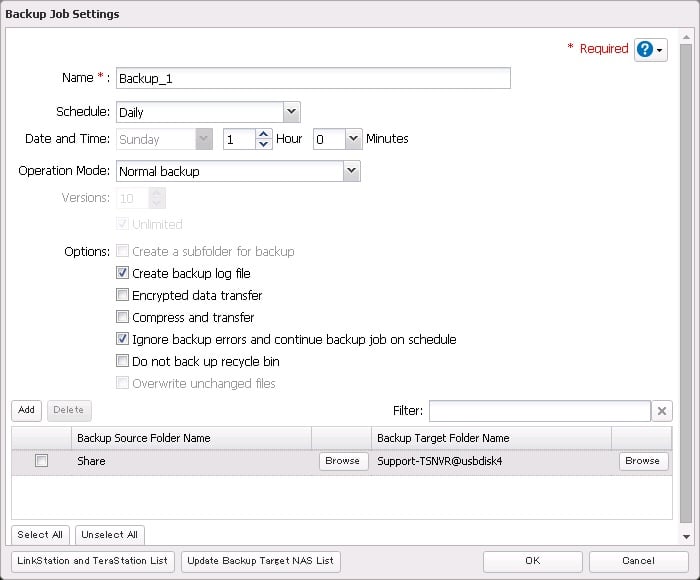
Step 8. To specify the destination for the backup, click on the Browse option under Backup Target Folder Name.
Step 9. Choose the target for the backup. It can be a local folder or a folder located on another TeraStation or LinkStation device. In this example, we will use a USB drive connected to the local TeraStation.
Step 10. Make sure to double-check that all settings are correct. You can include extra source and destination folders to be included in the backup job. After configuring all the desired options, simply click OK to save the backup job.
Step 11. The backup job appears in the job list. Edit or create new jobs as needed. The list shows job type and status. In this case, the job is Standing By and set to run daily at 1:00 AM. Click Close to return to the basic GUI.

Step 12. On the Backup line, you'll see the backup status indicating completion of the backup configuration.

Bonus Tip: Backup Your Buffalo NAS to Protect Data
PC users backup Buffalo NAS to NAS for two main reasons: data security and file transfer. NAS serves as storage for crucial and confidential data, and the aim is to safeguard it from unexpected disasters. However, what if the disaster affects the NAS itself? To ensure complete data protection, it's necessary to perform Buffalo NAScloud backup.
To backup NAS, you need a reliable utility like AOMEI Backupper Professional. It supports backing up NAS/network shares to other NAS/network shares in various Windows versions. It offers features like password protection, image compression, splitting, and backing up only used space for faster backups.
You can schedule backup tasks and manage storage with options for automatic deletion. Follow these steps:
Step 1. Download and install AOMEI Backupper.
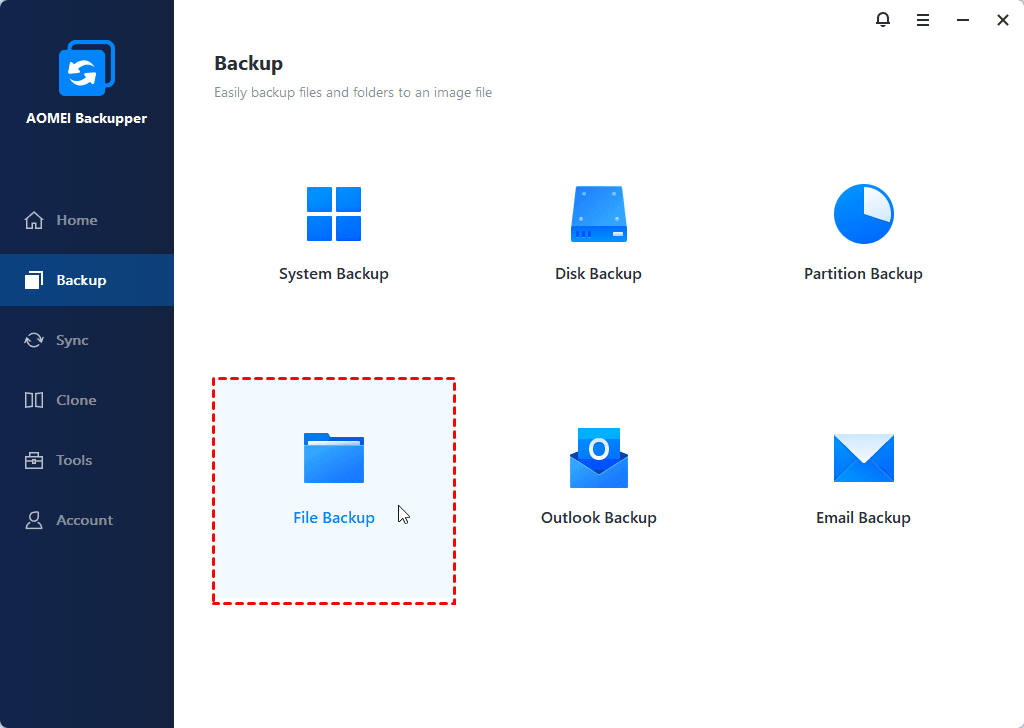
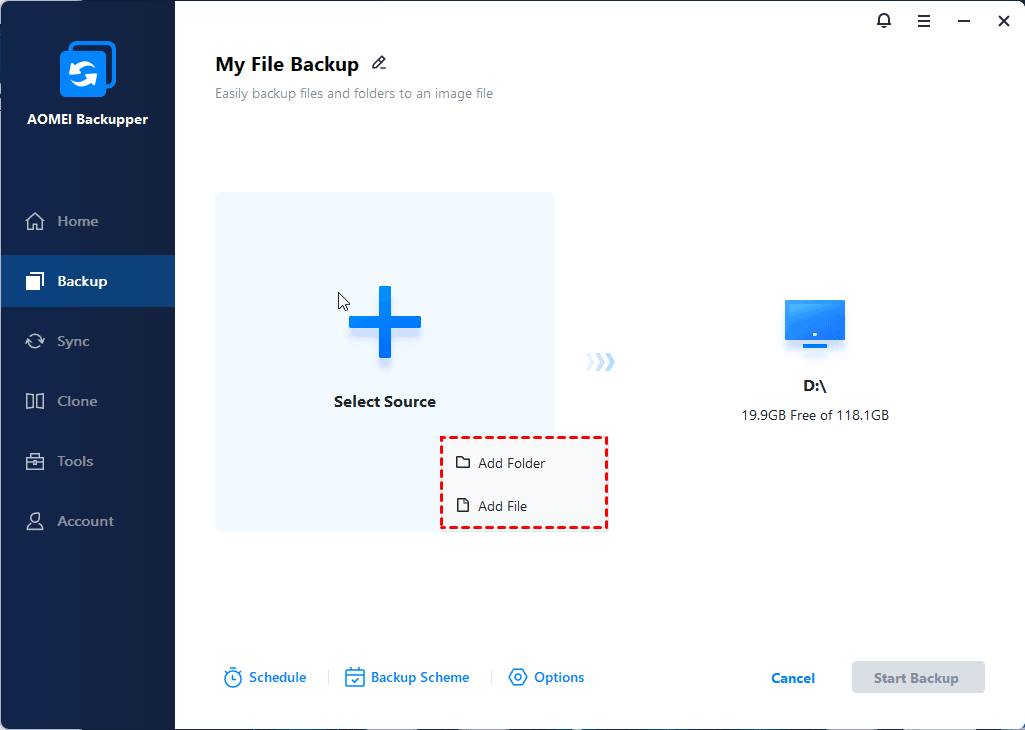
Step 2. Launch the software and navigate to Backup > File Backup.
Step 2. Click on Add Folder and then select the Share/NAS option.
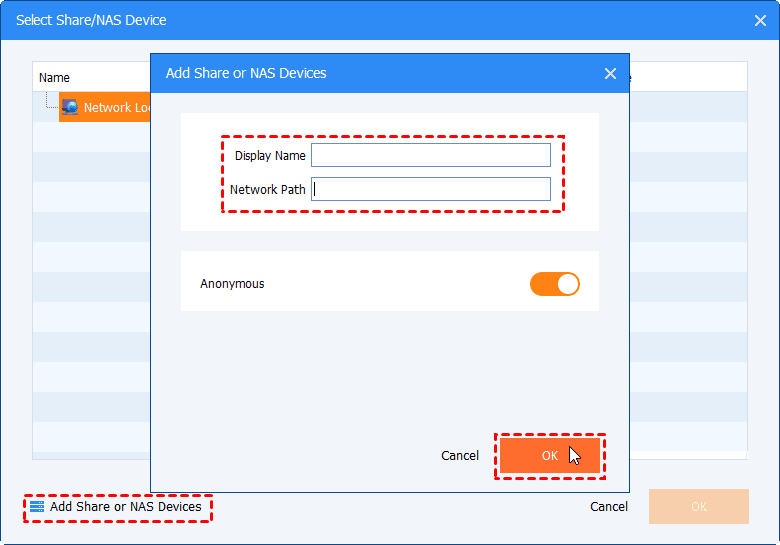
Step 3. Click on Add Network Location and enter the path of your Buffalo NAS. You may need to provide the username and password if you have set them up previously.
Step 4. Select the destination path for the backup. To add the other NAS location, click on the box and repeat the steps mentioned above.
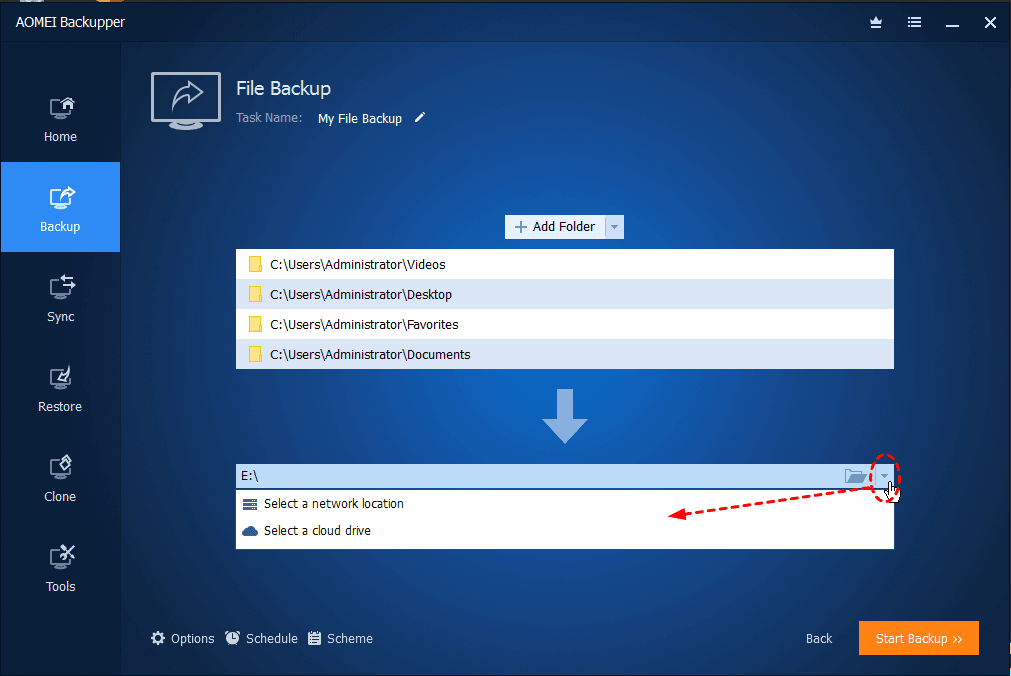
Step 5. You have the option to configure additional settings in Options, Schedule, and Scheme. Once you're done, click on Start Backup to initiate the backup process.
Backing up Buffalo NAS to another NAS is simpler than you might think. It ensures that your data is protected in case of any unfortunate events. AOMEI Backupper also supports backing up NAS to an external drive, providing you with more flexibility in your backup strategy.
Conclusion
This article describes in detail what Buffalo cloud backup is and provides specific graphic tutorials. Finally, it is recommended that you backup Buffalo NAS to NAS to prevent permanent loss of your data in case of catastrophic damage to your NAS. Additionally, you can benefit from a safer backup method called differential backup. This method reduces backup time and disk space usage while ensuring easy recovery when needed.
Believe me, AOMEI Backupper is one of the most powerful backup software options available to protect your data and system. Don't miss out on these incredible features. Download it now and start enjoying the benefits.