How to Fix Windows Migration Assistant not Working: 5 Ways
You will learn 5 proven solutions to fix Windows Migration Assistant not working, and a reliable Windows migration tool is introduced to help you transfer data between Windows PCs easily.
By Jonna Updated on September 15, 2023
Migration Assistant not Working in PC
I'm trying to use Migration Assistant to export my data from Windows 11 to Mac but it's not working on my Windows PC. It kept saying close the Edge when it's not even running. I restarted my computer and repaired the Microsoft Edge but still not working. I have a large amount of data that I need to be migrated. I really need some help to fix the Windows Migration Assistant not working issue!
Windows Migration Assistant is a helpful software tool developed by Apple Inc., specifically designed to simplify the transition from a Windows-based computer to a Mac. This utility streamlines the process of transferring essential files, settings, and applications from a Windows PC to a new Mac. However, Migration Assistant not working is an annoying problem that bothers a lot of people. Read this article to learn how to solve it with ease.
Why is Windows Migration Assistant not Working?
Many users reported that they encountered some Windows Migration Assistant errors, such as Windows/Mac Migration Assistant stuck or frozen, Migration Assistant not finding PC/Mac, Migration Assistant not recognizing external drive, Migration Assistant is blocked, etc. Actually, you are likely to encounter such issue due to the following reasons:
- Background apps running on the computer may trigger conflicts with the migration process.
- Disk-related issues, such as disk errors or insufficient disk space.
- Interference from security software that may block or hinder the operation of Migration Assistant.
- Insufficient permissions for certain files or folders.
- Connection problems between the PC and Mac, such as network issues or hardware connectivity problems.
- Outdated versions of Windows or MacOS.
How to Fix Windows Migration Assistant not Working in 5 Methods
To fix Migration Assistant not working on Windows 11/10/8/7 PC, five effective solutions are provided to help you resolve the issue.
Way 1. Disable Edge from Running
If you encounter an issue with Windows Migration Assistant says Edge is running, you can follow these steps to resolve the error:
Step 1. Launch Edge on your Windows PC, click on the ellipsis (three dots) near the top right, and select Settings.
Step 2. Navigate to System and performance, then disable the toggles for Startup boost and Continue running background extensions and apps when Microsoft Edge is closed.
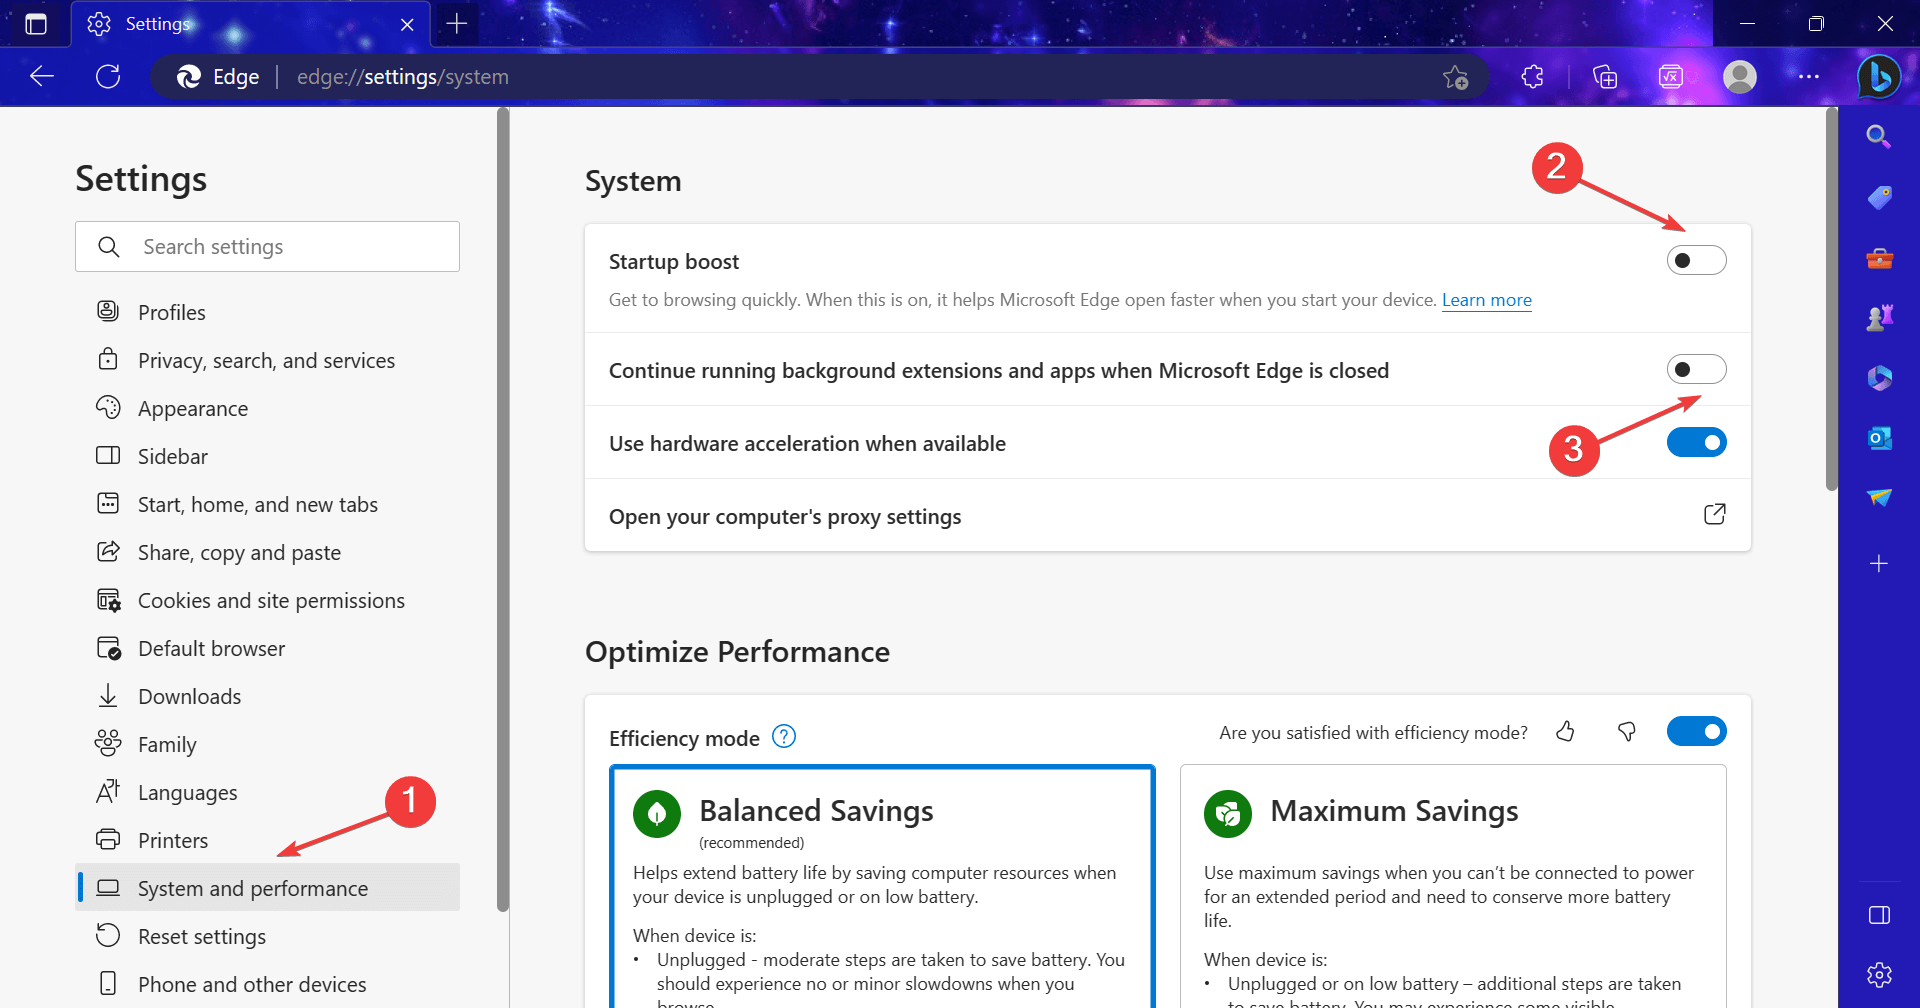
Step 3. After making these changes, restart your computer to apply the settings. Then, run the Migration Assistant again.
Way 2. Disable Startup and Background Apps
Sometimes, in addition to Edge, Windows Migration Assistant not responding issue is triggered by some apps that are running in the background. You can disable startup and background programs to see if the error can disappear.
Step 1. Right-click on the Windows taskbar and choose Task Manager from the quick menu.
Step 2. In the Startup tab, locate all apps labeled Enabled and click Disable near the bottom-right corner.
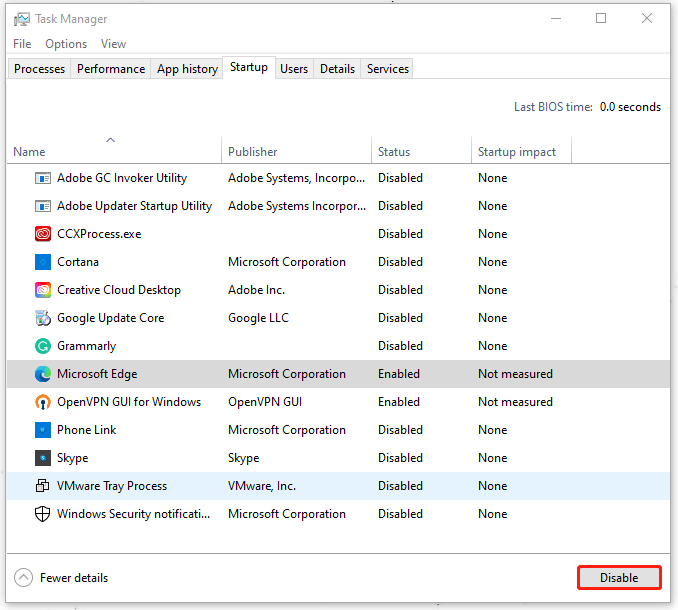
Then you can check if the Windows Migration Assistant not working issue has been fixed.
Way 3. Disable Security Software
Software conflicts often arise due to aggressive antivirus or firewall programs. If you've recently installed such software, consider uninstalling it. Alternatively, you can attempt to resolve the issue by temporarily disabling the Windows firewall.
However, before taking any of these steps, it's advisable to backup your important files. Disabling Windows security measures can leave your system less protected, increasing the risk of data loss or security issues. Ensuring your data is safely backed up is a prudent precautionary measure.
Way 4. Run CHKDSK for Disk
There may be disk errors when your Migration Assistant not finding Windows PC. You can check for and repair these errors using the following steps:
Step 1. Open Run by pressing Win + R on your keyboard, Input cmd, and hit the Ctrl + Shift + Enter keys to run Command Prompt as an administrator.
Step 2. Then, copy and paste the following command - chkdsk /r and press Enter to execute the command.
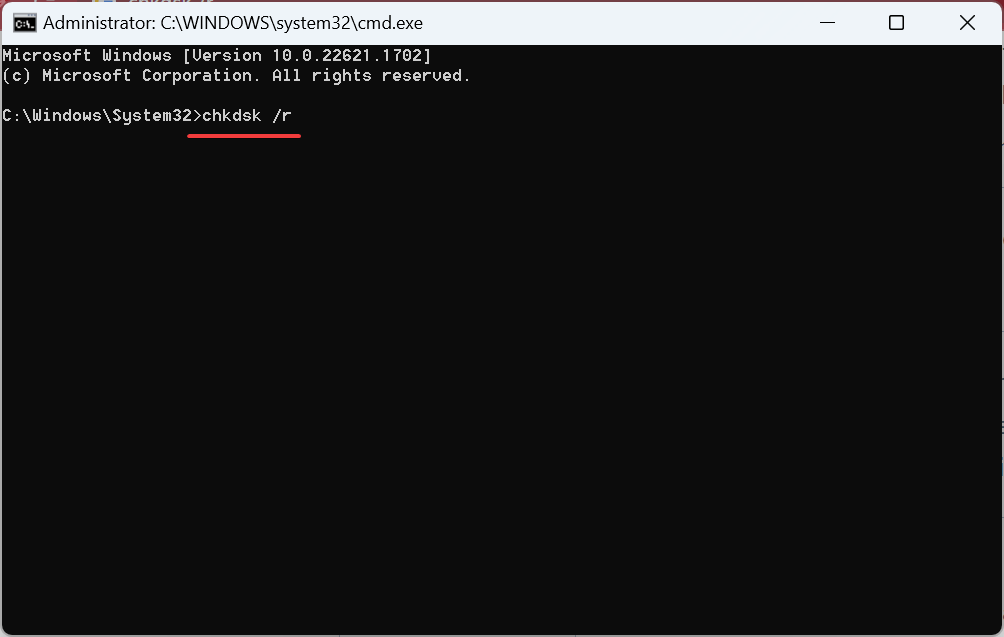
Step 3. When prompted to confirm running the scan the next time you reboot, press Y and then hit Enter.
Way 5. Run Migration Assistant in Compatibility Mode
Running Windows Migration Assistant in compatibility mode can be a helpful solution for users experiencing issues with the tool being stuck or not working correctly. Compatibility mode allows you to run an application as if it were designed for an earlier version of Windows, which can often resolve compatibility issues. Follow the steps below to fix Windows 11 Migration Assistant not working:
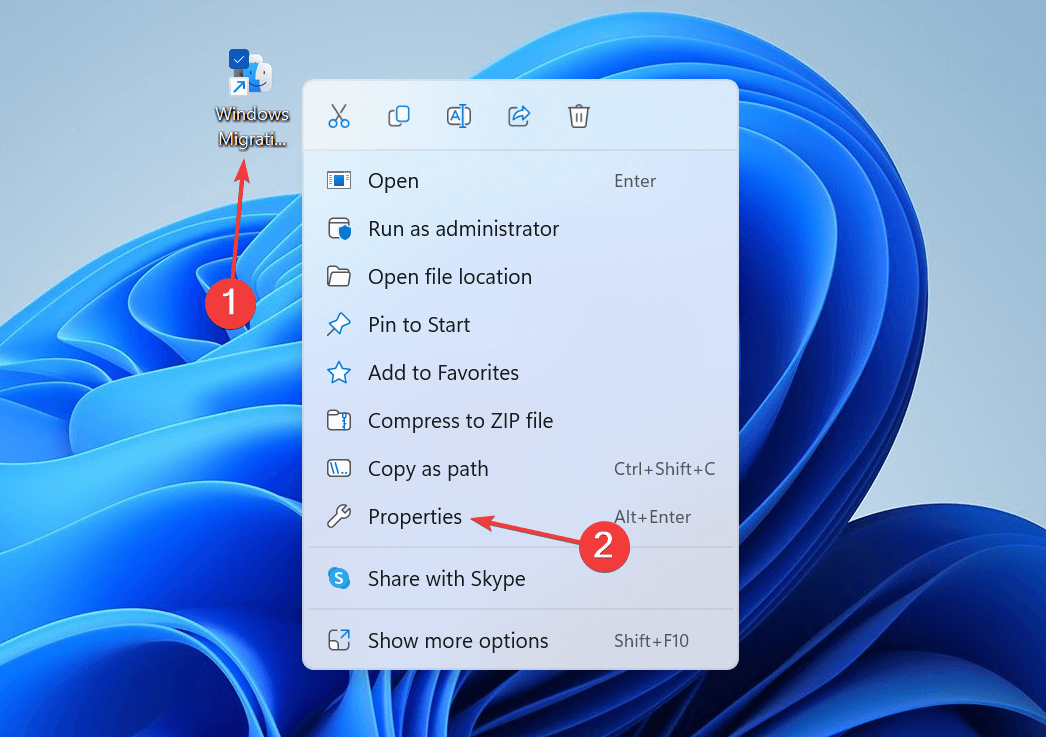
Step 1. Right-click on the Windows Migration Assistant tool, then select Properties from the context menu.
Step 2. In the Compatibility tab, tick Run this program in compatibility mode for, and select Windows 7 from the drop-down menu.
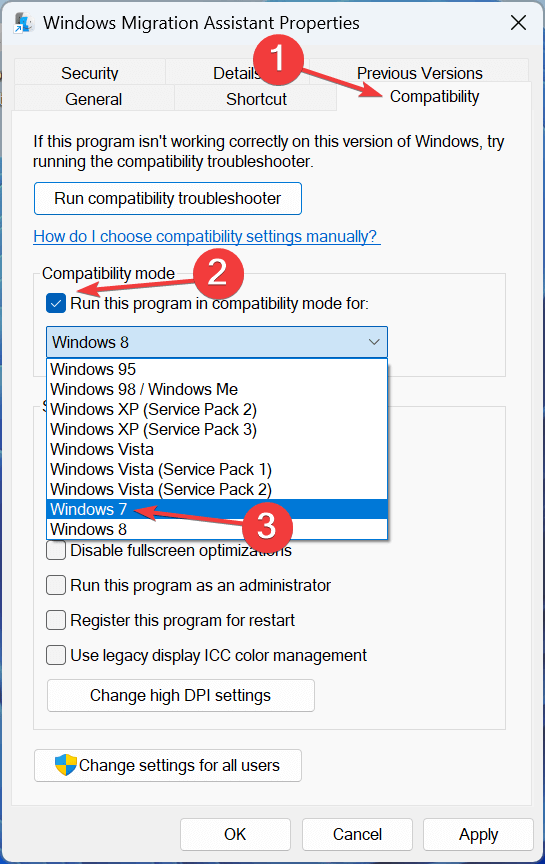
Step 3. Click on Apply and OK to save the changes.
Bonus Tip: Best Migration Tool for Windows PCs
Migration Assistant is a handy tool designed to make data migration from an old Windows/Mac to a new Mac easier. However, users may sometimes encounter issues where Migration Assistant fails, leaving them no solution. Also, there may be users who want to transfer data between Windows PCs. In this case, trying the free PC-to-PC file transfer software, AOMEI Backupper Standard, is a great idea.
📍 It enables you to transfer files from one PC to another with external devices, network drives, NAS, cloud storage, etc.
📍 It allows you to transfer everything from one computer to another, including personal files like photos, documents, and videos, as well as installed programs, the operating system, and system files.
📍 You have the option to create schedules for automated file transfer tasks in daily/weekly/monthly.
📍 It is compatible with a range of Windows operating systems, including Windows 11/10/8.1/8/7/Vista/XP (32-bit and 64-bit).
Please download AOMEI Backupper Standard and install it on your computer. For server users, try AOMEI Backkupper Server!
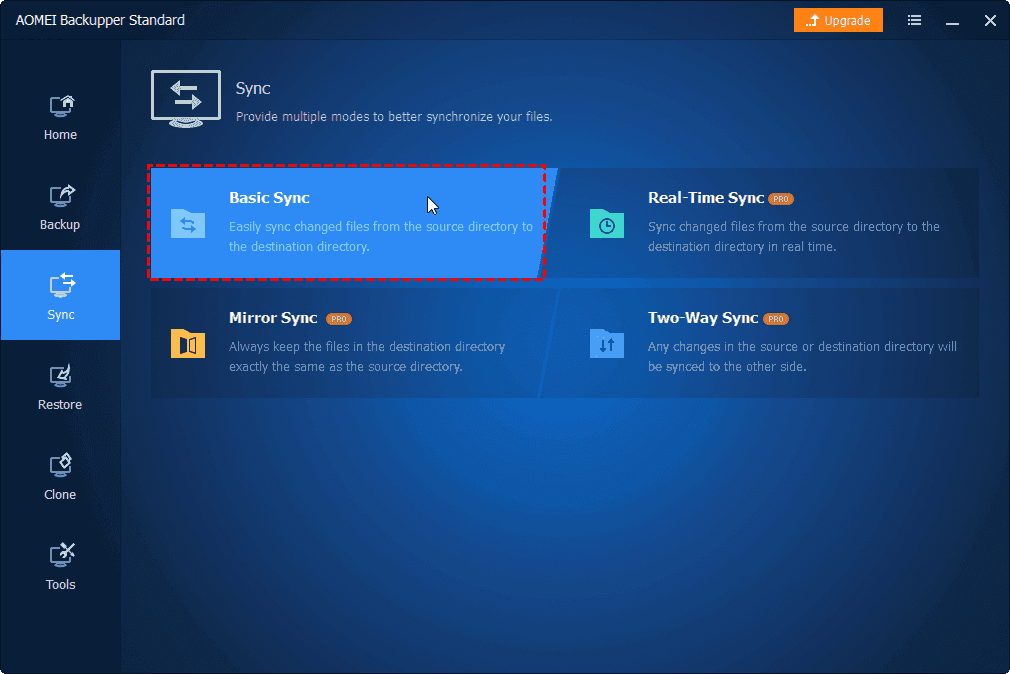
Step 1. To initiate the transfer process, open this software, and click Basic Sync under the Sync tab.
- ★ Notes: Please note that there are additional synchronization features available in the Professional version.
- Mirror Sync: This feature ensures that the source directory and the target directory are always identical. Any extra files in the target folder will be deleted to maintain mirror-like synchronization.
- Two-Way Sync: Two-Way Sync synchronizes changes in both the source and target file directories. If changes occur in either location, they will be synchronized to the other.
- Real-Time Sync: With Real-Time Sync, the software immediately synchronizes any changes detected in the source folder to the target folder as soon as they occur.
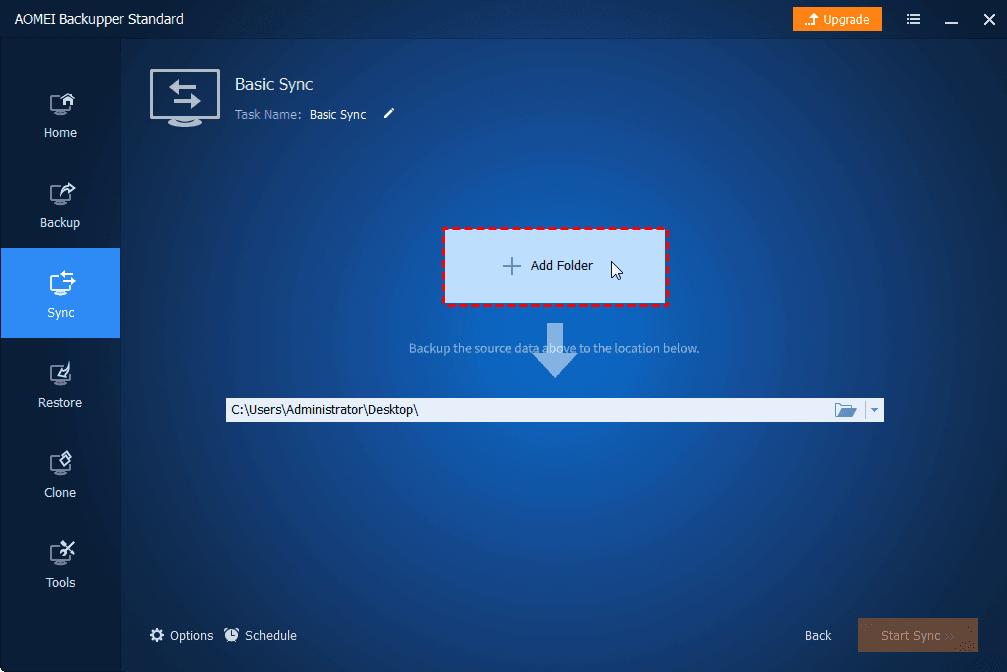
Step 2. To specify the folder(s) you wish to transfer, click on Add Folder and select the desired folder(s).
Step 3. In the destination box, click the inverted triangle icon to choose the way you want to transfer.
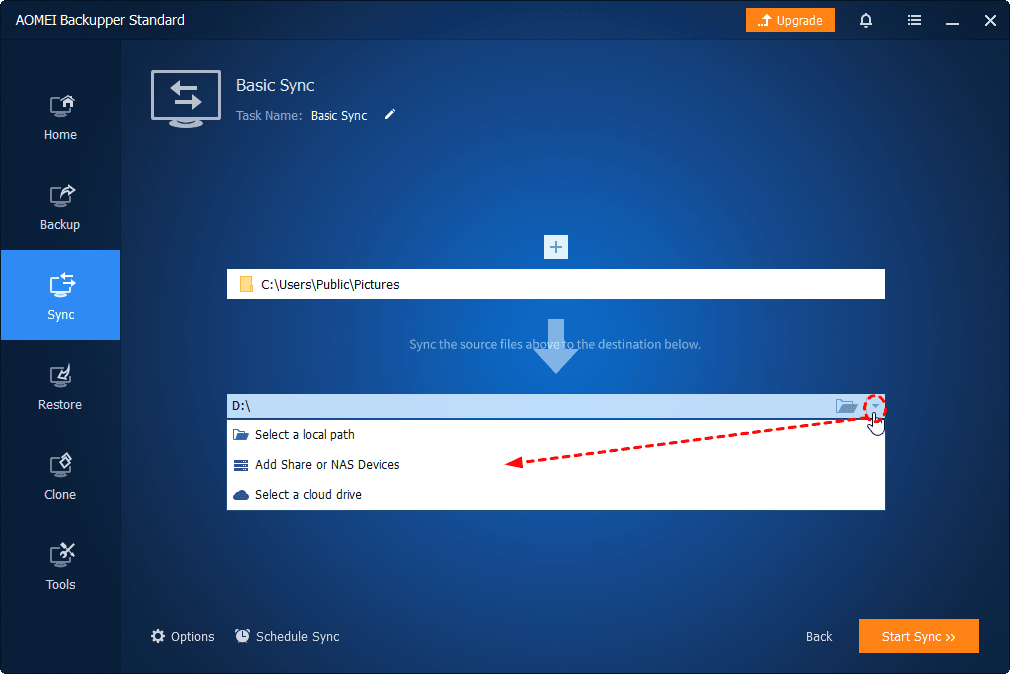
- ★ There are three options available:
- Select a local path: This option allows you to choose a local destination path, such as an external disk, USB drive, etc. Ensure the external storage device is connected before making your selection.
- Add Share or NAS Devices: With this option, you can transfer files between laptop and desktop PC without external storage device. It only requires you to type network path and select one of the shared folders on it.
- Select a cloud drive: This option enables you to synchronize local folders with a cloud storage service like Google Drive, OneDrive, or Dropbox. You need to install the corresponding desktop app of the cloud drive in advance.
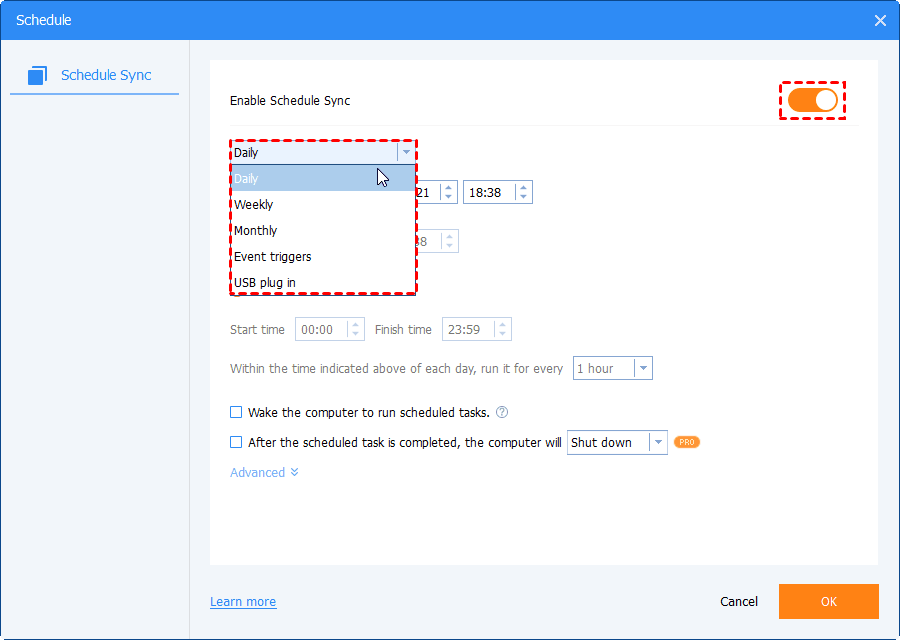
Step 4. (Optional) To sync changes automatically, you can enable Schedule Sync and then choose an auto sync mode that suits your needs.
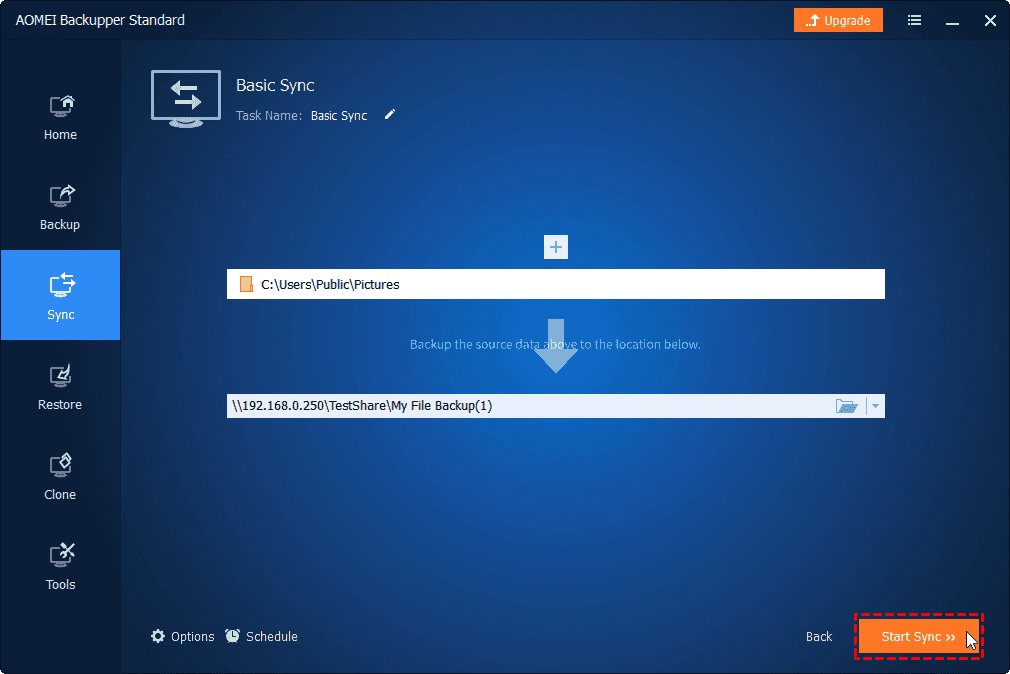
Step 5. Finally, click on Start Sync button to initiate the synchronization operation.
Conclusion
In conclusion, this page lists 5 approaches to fix Windows Migration Assistant not working issue. Also, if you need a Windows PC migration tool, you can try AOMEI Backupper. This software can help you easily transfer files from old PC to new PC in Windows 7/8/10/11.
Besides, you can use it to create a full backup for your Windows PC with various backup options, including System Backup, Disk Backup, Partition Backup, File Backup, and so on.