Fixed: Windows Has Stopped This Device Because It Has Reported Problems
In this article you will learn the cause of the error -Windows has stopped this device because it has reported problems, and further master the 14 fixes for this error.
by Yuka Updated on November 1, 2022
User Case
"I recently had a sudden system crash while playing a game and when I restarted the computer and re-entered the game, the system crashed again. When I restarted the computer again, I found this error message in Device Manager's display driver: Windows has stopped this device because it has reported problems. (Code 43). I initially thought it was a problem with the display adapter because it was an older GTX 970, for which I repurchased a new RTX 3070. When I installed the new display adapter and reinstalled the display adapter driver, I still saw the same error message in Device Manager. I'm not sure exactly what is wrong, just hoping someone can tell me how to fix it, any help would be appreciated!"

When you see this error in Device Manager, it usually means that the device has a hardware failure, or that the drivers are outdated and incorrectly configured. It is important to note that this error is not specific to a particular type of device, but can occur with devices including Bluetooth, hard drives, display adapters, etc. The error is not displayed directly on the desktop and you will only receive an error when you try to use a problematic device. Therefore, it becomes a critical point to confirm the presence of this error on your computer.
How Can I Confirm If Error Code 43 Exists on My Computer
In fact, there are many Device Manager error codes, and code 43 is just one of the more common ones. When you encounter this error, you can see the device displayed as a yellow exclamation mark in Device Manager.
- Right-click the Start button on the far left side of the taskbar and select Device Manager from the expanded menu.
- In the Device Manager window, check the devices that are displayed with yellow exclamation marks.

Note 📝: If not displayed, check the display adapter, Universal Serial Bus controller, disk drive, etc. in order of the devices listed above that may have errors.
- Right-click on the device with the yellow exclamation mark and select Content in the expanded menu.
- In the General tab window, check the status of the device and see if the error message "Windows has stopped this device because it has reported problems" is listed.
How to Fix “Windows Has Stopped This Device Because It Has Reported Problems”
Device Manager error codes are specific, so if you see error code 43 elsewhere, it probably means a system error, so be careful not to get confused. If you want to fix the error "Windows has stopped this device because it has reported problems. (Code 43)", please try the following 14 options in order.
Method 1. Restart the Computer
Restarting your computer can help you solve many problems and is a worthwhile solution. Therefore, when you encounter the error "Windows has stopped this device because it has reported problems", the first thing you should try is to restart your computer.
- Tap the Start button on the far left side of the taskbar.
- Tap the Power button again and select Restart in the expanded menu.
Wait for the restart to complete, then go back into Device Manager and see if the error message for code 43 still exists. If it still exists, go to the next scenario.
Method 2. Confirm That the Device Is Installed Correctly
If restarting the computer does not work, then you need to check the device and make sure that it is installed correctly.
You can unplug the device with the error and plug it into another computer to detect if the device has a hardware failure. If the device works properly on another computer without any errors, then you can connect the device to the source computer again and make sure that the installation procedure was done correctly.
Method 3. Run Windows Troubleshooting (Microsoft Fix it)
Windows 10 has a dedicated detection and repair tool built in to help us fix some of the problems that we can't begin to fix. When you encounter the error "Windows has stopped this device because it has reported problems", you can try to fix it using this troubleshooting tool.
- Use Windows + S to open the search box, type troubleshoot settings, and open it.
- In the Troubleshoot window, see if there are suggested troubleshooters. If there are no suggestions, you can click Additional troubleshooters.
- Locate and select the device with the error and tap the Run the troubleshooter button.

- Next the selected device will be diagnosed automatically and when the problem is diagnosed it will be fixed automatically and you will be notified that the problem is fixed.
Note 📝: If your computer is on Windows 8 and below, you can use Microsoft Fix it to fix it, which works the same way as Troubleshooter.
Method 4. Disable and Re-Enable the Device
When a device in Device Manager gets the error "Windows has stopped this device because it has reported problems", you can try disabling and re-enabling the device, which will help fix the error.
- Right-click the Start button on the far left side of the taskbar and select Device Manager in the expanded menu.
- In the Device Manager window, check the devices that are displayed with yellow exclamation marks.
- Right-click the device with the yellow exclamation mark, select Disable device in the expanded menu, and confirm this action.
- Right-click this device again and select Enable device in the expanded menu.

Method 5. Update or Roll Back the Driver
If the driver version of a device is out of date, or if this version is less compatible, it may also cause the error "Windows has stopped this device because it has reported problems". To do so, you need to update the device's driver or roll back the device's driver to the previous version.
💥 Update drivers
- Open Device Manager, and in the Device Manager window, select the device that shows a yellow exclamation mark.
- Right-click it and select Update driver in the expanded menu.
- In the Update Drivers window, select the Search automatically for drivers option.
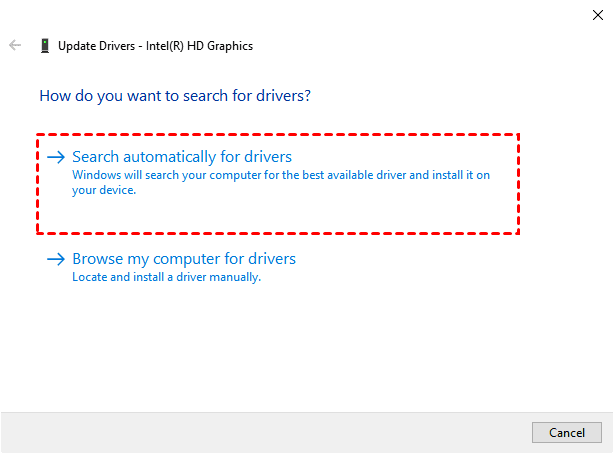
- If you find a new driver available, download and install this update, and wait for the process to complete.
Note 📝: If the automatic search does not help you find a new driver, you can also go to the device manufacturer's website and check if a new driver is available.
💥 Roll Back the Driver
- Open Device Manager and select the device that is displayed with a yellow exclamation mark.
- Right-click it and select Properties in the expanded menu.
- Switch to the Driver tab at the top of the Properties window, tap the Roll Back Driver button, and confirm this action.

Note 📝: The "Roll Back Driver" in Device Manager does not apply to the print queue and allows you to reply to the driver only once.
Method 6. Uninstall and Reinstall the Driver
In addition to updating or reverting the device driver, you can also choose to uninstall and reinstall the device driver, which also helps to fix the "Windows has stopped this device because it has reported problems" error.
- Open Device Manager and select the device with the yellow exclamation mark.
- Right-click it, select Uninstall device in the expanded menu, and confirm this action.
- In the Device Manager window, click the icon representing Scan for hardware changes. The previously uninstalled drivers will be installed automatically.
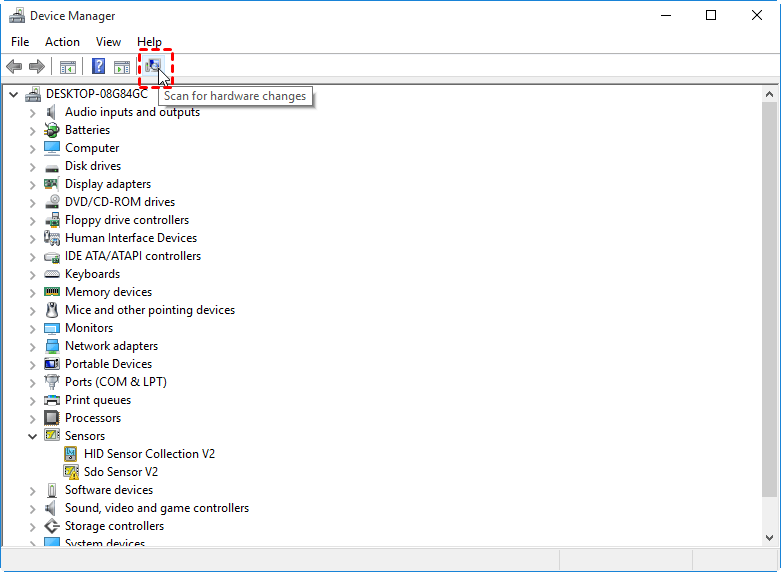
Note 📝: If the above error occurs for a USB device, then you need to uninstall the drivers for all devices below the Universal Serial Bus controller list.
Method 7. Change the Power Setting
If you are using a laptop with a high configuration, when your power plan is power saving, it will cause your computer to have limited performance and may cause the error "Windows has stopped this device because it has reported problems". For this reason, you will need to change the power settings.
- Open Device Manager and select the device with the yellow exclamation mark.
- Right-click it and select Properties in the expanded menu.
- Switch to the Power Management tab at the top of the Properties window, uncheck the Allow the computer to turn off this device to save power checkbox, and then tap the OK button.

Note 📝: If you are using a laptop, it is recommended that you check and change the power settings to balanced or high performance to prevent problems caused by the power settings.
Method 8. Disable the USB Selective Suspend Setting
If it is a USB device with the error "Windows has stopped this device because it has reported problems", you can disable the USB selective suspend setting, which will help to fix this error.
- Use Windows + R to open the Execute window, type powercfg.cpl and press Enter.
- In the Power Options window, find the power plan currently in use and tap the Change plan settings button on the right.
- In the Edit Plan Settings window, tap the Change advanced power settings button.
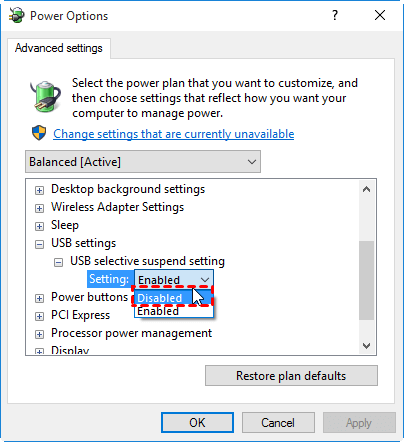
- In the Advanced settings window, expand USB settings> USB selective suspend setting in order.
- Tap the Enabled button next to Settings, switch to Disabled in the expanded menu, and then tap the Apply and OK buttons in turn.
Method 9. Enable Bluetooth Support Service
If your computer does not have Bluetooth support enabled, not only will the installed Bluetooth devices not function properly, but it may also cause the error "Windows has stopped this device because it has reported problems". To do this, you need to disable the Bluetooth service and enable the Bluetooth support service first.
- Open Device Manager, right-click on the Bluetooth device with the error, and select Disable device in the expanded menu.
- Use Windows + R to open the Execute window, type SERVICES.MSC and press Enter.
- Find Blue Support Service in the list of services window, right-click it and select Properties in the expanded menu.
- Find the Startup type in the General tab, change it to Automatic, and click the Apply and OK buttons in turn.

- Go back to Device Manager, right-click on the previously disabled Bluetooth device, and select Enable device in the expanded menu.
Method 10. Hard Reset Computer
When a device has the error "Windows has stopped this device because it has reported problems", you can fix it by hard resetting the computer.
- Completely shut down your computer and unplug all power connections and external devices (Bluetooth receiver, headset, camera, etc.).
- Press and hold the power button and wait 60 seconds.
- Plug the device with the error into another interface and turn your computer on again.
Method 11. Update Windows
Sometimes Microsoft patches for Windows 10 may help fix the "Windows has stopped this device because it has reported problems" error. To do this, you can check and update Windows.
- Use Windows + I to open Windows Settings and tap Update & Security.
- On the Windows Update tab, in the right panel, click Check for updates.
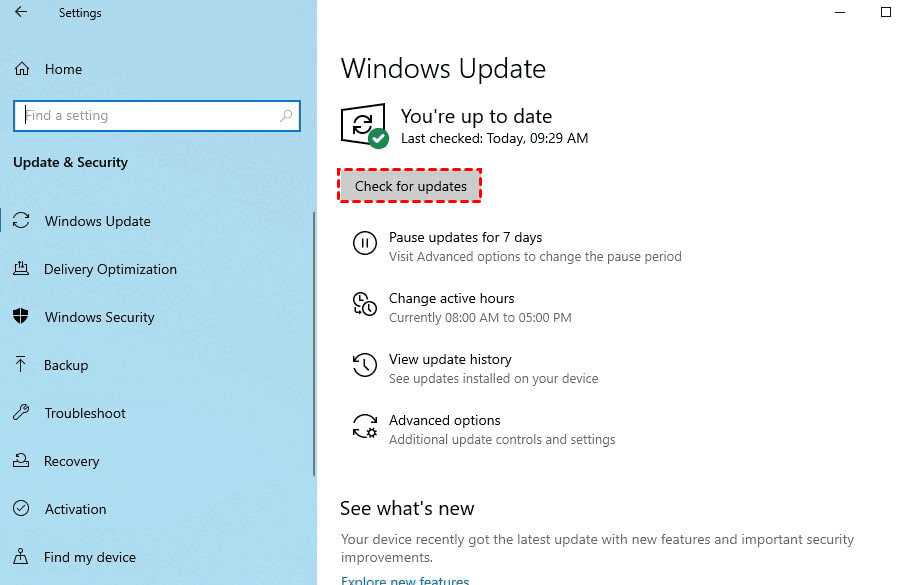
- If any updates are available, please tap the Download and install button.
Method 12. Update the BIOS
When you see the error "Windows has stopped this device because it has reported problems" in your computer, it means that there is a problem with your computer's hard drive. At this point, you can try to check the current BIOS version and update it. The following steps are for ASUS motherboards as an example.
- Use Windows + R to open the Execute window, type msinfo32.exe and press Enter.
- In the System Information window, you can view the current BIOS version of your ASUS motherboard.
- Next, you need to open your browser, go to the ASUS motherboard manufacturer's website and download the latest BIOS zip file, extract it and then save it to a USB flash drive (it is recommended that the size of the flash drive does not exceed 16GB and is a single sector).
- Please note that different brands of motherboards have different methods of entering the BIOS, so please check the motherboard manual or ask the motherboard manufacturer for help.
- Press F7 to access the advanced mode, and then select ASUS EZ Flash 3 Utility.

- Select the USB and then select the updated BIOS file.
- After the BIOS update file is read successfully, tap the YES button again and wait for the BIOS update to complete.
- Reboot your computer and open the System Information window again to check the BIOS version of your ASUS motherboard after the update. After confirming that the BIOS update was successful, go back into Device Manager and see if the error message for code 43 still exists.
Method 13. Windows System Restore
If you created a System Restore point before the "Windows has stopped this device because it has reported problems" error, you can fix the error by restoring your computer to a previous point in time using the System Restore feature.
- Tap the Start button on the taskbar, then tap the Power button, hold down the Shift key and select Restart to enter the Windows Recovery Environment.
- In the Windows boot options menu, click Troubleshoot -> Advanced options -> System Restore in order.
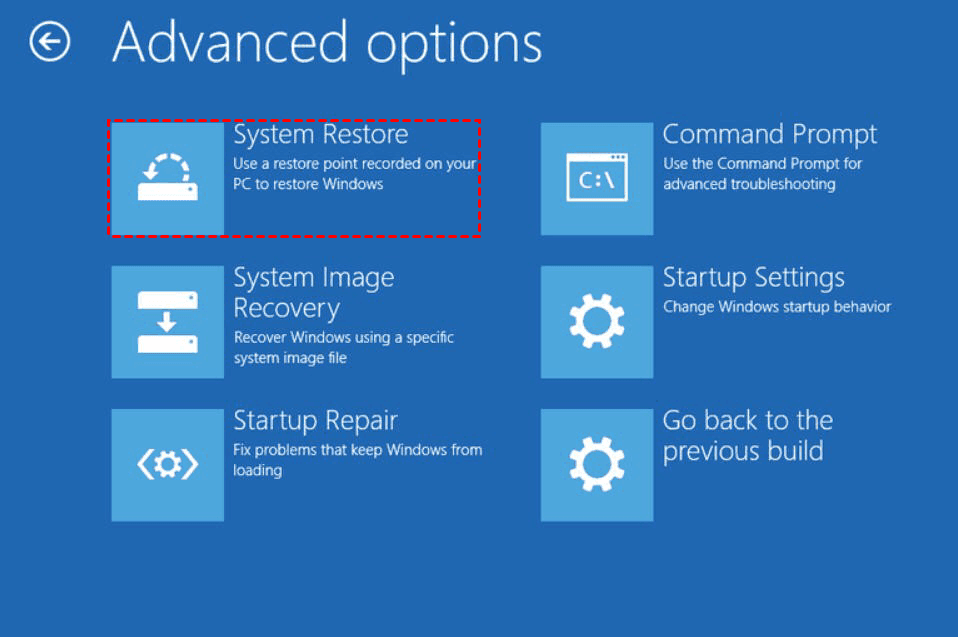
- Next, you can simply follow the System Restore wizard to perform a system restore.
Note 📝: You can also use Windows + R to open the Run window, type rstrui.exe and press Enter to open System Restore, then follow the prompts to select a time point for System Restore.
Method 14. Reset This PC
In addition to System Restore, you can also choose to reset your computer. This method also helps to fix the "Windows has stopped this device because it has reported problems" error.
- Use Windows + I to open Windows Settings, find and tap Update & Security.
- Switch to the Recovery tab in the left panel, find Reset this PC in the right panel, and tap the Get started button.

Create A System Backup Image to Prevent System Problems
We believe the above 14 methods can help you fix the Code 43 error. But you still need to keep a close eye on the system to prevent such problems from happening again. For this reason, it is recommended that you use AOMEI Backupper Standard to perform a system backup after fixing the code 43 error, not only to effectively prevent any system problems that may occur, but also to quickly restore your system to a normal state.
AOMEI Backupper Standard provides you with a free and professional system backup service with the following features.
😬 It is highly compatible with multiple versions of Windows 11/10/8.1/8/7/Vista/XP and so on.
😬 Backup all contents of Windows system partitions, including system files, boot file related partitions (EFI system partition and recovery partition, etc.), application and user profile files of the system disk, etc.
😬 You can backup your Windows 11 system to any location, including external hard drives, network shared folders, NAS devices, SD cards, USB flash drives, etc.
If you are using AOMEI Backupper Standard for the first time, please go through the following to learn the detailed operation steps of system backup.
- Run AOMEI Backupper Standard, select the Backup tab in the left panel, and select System Backup in the right panel.

- In the System Backup window, change the storage path of the system backup and then click the Start Backup button. If you have more than one backup task, you can also change the task name by tapping the pencil icon in the upper left corner.

Note 📝: Before the backup starts, you can click on Options, Scheduled Backup and Backup Scheme in the lower left corner for additional settings.
📛 Options: Allows you to add commrnts to Windows 11 system backup tasks and enable email notifications for free. If you want to enable the encrypted backup feature for better data security, it is recommended that you upgrade to the Pro version.
📛 Schedule Backup: Allows you to enable the scheduled backup feature for free and set up daily, weekly, and monthly scheduled automatic backups of Windows 11. You can also set up automatic backups of your system on event triggers and USB plug in, though you will need to upgrade to the Pro version to use it.
📛 Backup Scheme: Allows you to change the backup method of Windows 11 to differential backup or full backup, which can effectively improve the backup efficiency and save the time required for backup. Please note that the differential backup feature is available for a fee.
Summary
When you see the "Windows has stopped this device because it has reported problems" error for a device in Device Manager, you can refer to the 14 options above to fix it.
If the device with the above error is a hard disk and you have to replace it, then we recommend you to use AOMEI Backupper Standard for disk clone to protect your data.