Full Guide to Upgrade Surface Pro 8 SSD – Know Everything Here
Looking to upgrade Surface Pro 8 SSD? Check out this blog post for everything you need to know about boosting your device's performance. Get expert tips and tricks to finish the task easily.
By Clytze Updated on May 6, 2023
Can you upgrade Surface Pro 8 SSD?
Are you looking to give your Surface Pro 8 a performance boost? Aside from Thunderbolt 4 and the 120Hz display, perhaps one of the most important and welcome changes to Surface Pro 8 is the arrival of a removable SSD.
The Surface Pro 8 comes with a built-in SSD, which is responsible for storing your files and operating system. While the default SSD is sufficient for basic tasks, it may not be enough for power users or those who rely on their Surface Pro 8 for heavy-duty work. Thus you may need to replace it with a bigger one.

Upgrading the SSD on Surface Pro 8 can make a significant difference in speed and storage capacity for those users in need. In this article, we'll guide you through the process of Surface Pro 8 SSD upgrade. If you are in the same need as well, keep reading to catch more details.
Step-by-step guide on how to upgrade Surface Pro 8 SSD
Upgrading your Surface Pro 8 SSD is a relatively straightforward process. However, it does require some technical know-how and careful handling of delicate hardware. Here's a step-by-step guide on how to upgrade SSD on Surface Pro 8.
Things you need to prepare in advance
◈ Backup data on the SSD. Before you begin, make sure to backup all your important files and backup data on SSD to prevent data loss during the replacement process.
◈ Some needed tools. Prepare SIM ejection tool or paperclip, Torx T3 screwdriver, and compatible SSD. Make sure to purchase an SSD that is compatible with your Surface Pro 8. All Surface Pro 8 models come with a replaceable M.2 2230 SSD located under the kickstand.
◈ Initialize new SSD. If the prepared is a new SSD, please initialize it. When setting the partition style, please set the partition style (MBR or GPT) to the same as the hard disk.
◈ Find a professional data migration software. To upgrade SSD on Surface Pro 8, you need a reliable disk cloning software to transfer all data on the old SSD to the new one completely. Luckily, there is one that deserves your try called AOMEI Backupper Professional.
- With the Disk Clone feature of it, you can easily transfer all of your data and settings to the new SSD including operating system, system reserved partition or efi partition, installed programs, personal data, etc.
- You can upgrade the old Surface SSD to a new SSD of all common brands, including Samsung, Crucial, WD, Toshiba, etc.
- With its "SSD Alignment" feature, you can accelerate the reading and writing speed of the target SSD.
- It supports all Windows PC operating systems including Windows 11/10/8.1/8/7/Vista/XP. If you are a Windows Server user, you can use AOMEI Backupper Server.
Download and install it on your Surface Pro 8 to complete the process without effort.
Migrate Surface old SSD to new SSD with AOMEI Backupper
Then follow the illustrated steps to finish Surface Pro 8 SSD replacement:
1. Download, install and launch AOMEI Backupper on your PC. Click on Clone -> Disk Clone. To clone only OS to the destination SSD, please use the System Clone feature to clone only C drive.

2. Select the current SSD as the resource disk and click Next >> button to continue.

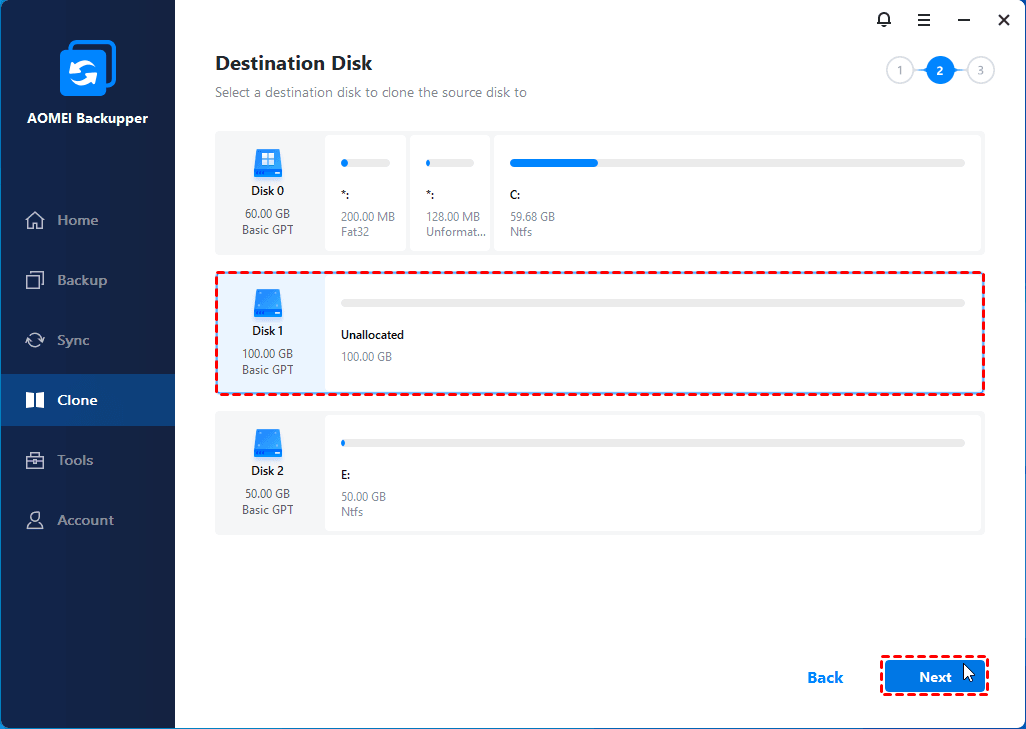
3. Select the prepared new SSD as the destination and click Next >>.
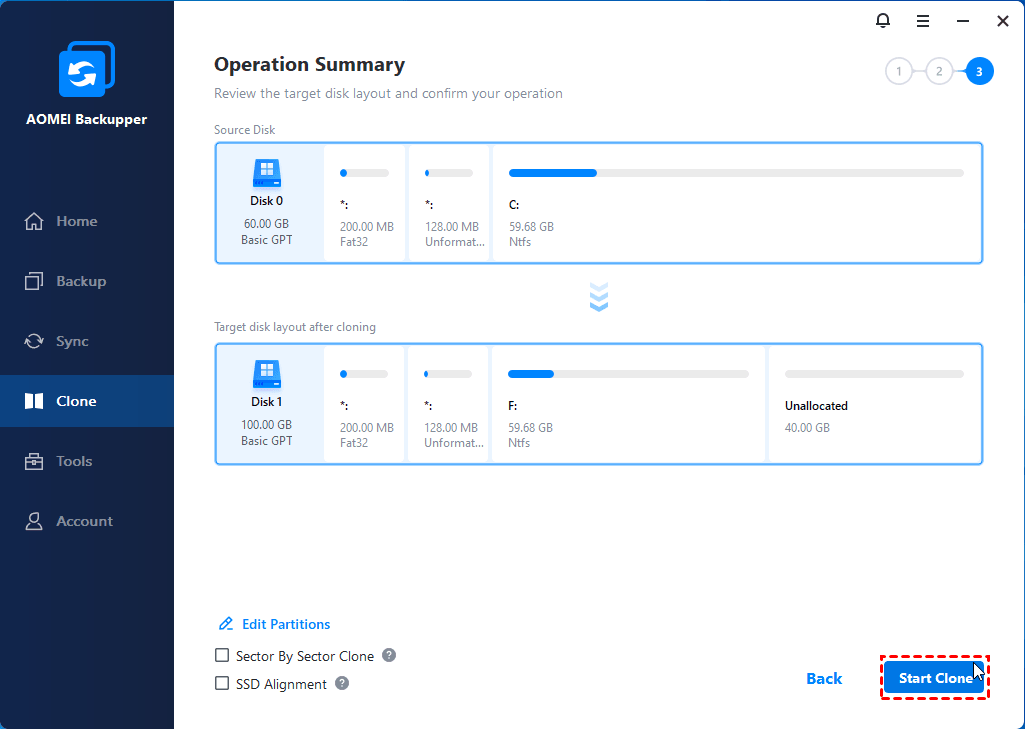
4. Tick SSD Alignment to accelerate the reading and writing speed of the new SSD. And then click Start Clone to begin migrate Surface Pro 8 SSD data to a new one.
✍ Notes:
▪ Sector By Sector Clone: This can ensure that everything is copied over accurately, including hidden files and system configurations. Please DO NOT select this option when cloning larger SSD to smaller SSD.
▪ Edit Partitions: This feature will allow you to resize the partitions on the target SSD to take advantage of the increased capacity when you clone a smaller SSD to a larger disk.
Physically complete Surface Pro 8 SSD upgrade
After the cloning process is done, now that all the data on the old SSD is transferred to the new one securely. You can start replacing the old SSD with the new cloned one.
1. Shut down your Surface Pro 8, and open up the kickstand to expose the SSD cover on the left side.
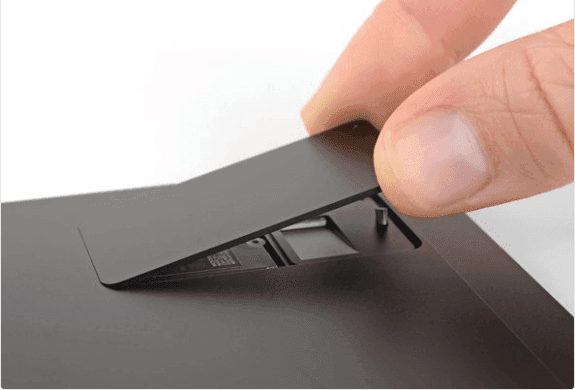
2. Using a SIM ejection tool or paper clip, push into the small hole on the cover to remove it.
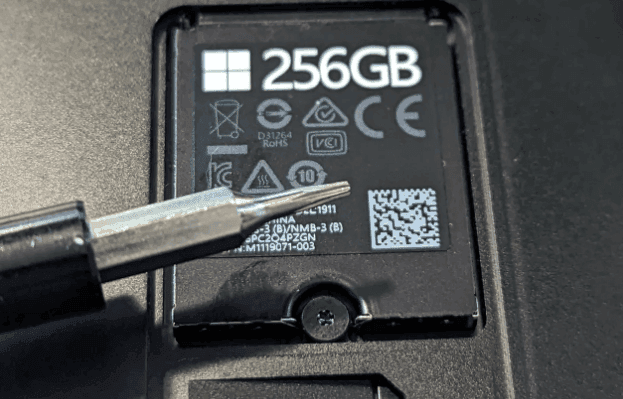
3. You may use a Torx T3 screwdriver to remove the screw holding the SSD in place and gently slide the SSD out of its slot.
4. Align your new SSD with the SSD slot and slide it in at a 45-degree angle until the contacts are completely covered by the SSD slot.
5. Use the Torx T3 screw to hold the new SSD in place and then put the SSD cover back on. Now the Surface Pro 8 SSD replacement is completely done now.
Summary
In conclusion, it is a relatively straightforward process to upgrade Surface Pro 8 SSD, which can help improve overall performance, increase storage capacity, and extend the life of your device. Just make sure to follow these steps carefully and choose the best data migration tool AOMEI Backupper to help you migrate data from old SSD to new SSD with no data loss. With a little bit of time and effort, you'll have a faster, more efficient Surface Pro 8 in no time!
Finally yet importantly, you can also deal with many problems with the help of AOMEI Backupper. You can enable Dell secure erase SSD and the wiped data won’t be able to recover, xcopy is not recognised as an internal command is also solvable with its help. Try it now and discover more!

