Top 2 Ways to Transfer Files to Raspberry Pi SD Card
You can learn about two ways to transfer files to Raspberry Pi SD card. These include using the command line and using free file transfer software.
By Miya Updated on October 19, 2023
User Case: How to Transfer Files from Computer to Raspberry Pi
“Hey, folks! So, I've got this Raspberry Pi set up as a media center using Kodi. Now, I want to transfer some video files from my computer to the Raspberry Pi. What's the easiest way to do that? Should I connect them directly via an Ethernet cable or use a USB drive? Any tips or step-by-step instructions would be awesome! By the way, I'm using a Raspberry Pi 4 Model B, and my computer runs on Windows 10. Thanks in advance for the help!”
If you are like this user and want to transfer files to Raspberry Pi from your Windows computer, then you have come to the right place. This article will provide two effective methods to teach you how to transfer files to Raspberry Pi from PC. If you are a computer novice, then please focus on the second method.
Transfer Files to Raspberry Pi with 2 Ways
Raspberry Pi is a line of compact and single-board computers that can be connected to a computer monitor or TV. It offers a desktop-like computing experience at an affordable price. Due to its low cost and portability, Raspberry Pi has found applications in various fields.
When using a Raspberry Pi, you might often come across situations where you need to transfer files like pictures, videos, or any other file type from your computer to the Raspberry Pi. In this part, we will provide detailed graphic tutorials to help you transfer files to Raspberry Pi.
1. Transfer Files to Raspberry Pi via USB Storage Device
Here's a simple and convenient method to transfer your files to a Raspberry Pi using a USB storage device.
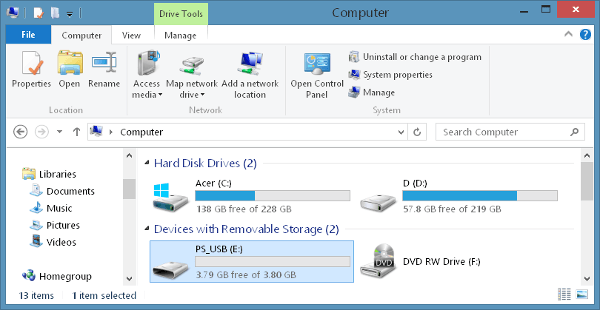
Step 1. Plug in your USB storage device into your computer. Find the USB storage device in your file explorer and make a note of its name, such as "PS_USB," for easy identification on the Raspberry Pi later on.
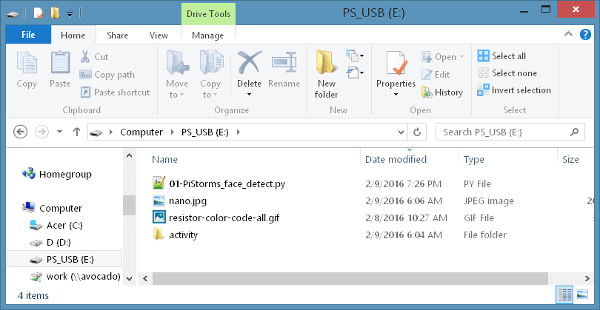
Step 2. Simply move the files you wish to transfer to the Raspberry Pi into the folder of the USB storage device.
Step 3. Unmount the USB storage device from your computer and safely remove it. Then, insert the USB storage device into one of the USB ports on the Raspberry Pi.

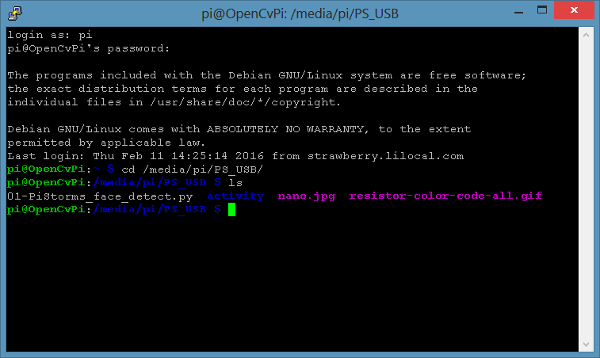
Step 4. Now, to access the Raspberry Pi, open a terminal and log in using the username "pi" and password "raspberry". You can either use the terminal provided in the graphical user interface (GUI) or follow the instructions in the Hyperterminal Connection section to establish a connection with the Raspberry Pi.
Step 5. Go to the folder of the USB storage device by navigating to /media/pi/ followed by the name of your device (replace "PS_USB" with the actual name). Use the following code:
- cd /media/pi/PS_USB
Step 6. To view the files in the USB storage device, use the "ls" command. Simply type "ls" in the terminal and press enter.
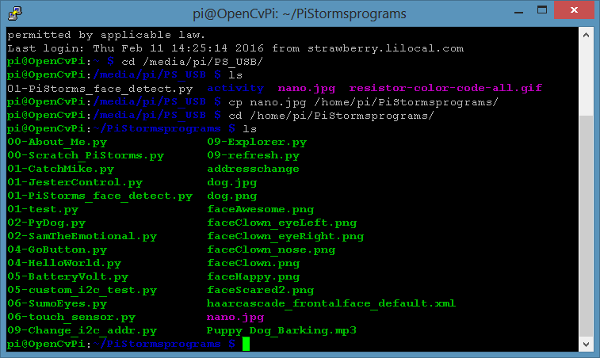
Step 7. Copy the desired files to your preferred folder. For example, if you need a picture for a PiStorms program and want to copy the "nano.jpg" file to the "PiStormsprograms" folder, use the following command:
- cp nano.jpg /home/pi/PiStormsprograms/
Step 8. Go to the folder where you copied the file(s) to verify that the transfer was successful.
Okay, the above is the first method to transfer files to Raspberry Pi. However, this method requires the use of the command line, which may be a bit complicated. So, after our testing and verification, we found a second easy way for you - using free file transfer software.
For detailed guidance on this software please proceed to the second method to learn the best way to transfer files to Raspberry Pi.
2. Transfer Files to Raspberry Pi via a Powerful Freeware
AOMEI Backupper Standard is a top-notch free backup software compatible with Windows 11/10/8.1/8/7/Vista/XP, offering transfer files to Raspberry Pi SD card. It provides several practical features:
◐ Sync: Synchronize files or folders between different locations.
◐ Backup and Restore: Create image files for the operating system, disk, partition, or files, allowing easy restoration when needed.
◐ Clone: Duplicate disks or partitions, including cloning SSD to a larger one.
To transfer files to Raspberry Pi SD card using AOMEI Backupper's "Sync" feature, follow the steps below:
Step 1. Connect the Raspberry Pi SD card to your computer and ensure it is recognized. Download, install, and launch AOMEI Backupper.
Step 2. Navigate to the left pane and click on Sync. Then, choose the Basic Sync option.

Step 3. Click on Add Folder to choose the folder(s) you wish to transfer from your PC to the Raspberry Pi SD card.

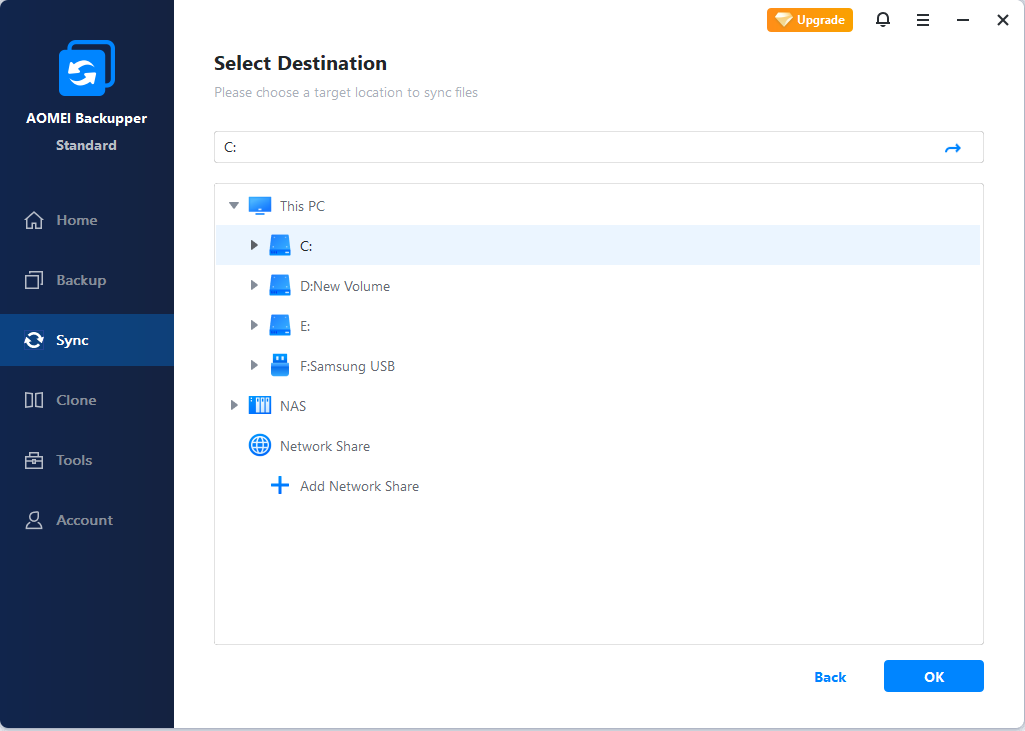
Step 4. Select the Raspberry Pi SD card as the destination location.
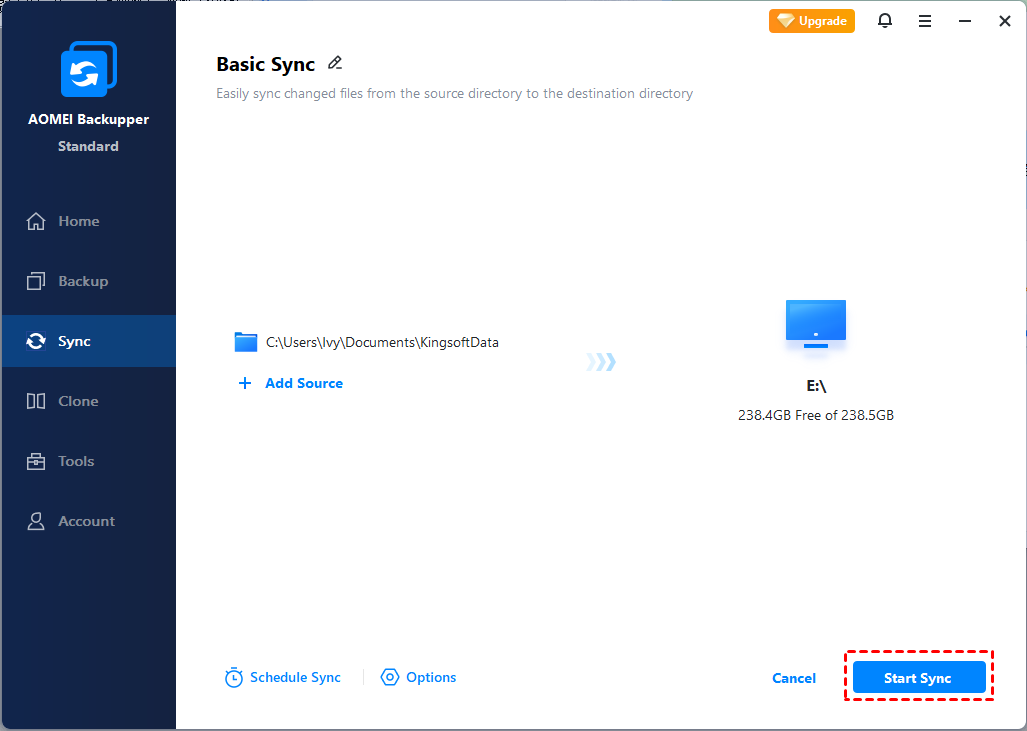
Step 5. Initiate the operation by clicking on the Start Sync button. Once the sync process finishes, remember to safely disconnect your Raspberry Pi SD card.
✎ Additional Information:
★To regularly transfer files to Raspberry Pi SD card, you can utilize the Schedule feature in AOMEI Backupper. For Real-time Sync, upgrading to higher editions of AOMEI Backupper is required.
★Keep in mind that Sync operates at the folder level for data transfer. If you wish to transfer individual files without folders, you can use the File Backup feature in AOMEI Backupper and then restore the backup image to your Raspberry Pi SD card.
★If you have an AOMEI account, you can back up files to AOMEI Cloud. Upon signing up for an AOMEI account, you can enjoy 1TB of free storage for 15 days.
Summary
You've learned how to efficiently transfer files to Raspberry Pi SD card in Windows 7/8/10/11. Compared to using USB and Command Prompt, AOMEI Backupper offers a faster file transfer solution.
Additionally, it can assist in resolving issues like a cloned Windows 7 that won't boot on a new computer and can even serve as a CompactFlash card copier if you have one. Give AOMEI Backupper a try and be amazed by its numerous fantastic features!