Easily Solve “This App Can’t Open in Windows 11” Problem (19 Solutions)
How to solve the "this app can't open in Windows 11" problem? Learn the specific reasons through this article and try 19 methods in turn. You can also learn the way to secure your computer data.
by Clytze Updated on October 20, 2022
Can’t Open the Application in Windows 11, It's Breaking Me.
"When I replaced my motherboard with a new one and met the upgrade requirements for Windows 11, I was happy to upgrade my computer. But the ensuing problem crashed me, as many applications in Windows 11 would not open. Since I just upgraded and I was sure I hadn't made any changes. Does anyone know how to fix this app can’t open in Windows 11 problem? Any help I would appreciate!"
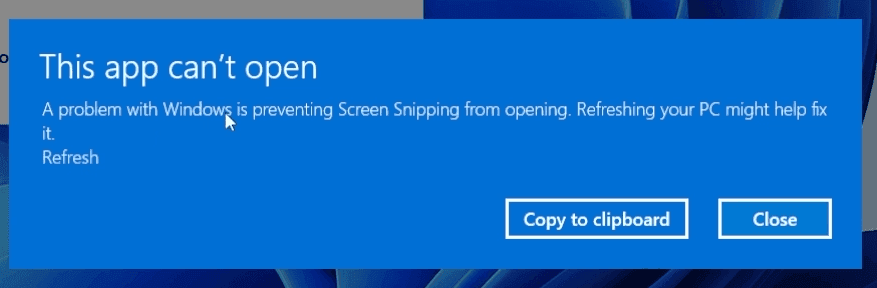
After Windows 11 was released, many users chose to upgrade. But many of them found that many applications such as Screenshot Tool, Microsoft Store, Settings, etc could not be opened after the upgrade, just like the case described above.
So how can you solve the problem of “Windows 11 this app can’t open” problem? Here is a summary of 19 methods for you guys. But before you start, it is recommended to understand the cause of this problem.
Why This App Can’t Open in Windows 11?
After you install or upgrade Windows 11, you may find that some applications cannot be opened. This may be caused by the reasons below.
- App or app store is corrupted
- Conflict with user account control settings
- Corrupted stored cache data
- Conflict with firewall or anti-virus software
- Windows version is out of date
- Windows Update service is disabled
- An older version of an application is installed
- Malware or virus existed
- Misconfigured settings
- Critical services are not running
19 Solutions to Fix “This App Can’t Open in Windows 11” Problem
If you are struggling with the“this app can’t open in Windows 11”problem, you can try the 19 methods in order. I believe there is always a way to help you solve this problem.
- Restart your computer
- Use Windows built-in troubleshooter
- Reset or repair an application
- Reinstall or update an application
- Clear Microsoft Store cache data
- Re-register the Microsoft Store using Powershell
- Enable Windows Update Service
- Change user account control settings
- Update your Windows 11
- Scan for viruses and malware
- Temporarily disable Windows Firewall or third-party anti-virus software
- Repair the license service
- Modify local security policies
- Create and use a new local user account
- Run the system file checker
- Update the Microsoft Store using a command prompt
- Check the network connection
- Check the computer time
- Perform a clean boot
Method 1. Restart Your Computer
Restarting your computer can be an effective solution to many problems. So, when you encounter the“this app can’t open in Windows 11”problem, you can try this method, which may help to fix it.
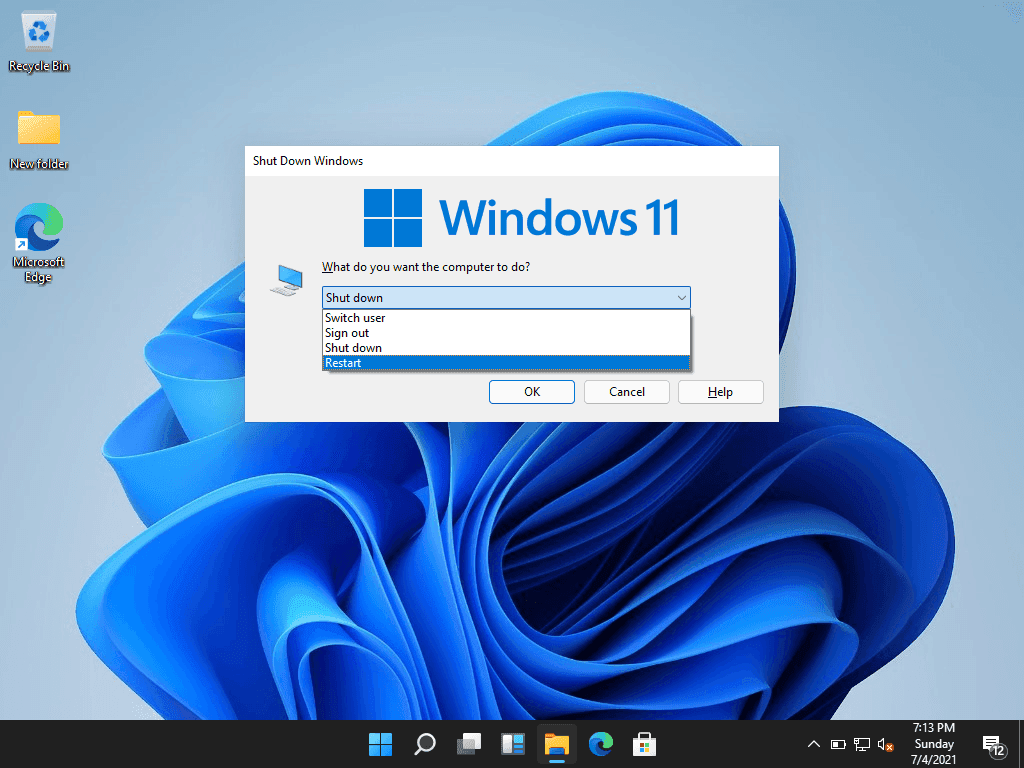
Step 1. Press the Alt+F4 key to open Close Windows.
Step 2. Select the Restart option in the drop-down menu and click OK to wait for the computer to finish restarting.
Method 2. Use Windows Built-in Troubleshooter
Like Windows 10, Windows 11 has a built-in troubleshooter that can help you solve any problem, including the“this app can’t open in Windows 11”problem.
Step 1. Press Win+I together to open Settings.
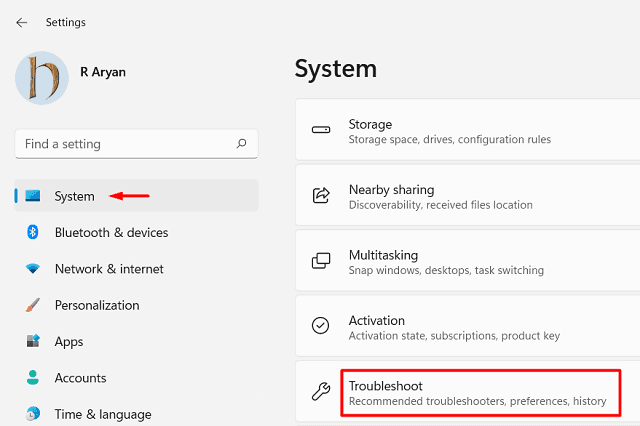
Step 2. Switch to the System tab in the left panel and select the Troubleshooting option in the right panel.
Step 3. Then click the Other troubleshooters option and open the corresponding list.
Step 4. At the bottom of the list, find the Windows Store apps option and click the Run button next to it.
Step 5. Next, a diagnostic window will appear and wait for Windows to complete the automatic diagnosis. If this process does not identify any problems, click the Close option and go to the next method.
Method 3. Reset or Repair an Application
When the Windows built-in troubleshooter does not help you solve the “this app can’t open in Windows 11” problem, you can try to reset or repair the application manually.
Step 1. Press the Win+I key to open Settings.
Step 2. Switch to the Applications tab in the left panel, and click the Apps & features option in the right panel.
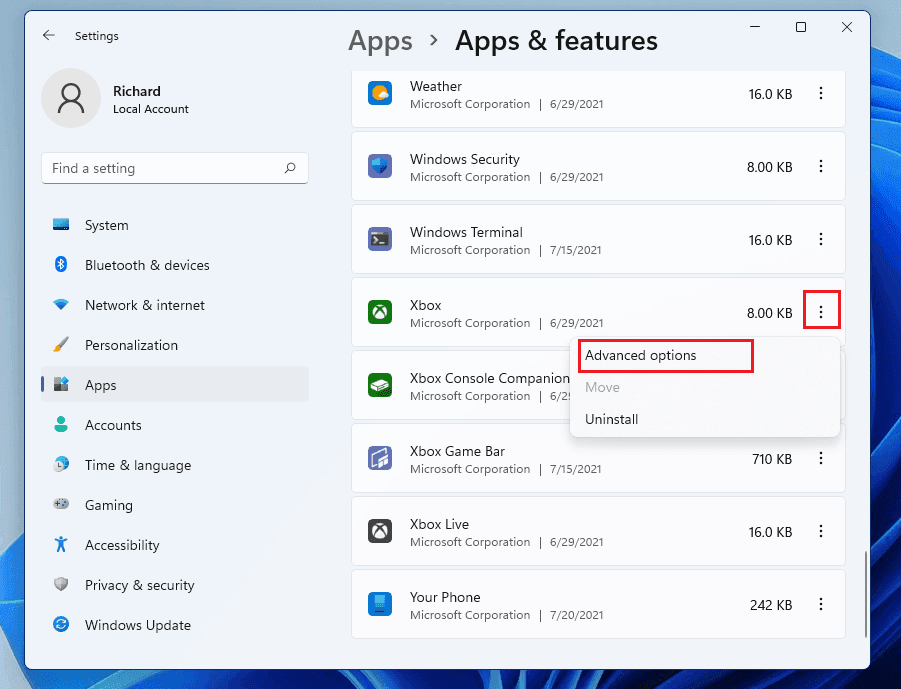
Step 3. Select the problematic application in the list of installed applications, click ⋮ next to it, and select the Advanced options in the expanded menu.
Step 4. Find the Reset section in the new window and try clicking on the Repair and Reset options in turn according to the instructions below.
Method 4. Reinstall or Update an Application
If resetting or repairing the application does not help you resolve the issue of the application not opening in Windows 11, you can try reinstalling or updating the application.
Reinstall the Application
Step 1. Open Settings by pressing the Win+I key together.
Step 2. Click Applications > Applications & Features.
Step 3. Select the problematic application in the list of installed applications, click ⋮ next to it, select Uninstall in the expanded menu, and reconfirm this action in the pop-up window.
Step 4. Next, you need at the top to reinstall the uninstalled application. Click the magnifying glass button directly below the desktop, type Microsoft Store in the search box, and open it.
Step 5. Enter the name of the uninstalled application in the search box at the top of the Microsoft Store window and jump to the download interface from the search results.
Step 6. Click the Get button on the download interface and wait for the installation to finish.
Update the Application
Step 1. Open the Microsoft Store window in the same way and click the Media Cabinet button in the bottom left corner.
Step 2. In the right panel, find and click the Get updates button.
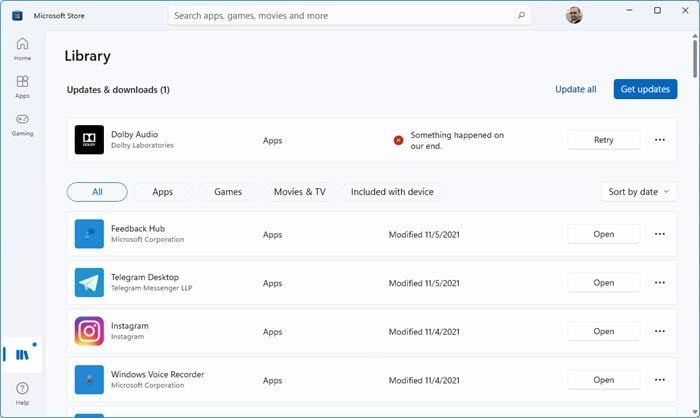
Step 3. Find the application which can be updated, click the update button and wait for the update to complete.
Method 5. Clear Microsoft Store Cache Data
If none of the above methods work, then the main culprit may be the Microsoft Store. You can try to resolve the issue by resetting the Microsoft Store to clear the cached data.
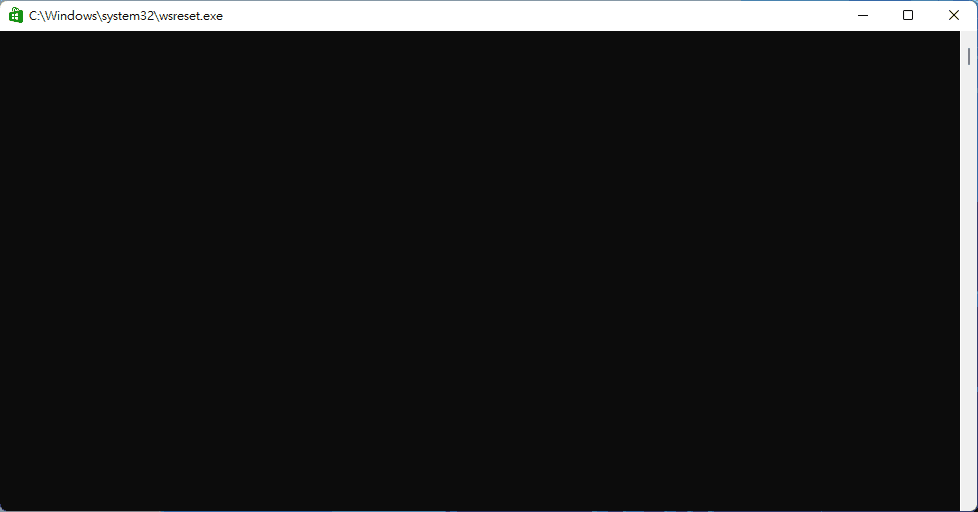
Step 1. Use the Windows+R key combination to open the Run window, type wsreset and press Enter.
Step 2. At this point, you will open a black console window. You may be confused that there is nothing in it, please don't worry, this is normal, please wait patiently for it to reset the storage cache.
Step 3. When the process is complete, the window will automatically close and automatically jump to the Microsoft Store home page, close it and then try to see if the problem has been solved. If not, go to the next method.
Method 6. Re-register the Microsoft Store using Powershell
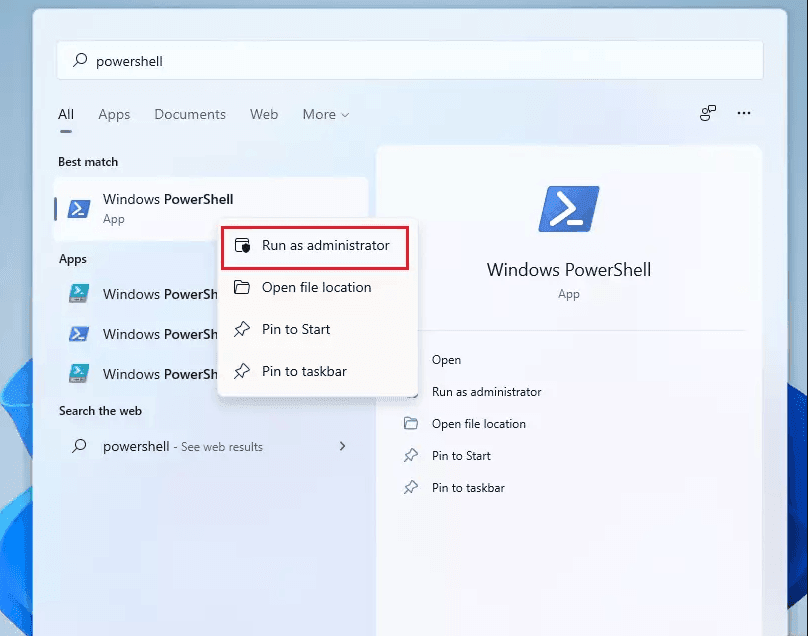
Step 1. Press Win+S together to open the search box, type PowerShell, select this application and choose Run as administrator.
Step 2. Enter the command below in the Windows PowerShell viewport and press Enter to execute this command.
PowerShell -ExecutionPolicy Unrestricted -Command "& {$manifest = (Get-AppxPackage Microsoft.WindowsStore).InstallLocation + 'AppxManifest. xml' ; Add-AppxPackage -DisableDevelopmentMode -Register $manifest}

Step 3. After waiting for the command to finish executing, close the PowerShell window and try to start the application again to see if the problem has been solved, if not please go to the next method.
Method 7. Enable Windows Update Service
Windows Update Service is turned on by default, but for some reasons it can be disabled and cause the “this app can’t open in Windows 11” problem. For this, you need to check and turn on the Windows Update service.
Step 1. Use the Windows+S key combination to open the search box, type service, and open it in the results.
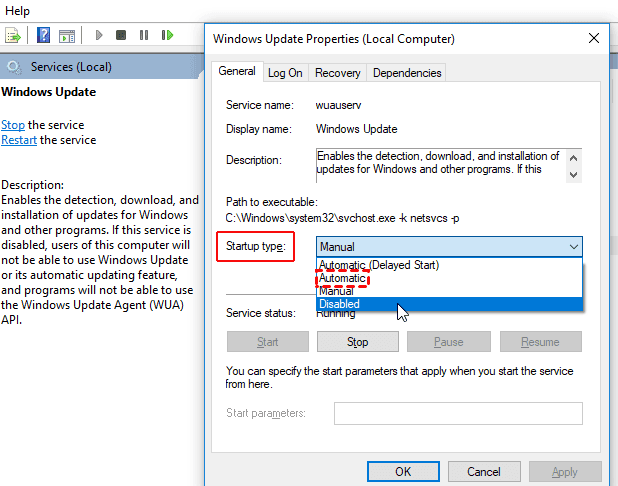
Step 2. In the list on the right side of the service window, find and double-click Windows Update service.
Step 3. In the Windows Update window, change the startup type to Automatic, and click the Apply and OK buttons to save the changes.
Method 8. Change User Account Control Settings
From the results of some users’ feedback, we can see that changing the User Account Control settings can effectively solve the“this app can’t open in Windows 11”problem.
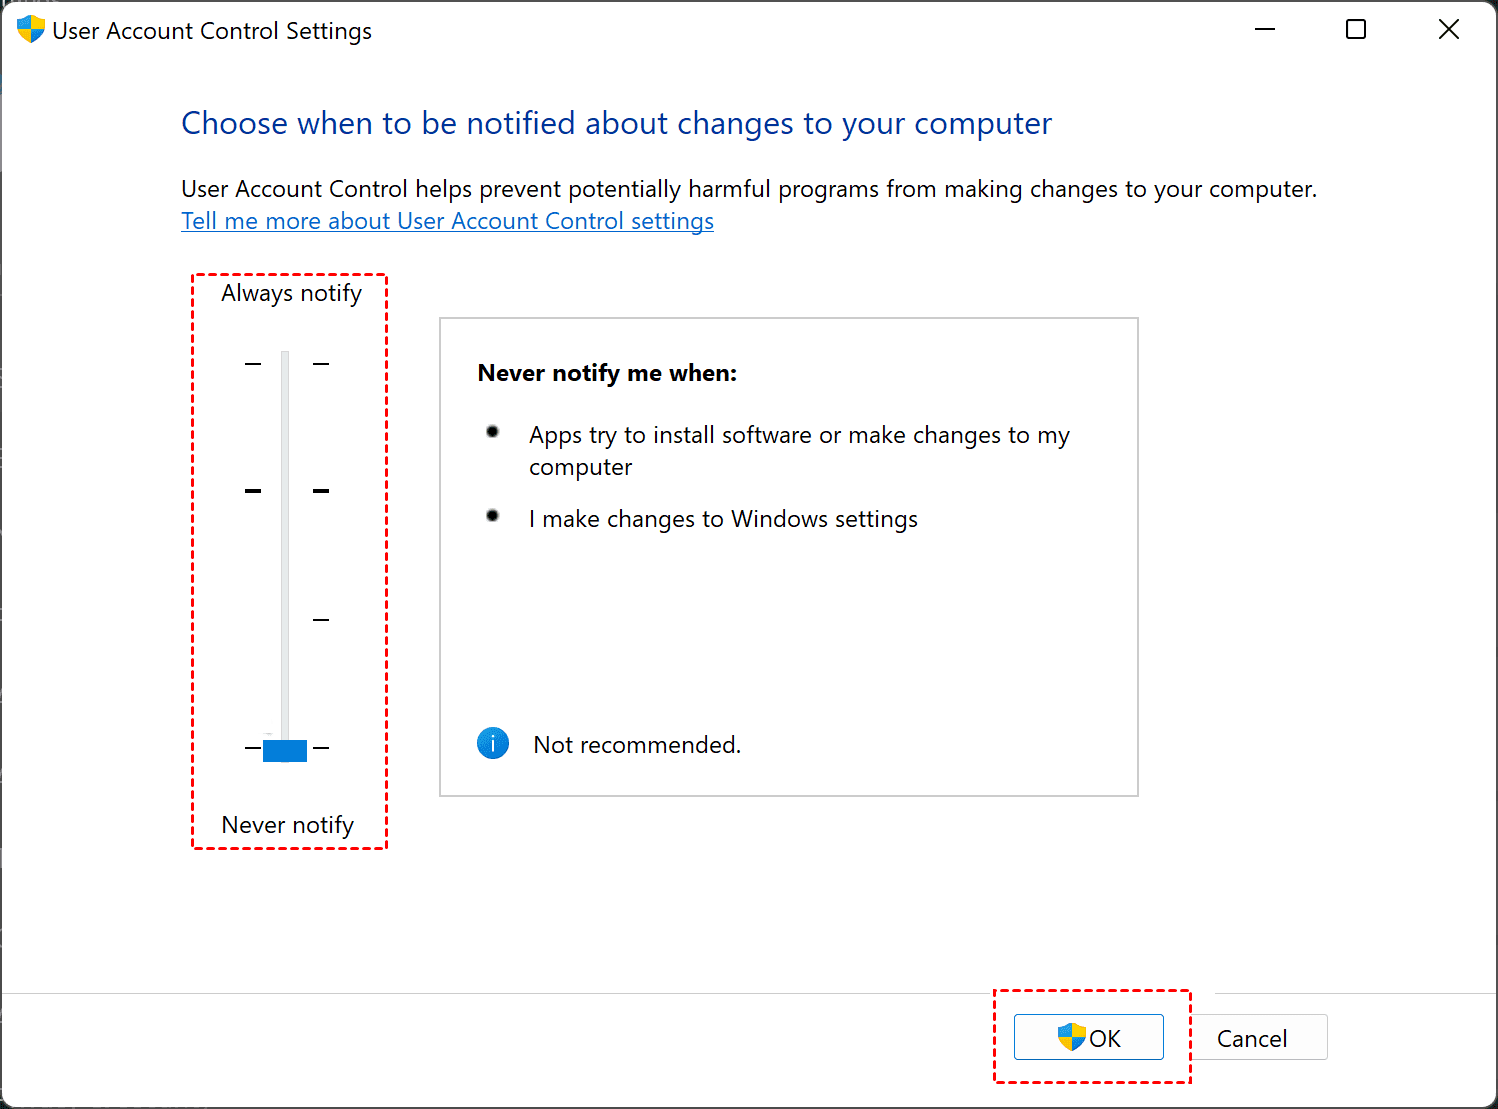
Step 1. Open the search box using the Windows+S key combination, type UAC, and open Change User Account Control settings in the results.
Step 2. In the User Account Control settings window, change the settings by changing the slider position. If the original setting is Always Notify, pull the slider to the bottom of Don't Notify. If the original setting is Don't Notify, pull the slider to the top of Always Notify. When the changes are complete, click the OK button to save the changes.
Method 9. Update Your Windows 11
Windows 11 has had several updates since its release, and if the version of Windows 11 you have installed is out of date you may have the“this app can’t open in Windows 11”problem. For this reason, you need to update your Windows 11 version, and Microsoft also recommends that Windows 11 users install the latest KB5006746 update starting October 21, 2021.
Step 1. Press the Win+I together to open Windows Settings and select the Windows Update tab in the left panel.
Step 2. In the right panel, click the Check for Updates button. Then click the Download and Install button if the update is available, wait for this update to complete and restart your computer.

Method 10. Scan for Viruses and Malware
Open Windows Defender Firewall or third-party antivirus software and run a full scan of your computer to check for the presence of viruses and malware in it. If there are, choose to remove or repair them; if not, consider turning them off temporarily.
Method 11. Temporarily Disable Windows Firewall or Third-party Anti-virus Software
Windows Firewall filters incoming and outgoing network activity and blocks any unauthorized user from accessing the computer. And third-party antivirus software provides security but also creates obstacles that eventually lead to this problem. For this reason, you need to turn them off temporarily.
Step 1. Press the Win+S together to open the search box, type console and open this application.
Step 2. Find and click System and Security, then select Windows Defender Firewall.
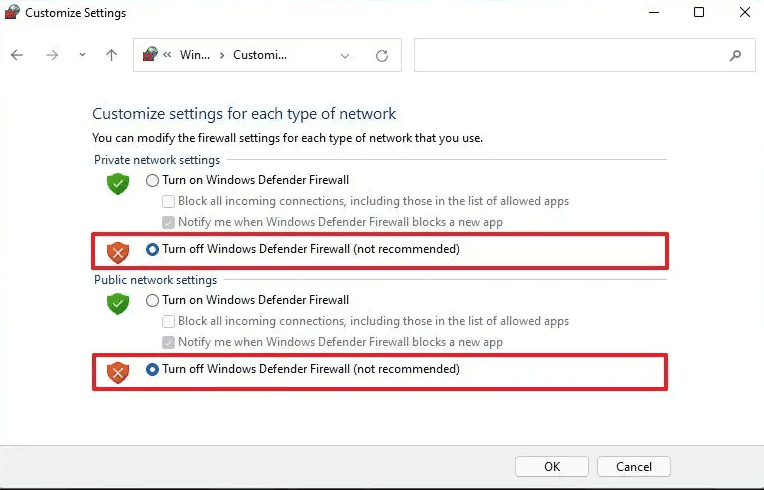
Step 3. Find and click on Turn Windows Defender Firewall on or off from the left menu.
Step 4. In the Private Network Settings and Public Network Settings sections, select Turn off Windows Defender Firewall (not recommended) respectively, and then click the OK button to save the changes.
Method 12. Repair the License Service
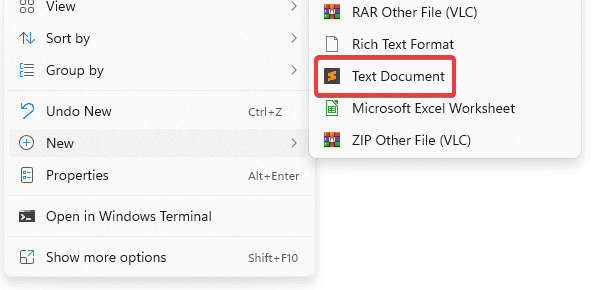
Step 1. Right-click the blank area of the desktop, select New in the expanded menu, and then select Text Document.
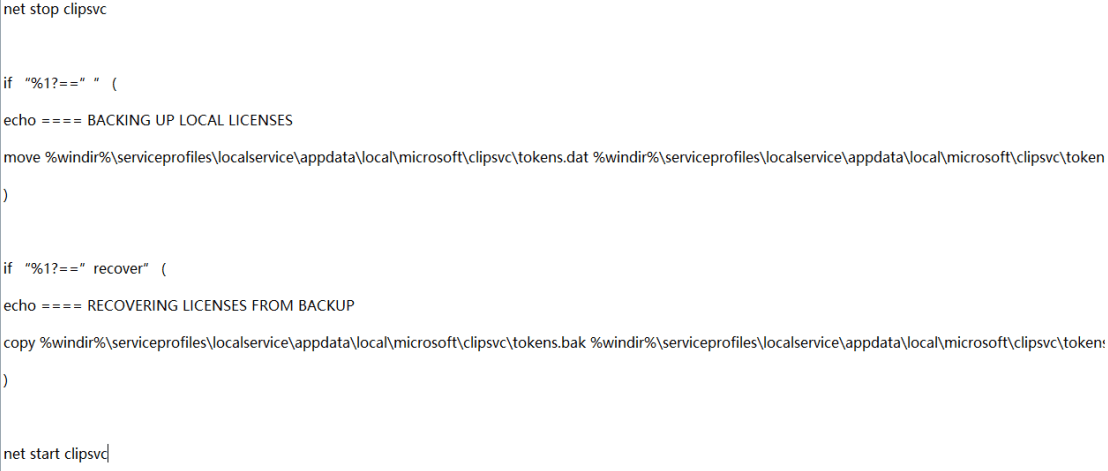
Step 2. Double-click to open the new text document, and enter the content below.
echo off
net stop clipsvc
if "%1?=="" (
echo ==== BACKING UP LOCAL LICENSES
move %windir%\serviceprofiles\localservice\appdata\local\microsoft\clipsvc\tokens.dat %windir%\serviceprofiles\localservice\appdata\ local\microsoft\clipsvc\tokens.bak
)
if "%1?=="recover" (
echo ==== RECOVERING LICENSES FROM BACKUP
copy %windir%\serviceprofiles\localservice\appdata\local\microsoft\clipsvc\tokens.bak %windir%\serviceprofiles\localservice\appdata\ local\microsoft\clipsvc\tokens.dat
)
net start clipsvc
Step 3. Click the File button in the upper left corner, and select the Save as new file option in the expanded menu.
Step 4. In the Save as new file window, select the location to save, change the file name to license.bat, change the archive type to all files, and then click Archive to save this text file as a batch file.
Step 5. Navigate to your saved location, right-click on the text file, and select Run as a System Administrator in the expanded menu.
Method 13. Modify Local Security Policies
Step 1. Open the Run window, type secpol.msc, and click the OK button.
Step 2. Open the Local Security Policy window, click Local Policies > Security Options in the expanded menu.
Step 3. Double-click to open User Account Control: Detect application installations and prompt for elevation, and User Account Control: Run all administrators in Admin Approval Mode, make sure both of them are set to enabled.
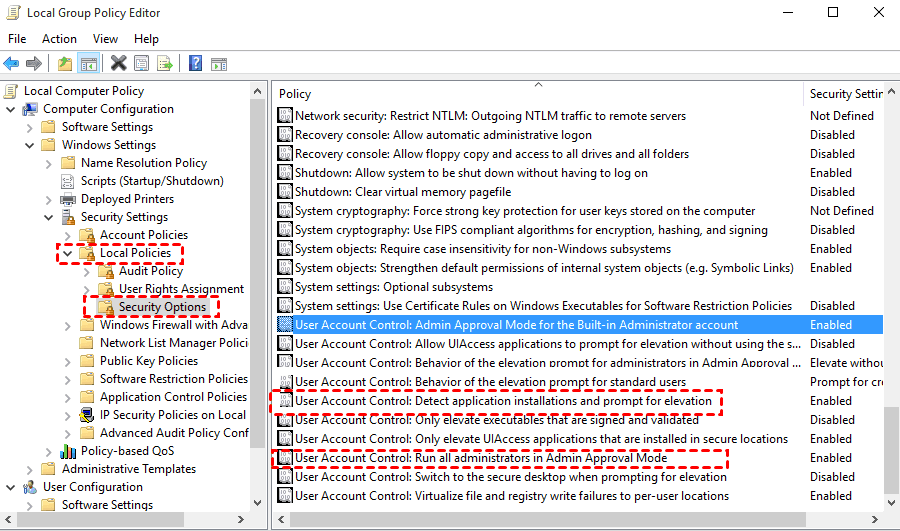
Step 4. Type the command prompt in the search box and select Run as administrator.
Step 5. In the Command Prompt window, type gpupdate /force and press Enter to execute the command. Wait for the process to complete and restart your computer.
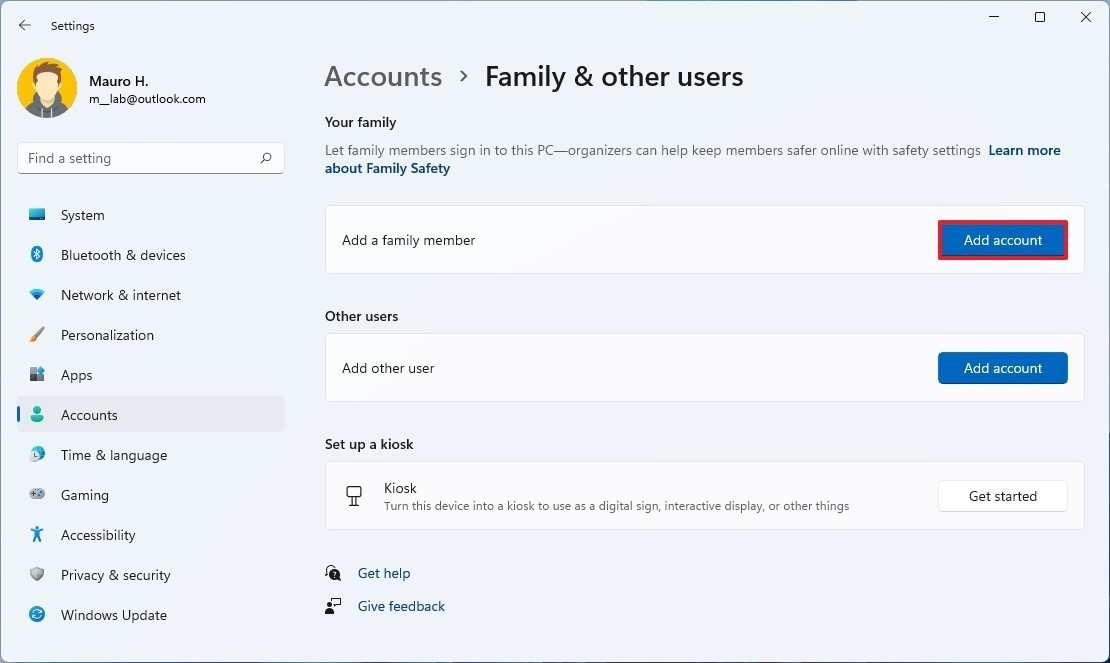
Method 14. Create and Use a New Local User Account
Step 1. Use the Windows+I key combination to open Windows Settings.
Step 2. Switch to the Accounts tab in the left panel, and click Family & Other users in the right panel.
Step 3. In the Other users section, click the Add account button.
Step 4. In the Microsoft account login window, click I don't have this person's login information.
Step 5. Next, select the option to add a user without a Microsoft account.
Step 6. Now, you need to set up a new account. Set the user name and password for the new account, and re-enter the password to confirm, and click Next.
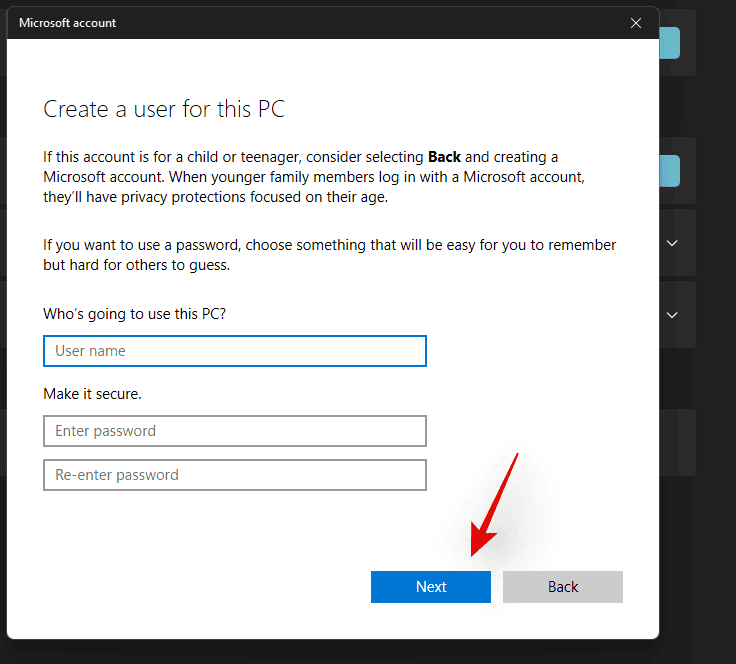
Step 7. Next, you need to set 3 more security questions (for recovering your account in case you forget your password) and click Next. Once everything is done, switch your local account and try again to see if the application can be opened, if not go to the next method.
Method 15. Run the System File Checker
System File Checker (SFC) is a Windows built-in tool that scans and repairs corrupt system files in it, which will help to solve the“this app can’t open in Windows 11”problem.
Step 1. In the search box, type Command Prompt and select Run as Administrator.
Step 2. In the Command Prompt window, type sfc /scannow and press Enter to execute this command.
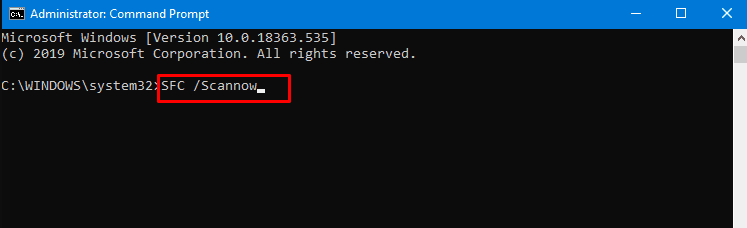
Step 3. This may take you more than ten minutes, wait for the process to complete, and then restart your computer. If this method does not work, go to the next method.
Method 16. Update the Microsoft Store Using a Command Prompt
Step 1. Type the command prompt in the search box and select Run as administrator.
Step 2. In the Command Prompt window, enter the command below and press Enter to execute this command.
schtasks /run /tn "\Microsoft\Windows\WindowsUpdate\Automatic App Update"
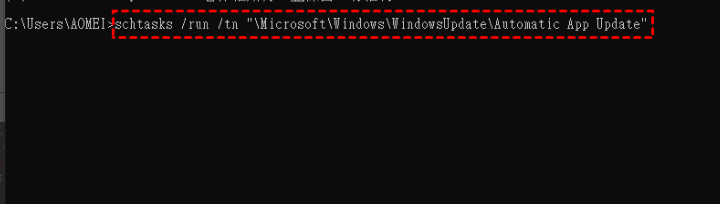
Step 3. Wait for this process to complete, then restart your computer.
Method 17. Check the Network Connection
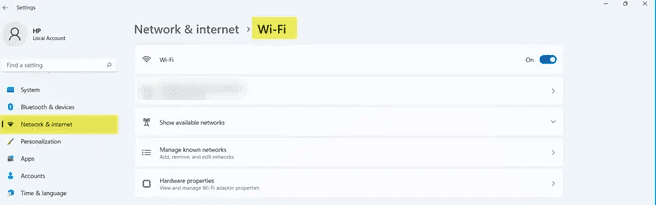
Step 1. Use the Windows+I key combination to open Windows Settings, and switch to the Network & internet tab in the left panel.
Step 2. First check if your computer Wi-Fi network is connected, and then check the Wi-Fi properties to make sure it is connected to a 5GHz network.
Method 18. Check the Computer Time
Step 1. Use the Windows+I key combination to open Windows Settings and switch to the Time & Language tab in the left panel.
Step 2. Find and click the Date & Time option in the right panel.
Step 3. Check if the date, time and time zone currently displayed are correct and turn on Set time automatically option. Restart your computer again and try to open the application again.

Method 19. Perform a Clean Boot
Step 1. Use the Windows+R key combination to open the Run window, type msconfig and press the Enter key.
Step 2. In the System Configuration window, check the Selective startup option, and uncheck the Load system services and Load startup items checkboxes, and click the OK button.
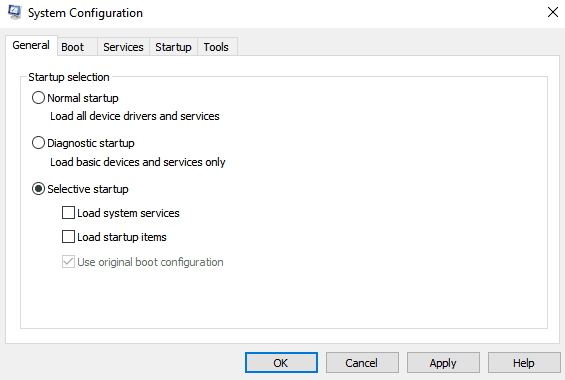
Step 3. In the confirmation window, click the Restart button, wait for the computer to finish restarting, and then try to open the application.
Another Way to Protect Computer Data Security - AOMEI Backupper Standard
The above 19 methods can certainly help you solve the“this app can’t open in Windows 11”problem. But to prevent data loss on your computer, it is recommended to use AOMEI Backupper Standard to backup your files before fixing the problem to ensure the security of your computer data.
AOMEI Backupper Standard has a clear interface and is easy to use, no matter your computer is the latest Windows 11 system or the previous Windows 10/8.1/8/7 etc, you can backup your important files to any location for free, such as backup files to cloud, NAS device, external hard drive, etc.
Next, we will introduce the detailed steps of AOMEI Backupper Standard file backup.
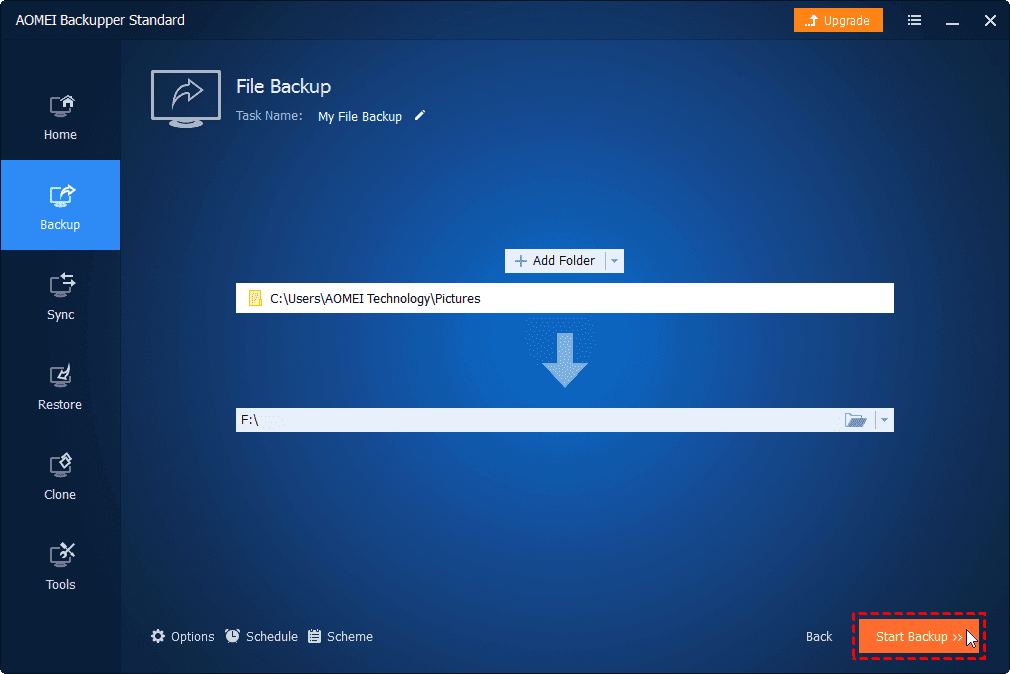
Step 1. Download AOMEI Backupper Standard, install and launch the software. Select Backup > File Backup.

Tip: You can also choose to backup files to AOMEI Cloud with the help of the Cloud Backup feature. It requires you to create an AOMEI account, after registration, you can enjoy 1TB free storage in 15 days.
Step 2. Click Add File or Add Folder, then select the files or folders that you want to backup.

Step 3. Click the inverted triangle at the right edge of the second bar and choose a destination path for your backup.

Notes:
In addition, you can tap on the three options in the lower-left corner for some additional settings.
- Options: You can add a comment to the current backup and enable email notifications. If you upgrade to the Pro version, you can also enable the encrypted backup feature.
- Schedule: You can set Daily, Weekly, Monthly, Event trigger and USB plug in to automatically backup your files. The last two are available in the Pro version.

- Scheme: You can change the backup method to full backup, incremental backup and differential backup, and enable the automatic cleanup backup feature. Note that the differential backup and auto cleanup backup need to be upgraded to Pro version to use.
Step 4. Confirm all your operations and click Start Backup to automatically backup files to prevent data loss.
In addition, AOMEI Backupper Standard provides you with other features you may be interested in.
- As long as you have made backups of your files before they were damaged or lost, you can restore those lost files with the File Restore feature.
- The software also gives you automatic file sync feature, allowing you to automatically sync your files or folders to a target location with fixed frequencies (Daily, Weekly, Monthly, Event trigger and USB plug in) for further saving you time.
- The software also provides you with Partition Backup and Disk Backup features that allow you to easily backup the target partition or disk to any location in just a few simple steps, further enhancing the security of your computer data.
Summary
“This app can’t open in Windows 11” problem can cause you a lot of trouble, but you can refer to the reasons listed in this article and try 19 methods in turn. I believe you can fix this problem effectively. However, to ensure the reliability of your data, it is recommended to use AOMEI Backupper Standard to backup your files to prevent data loss.
AOMEI Backupper Standard is perfectly adapted to multiple Windows systems and can backup files to any location in just a few simple steps. So, even a computer green hand can easily get started.
Besides, the software also has other functions such as partition backup, disk clone and partition clone to provide you with all round protection for your data. You can download this software to explore more features.

