Top 3 Methods to Create Synology Offsite Backup Easily
On this page, you will learn how to create Synology offsite backup using Hyper Backup, Snapshot Replication, and a free Synology backup tool AOMEI Backupper Standard.
By Jonna Updated on October 18, 2023
What is Offsite Backup for Synology?
Synology NAS is widely used in data storage in companies and businesses. However, data stored in the NAS always needs to be protected for multiple reasons like human errors, mechanical failures, maintenance errors, malicious infection, etc.
Offsite backup for Synology refers to the practice of creating and preserving backup copies of data stored on a Synology NAS device in a location that is physically separate from the primary NAS device, like backing up Synology to external hard drive, cloud, USB, and other devices.

In the following, we will delve into the advantages of creating Synology offsite backups and how to perform offsite backup for Synology NAS in 3 easy solutions.
Benefits of Backing up Synology NAS Offsite
Offsite data backup constitutes a pivotal component of the 3-2-1 backup strategy, which is designed to optimize data security. Usually, Synology offsite backup options including tapes, external hard drive (including HDD, SSD), USB flash drive, cloud drive like OneDrive, another NAS device, etc. And here are the key advantages of offsite backup for your Synology NAS:
- Disaster Recovery: Offsite backup Synology NAS ensures that data is protected from various risks, such as hardware failures, natural disasters, theft, or other unforeseen events that could potentially impact the primary storage system.
- Data Availability: Offsite backups guarantee data availability, enabling you to access and restore your data even if the primary NAS becomes inaccessible or experiences downtime.
- Data Mobility: Offsite backups provide data mobility, allowing you to recover data to a different location or device if necessary, making it easier to adapt to changing business requirements.
Way 1. Create Synology Offsite Backup using Hyper Backup
Hyper Backup is a built-in backup utility released by Synology, specifically designed for Synology NAS (Network Attached Storage) devices. This tool enables you to backup data stored on your NAS, as well as applications and system configurations. It allows you to create backups to external devices and cloud services like Google Drive, OneDrive, S3 Storage, and more.
The following content will show you create Synology cloud backup to backup data offsite from your original NAS device using Synology Hyper Backup:
Step 1. If Hyper Backup is not already installed, visit the DSM Package Center to install it. Once installed, launch Hyper Backup.
Step 2. Click on the + icon located at the bottom left corner, and then select Data backup task.
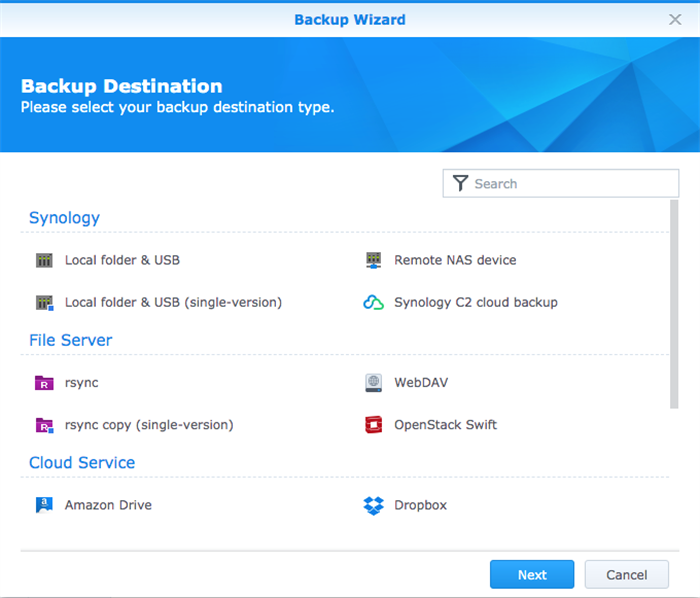
Step 3. On the Backup Destination page, choose an appropriate destination based on your requirements (e.g., a cloud service like Google Drive), and click Next.
Step 4. Select the Shared Folder where you wish to store the backup and provide a name for the directory where the data will be stored. Then, click Next.
Step 5. Pick the source data you want to back up and proceed by clicking Next. If you intend to select an encrypted shared folder, ensure that it's mounted during the process to have it displayed in the list.
Step 6. Manage Backup Settings like compression, backup schedule, encryption, etc. to suit your specific needs.
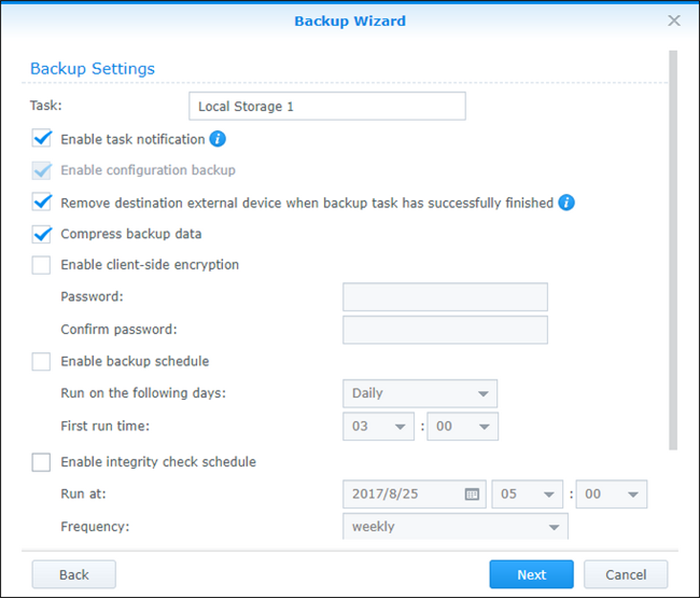
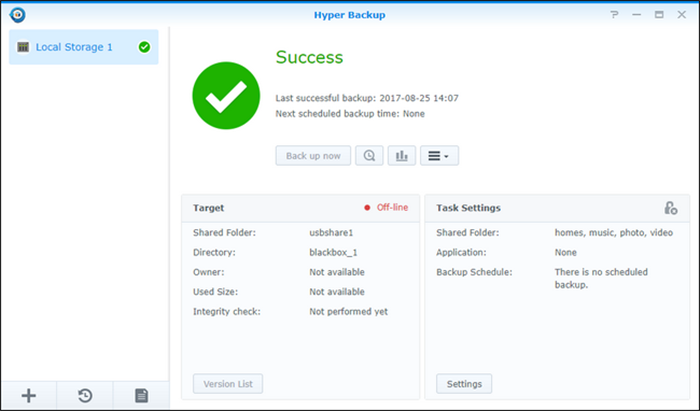
Step 7. Click Apply to finalize the configuration of NAS backup in Hyper Backup and execute the backup task.
Way 2. Use Snapshot Replication to Create Synology Offsite Backup
You can also do Synology NAS offsite backup by backing up Synology NAS to another NAS using Snapshot Replication. This tool is one of the core features of DSM, specifically for NAS devices that use the Btrfs file system. It is designed to create and manage point-in-time snapshots of your data, as well as replicate those snapshots to another Synology NAS for data protection and disaster recovery purposes.
Here is how to create Synology backup offsite to another Synology NAS with Snapshot Replication:
Step 1. Install Snapshot Replication from Synology’s package center, and launch it.
Step 2. Before starting snapshots or replication, ensure that the volume type is Btrfs. Then, you can select a folder to replicate. Once you've chosen the folder, proceed to configure the Snapshot schedule.
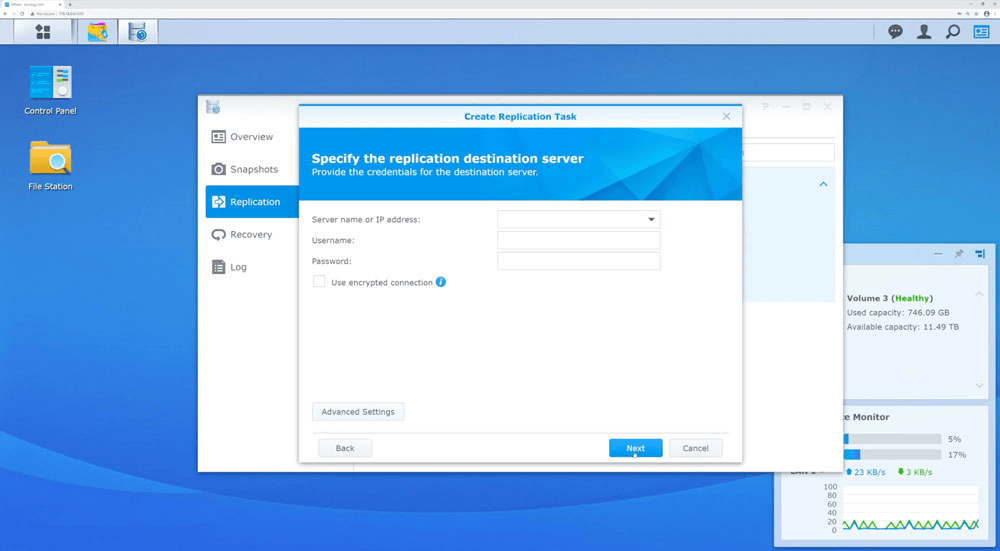
Step 3. Once you've selected your desired options, you'll be prompted to initiate replication and create a new folder for the replication destination. Here, you will use the secondary NAS as the offsite backup location by inputting its IP address and credentials.
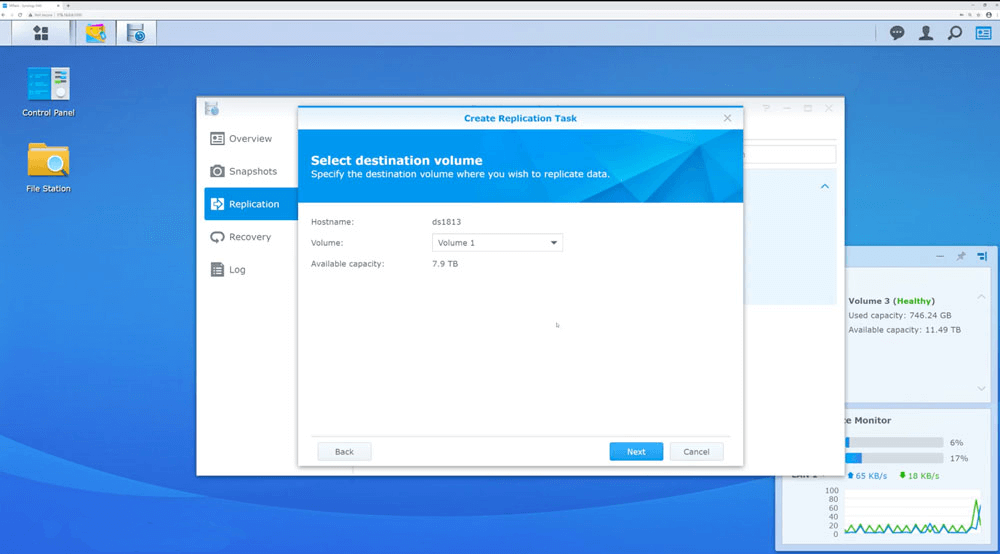
Step 4. Go on to configure more backup settings under Advanced Settings. Then, select a volume as the replication destination, then click Next.
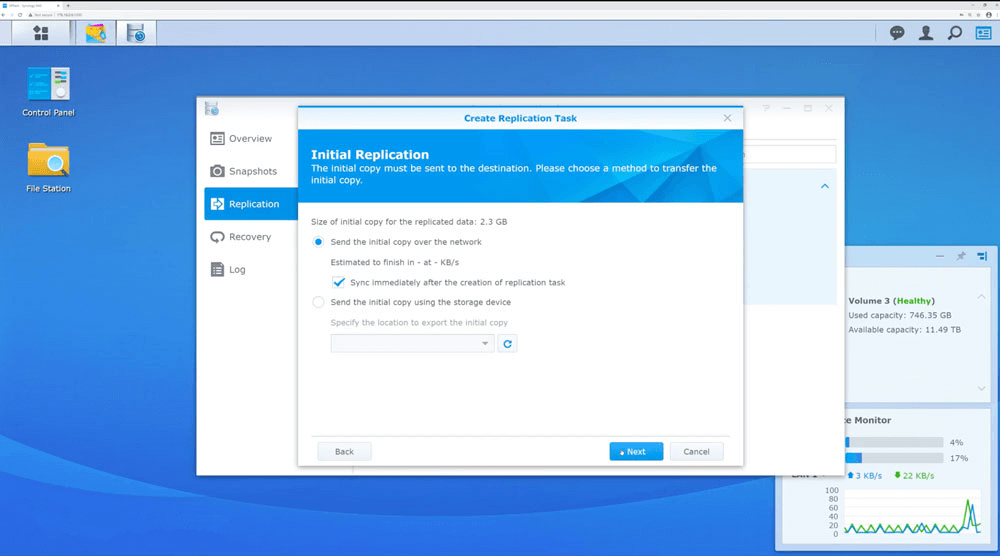
Step 5. Follow the on-screen guide to initial replication and set replication schedule, then confirm the settings and click Apply to backup Synology offsite.
Way 3. Backup Synology Offsite with Professional Backup Software - All in One
AOMEI Backupper Standard is an all-around and free NAS backup software that is compatible with all Windows PCs. It empowers you to backup NAS devices to a range of storage solutions, including internal and external hard drives, USB drives, cloud storage, another NAS, and various other storage devices.
- It offers Schedule Backup to backup Synology NAS in daily, weekly, monthly, event triggers, or USB plug in.
- It uses incremental backup to backup only changed data by default, helping you save backup time and storage.
- It supports not only Synology NAS, but also QNAP NAS, Seagate NAS, WD NAS, and more.
- You can upgrade to Professional edition to enjoy advanced features, such as backup filter, backup encryption, differential backup, auto delete old backups, etc.
To get started, please download this best offsite backup solution for Synology - AOMEI Backupper Standard and install it. Then, follow the guideline below to backup your NAS easily:
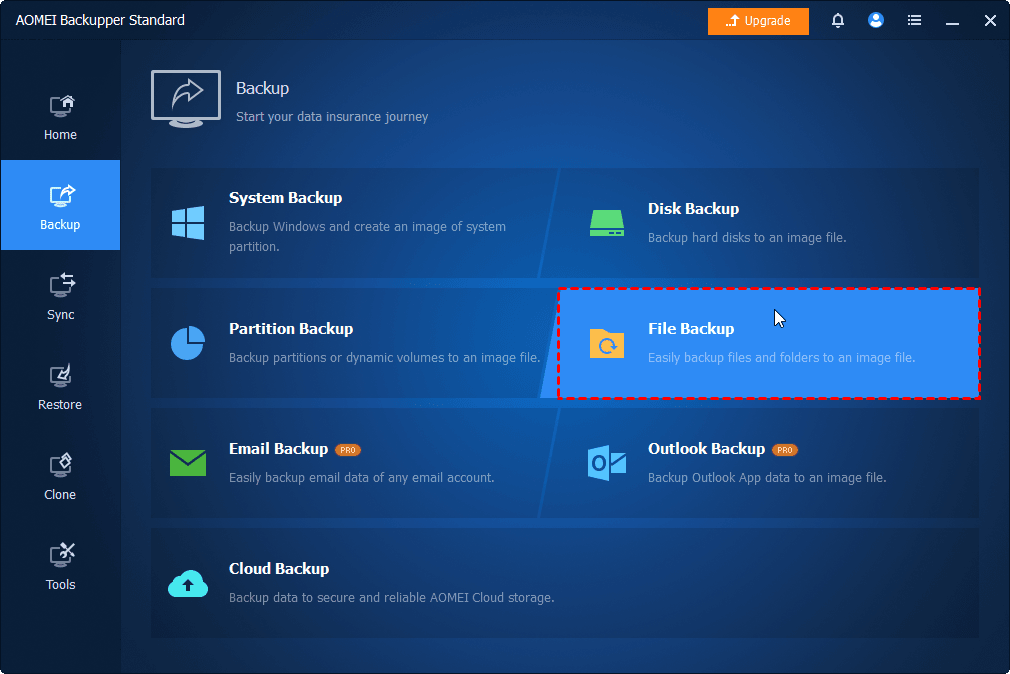
Step 1. Click on Backup on the left pane and choose File Backup.
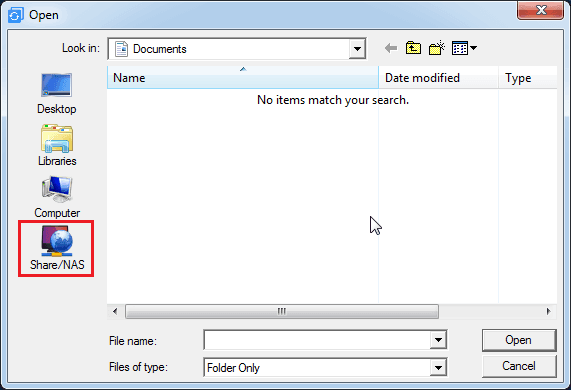
Step 2. Tap on Add Folder or Add File, and select Share/NAS in the popping-out window.
Step 3. Click on Add Share or NAS Devices to enter the path of your NAS and confirm with OK. Then select the folders or files in the NAS for backup, and click OK to continue.

Step 4. Specify a target directory by choosing Select a cloud drive, select a local path, or Add Share or NAS Devices.

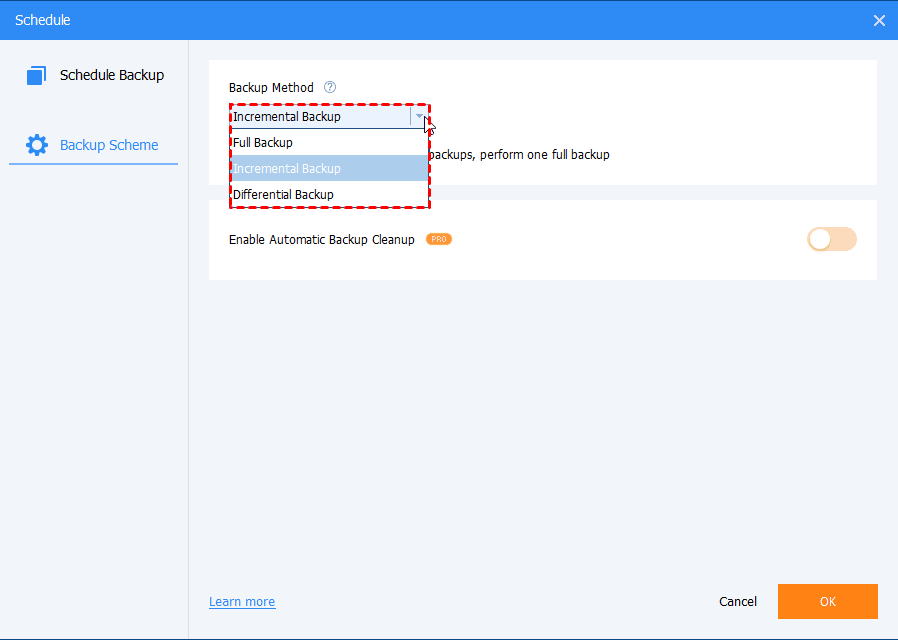
Step 5. (Optional) You can click Options to enable compress, split, or comment on the backup image, Schedule Backup to set up automatic NAS backup, and Backup Scheme to choose the wanted backup method.
Step 6. Hit Start Backup to backup your Synology NAS offsite to the target location.
Conclusion
Synology NAS is a popular device for sharing data for families or companies. When there is important data stored in NAS, you should always do Synology offsite backup to avoid any data loss. For this case, you can use the internal backup solution Hyper Backup or take snapshot and replicate it with Snapshot Replication.
Besides, AOMEI Backupper Standard, which provides more backup strategies, can help you backup Synology NAS to multiple devices on a single interface. What’s more, you can use it to upgrade to larger hard drive with ease relying on its disk cloning feature.
For Windows Server users, it also offers a server version that allows you to sync/backup data to Synology NAS, as well as backup Synology NAS hassle-free.