Top 3 Methods for Synology NAS Incremental Backup
Synology Incremental backup saves only changed files to save disk space. You can try Hyper Backup and suchlike tools. To manage multiple storages, try AOMEI Backupper.
By Delia Updated on January 18, 2024
What is Synology Incremental Backup
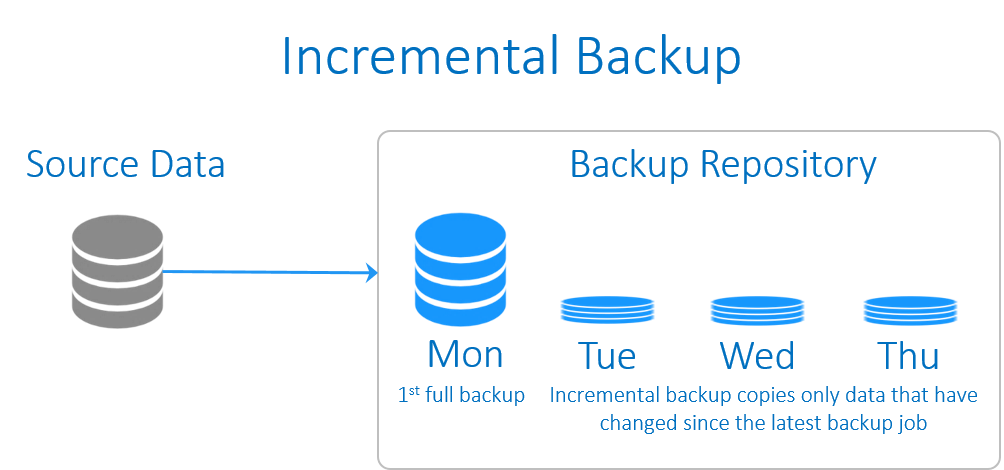
Synology incremental backup refers to backing up only changed or newly added files (since last full or incremental backup) to or from Synology NAS. To recover data from it, the last full backup plus all the incremental backups until the time point of restoration are all required.
The pros and cons of Synology incremental backup
| Pros | Incremental backup takes up minimum space and time in backup compared to other modes. It saves your resources when you back up data to Synology NAS, or from Synology NAS to other locations. |
| Cons | The restoration of incremental backup needs both the last full backup and all the subsequent backups in order, which increases the recovery time. And if you lost any of them, the recovery will not succeed. |
Synology incremental backup vs. differential backup
Incremental backup and differential backup are both widely accepted backup modes that back up only changed files. But a differential backup backs up the changes in data based on the last full backup.
Also, a full recovery of differential backup requires the last full backup plus the latest differential backup, which makes it faster in restoration than incremental backup. But it also consumes larger storage space and takes a longer time to backup. Therefore, when it comes to Synology NAS backup, incremental is still the more popular one.
🔰One tool for either incremental or differential
Perform incremental/differential/full backup with Synology NAS, or other network locations, local folders, external drives, cloud services, etc. More »
How to Perform Incremental Backup for Synology or Other NAS
Synology NAS integrates many add-on packages to expand the functionality, some of them enable you to do incremental backup like Hyper Backup or Glacier Backup, which can be easily downloaded from the Package Center.
However, these tools are apparently only applied to Synology NAS, and have some restrictions on features or supported storage devices. In this case, you could also use an alternative program for more robust incremental backup solution on all kinds of NAS and other storages.
-
Method 1. Use Synology Hyper Backup to do incremental backup
-
Method 2. Use Synology Glacier Backup to do incremental backup
-
Method 3. Best Software to schedule incremental backup for all NAS
Method 1. Use Synology Hyper Backup to do incremental backup
Hyper Backup is a data backup utility specially developed for Synology NAS. It supports backing up data to local shared folders, external storage devices attached to your Synology NAS, remote Synology NAS, file servers, and cloud services.
Synology Hyper Backup uses incremental backup to save your storage space. That is to say, after an initial full backup, only added or changed data will be backed up.
To get access to it, please log in to DSM and search for Hyper Backup in Package Center. Then download it.
Note your Synology NAS should be running DSM 6.0 or above, because Hyper Backup is not supported by older versions
After downloading Hyper Backup, you can follow the steps below to create Synology incremental backup:
1. Launch Synology Hyper Backup, click + button and choose Data backup task.
2. Select a backup destination. If you want to perform Synology incremental backup to USB, please attach it to the NAS, and choose Local folder & USB here. Click Next to continue.

3. Select Create backup task, choose a local shared folder or an external storage device attached to your Synology NAS (like USB). Optionally, you could modify the Directory name as you like. Then click Next.
4. Select the source data you want to backup and click Next. If you want to select an encrypted shared folder, please make sure it has been mounted during the process. Otherwise it won't be displayed in the list.
5. Manage Backup Settings like compression, backup schedule, encryption, etc. according to your needs.

Enable backup rotation to set the maximum of incremental backup versions it could store. Then Apply the changes.

6. Execute the backup task immediately.
For the first time to backup the source data, it will create a full copy, but after that it will check for changes based on last backup, and store them only.
Click here to learn detailed steps about Synology incremental backup to USB or local shared folders.
Method 2. Use Synology Glacier Backup to do incremental backup
As one of the add-on packages of Synology NAS, Amazon Glacier Backup provides secure and durable data storage at low costs. It could back up files to your Amazon Glacier account so as to save space on Synology NAS, and provides a contingency plan to avoid data loss.
Before using Synology Glacier Backup, you need to register and set up an Amazon Glacier account for AWS, then download Glacier Backup from the Package Center of DSM.
1. Launch Glacier Backup, click Backup > Action > Create.

2. Give the task a name, agree on the conditions and click Next to continue.
3. Enter the Access Key and Secret Key of your Amazon Glacier account. Optionally, you can tick Enable transfer encryption, or configure the Multiple Upload part size.

4. Specify the data you want to backup and click Next.
5. Then you can set up a schedule for your backup. Note it will create a full backup at the first time, and store only changed files after, so that you can achieve the goal of Synology NAS incremental backup.

Method 3. Best Software to schedule incremental backup for all NAS
Both of above methods are only applicable to Synology NAS with relatively simple features. If you have diverse needs for data backup on various devices, like QNAP NAS incremental backup or schedule NAS backup, this alternative could serve you better.
◆ AOMEI Backupper Standard, a complete backup and restore program running on all Windows PCs, enables you to select internal/external hard drive, USB, cloud drive, NAS, etc. as source or destination.
◆ It supports full/incremental backup, with or without schedule. And you can choose intelligent or sector-by-sector backup, compress or splitting image as well.
◆ You can enjoy advanced features in Professional edition, such as backup filter, backup encryption, schedule backup triggered by events or USB drive, differential backup, backup scheme to auto delete old backups, etc.
Now, I’ll introduce how to perform Synology NAS incremental backup based on the completely free Standard version. You could follow this process to backup other NAS or devices as well.
(PS: This free version only works for Windows 11/10/8/7/XP/Vista. For server users, try AOMEI Backupper Server. 70% off for one server computer.)
1. Install and launch the software, click Backup on the left pane and choose File Backup.
If you want to backup local partitions, system or the hard drive to NAS or other locations, you could make the choice accordingly.

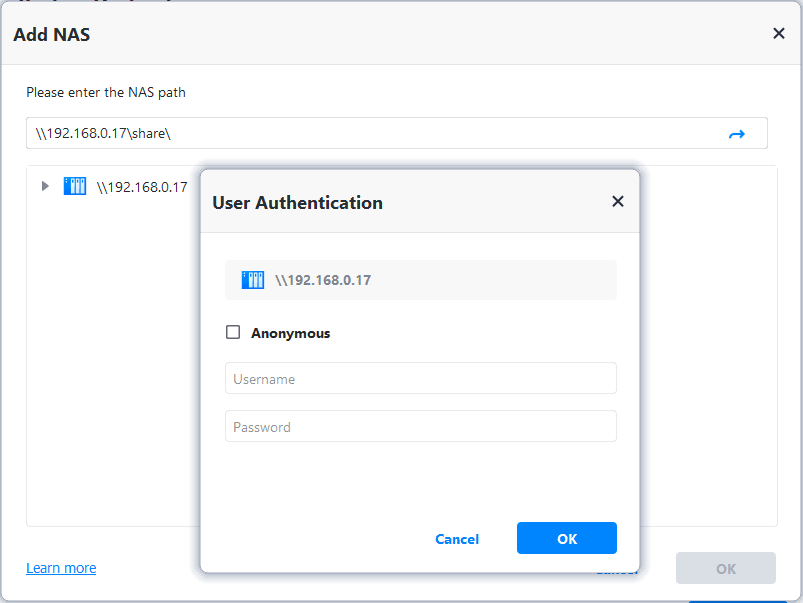
2. Click Add Folder or Add File to specify the source data. To backup data on Synology NAS, please select Share/NAS in the popping out window.
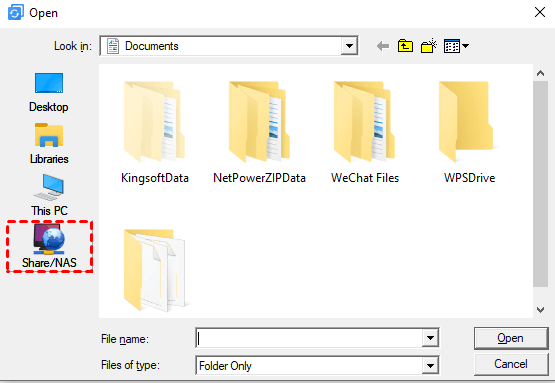
Click Add Network Location to enter the path of your NAS and hit OK. Then select the folders or files in the NAS, click OK to continue.
3. Specify a target directory. For removable devices like USB or external hard drive, please connect it to your computer at first. If you want to backup NAS to another network location, repeat the operation in last step.
4. Before Start Backup, you can manage backup settings as you like:
To do automatic incremental backup for Synology NAS, click Schedule Backup at the bottom and set up the frequency.

A scheduled backup is running in incremental mode by default. With the exception of the first full backup, all the subsequent automatic backups will only back up changed data to NAS. In Backup Scheme tab, there are also options to choose scheduled backup mode.
Note the differential backup is available in Professional edition.
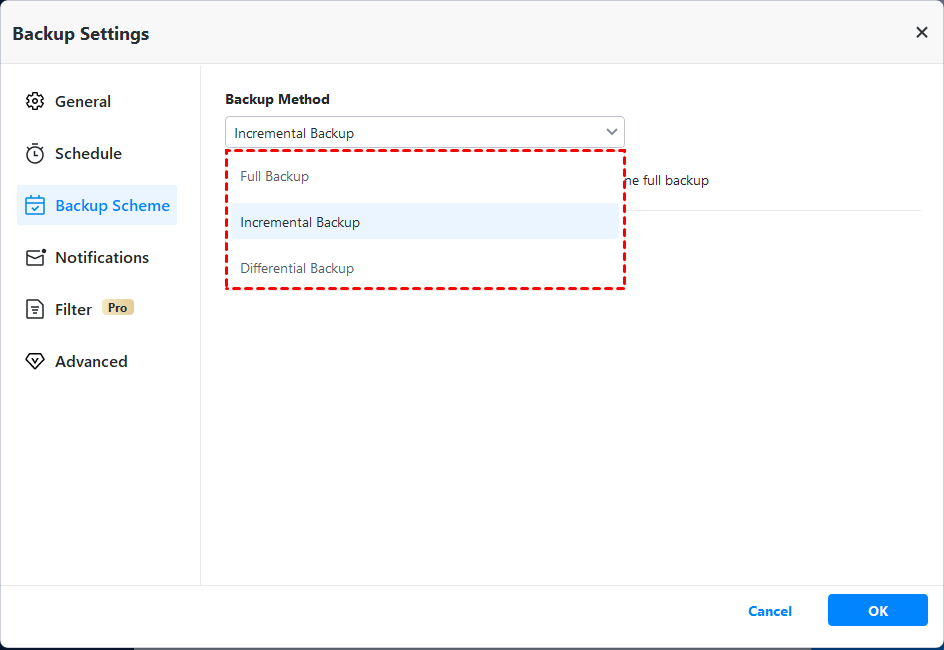
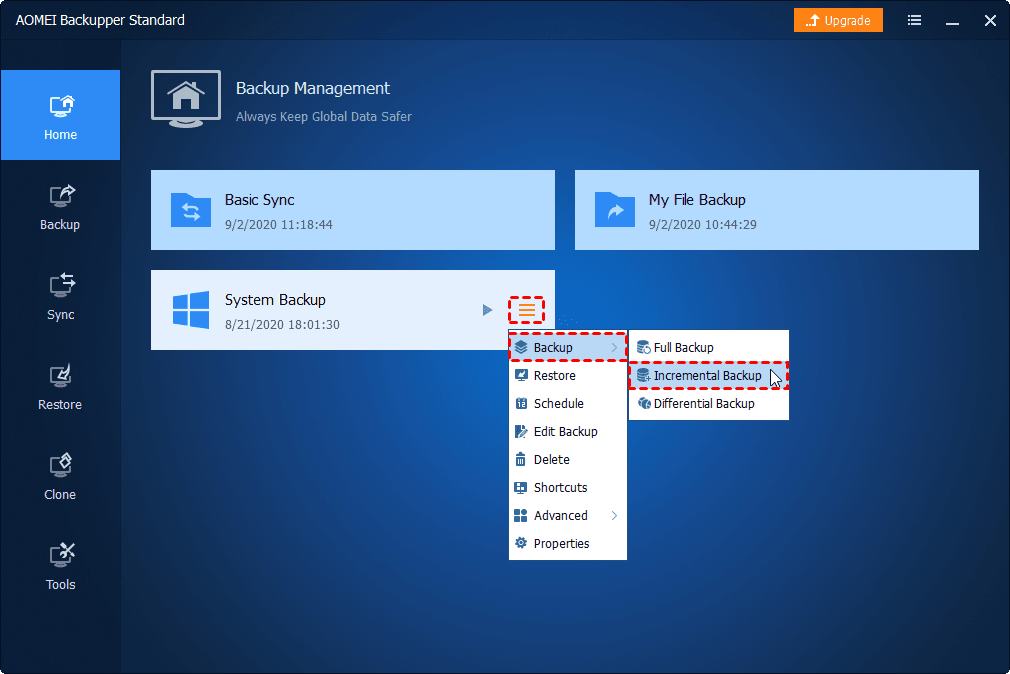
You can also run incremental or differential backup once manually. Just complete the first-time full backup without schedule, then go to Home tab, click on the task and choose Backup > Incremental Backup or Differential Backup.
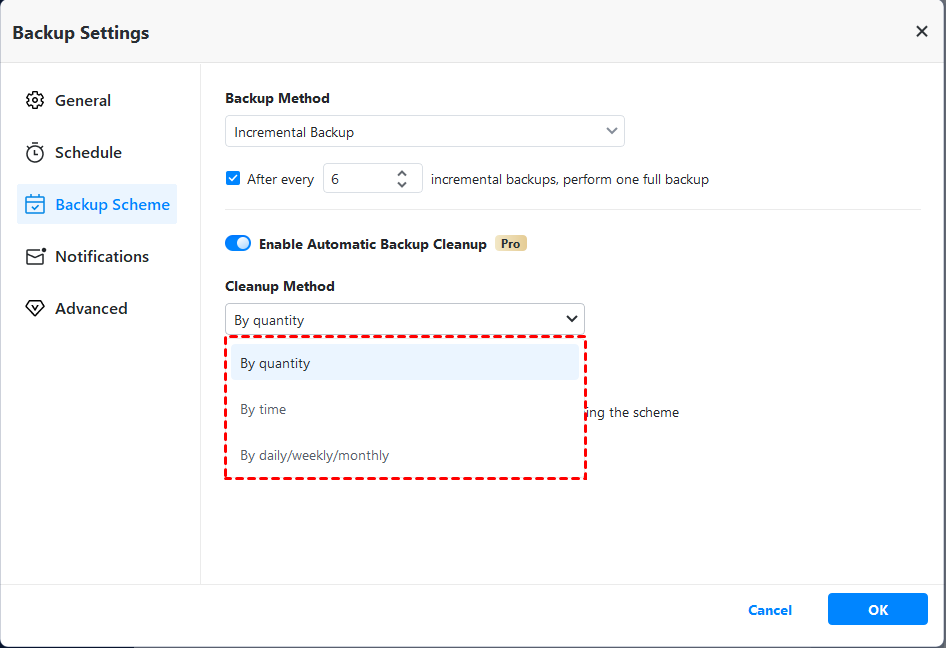
Although incremental backup consumes the minimum storage spaces among the three backup modes, if you perform a scheduled task for a long time, the accumulated image files can also fill your NAS or other devices, and it becomes troublesome to restore a specific version.
In this case, you could upgrade to advanced editions like Professional to enjoy the automatic backup cleanup feature in the Backup Scheme. Setting up a backup scheme here could delete your old backups intelligently therefore save your storage space.
✍Tips:
-
A higher compression level in Options could also make the image smaller, but with a longer backup time.
-
If you want to create incremental backups to Synology NAS, just choose the source and target path accordingly.
-
From 6.1 version, you could also add or manage NAS devices in Tools > Share/NAS Management.
-
AOMEI Backupper can help you perform Synology NAS incremental backups in addition to allowing you to backup your files to AOMEI Cloud. When you sign up for an AOMEI account, it will give you 1TB of free storage space for 15 days.

Conclusion
Synology incremental backup could significantly save your time and storage space, and there are some add-on packages support you to do it. But if you want to apply it other NAS or devices, a third-party program like AOMEI Backupper would work better.
Not only incremental or differential backup, with its complete features, you can realize NAS mirror backup via File Sync. If you would like to backup it to NAS within unlimited PCs or servers, there’s also a Technician or TechPlus edition. Check them in the edition comparison page.