Top 2 Ways to Use Synology Backup SharePoint Easily
You can learn why use Synology backup SharePoint and how to use Synology to SharePoint with 2 easy and secure methods. Each method contains a tutorial. Keep reading for more detailed information.
By Clytze Updated on January 12, 2023
Why Use Synology Backup SharePoint?
SharePoint Online is a collaborative cloud service for organizations and companies. It allows users to create websites to upload new items such as videos, documents, etc. Using SharePoint can make it easier for team members to work together, thereby improving the overall work efficiency of the team.
Therefore, a large number of companies have utilized SharePoint and stored a large amount of important data on SharePoint. In order to ensure data security, many users will choose to use Synology to back up SharePoint, because Synology has the following advantages.

- Compatible with different devices: Unlike many cloud services, Synology NAS is compatible with many different devices, such as Android, macOS, iOS, Windows, Linux, and more.
- Supports free apps and services: Synology NAS is a special cloud storage service that offers many free apps in its package center. Therefore, users can manage their data to the maximum extent.
- Excellent connection: Synology combines the advantages of traditional hard drives and cloud services. Users can access data on Synology through the Internet and network connections.
How to Use Synology Backup SharePoint
After understanding why use Synology NAS backup SharePoint, you can read on to learn 2 ways to achieve this goal. You can choose to manually backup SharePoint to Synology or use free software to automatically backup SharePoint to Synology NAS according to your needs. Each method includes a detailed tutorial.
Method 1. Use Synology Backup SharePoint Manually
If the number of files you need to back up is not too many, you can first try to manually back up SharePoint with Synology, that is, the method of downloading and uploading. When backing up Office 365 SharePoint to Synology NAS, you should ensure that the network is stable. Then follow the graphic tutorial below to get started.
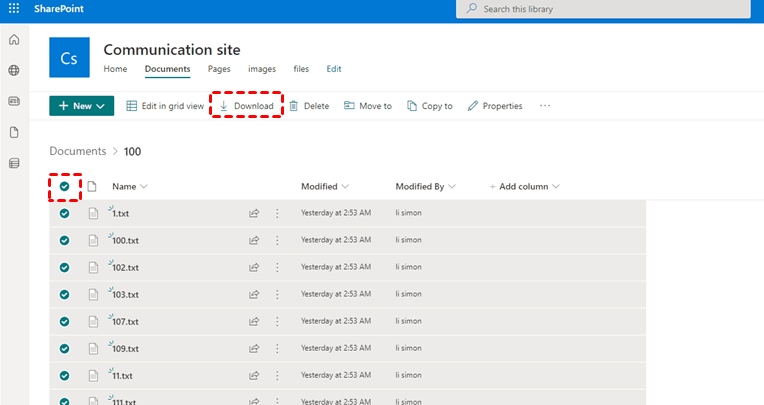
Step 1. Sign in to your Office 365 on the web and go to SharePoint. Then locate the data you want to backup.
Step 2. Download the data on your local service.
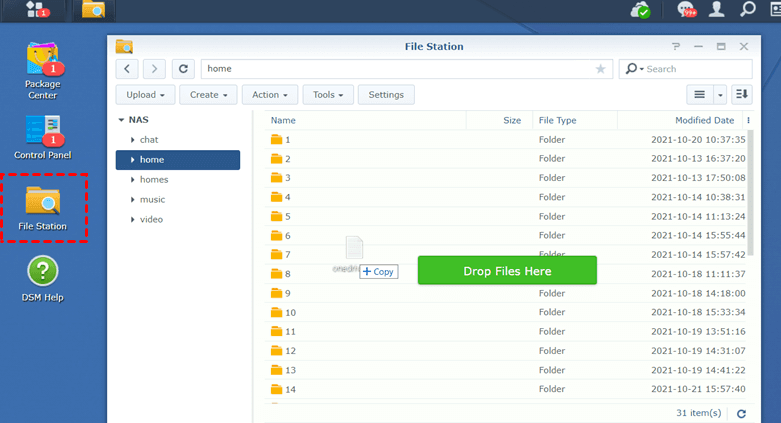
Step 3. Now, Synology NAS and go to File Station. Then drag and drop the data you download to it.
Method 2. Use Synology Backup SharePoint Automatically
When you need to back up a large number of files, the first method is not very practical, because the method of downloading and uploading will become more troublesome and time-consuming, and if the long-term uploading and downloading encounters unstable network problem may directly lead to situations where the backup fails.
Therefore, the easier way is to choose a free professional third-party backup software - AOMEI Backupper Standard to help you automatically backup SharePoint to Synology. It also has the following advantages.
- Scheduled backup: You can create scheduled backups according to your needs, including daily, weekly, and monthly. The software will then automatically run the backup task at regular intervals according to how often you want it to be backed up.
- Multiple backup paths: In addition to SharePoint and Synology, you can also choose various devices as the source or destination path according to your needs, such as local disk, external hard drive, USB flash drive, cloud drive, network drive, etc.
- Different operating systems: AOMEI Backupper supports many different Windows PC systems, including Windows 11/10/8.1/8/7/XP/Vista, etc.
Before officially starting to automatically backup SharePoint to Synology, you need to do the following preparations first. Then follow the graphic tutorial below to start the backup operation.
- Make sure your Synology NAS is connected to the Internet and you can access it.
- Download the free file backup software - AOMEI Backupper Standard and install it on your computer. If you are a Windows Server user, you can try AOMEI Backupper Server.
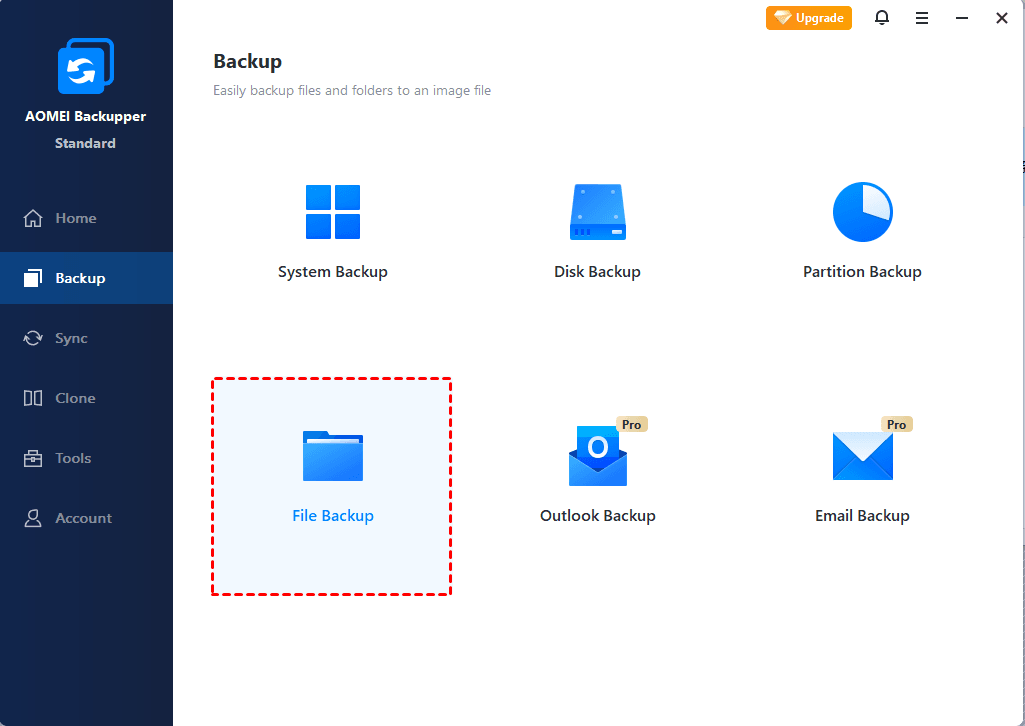
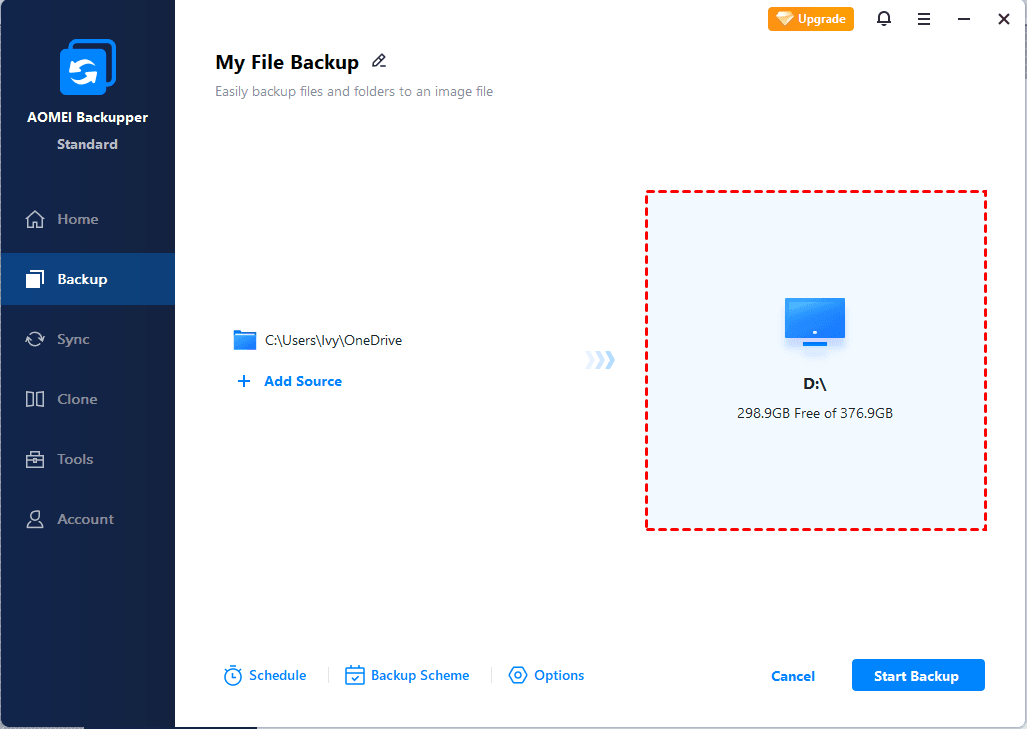
Step 1. Open AOMEI Backupper Standard, and click Backup > File Backup.
Note: If you want to protect your precious files while making them easy to access, family photos, for example, you could consider using basic sync feature in the Sync tab.
Step 2. Click Add File or Add Folder to select the SharePoint data you want to backup.
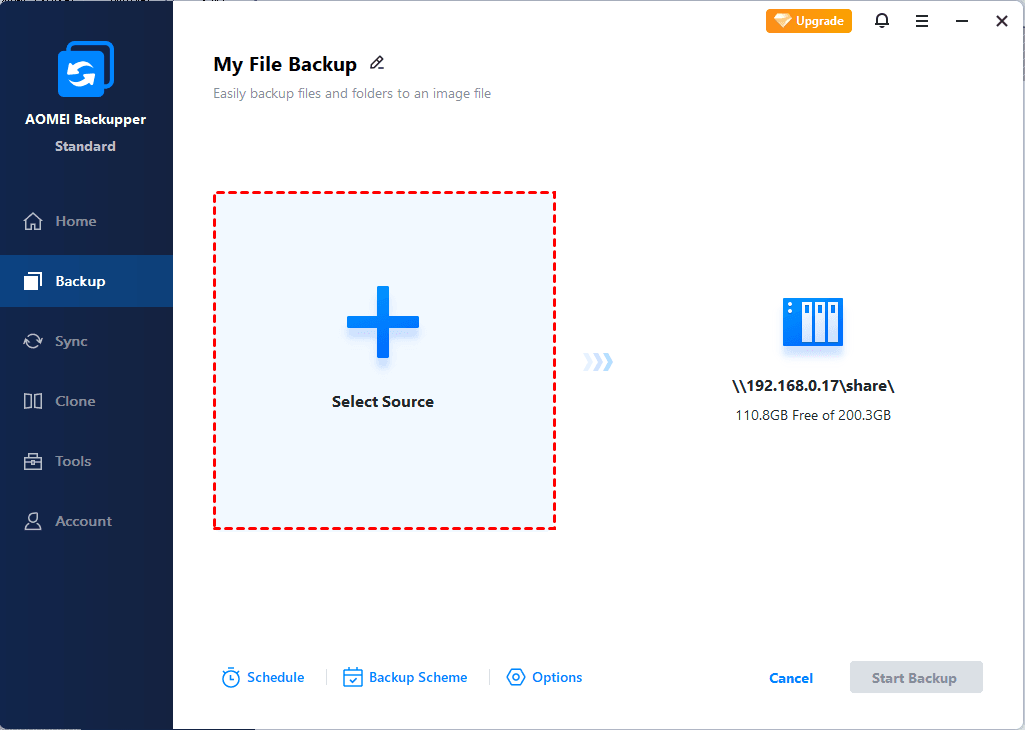
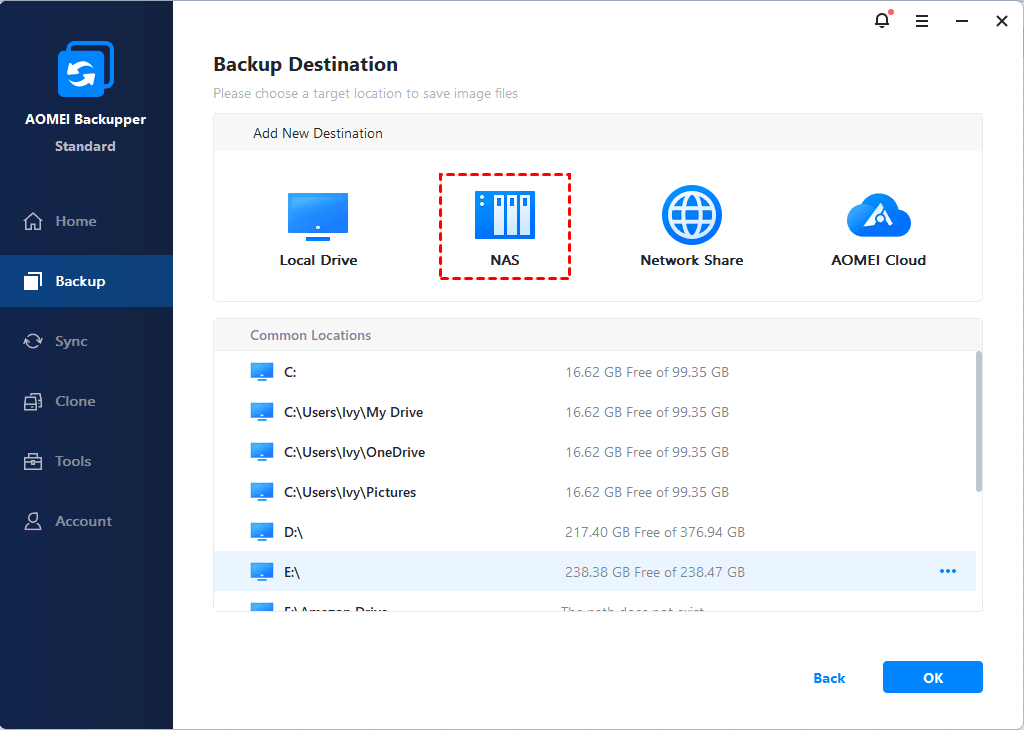
Step 3. Click where the arrow points to select a folder on Synology NAS. You need to add Synology NAS ahead of time if this is your first time creating file backup with AOMEI Backupper.
First, click Share/NAS in the pop-up window.
![]()
Next, click Add Share or NAS Devices, and then type display name, IP address, username and password of your Synology NAS.
Step 4. To protect data continuously, you can click Schedule to set different backup frequencies, such as the default backup options - daily incremental backup. It will backup files and changes made every day, which greatly reduce the risk of data loss. Finally, click Start Backup.

Notes:
- Options: You can make a comment for this task, compress files, enable email notifications, create pre/post commands, etc.
- Schedule Backup: If you want to run scheduled backups, you can choose a different backup frequency according to your needs. You can select daily, weekly, monthly, event triggers or USB plug in. The last two are available in the AOMEI Backupoper Professional.
- Backup Scheme: It provides three different backup methods, and you can upgrade to the professional version to experience a more efficient differential backup method. After upgrading, you can also enable automatic backup cleanup feature to save disk space.
Summary
This article explains why use Synology backup SharePoint and 2 ways to achieve the goal. If the number of files you want to backup is not too many then you can manually backup SharePoint to Synology. The easier way is to use the free third-party backup software AOMEI Backupper Standard to automatically backup SharePoint files to Synology. You can set different backup frequencies, backup methods and backup paths according to your needs.
In addition, this software also provides Backup, Restore, Clone, Create bootable media, Recovery Environment and other functions to protect data security in all aspects. With it, you don't worry about data loss, you can download this software to explore more functions by yourself.

