7 Ways to Easily Fix SSD Not Showing up in the BIOS
How to solve the problem of SSD not showing up in BIOS? Read this article to learn about the causes of this problem and the 7 corresponding solutions, and the method to prevent SSD data loss.
by Clytze Updated on November 7, 2022
Really Strange: My SSD not Showing up in BIOS
"I recently purchased a new SSD and I want to put my system in this new drive and use the old mechanical drive to store games, videos and data. The idea was good, but when I get into the BIOS and want to change the boot order, this new SSD is not listed. In other words, the SSD not showing up in BIOS boot priority. This is really strange because I can see the SSD in Task Manager. I've asked friends and colleagues and they don't have any good ideas, does anyone know how to fix new SSD not showing up in BIOS?"
In fact, SSD (Solid State Disk or Solid State Drive) is gradually replacing the traditional mechanical hard disk drive (HDD) and becoming the future trend. The reason is that SSD has a faster reading and writing speed, no noise and low power consumption advantages, which can bring you a more reliable experience. Of course, this does not mean that it is perfect.
Usually, the BIOS can detect the SSD connected to the computer and you can see the model and capacity of the SSD. However, as mentioned above, SSDs sometimes have errors, like SSD not showing up in BIOS. To solve this problem, the best way is to start with the cause.
Reasons for SSD not Showing up in BIOS
From the user feedback, the problem that SSD not showing up in BIOS is very common. And in most cases, it is caused by the underlying reasons of the SSD which are mainly as follows.
- Hard drive not enabled in BIOS
- Device driver version is too old
- Faulty or disconnected data cable
- Solid State Drive Failure
7 Ways to Fix SSD Not Showing up in BIOS
SSD not Detected in BIOS is a common problem, and fully understanding its cause will help you fix it. Next, this article will give you 7 different solutions to ensure that your SSD is detected properly by the BIOS.
- Method 1. Troubleshoot hardware
- Method 2. Set up SSD in BIOS
- Method 3. Manually update the available drivers
- Method 4. Replace the data cable
- Method 5. Unplug other drives on the computer
- Method 6. Format the SSD
- Method 7. Use Hardware and Device Troubleshooting
Method 1. Troubleshoot Hardware
When you encounter the problem that the SSD not showing up in BIOS, you should first troubleshoot the SSD hardware, because it will directly affect the BIOS detection result.
For this, you need to check the SSD hardware and the corresponding ports in detail to make sure they are working properly. In addition, you can also try changing to another SSD port to see if you can fix the SSD not showing up in BIOS in Windows 10 issue.
Method 2. Set up SSD in BIOS
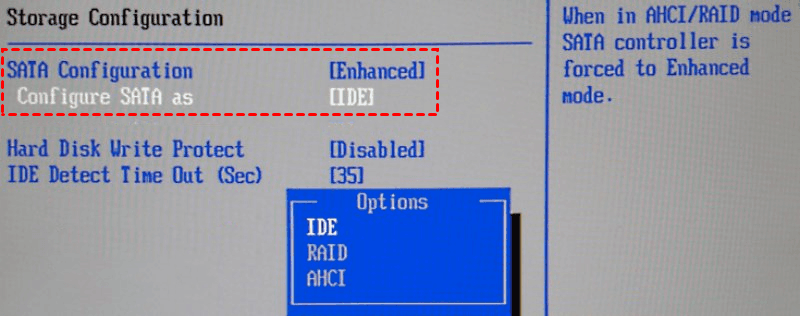
SSD configuration mode is also known as SATA controller mode. If your drive is not configured with SATA controller settings, you will have problems like SSD not showing up in BIOS. For this reason, you will need to reconfigure the BIOS settings of your SSD to resolve this issue. Please note that different brands of motherboards have different methods of entering the BIOS. So, please consult your motherboard manufacturer for details, the next steps will take a Dell computer as an example.
Step 1. Reboot your computer and press the F2 (different computers have different keys to enter the BIOS, please replace them as appropriate). Then, press Enter when prompted to enter SSD configuration mode.
Step 2. Once in configuration mode, select the SATA option and press Enter again.
Step 3. Next, you will see the SATA controller mode option, just switch the original compatibility mode to IDE compatibility mode.
Method 3. Manually Update the Available Drivers
When the driver version on your computer is too old, it may affect the BIOS detection results and cause problems like the SSD not showing up in BIOS. So, you need to make sure that all drivers are up to date. It is recommended that you manually update the drivers available on your computer.
First, fully understand what drivers are available on your computer. And look for the appropriate manufacturer's website in your browser to download the latest version of the drivers and successfully install them on your computer. Please note that the downloaded and installed driver updates must be compatible with the Windows operating system, otherwise they may cause new troubles.
Method 4. Replace the Data Cable
In most cases, an external SSD is connected to the computer via a data cable. If there is any damage to your data cable, or if it appears visibly worn, it may affect the BIOS detection results. And this may cause the problem that SSD not showing up in the BIOS.
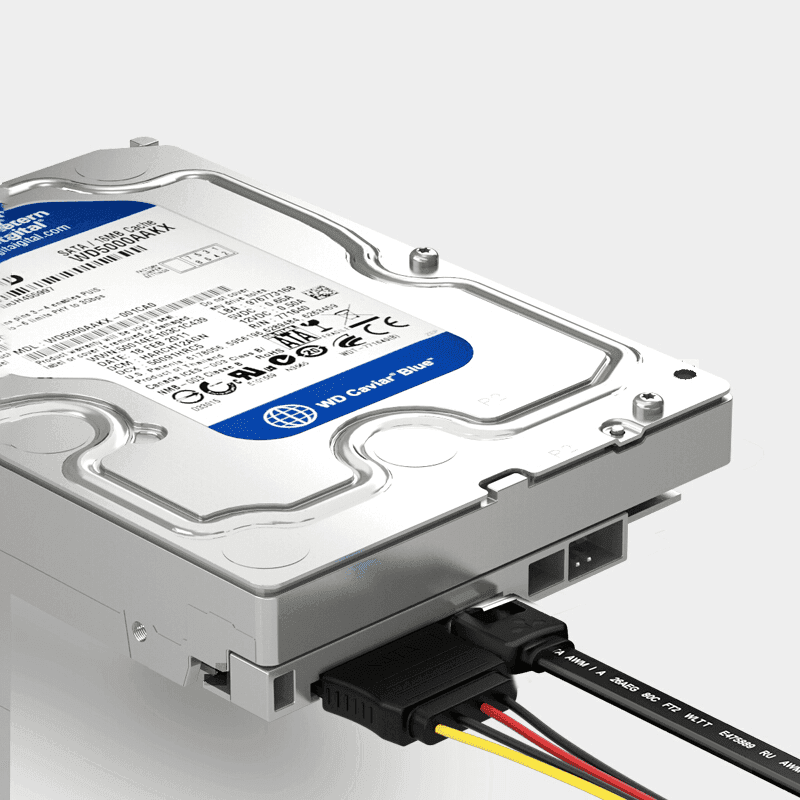
Therefore, you need to check the physical condition of the data cable for any major wear and tear. Or if available, try replacing it with another cable for testing. If you need to replace the cable with a new one, it is recommended that you choose the cable made by your SSD manufacturer as a preference, which may be better in terms of compatibility.
Method 5. Unplug Other Drives on the Computer
When you connect your new SSD, if there are other hard drives on your computer, a compatibility error may occur. This may cause the new SSD not showing up in the BIOS problem.
For this reason, we recommend that you temporarily disconnect the other hard drives and make sure that only the SSD is connected to your computer to see if the problem is fixed.
Method 6. Use Hardware and Device Troubleshooting
The Hardware and Troubleshooter tool that comes with Windows is a great solution that you can use to automatically fix SSD unknown errors and help you resolve SSD not showing up in BIOS. Then you can follow the detailed steps.
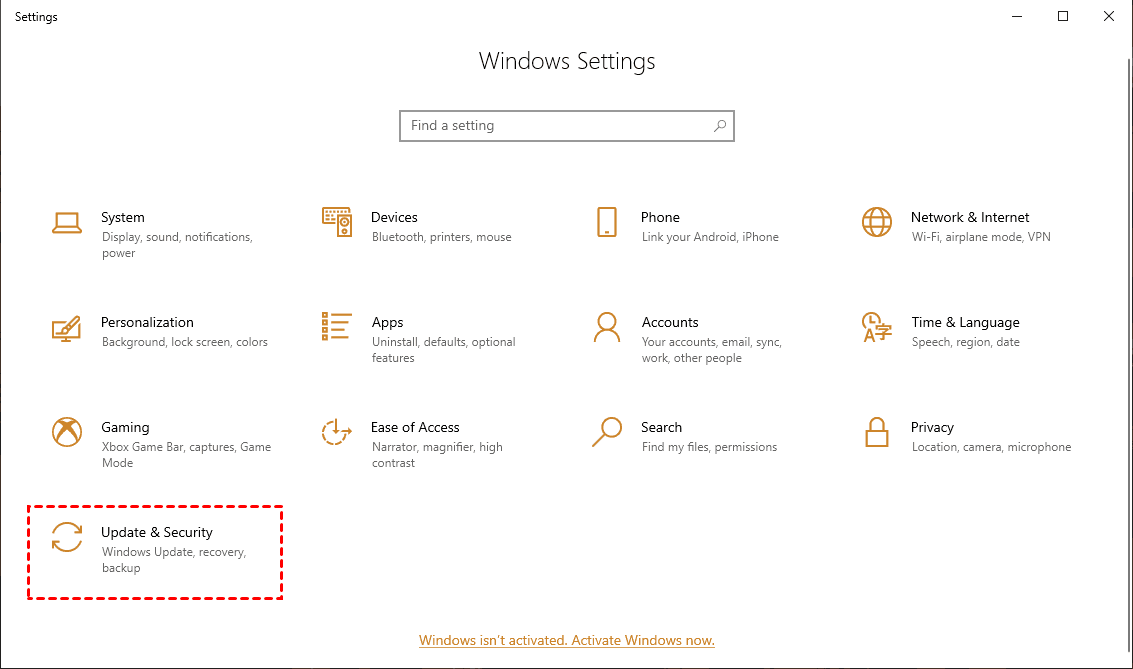
Step 1. Click the Start button on the left side of the taskbar, and click the Settings button in the menu. In the Windows Settings screen, find and click on the Update & Security option.
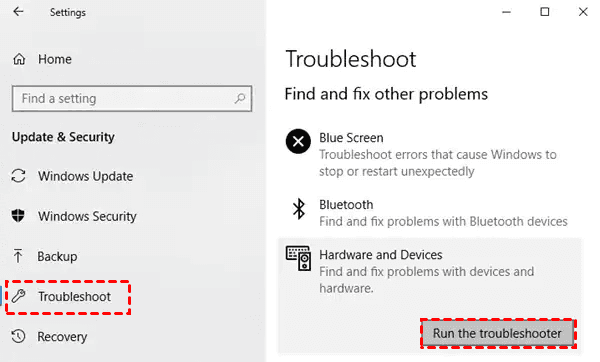
Step 2. Switch to the Troubleshooter tab in the left window, find Hardware and Devices in the right window. Then click the Run the troubleshooter button and wait for the automatic repair to complete.
Method 7. Format the SSD
Just like reinstalling a Windows system, formatting an SSD can be a safe and effective way to solve various problems caused by corrupted files or improperly installed applications, including problems like SSD not showing up in BIOS. You can follow the steps below.
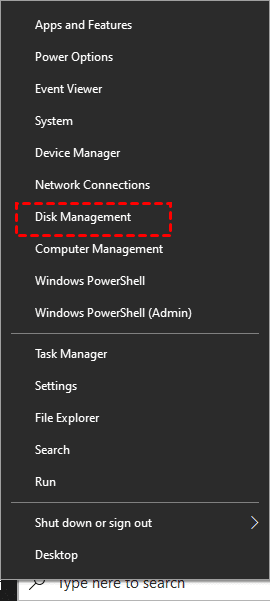
Step 1. Right-click the Start button and click the Disk Management option in the expanded menu.
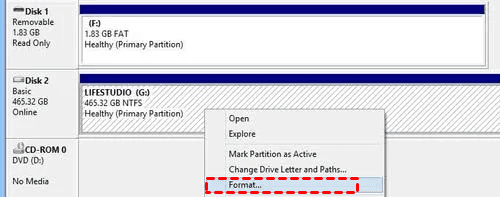
Step 2. Find your SSD, right-click on the blank area and select Format... from the expanded menu.
Note:
You can identify which drive is the SSD that needs to be formatted according to its capacity. If you have two drives with the same capacity, it is recommended that you disconnect the other drive first to avoid formatting errors.
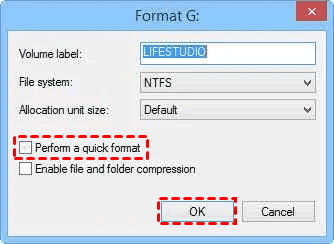
Step 3. In the SSD formatting pop-up window, confirm the information. It is recommended to select NTFS and uncheck the Perform a quick format checkbox. Then click the OK button and wait for the SSD formatting to complete.
The above 7 methods will help you to solve the problem of SSD not showing up in BIOS so that your SSD can be detected correctly. However, it is necessary to remind you that SSD is essentially just a storage device. After being affected by power outages, viruses, aging hardware and other factors, it can also threaten the security of the various data it stores.
Therefore, it is recommended that you use reliable software to backup the data on your hard drive to prevent SSD data loss. And AOMEI Backupper Standard meets the above requirements.
An Easy Way to Avoid SSD Data Loss - AOMEI Backupper Standard
AOMEI Backupper Standard is a free and professional disk backup software for Windows 11/10/8.1/8/7/Vista/XP. It allows you to backup MBR disks, GPT disks, external hard drives, USB drives and other storage devices.
If you have storage space concerns, you can also use its incremental backup feature to improve backup efficiency. Besides backing up SSD, it also supports partition backup and system backup, so you can take your data security to the next level.
Next, we will introduce the specific steps of AOMEI Backupper Standard disk backup.
Step 1. Download AOMEI Backupper Standard, install and open it, click Backup > Disk Backup.

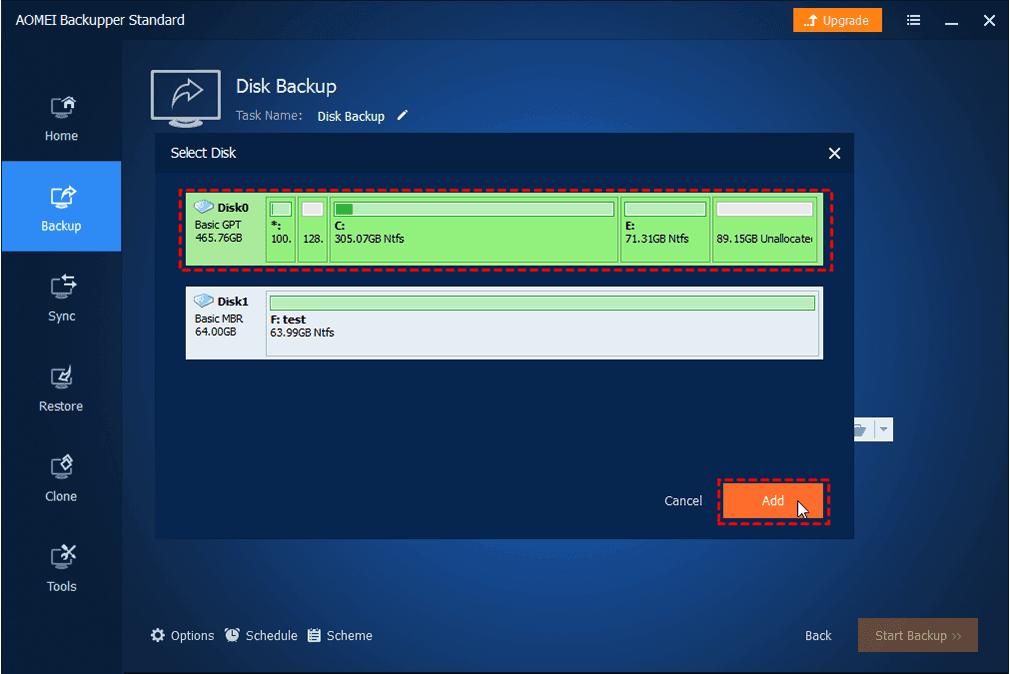
Step 2. Click the Add Disk button. It is recommended that you change the name of this task by clicking on the pencil icon next to Task Name so that you can distinguish it better.

Step 3. In the pop-up window, select the source disk you want to backup. Or you can add multiple source disks directly if you have more than one to backup.
Note:
You cannot restore multiple disks contained in an image file to a larger disk. Therefore, if you want to add multiple disks, you will need to restore them separately.
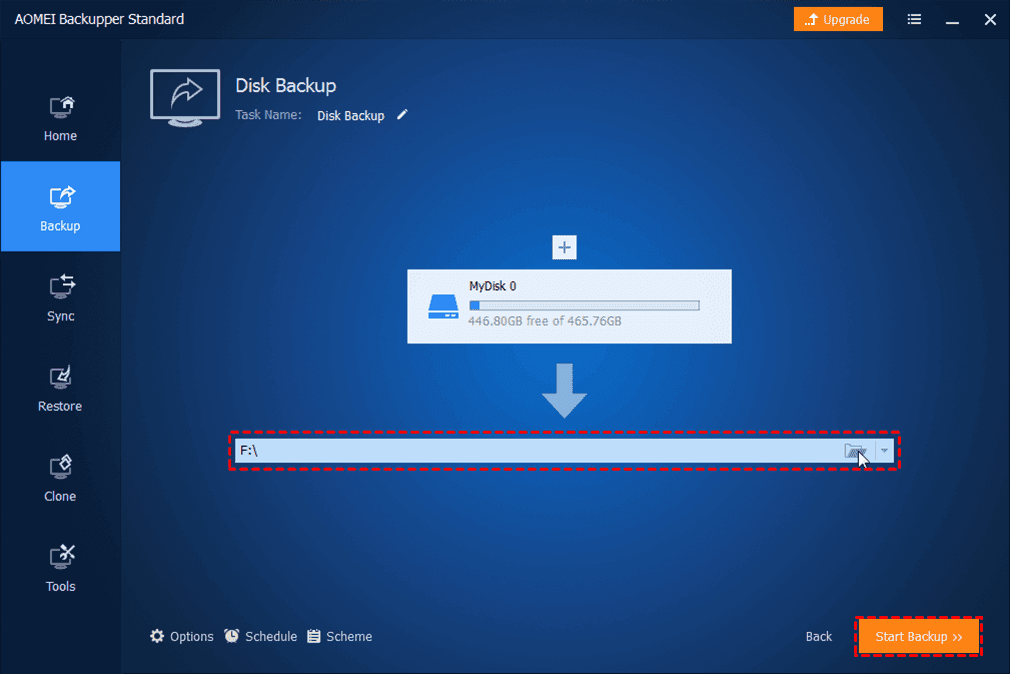
Step 4. Click the address bar pointed by the white arrow to select the destination path for storing data. Then click Start Backup button and wait for the backup to complete.
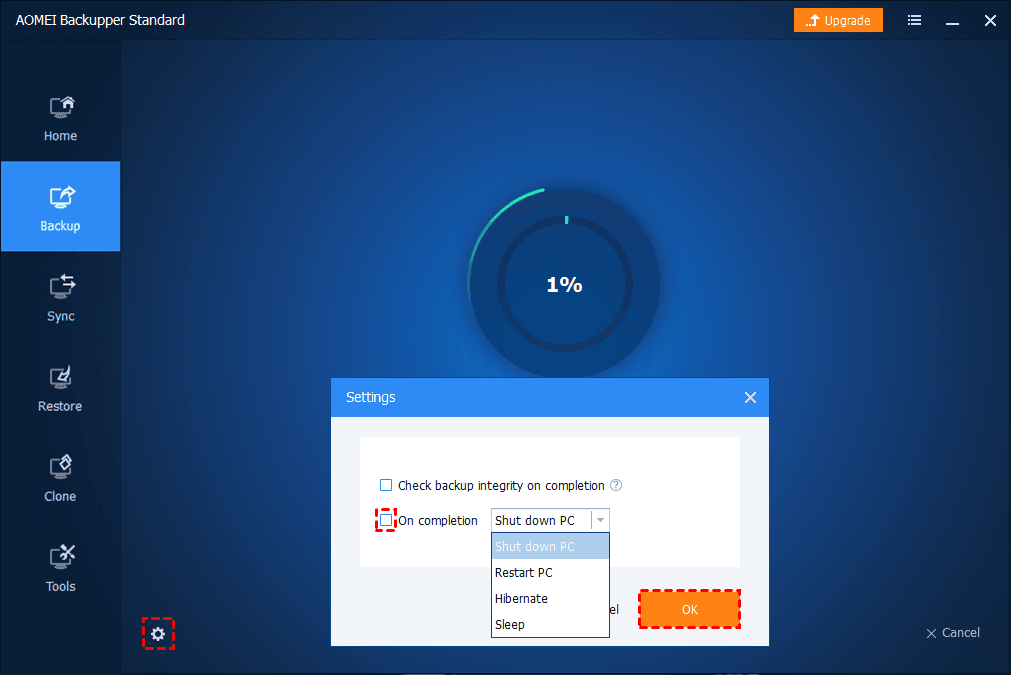
Step 5. During the backup process, you can click the Settings icon in the bottom left corner to choose your own operations after the backup is complete, including Shut down PC, Restart PC, Hibernate and Sleep. If you want to use this feature, check the checkbox in front and click OK.
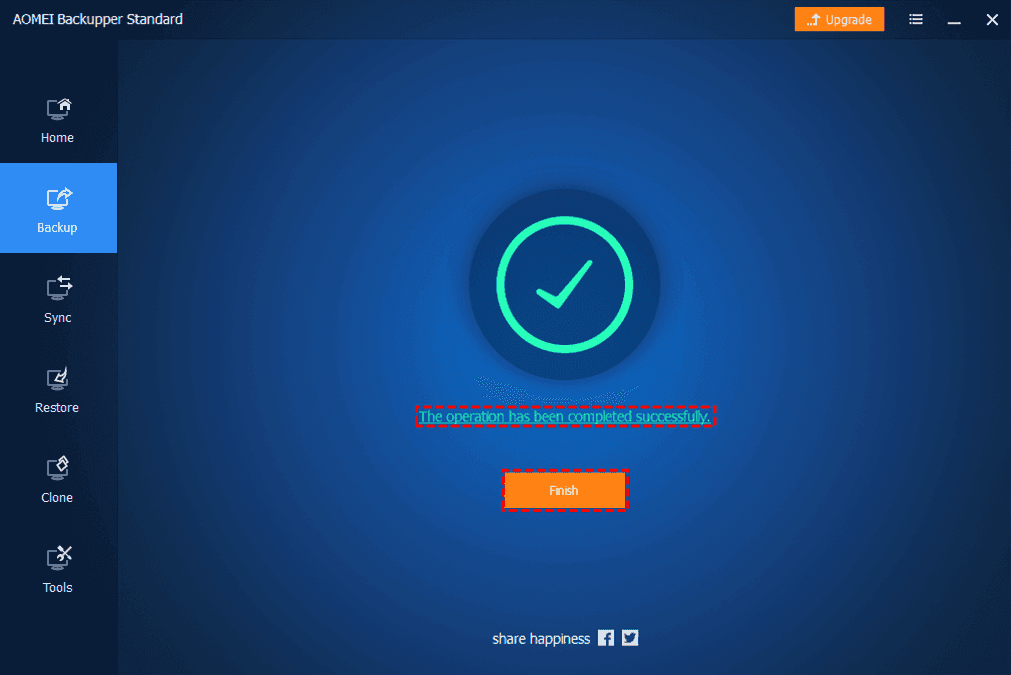
Step 6. Once the backup is complete, just click the Finish button.
Notes:
- If you want to restore a disk backup image, you can use the Disk Restore feature.
- If you want to view the disk backup content without restoring the backup image, you can use the Check Image feature in the Tools tab.
- If you want to migrate your entire system to an SSD, you can upgrade to AOMEI Backupper Professional and then use the System Clone feature.
- To further secure your data, you can choose to create a Windows PE bootable disk, which can be used as a first-aid means to restore the system in case of a crash.
Summary
If you are still struggling with the SSD not showing up in BIOS, you can try the above 7 methods in order. If you need to format the SSD in the process, we recommend you to use AOMEI Backupper Standard to perform a disk backup in advance to prevent data loss.
As a free and professional disk backup software, it supports backing up different kinds of disks in all Windows systems and provides incremental backup method to save disk space. It also offers System Backup, Partition Backup and File Backup to meet your different needs. By the way, it is easy to operate, you only need a few steps to achieve disk backup, so you can try various solutions with more confidence.
In addition, this software is also a great restore tool. If your computer encountered any problems, it can restore the backup image easily and quickly. Even if you'd like to restore the system to another computer with different hardware, its Universal Restore feature can help you achieve the goal. You can download this software to explore more features.

