How to Create Clonezilla USB with Rufus vs Easier Way
With this article, you can learn how to create bootable disks for Clonezilla with Rufus. And you can also learn another easier way to create bootable disks and make disk clones!
By Miya Updated on August 11, 2023
What Is Clonezilla USB Drive?
A Clonezilla USB drive refers to a USB flash drive that has been prepared and configured to boot and run the Clonezilla software. It allows you to use Clonezilla without the need for a CD or network server. By creating a bootable Clonezilla USB drive, you can easily launch and utilize the Clonezilla software on a computer.
Having a Clonezilla USB drive offers convenience and flexibility, as you can carry it with you and use it on multiple computers without the need for an internet connection or physical media such as CDs or DVDs.

Why You Need to Create Clonezilla Bootable USB?
Making Clonezilla USB with Rufus offers several advantages and reasons why it is beneficial:
- Portability: A Clonezilla bootable USB drive allows you to carry the Clonezilla software with you wherever you go. You can use it on different computers without the need for installation or access to a network server. This portability enables you to perform disk cloning, imaging, and backup operations efficiently on various machines.
- Ease of Use: Using a bootable USB drive eliminates the need for burning Clonezilla ISO files onto CDs or DVDs. It simplifies the process of launching Clonezilla and eliminates the hassle of carrying physical media. Booting from a USB drive is generally faster and more convenient than using other methods.
- Compatibility: Many modern computers support booting from USB drives, making it a widely compatible method for running Clonezilla. With a bootable USB drive, you can use Clonezilla on different types of computers, including laptops, desktops, and servers, regardless of the operating system installed.
- Emergency Recovery: A bootable USB drive with Clonezilla can be a valuable tool for emergency situations. If your system experiences a critical failure or data loss, having a Clonezilla USB drive allows you to quickly boot into the Clonezilla environment and perform backup or recovery operations to restore your system to a working state.
Create USB Bootable Clonezilla with Rufus
To create a bootable Clonezilla USB with Rufus, you typically download the Clonezilla ISO file from the official website and use the tool Rufus to write the ISO file to the USB drive, making it a Clonezilla bootable media. Once the USB drive is prepared, you can plug it into a computer, boot from it, and access the Clonezilla environment to perform disk cloning, imaging, backup, or recovery operations.
To create a Clonezilla bootable media, follow these steps after connecting a USB flash drive with a minimum storage capacity of 4 GB:
Step 1. Visit the official website of Rufus and navigate to the Download section. Click on the provided download link to obtain the latest version of Rufus and run it.
Step 2. Choose the USB flash drive from the Device section and then click on the Select button.
Step 3. Choose the Clonezilla ISO file and then click on the Open button. Finally, click on the Start button to proceed.

Easier Way to Perform Bootable Clone on Windows
To create a Clonezilla bootable USB with Rufus, you may need to have some specialized knowledge. So is there any way to create a USB drive easily? The answer is yes. Here I recommend you a professional disk cloning software which can easily create bootable USB and clone the disk after booting!
AOMEI Backupper Professional stands out as one of the top disk cloning software options for Windows 11/10/8.1/8/7/XP/Vista, offering a range of remarkable features:
☂ It provides three cloning methods: Disk Clone, System Clone, and Partition Clone, supporting popular disk brands like Samsung SSDs, WD disks, Crucial SSDs, and more.
☂ With the Live Disk Cloning or Hot Clone feature, you can clone a hard drive to SSD or another HDD without interrupting the running operating system. This means you can continue working on your computer while the disk-to-disk clone is in progress.
☂ The software clones only the existing data (used sectors) on the disk. However, if you prefer to clone all sectors on the source disk, regardless of their usage, you can opt for the Sector by sector clone option.
☂ For SSD target drives, the SSD Alignment feature is available to enhance the reading and writing speed, ultimately boosting overall performance and extending the lifespan of SSDs.
In addition to disk cloning, this tool assists in creating bootable media for situations when Windows fails to boot or when you prefer not to load the operating system during the cloning process. Download it to create a bootable media and perform disk clone now.
1. Create a Bootable USB Flash Drive
In this section, I'm going to show you how to create bootable disks, and after booting from the boot disk, we'll be able to do disk cloning.
Step 1. Open AOMEI Backupper and navigate to the Tools tab. From there, choose the Create Bootable Media option.

Step 2. In the window that appears, select the Windows PE - Create bootable disc based on Windows PE option (recommended), and then click on the Next button.
➹ Attention: Alternatively, you have the option to create a bootable disk based on the Linux kernel. However, it's important to note that a Linux-based bootable media only provides access to the basic functions of AOMEI Backupper.

Step 3. To create a bootable USB drive, simply choose USB Boot Device as shown in the screenshot, and then click on the Next button.

Step 4. Once the operation is complete, you can simply click on the Finish button to exit the interface.
2. Perform Disk Clone with the Easiest Way
After understanding how to create a bootable disk, and after booting from the boot disk, we are ready for disk cloning. Check it out now!
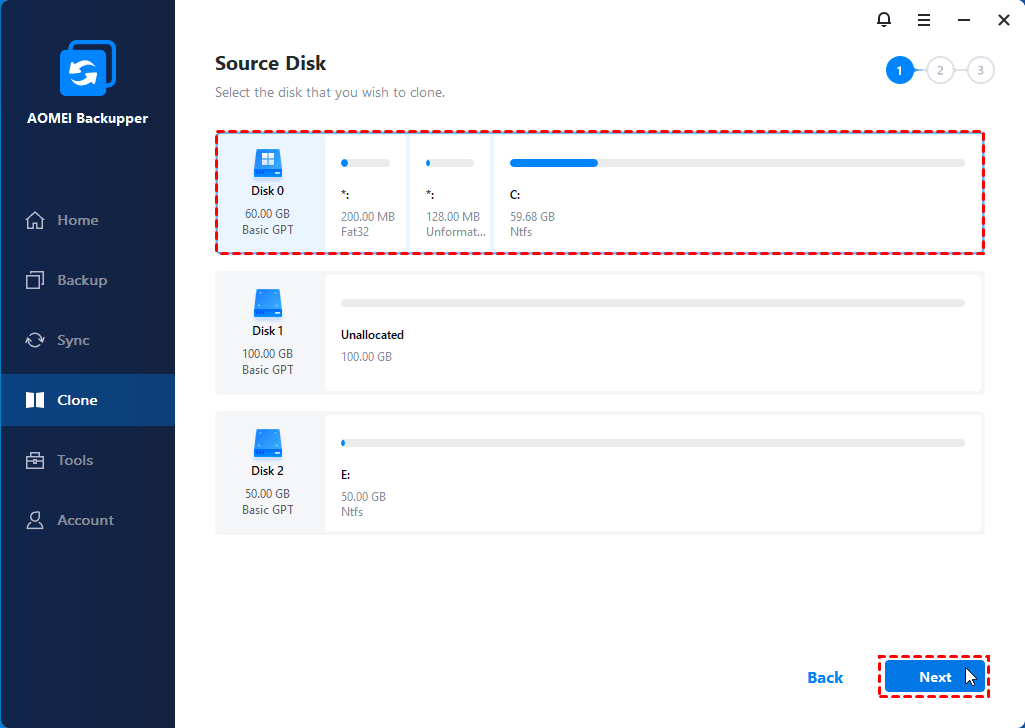
Step 1. When your computer reboots from the startup disk, you'll be logged directly into this software. Then choose the Clone tab and choose the Disk Clone option.

Step 2. Choose the source disk (Disk0) that you wish to clone, and then click on the Next button.
Step 3. Pick the SSD as the destination disk (Disk1) to store all the cloned data, and then click on the Next button.

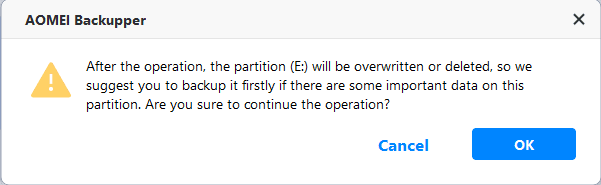
Tip: If the destination disk is not empty, a prompt will appear indicating that the destination disk will be overwritten or deleted. Clicking OK will allow you to proceed, assuming you have already created a backup of the destination disk.
Step 4. Since you are cloning a hard drive to an SSD, it is advisable to enable the SSD Alignment option by checking the corresponding box. This will optimize the performance and lifespan of the SSD. Once you have reviewed and confirmed the settings, click on the Start Clone button to safely initiate the HDD to SSD cloning process.

Helpful tips:
✍ Sector by sector clone: This option allows you to clone all sectors from the source disk to the destination disk, regardless of whether they are used or not. However, if you are cloning a large hard drive to a smaller SSD, it is important NOT to select this option, as it will result in a failed cloning process.
✍ Edit Partitions: When cloning a disk to a larger one, this option allows you to ensure that the target drive shows its full capacity. You have the choice to either "Add unused space to all partitions" or "Manually adjust partition size" as per your requirements.
Step 5. Once all the disk cloning operations are complete, simply click on the Finish button.
❥ Tip: To enable disk cloning on any computer, regardless of location or time, you can utilize AOMEI Backupper Technician or Technician Plus to create a portable version. This allows you to clone disks conveniently and efficiently wherever and whenever needed.
Summary
This article shows you in detail how to create Clonezilla USB with Rufus. In addition to this method, it also shows you an easier way to do disk cloning. Simply create a USB bootable disk and boot from it to clone the disk! In addition to disk cloning, you can also do system clone such as clone Windows 11 to new SSD, download this software now!