How to Use PowerShell Move Files from One Folder to Another
By now you should know how to use PowerShell moving files from one folder to another and the specifics of using it. For computer novices it is recommended to use a third-party program.
By Miya Updated on October 27, 2023
User Case: How to Copy Folder and Subfolders to Another Folder in Powershell
“Hey, folks! So, I'm trying to move some files from one folder to another on my Windows 10 laptop using PowerShell. Can someone help me out with the exact command I should use? I want to make sure I do it right! By the way, I'm using a Dell Inspiron laptop, if that makes any difference. Thanks in advance for the help!”
If you want to use PowerShell move files from one folder to another and you don't know how to do it. Then you have come to the right place! This article will show you exactly what command line to use and will give you concrete examples! If you want an easier way to transfer files, then we recommend free file transfer- AOMEI Backupper. It's easy to transfer files without having to think about it! Please read it carefully.
How to Use Powershell Move Files from One Folder to Another
The Move-Item cmdlet is used to transfer items, along with their properties, contents, and child items, from one place to another. Both locations need to be supported by the same provider. For instance, you can move files or subdirectories between directories or move registry subkeys from one key to another by using PowerShell move all files from one to another.
Moving an item involves adding it to the new location and removing it from the original location. This allows you to organize and reposition items efficiently. To use PowerShell moving files from one folder to another, enter the following command line:
Move-Item
[-Path] ] {String[ ]}
[[-Destination] {String}]
[-Force]
[-Filter {String}]
[-Include {String[ ]} ]
[-Exclude {String[ ]} ]
[-PassThru]
[-Credential {PSCredential} ]
[-WhatIf]
[-Confirm]
[{CommonParameters}]
If you don't know exactly what to do, read on. I will provide you with six applications and specific examples! Let's take a look at how to use PowerShell move multiple files from one folder to another below.
6 Examples of Using Powershell Move Files from One Folder to Another
- Example 1: Moving a File to a Different Directory and Renaming It
By executing this command, you can relocate the "Test.txt" file from the C: drive to the E:\Temp directory while simultaneously renaming it from "test.txt" to "tst.txt".
Move-Item -Path C:\test.txt -Destination E:\Temp\tst.txt
- Example 2: Moving a Directory and Its Contents to a Different Directory
By using this command, you can transfer the entire C:\Temp directory, including all its subdirectories and files, to the C:\Logs directory. As a result, the Temp directory and all its contents will be relocated and become accessible within the Logs directory.
Move-Item -Path C:\Temp -Destination C:\Logs
- Example 3: Moving All Files with a Specified Extension from the Current Directory to Another Directory
Using this command, you can move all the text files (*.txt) present in the current directory (indicated by a dot (.) ) to the C:\Logs directory.
Move-Item -Path .\*.txt -Destination C:\Logs
- Example 4: Moving All Files with a Specific Extension from the Current Directory to Another Directory (Including Subdirectories)
By executing this command, you can recursively move all the text files from the current directory and its subdirectories to the C:\TextFiles directory. This ensures that all text files are transferred to the specified destination, regardless of their location within the directory structure.
Get-ChildItem -Path ".\*.txt" -Recurse | Move-Item -Destination "C:\TextFiles"
◀Note: In Windows PowerShell 2.0, when using the Recurse parameter with Get-ChildItem, the Path parameter must be a container. To filter .txt files, use the Include parameter (Get-ChildItem -Path . -Include *.txt -Recurse | Move-Item -Destination C:\TextFiles).
- Example 5: Moving Registry Keys and Values to a Different Key
By executing this command, the registry keys and values within the MyCompany registry key located in HKLM\Software are moved to the MyNewCompany key. The wildcard character (*) signifies that the contents of the MyCompany key will be transferred, excluding the key itself. This command omits the optional Path and Destination parameter names for brevity.
Move-Item "HKLM:\software\mycompany\*" "HKLM:\software\mynewcompany"
- Example 6: Moving a Directory and Its Contents to a Subdirectory of a Specified Directory
Executing this command will relocate the Logs[Sept`06] directory, along with its contents, into the Logs[2006] directory.
Move-Item -LiteralPath 'Logs[Sept`06]' -Destination 'Logs[2006]'
◀Notes:
1. To handle directory names with brackets, the LiteralPath parameter is used instead of Path. Single quotation marks are employed to enclose the path, ensuring the backtick symbol (`) is correctly interpreted.
2. The Destination parameter, including brackets, is also enclosed in single quotation marks to avoid misinterpretation.
By now you should be clear on the specific command line for moving files from one folder to another using PowerShell and the specifics of using PowerShell move files from one folder to another. So this may be a little complicated and difficult to understand - for computer novices. So I'm going to recommend a simpler way to move files. That's to use a free file transfer program.
The Easiest Way to Sync Files via Best File Move Freeware
To avoid the risk of losing or corrupting files while using PowerShell move files from one folder to another, I recommend using a reliable and free file move software called AOMEI Backupper Standard. It provides a simple and efficient solution for syncing files or folders. With AOMEI Backupper, you can easily select and sync multiple files or folders simultaneously, eliminating the need for manual selection. Here are some notable features:
✍Various sync methods: The software offers advanced sync modes in addition to Basic Sync, providing flexibility based on your specific needs such as Real-Time sync in Pro version.
✍Multiple sync locations: You can sync files not only to local folders but also to external hard drives, network drives, cloud drives, and more.
✍Note that the free version is compatible with Windows 11/10/8/7/XP/Vista. For server users, there is the AOMEI Backupper Server available.
Download and install the freeware on your computer.
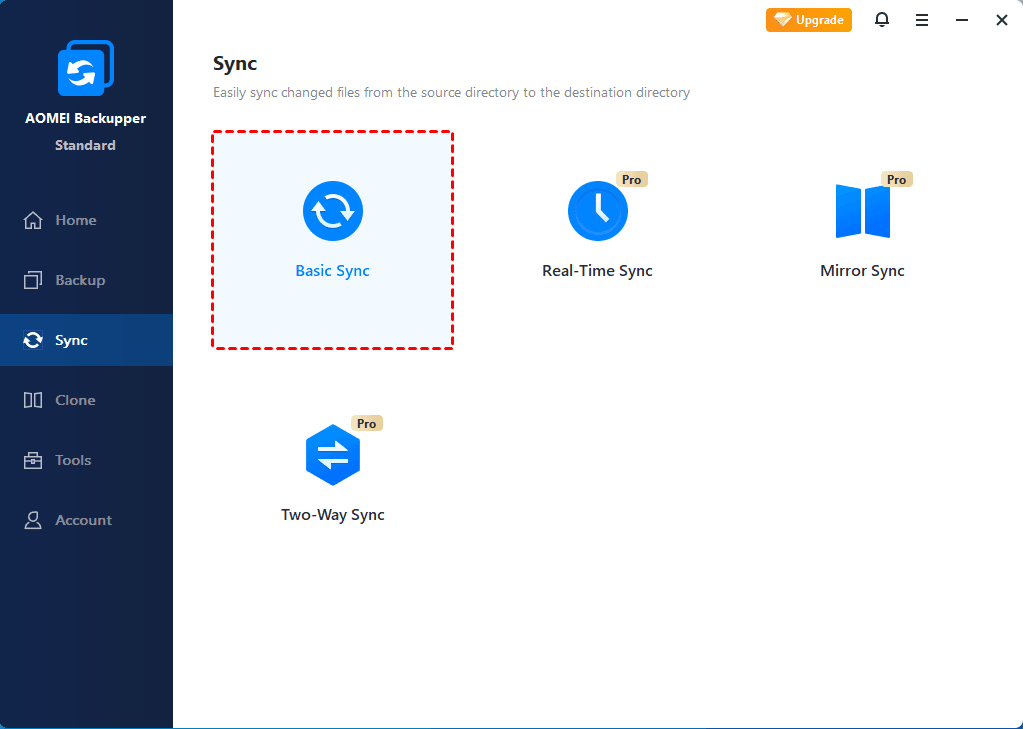
Step 1. Launch the software and choose Basic Sync under the Sync option.
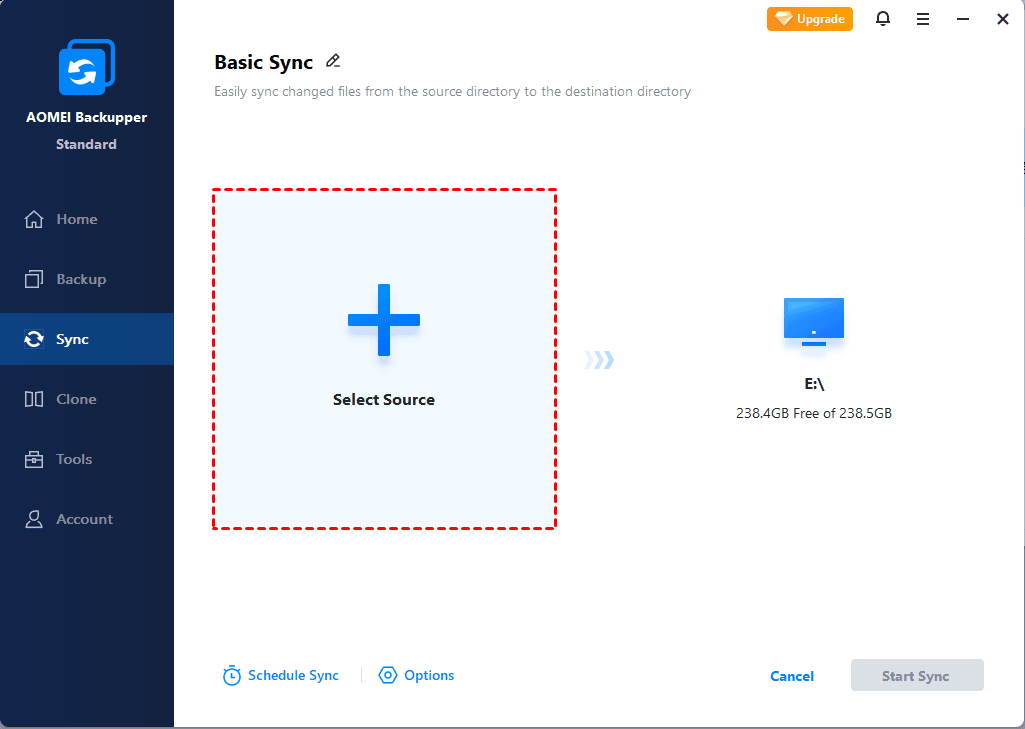
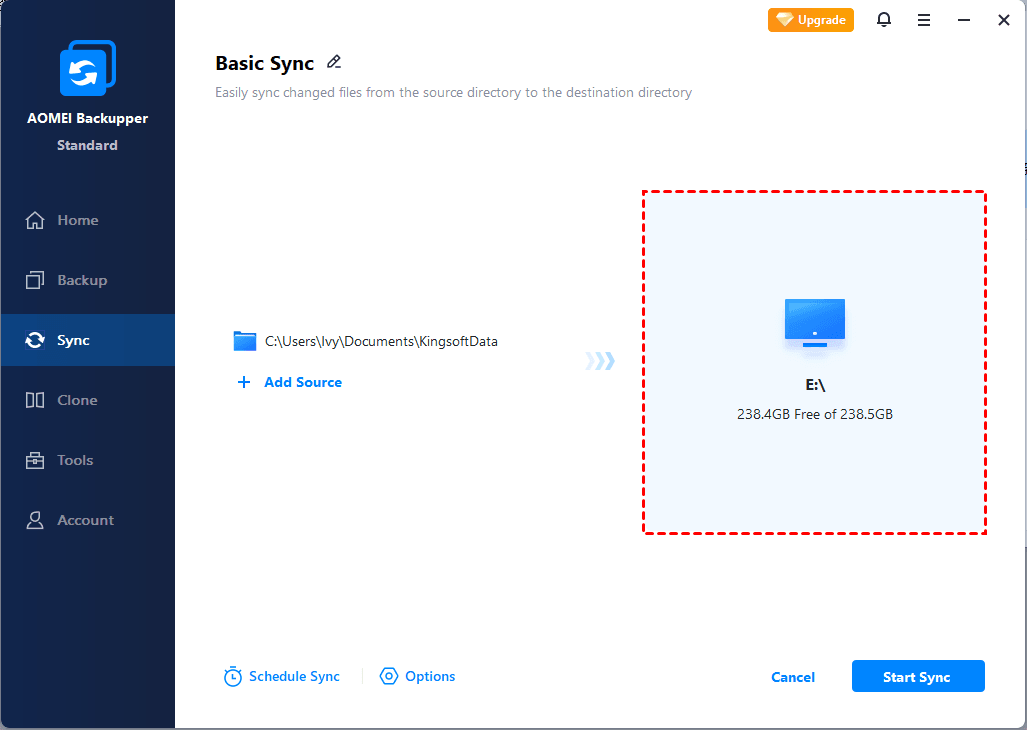
Step 2. Select the files and folders you want to synchronize to your desired location by clicking on Add Folder. To sync multiple folders simultaneously, simply click on the plus icon to add additional folders.
Step 3. Expand the drop-down menu in the second bar to choose a destination where you want to store the folders.
◉Notes:
Options: You have the option to provide comments for your task and configure email notifications.
Schedule Sync: Choose the desired automatic sync frequency, such as daily, weekly, or monthly.

Step 4. After reviewing your settings, click on Start Sync to initiate the operation.
Conclusion
That’s all about how to use PowerShell moving files from one folder to another. We have listed specific command lines and specific operation examples for you. Whether you choose the move command or the free file move tool AOMEI Backupper, I hope you can successfully address your file-moving needs. I recommend the latter option due to its powerful features for easy and quick file relocation.
AOMEI Backupper is not just a file move tool; it also offers Backup, Restore, and Clone features. It can assist you in fixing Windows 11 gaming issues, creating full backups of your Windows 11 system, and more. Download it now to save yourself from potential trouble. Give it a try today!