2 Effective Ways to Perform Kingston Secure Erase
This article introduces you to two ways to accomplish Kingston Secure Erase. You can see which method is more suitable for you according to your needs.
By Yuka Updated on December 9, 2022
Why You Need a Kingston SSD Wipe?

“Hi, I have a Kingston SSDNow V300 120 GB which I wanna sell and wipe, so no personal data can be 'undeleted'. I don't want people to be able to access my files after they get this SSD. Does anyone know of a reliable way to do this?”
For different reasons, a user may want to securely erase their Kingston hard drive. For example, some HDD users want to upgrade to an SSD. SSDs are faster, more durable, more compact, quieter and use less energy. Other users are already using SSDs and want to upgrade to a higher capacity SSD, given that high capacity SSDs are now cheaper than ever before.
Like other types of flash memory, you can only write to an SSD so many times, which presents a problem if you want to wipe the SSD clean. Using common tools can damage the SSD and reduce its lifespan.
How to Perform Kingston SSD Secure Erase
If you are a Kingston hard drive user, how can you easily perform a Kingston Secure Erase? Here are two methods for you, one is to use Kingston SSD Manager and the other is to use a reliable third party software. You can decide which method to use after reading this.
Method 1. Kingston SSD erase via Kingston SSD manager
KSM is an application that provides users with the ability to monitor and manage all aspects of Kingston SSDs. You can follow the steps below to learn how to secure erase a Kingston SSD.
💖Note: In order to use Kingston SSD Manager, you must have:
✿ One or more Kingston SSDs
✿ AHCI mode set in the BIOS
✿ Administrator privileges on Windows
- Be sure to make a complete backup of any important data before you proceed!
- Download the appropriate Kingston SSD Manager version for your system from the official website.
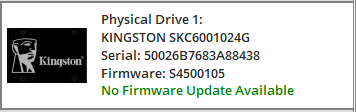
- Open the Kingston SSD Manager application. Find and select the drive you want to secure erase in the left panel.
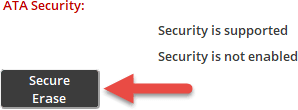
- Go to the Security tab at the top:

- Find the Secure Erase under the ATA Security heading and click this button to start the secure erase process.
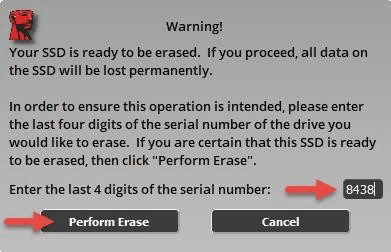
- You will be prompted with a pop-up window warning you of permanent data loss. Once you have read and understood the warning, you can enter the last 4 digits of the drive's serial number and click the Perform Erase button.
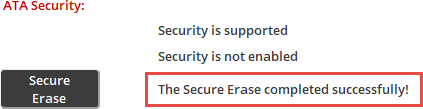
- The secure erase may take a few minutes to complete. Once complete you will see a message stating the secure erase completed successfully:
Tips:
- Kingston SSD Manager can only erase Kingston SATA SSDs (NVMe is not supported).
- You must have your SSD connected to your system as a secondary (non-OS) drive.
- Your drive must not contain any partitions, you can see this user guide to remove partitions.
- Your drive must not be in a security freeze (see the Remove a Security Freeze section linked above).
- Your drive must not be password protected.
Method 2. Kingston Secure Erase via Powerful Third-Party Tool
Sometimes, SSD may not be detected by Kingston SSD Manager for some reasons. This is when you can use third party software to perform a Kingston Secure Erase. AOMEI Backupper is a wiper tool designed for all Windows PCs. It provides you with many useful features, including:
💥 Multiple secure erase methods such as DoD 52220.22-M (with 7 passes) or Gutmann (with 35 passes).
💥 It supports erasing USB drives, hard disks (HDD/SSD) and SD cards. All brands of disks are supported, including Kingston, Western Digital, Samsung and SanDisk.
💥 It helps you to erase selected partitions or unallocated space to free up space and the erased data will not be recoverable.
💥 Besides the erase function, it also provides you with backup, recovery, cloning, synchronization and other functions. You can backup your important files before wiping Kingston SSD.
Here I will show how to perform a Kingston SSD wipe using AOMEI Backupper. Download this software ahead of time and launch it. Deleted data cannot be recovered, you can backup your files first to protect the important data you don't want to lose.
- Make sure the Kingston SSD you want to erase is connected to your computer and can be detected.
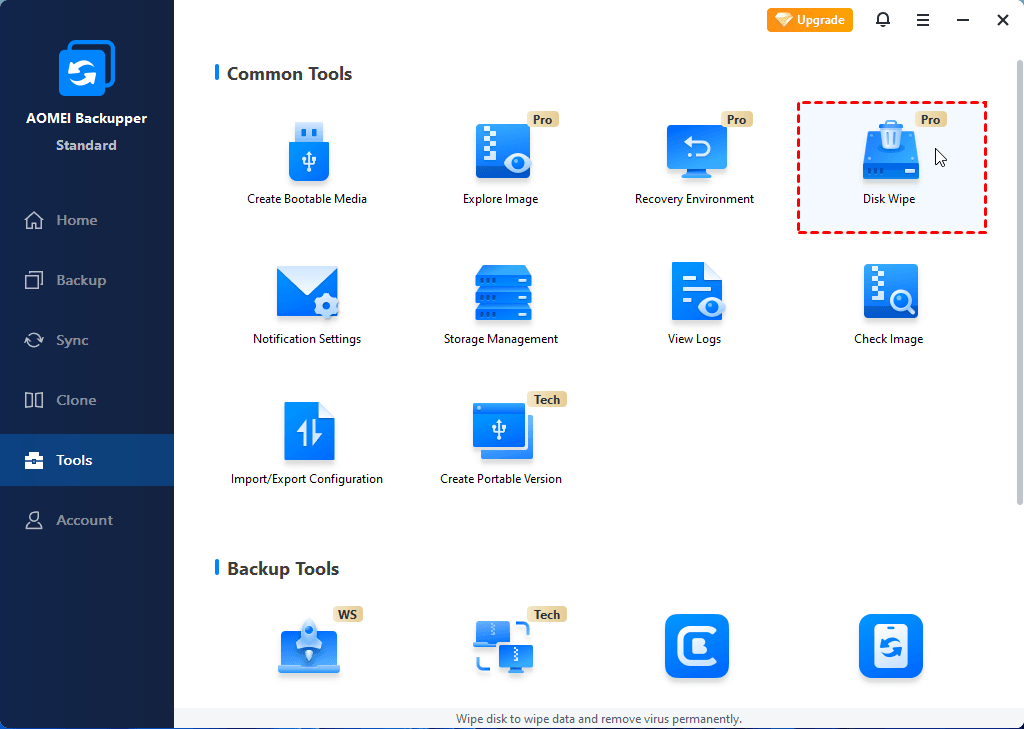
- Start AOMEI Backupper on your computer. Click Tools on the left panel and select Disk Wipe on the right.
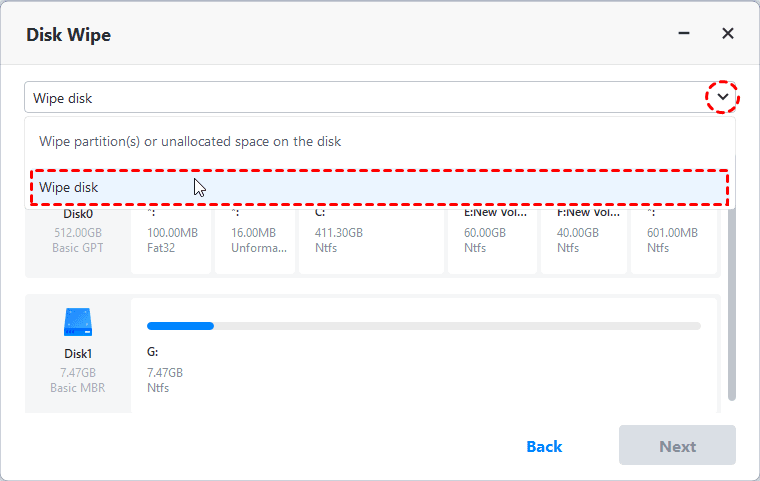
- You will then be asked to select the type of wipe you want. If you want to erase everything from your Kingston SSD, select Wipe disk to delete all partitions and clear all sectors on the disk.
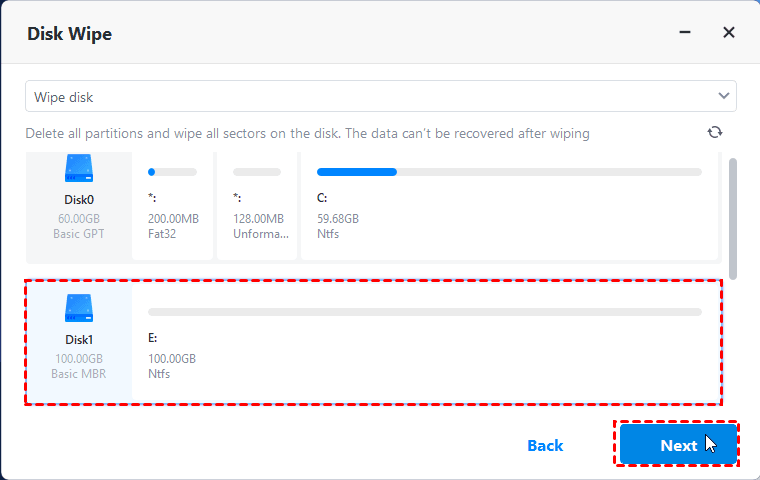
- Select the hard drive you want to wipe data and click Next to continue.
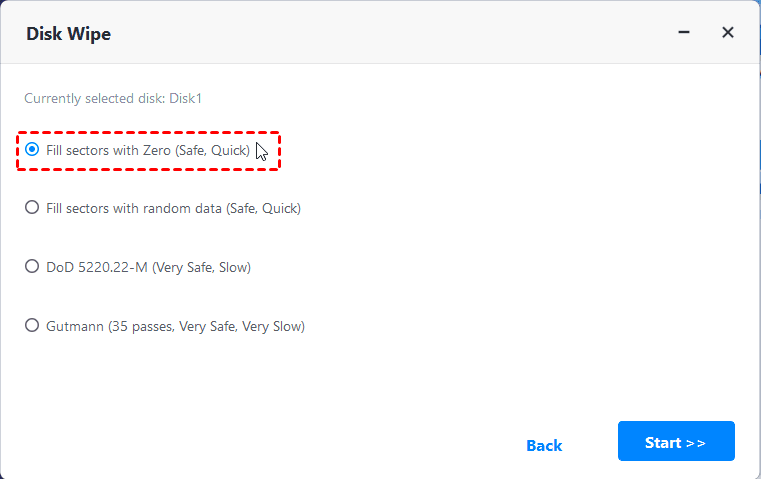
- On the Wiping Method page, choose Fill sectors with Zero. Then click Start to begin the zero filling process. You can also choose other erasure methods according to your needs.
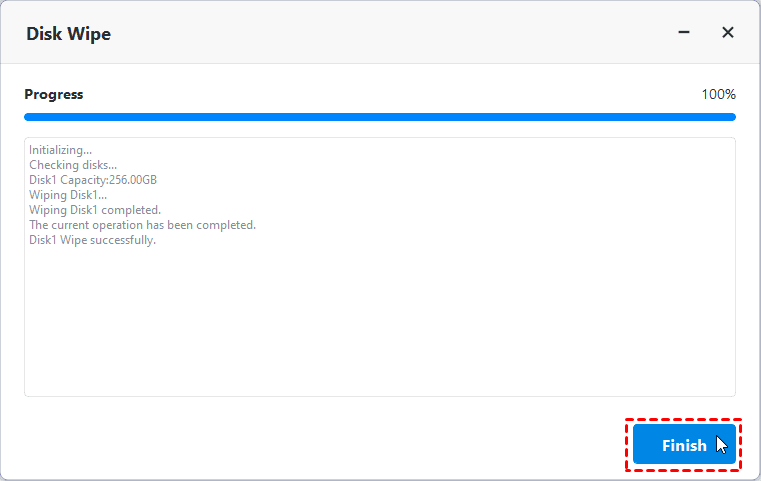
- You will then be taken to the erase process page. If you want to stop the process, you can click Cancel in the right corner. When the operation is complete, click Finish.
Note✍:
◉ If you want to erase the current system disk or the C drive where Windows is installed, the software will reboot to WinPE to perform the operation. You will not be able to enter the system after completion.
◉ This function does not support wiping dynamic disks.
Conclusion
This article provides you with two ways to learn how to perform a Kingston secure erase. You can choose the one that suits your needs after reading it. By comparison, AOMEI Backupper is more practical. It can help you securely erase not only Kingston SSD, but also other brands of hard drives, whether HDD or SSD. You can also use this software to migrate data or system on Kingston SSD. It ensures that you can boot successfully from the cloned disk without encountering any problems.