How to Transfer Files to a Flash Drive Easily (4 Ways)
You can know the reason for transferring files to a flash drive and learn how to transfer files to a flash drive in 4 easy ways. Each method includes the stepwise tutorial.
by Clytze Updated on October 27, 2022
Why Transfer Files to a Flash Drive?
Nowadays, multiple storage devices can store files, but transferring files to a flash drive is still a very popular method. This article summarizes some important reasons below.
- Fast transfer speed: Compared to other network transfer methods, it is a fast way to copy files from one computer to another.
- Easy to carry and use at all times: USB flash drives make it easy to keep frequently used files close at hand, and you can access these files anytime on any computer that supports USB.
- Protect data: In case of accident computer problems that cause files inaccessible and data loss, storing files in a location outside the computer such as a flash drive is more conducive to data protection.
How to Transfer Files to a Flash Drive
Next, the article will show you how to transfer files to a flash drive in 4 easy ways.
- Method 1 can transfer a small number of files as well as support batch transfer of multiple files and large files.
- Method 2, Method 3 and Method 4 are only suitable for a small number of files.
Each method contains a detailed graphic tutorial. You can continue reading to learn how to transfer files to a flash drive in windows 10, how to transfer files from pc to flash drive faster, etc.
Method 1. Free File Transfer and Sync Software
Whether you want to transfer a small number of files or batch transfer multiple files and large files, you can use the free file sync software AOMEI Backupper Standard to easily achieve the goal.
- Transfer multiple files at once: You can transfer multiple files or large files to the flash drive without moving them one by one.
- Automatic file transfer regularly: It can automatically sync files to a USB flash drive at fixed intervals (daily/weekly/monthly).
- Easy to operate: It has a user-friendly interface and simple operation.
- Support for various systems: It supports multiple Windows operating systems such as Windows 11/10/8.1/8/7/XP/Vista.
You can insert the USB flash drive to your computer and make sure it can be recognized, then follow the graphic tutorial below to transfer files to a flash drive with just a few clicks.
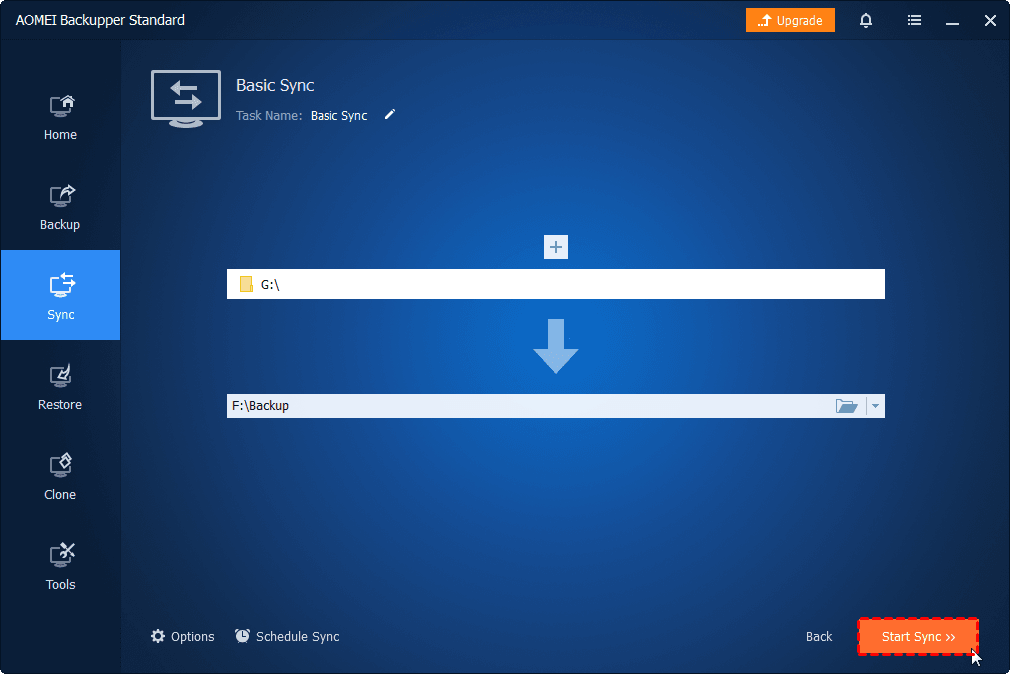
Step 1. Download AOMEI Backupper Standard, install and launch it. Then click Sync > Basic Sync.
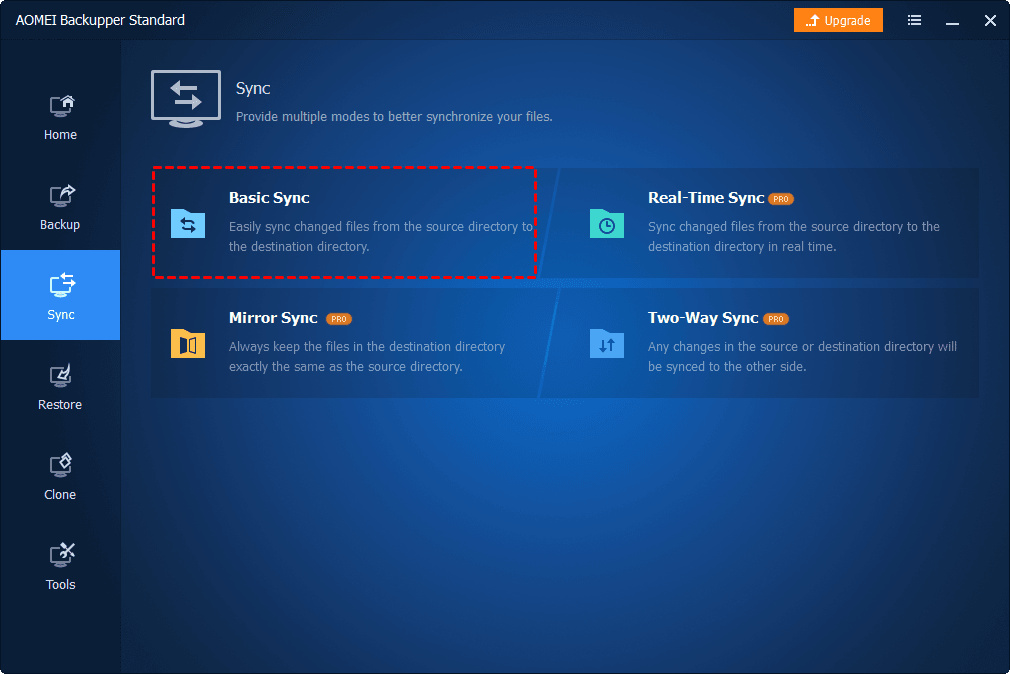
Notes: There are other 3 advanced sync modes, if you need, you can upgrade to the Pro version and enjoy them.
- Mirror Sync: It will keep the USB flash drive directory the same as the computer directory. Therefore any additional files in the target folder will be deleted.
- Real-Time Sync: As soon as the folder in the computer is changed it will be synced to the USB flash drive.
- Two-Way Sync: It will sync the changes in the computer directory to the USB flash drive directory and vice versa.
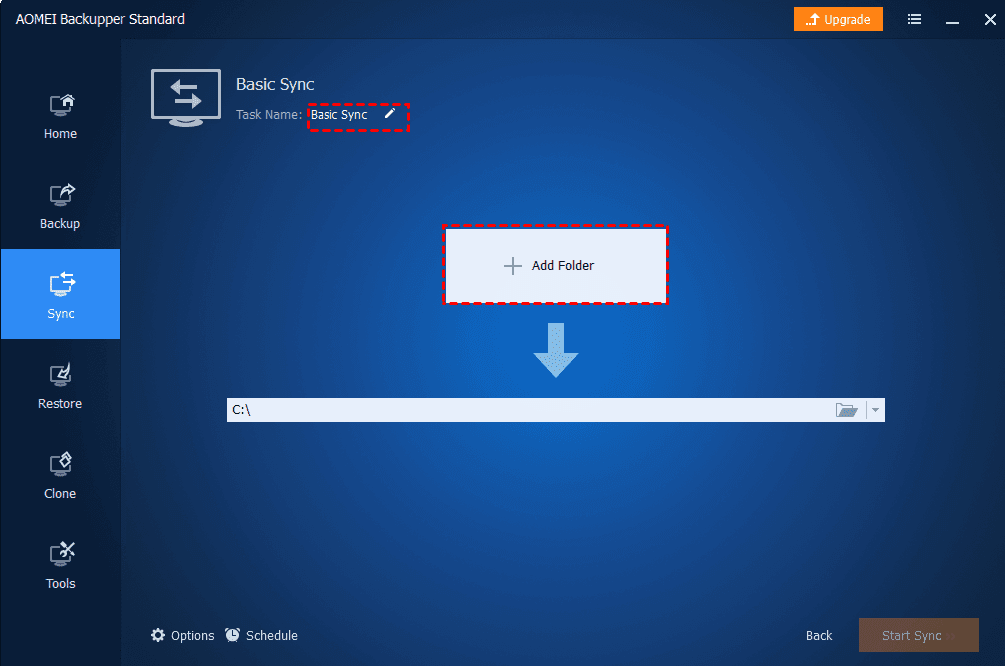
Step 2. Click Add Folder to select the local folders you want to transfer to the flash drive.
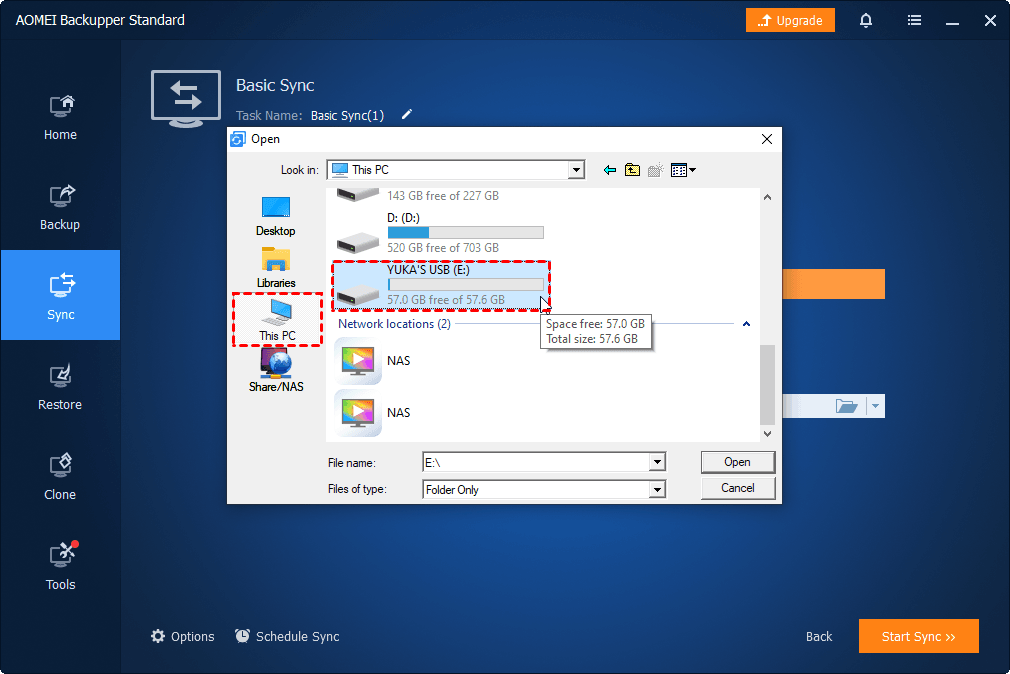
Step 3. Click the inverted triangle at the right edge of the second bar and select the USB flash drive as the destination location.
Step 4. Confirm your operations and click Start Sync to transfer files to a flash drive easily.
Notes:
- Options: You can write comments for your sync tasks as well as set the email notification.
- Schedule: It can help you to automatically sync your files, and you can set the intervals as Daily, Weekly, Monthly, Event trigger and USB plug in. The last two are available in the professional version.
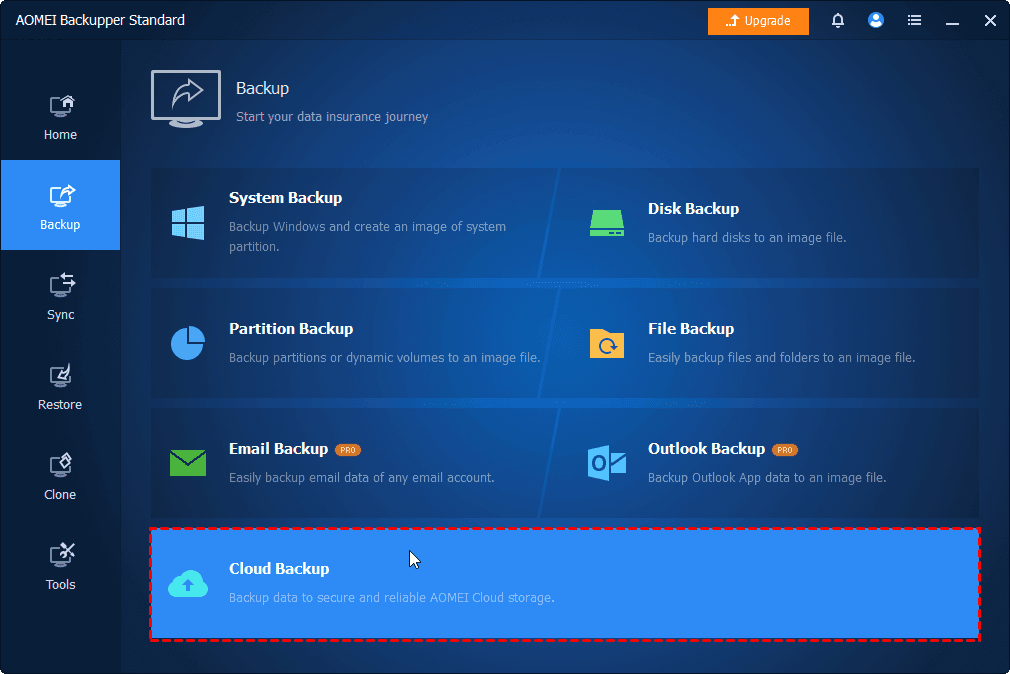
★ How to backup files to AOMEI Cloud
If you want to create a backup for your important files, you could consider using AOMEI Cloud. Compared to a USB drive, a cloud drive is less subject to getting lost or infected. Just click Backup > Cloud Backup to make it.
Method 2. Copy and Paste
The second method of transferring files to a flash drive is through copy and paste. There are two common ways to copy and paste, one is to copy and paste by right-clicking on the file, and the other is to copy and paste using keyboard shortcuts.
Copy and paste by right-clicking on the file
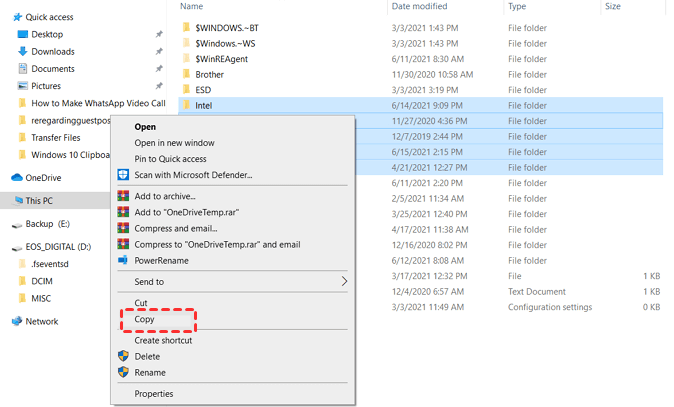
Step 1. Insert the flash drive into an available USB port (or other compatible ports). Press Win+E to open Windows Explorer and navigate to the location where you want to copy files.
Step 2. Using the left-click, select the files you want to copy. You can also use Ctrl+ Left-click to select files if you don't want to select all files in a row.
Step 3. When you finish, right-click and select Copy from the options. Next, go to the Flash Drive visible in Windows Explorer.
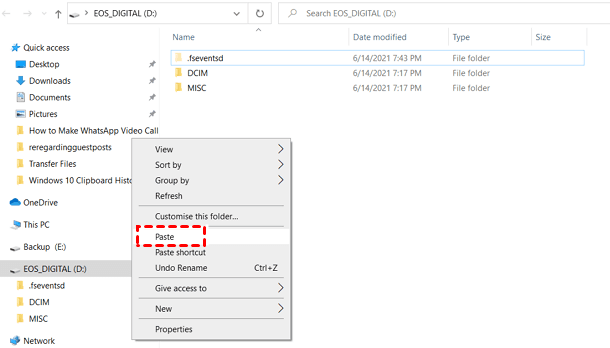
Step 4. Double click on the Flash drive to open it, then right-click on any empty area and choose Paste.
Copy and paste using keyboard shortcuts
Step 1. Find the files that you want to copy.
Step 2. Use Tab to highlight the first folder or file, and then use shift to select the files. Once done, press Ctrl + C to copy all of them.
Step 3: Open Windows Explorer using Win + E and then the flash drive. Navigate to the location where you want to store the files, and then press Ctrl + V.
Method 3. Drag and Drop
The third method is to transfer files to a flash drive by dragging and dropping them. This method is also very easy when you only need to transfer a small number of files to a flash drive.
Step 1. Plug the flash drive into an available USB port and make sure it is recognized by your computer.
Step 2. Open Windows Explorer and open the flash drive and then the file location you want to copy. Both should be in two separate windows. Use Win + Left (⬅) and Win + Right (➡) to set the two windows side-by-side.
Step 3. Select the file you want to copy and keep the left click, drag the file and drop it to the window where the flash drive is located and release the left click. At this point, you will see the copy progress of the dragged and dropped file.
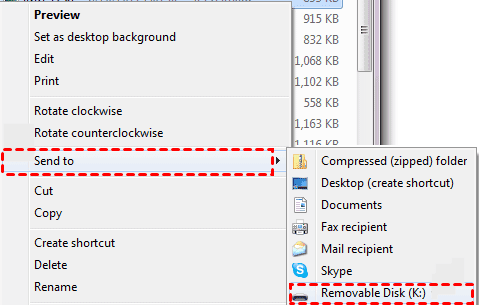
Method 4. Use the Send to Feature
The last method is to use the "Send to" option to transfer files to a flash drive. This feature has existed for a long time and allows you to send files to Bluetooth, email, a flash drive, etc. You can follow the steps below.
Step 1. Press Win+E to open Windows Explorer and navigate to the file location you want to copy.
Step 2. Select the files using drag and drop with the mouse to select the files in a row or use Shift + Left click to select individual files.
Step 3. Right-click and select “Send to”, and then select the USB drive. The files will be copied to the root folder of the USB drive.
Summary
This article introduces the reason for transferring files to a flash drive and how to transfer files to a flash drive. If you only need to transfer a small number of files, you can choose to use Copy & Paste, Drag & Drop or the Sent to feature.
If you want to transfer multiple files at once easily or transfer large files, then you can use the free file sync software AOMEI Backupper Standard to help you. It can not only transfer multiple files in batch, but you can set different frequencies to transfer files to a USB flash drive regularly. It also supports multiple Windows operating systems.
Besides, it is an excellent backup software that provides System Backup, Disk Backup, Partition Backup and File Backup functions. If you want to backup files to an external hard drive, it can easily help you achieve the goal. You can download this software to discover more useful features.

