4 Ways: How to Move Files to External Hard Drive without Copying
Here are the top 4 ways to transfer files from PC to external hard drive without manually coping-pasting job, thus saving your time and efforts.
By Maggie Updated on December 15, 2023
User case: Move files to external hard drive rather than copy
I regularly move files from my desktop (C:) to my external hard drive (D:). However, when I drag files into my D: drive it copies it instead of moving it. Is there a way to change this?
Some background info:
-My C: is a SSD
-My D: is a NTFS formatted external HDD
- Question from {{Microsoft Community}}
Likely, users try to save their files to external hard drives for various reasons. How to move apps/files to external hard drive Windows 10? In this article, we have 4 proven efficient ways.
Why do you choose move files to external hard drive?
Transferring files to external devices is a crucial step in safeguarding your essential data against potential computer crashes, hard drive failures, or virus infections. This process not only ensures the security of your files but also provides convenient access to them whenever needed. Moreover, storing files on an external hard drive offers the flexibility to delete the originals after successful transfer, thereby freeing up valuable storage space for additional content.
While the conventional method of copy and paste is widely used, customer feedback suggests that it may lead to unnecessary duplicates on the computer and, at times, result in data loss. In response to these concerns, users are actively seeking more efficient alternatives. This article tells how to move files to external hard drive without copying.
How to move all files to external hard drive
In response to users demands on how to move files to external hard drive windows 10/11, we have diverse ways to do so as below:
Way 1. Auto transfer via AOMEI Backupper Standard
AOMEI Backupper Standard stands out as best free file sync software specifically design for Windows 11/10/8/7/XP/Vista. Its Basic Sync feature empowers users to seamlessly synchronize folders between different drives, such as from C drive to D drive or between distinct folders like from an internal disk to an external disk, extending to PC-to-PC synchronization and more.
☎ In addition to sync from local to external drive, you can also sync folders to OneDrive, Google Drive, Dropbox, , USB flash drive, NAS, over network etc.
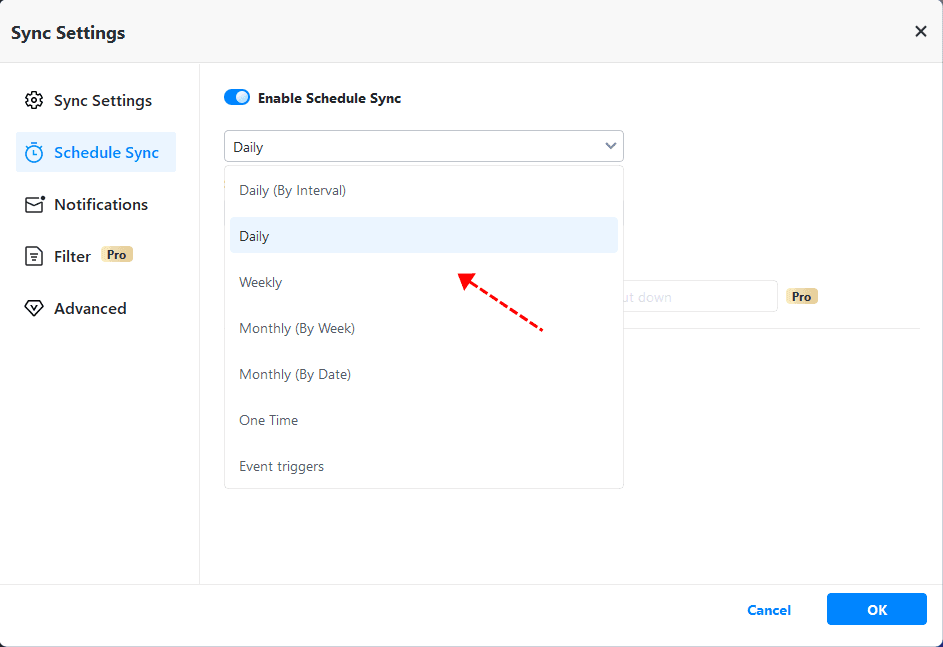
☎ You could set up a sync schedule to run the sync task automatically, like Daily/Weekly/Monthly/etc.
☎ Apart from Basic Sync, it offers more advanced sync options in the pro version: Two-Way Sync, Real-time Sync and Mirror Sync.
Now download this software and install it on your PC:
Best free Windows sync software for personal use.
Step 1. Navigate to the "Sync" tab and choose "Basic Sync."

Step 2. Click on "Add Folder" to explore files and folders within the local drive.

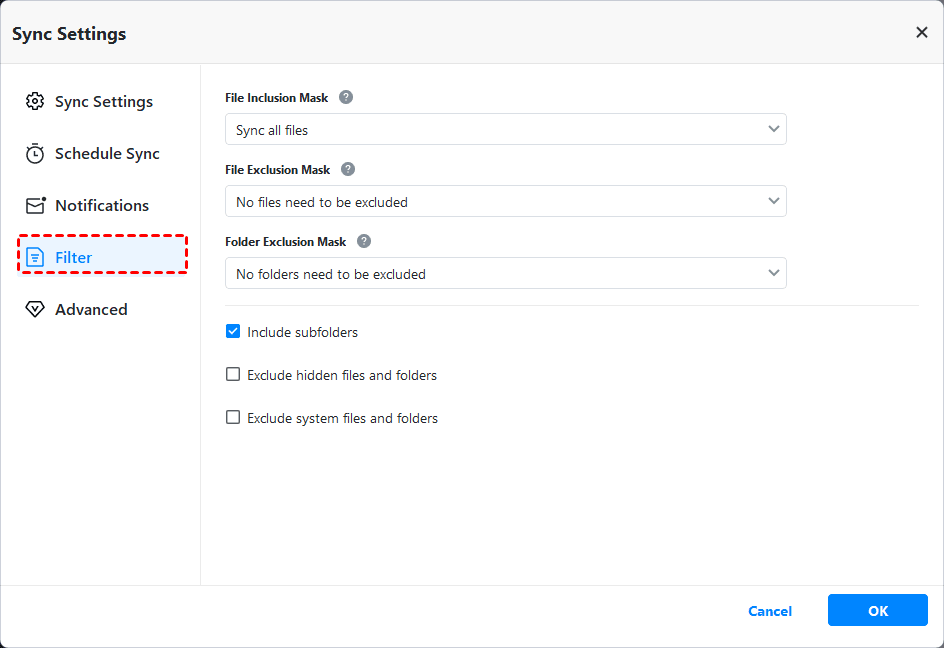
☞Tip: If you prefer not to transfer all files, you can utilize the "Filter Settings" feature (available in AOMEI Backupper Professional) to selectively exclude or include specific file types from the chosen folders.
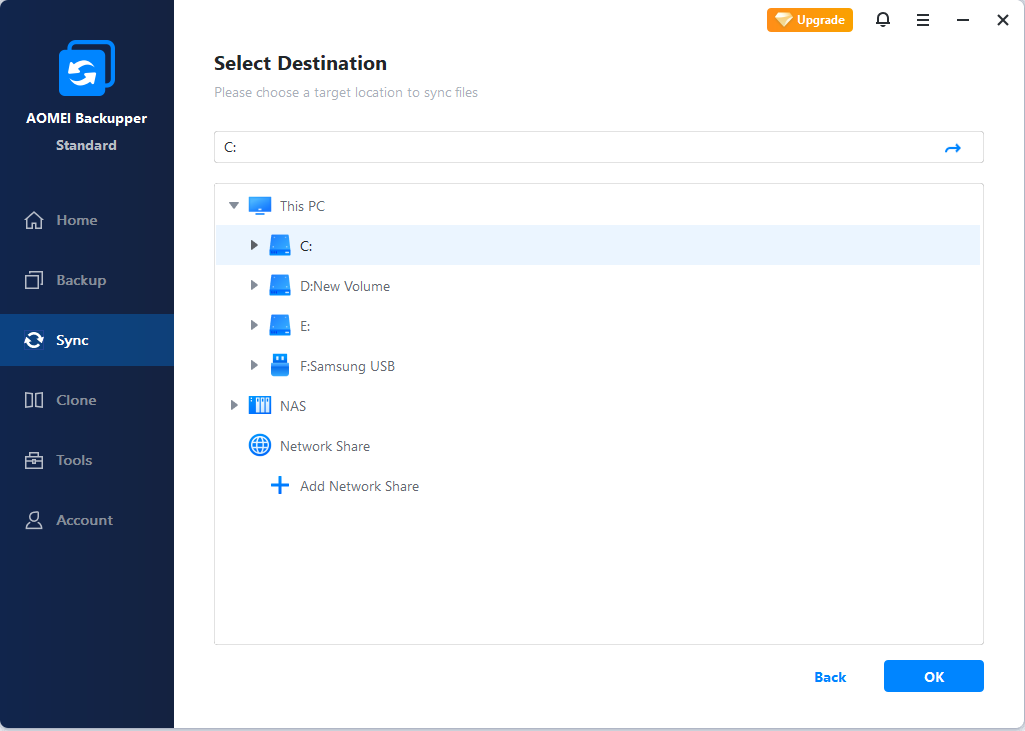
Step 3. In the second box, navigate and select external drive as the destination path.
Step 4. (Optional) You can click on the “Schedule Sync” at the bottom to enable auto sync.
Step 5. Subsequently, click "Start Sync" to initiate the process of moving files from the local drive to the external drive.
Way 2. Move Files to External Hard Drive Using File History
If you give up to rely on third-party software, Windows offers a built-in solution called File History. By default, File History backs up all files from Windows libraries, encompassing desktop, contacts, documents, downloads, favorites, links, music, OneDrive, photographs, saved games, searches, videos, and more. Consequently, users need to manually select specific files for backup and choose an external hard drive as the destination.
Here's a step-by-step guide on using File History to transfer files to an external hard disk. Ensure the external hard drive can be detected properly.
Step 1. Click “Start”, type backup in the search box and select it.
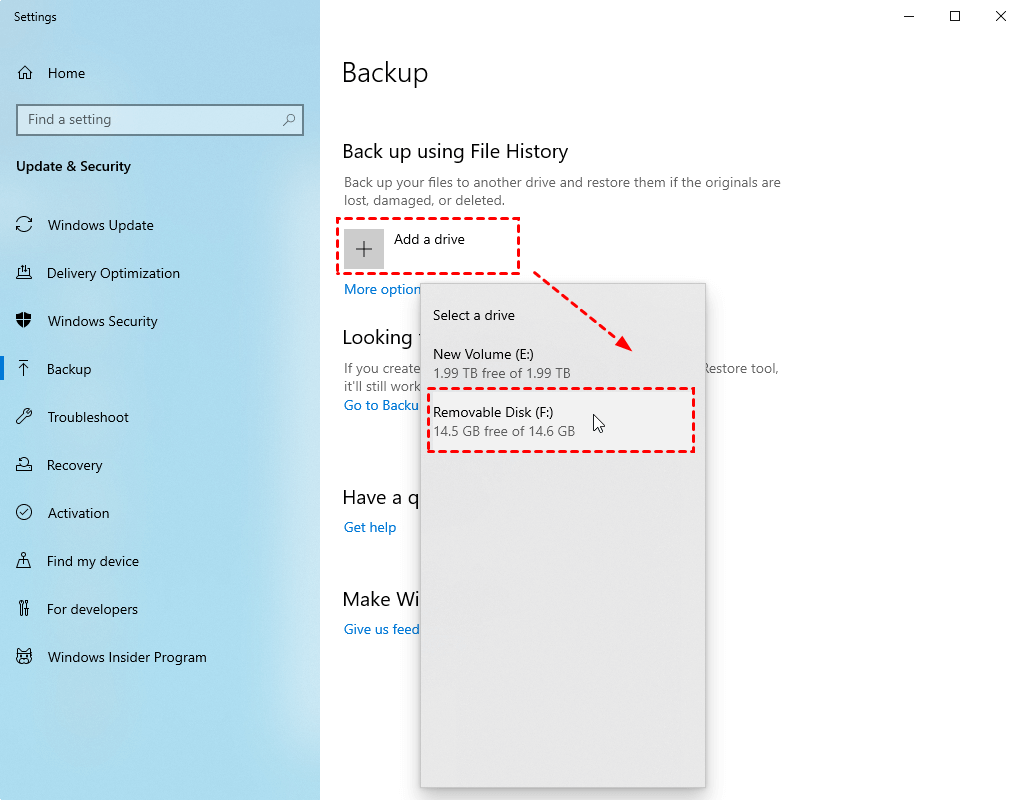
Step 2. Click "Add a drive" and select the external drive. Then, it will turn on the slide button under “Automatically back up my files” link.
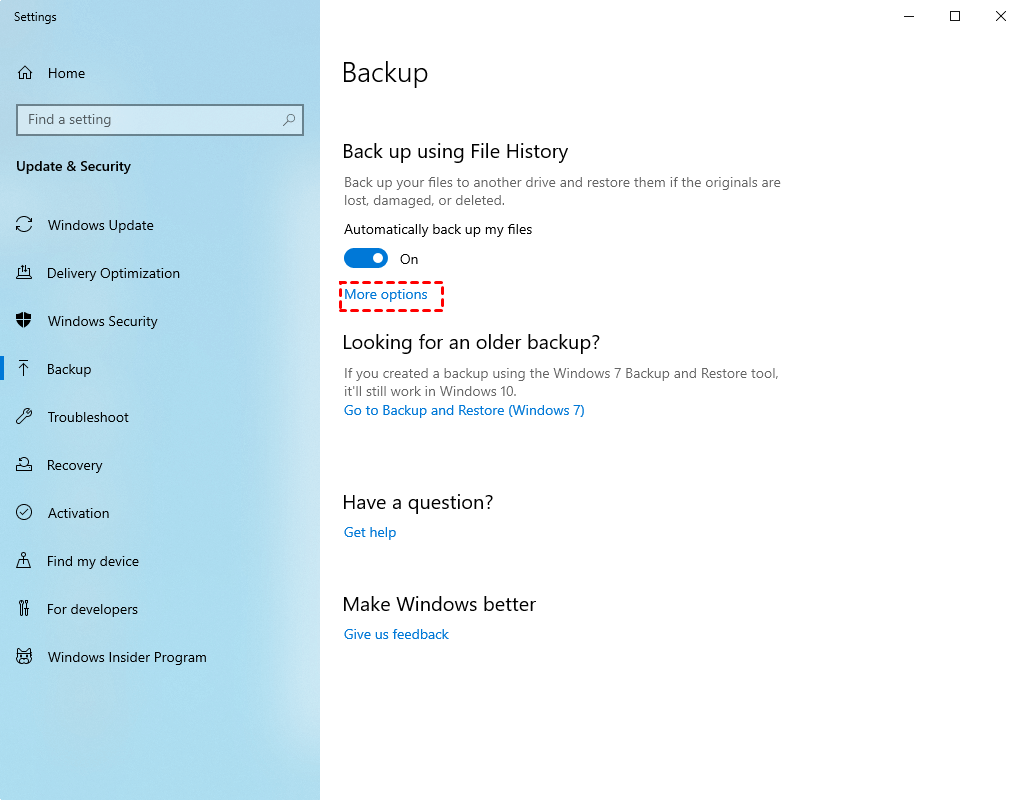
Step 3. Click “More options” to set up backup settings. Scroll down to “Back up my files”, “Keep my backups”, “Exclude these folders” and select any setting you like. After that, go back to the top of backup options and click “Back up now” to sync your files immediately.
Way 3. Copy files from local drive to external drive via the Move feature
Step 1. Open Windows Explorer by pressing Windows + E.
Step 2. Locate the files or folders you intend to move, right-click on them, and choose "Properties" from the context menu.
Step 3. Navigate to the "Location" tab and click on the "Move" option.
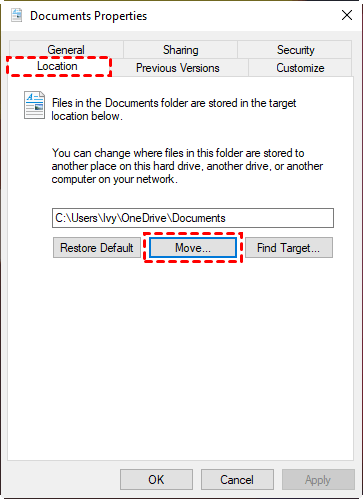
Step 4. Choose the destination where you wish to store your files or folders, then click "Apply" and confirm your selection.
Way 4. Move Files to External Hard Drive via Backup and Restore
If you're looking for a backup utility that specializes in creating system images and includes a file backup feature for transferring files to an external hard drive, the Backup and Restore tool can assist you. Although the procedure involves multiple steps, it's a reliable option for successful file transfers. Here's how to use Backup and Restore
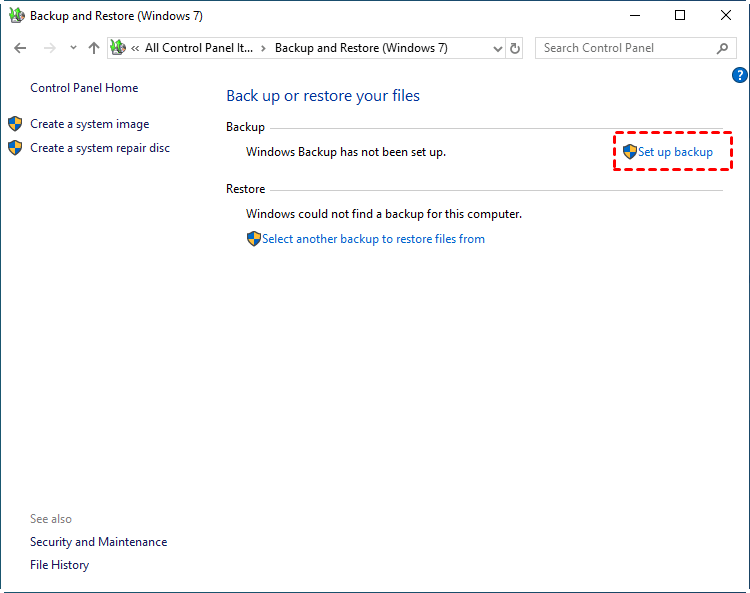
Step 1. Go to the Control Panel and find "Backup and Restore."
Step 2. Tap "Set up backup" and wait for the pop-up window to complete the process.
Step 3. Choose the external hard drive as the destination disk.
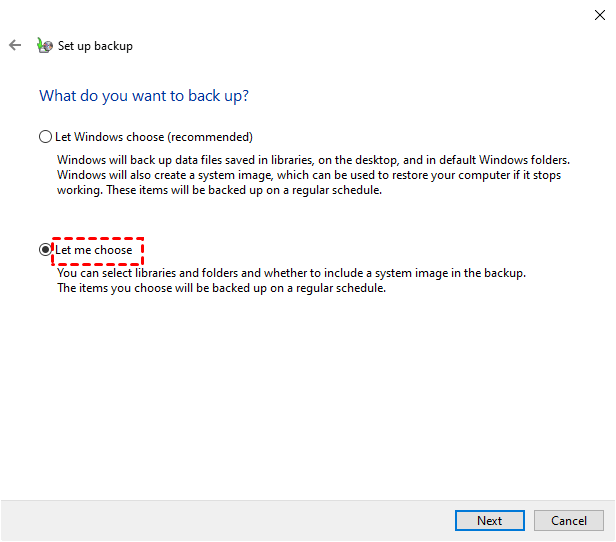
Step 4. When selecting the folder to back up, check the "Let me choose" option, then click “Next”.
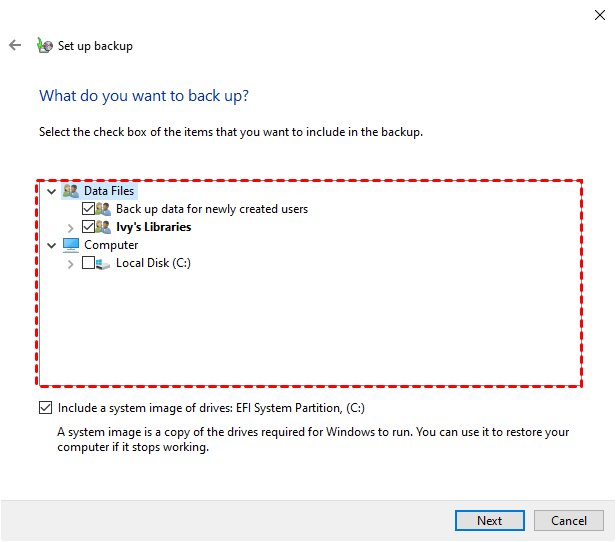
Step 5. Pick the specific folder or file you want to set up backup for and click Next.
Step 6. While reviewing your backup settings, click "Change schedule" to customize your scheduled backup based on your preferences.
Step 7. Click OK to start your first backup process. Subsequently, your PC will automatically back up files to the external hard drive at the scheduled frequency.
To sum up
This post tells 4 ways how to move files to external hard drive: AOMEI Backupper Standard, File History, built-in Move feature and Backup and Restore function.
All 4 approaches offer efficient file backups to an external hard drive while preserving the integrity of the original files. Among these options, AOMEI Backupper Standard is highly recommended due to its user-friendly interface and easy-to-use operation. Now determine which means by yourself!