Grsync in Windows | Setup and Alternative
All things of Grsync in Windows are here. If you are interested in Grsync and its alternative, let’s get started to read!
By Maggie Updated on November 29, 2023
About Grsync
Grsync, or Rsync Gui Windows 10/11 serves as a graphical user interface for Rsync, a widely utilized differential backup and file synchronization tool in Unix-like operating systems. Developed with the GTK widget toolkit and licensed under the GNU General Public License like Rsync, Grsync simplifies the complexities of Rsync's command-line arguments.
Rsync, a powerful command-line tool for file synchronization in Linux systems, supports local folder backups, SSH tunneling, and delta-only synchronization. While rsync efficiently handles synchronization by transferring only modified parts, its command-line interface may be challenging for users unfamiliar with it.
Grsync Windows bridges this gap by offering a user-friendly graphical interface. It allows users to configure source and destination directories, synchronization options, and more, all through an intuitive graphical interface, eliminating the need to input Rsync's command-line parameters directly. With GTK-3 compatibility since version 1.3.0, Grsync makes Rsync more accessible and user-friendly, catering to those who prefer a visual approach for file synchronization and backup management.
Install Grsync in Linux
Grsync for Windows is readily available for installation on various Linux operating systems. Here are commands for popular distributions:
Arch Linux (and variants like EndeavourOS, Manjaro):
$ sudo pacman -S grsync
or if using an AUR helper like Paru or Yay:
$ paru -S grsync
or
$ yay -S grsync
Debian, Ubuntu, Linux Mint, Pop_OS!:
$ sudo apt install grsync
Fedora:
$ sudo dnf install grsync
openSUSE:
$ sudo zypper install grsync
You can also choose to install Grsync from the source. Visit the official Grsync download page, obtain the latest tar file, and compile and install it using the standard source installation commands like ./configure && make. Note that you may need to have gtk and autotools installed for compiling Grsync from source. Refer to the Grsync website for further details.
How to sync files and folders from local system to remote system
Here is a guide on how to synchronize or transfer files/folders from one system to another using Grsync.
For this example, we will use two Linux systems:
Local system:
- OS: Fedora 34 desktop
- Source directory: /home/sk/Downloads/Ostechnix/
Remote system:
- OS: AlmaLinux 8 server
- User: ostechnix
- IP address: `192.168.122.143/24`
- Destination directory: `/home/ostechnix/Backup/`
Here are the steps:
1. Open Grsync.
2. Create a new session by clicking on the plus (+) sign in the toolbar at the top right corner. You can also do this from Menu -> Sessions -> Add or press Alt+A.
3. Name your new session, for example Remote sync.
Now, you're ready to set up the synchronization:
4. In the Source field, enter the path of the source directory on the local system: /home/sk/Downloads/Ostechnix/
5. In the Destination field, enter the details for the remote system: [email protected]:/home/ostechnix/Backup/
- You might need to provide the password for the ostechnix user on the remote system.
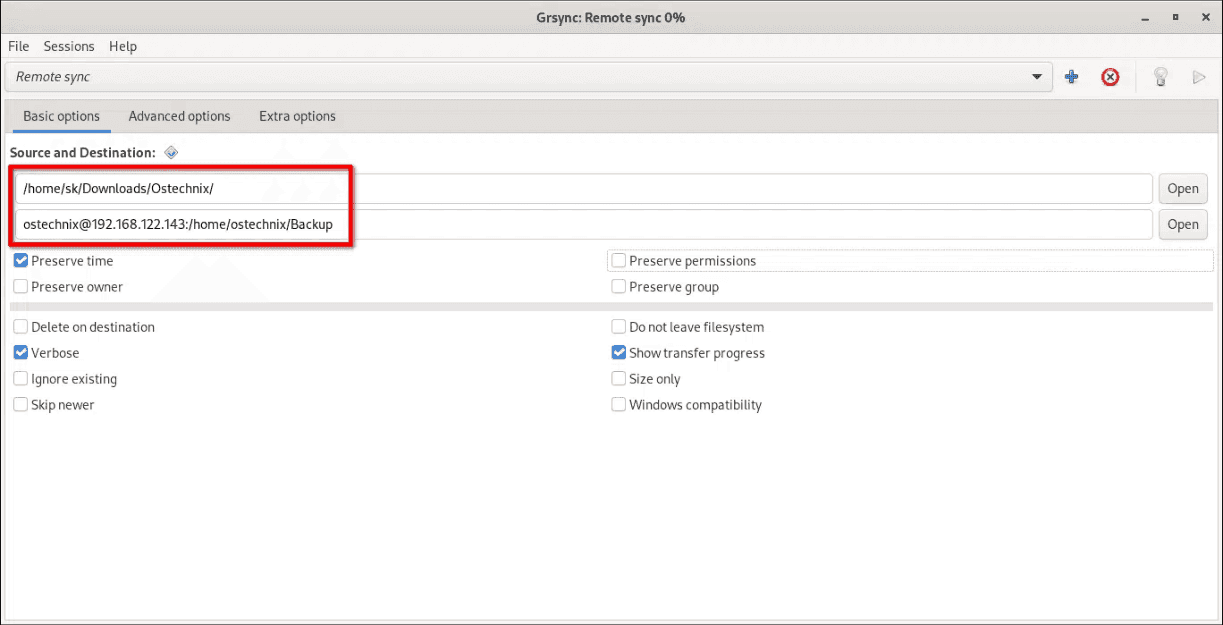
6. Configure any additional options or filters as needed.
7. Save your session configuration.
Now, you can run the synchronization by clicking the "Execute" button. Grsync will transfer files/folders from the source directory on the local system to the destination directory on the remote system.
Best Grsync alternative in Windows
As mentioned earlier, installing Grsync on Windows 10 can be challenging, even with a simplified method. If you're willing to explore Grsync Windows alternatives and avoid the complexities, consider using a Windows-based program. It might be a more convenient solution, saving you from unnecessary difficulties.
✍ Legacy Backup and Restore Utility: The traditional Backup and Restore utility follows a slow and error-prone process, lacking flexibility in data backup options.
✍ File History: While File History offers a simple setup for automatic folder backups, it has limitations on supported storage locations. In Windows 11, you're unable to add personal folders.
✍ AOMEI Backupper: A convenient tool with both Backup and Sync features, AOMEI Backupper allows you to choose source and target paths, including internal/external hard drives, network/NAS, cloud drives, and USB. This flexibility enables easy synchronization of local drives with network/cloud drives, NAS with cloud, NAS to NAS, and more.
From above, you see AOMEI Backupper is the best alternative to Grsync. You can also set up a schedule to auto run backup or sync task on a regular basis, and perform incremental or differential backup to copy only changed files. ( Differential backup is used in the Pro version)
Now download this software and install it on your computer. Here I will show you how to sync files via this tool:
Step 1. Launch the Grsync Windows alternative----AOMEI Backupper, switch to Sync tab and select Basic Sync.
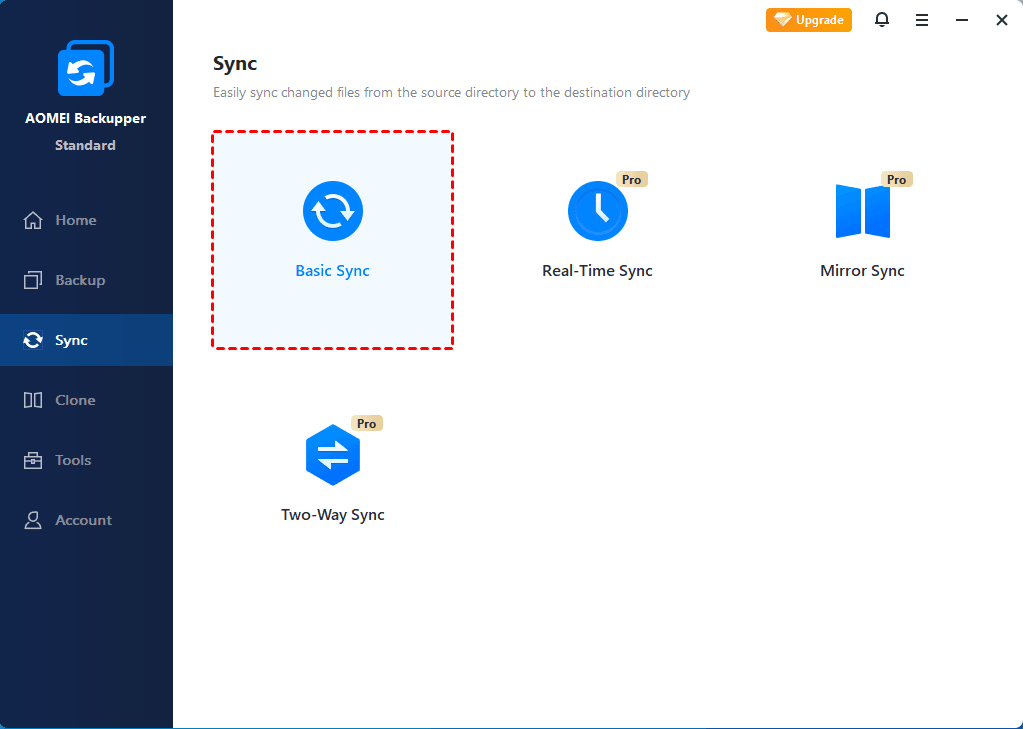
Advanced sync modes are available in the Professional+ edition:
☛ Real-Time Sync: Sync changed files from source directory to target directory in real-time.
☛ Mirror Sync: Always keep the files in source directory exactly same as target directory.
☛ Two-Way Sync: Any changes made to source or target directory will be synchronized to the other side.
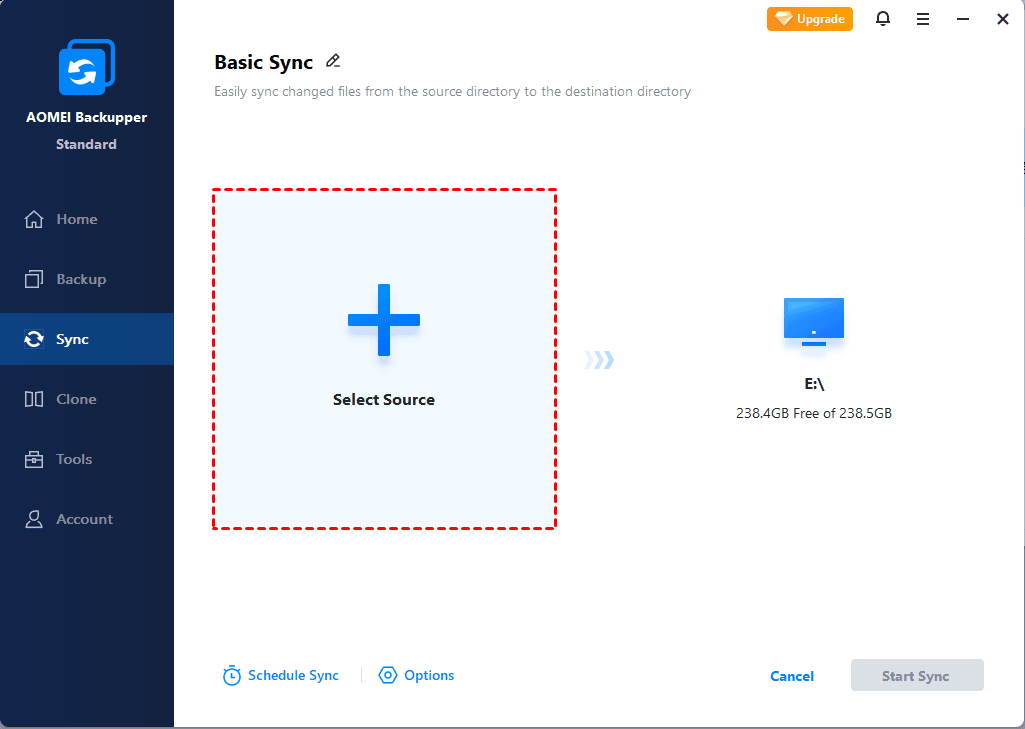
Step 2. Edit Task Name based on your needs. Click Add Folder to select the folder you want to sync. You can add multiple folders by repeating this step.
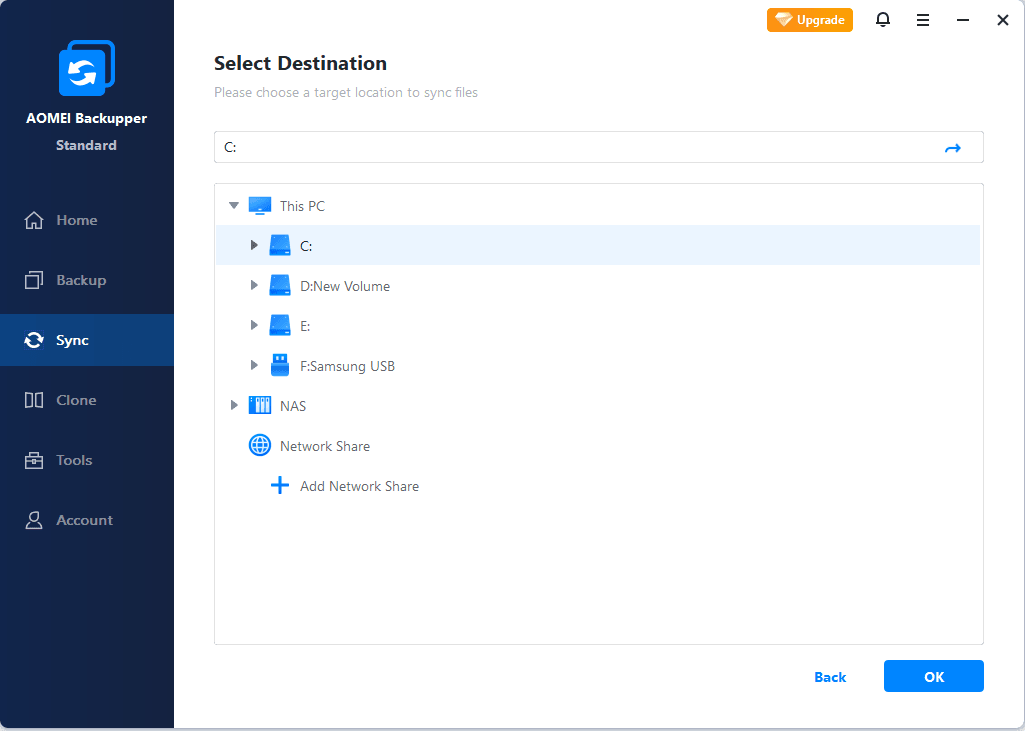
Step 3. Choose a destination path. Tick the triangle icon to choose Add Share or NAS Devices or Select a cloud drive accordingly.
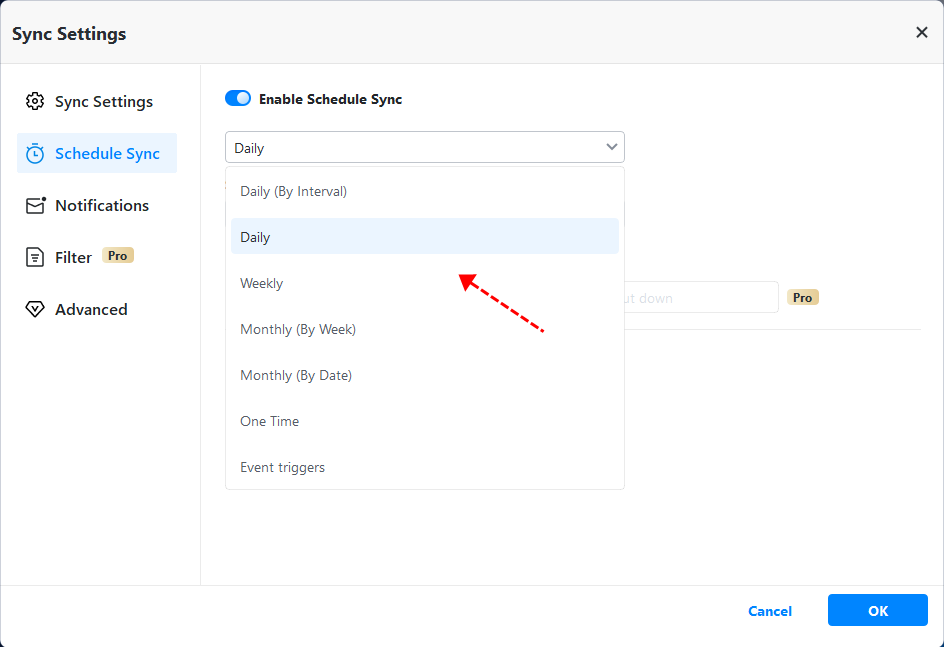
Step 4. (Optional) Click Schedule Sync to automatically execute the task based on daily, weekly, monthly, event-trigger and USB plug-in mode.
Step 5. Click Start Sync to start file synchronization.
Conclusion
Form this post we know that Grsync Windows is the graphical user interface for Rsync. And the whole process to install and use it is also presented here. If you find it implicated to do so, you can use another easier alternative AOMEI Backupper. This software is more comprehensive and user-friendly.
Apart from syncing files and folders, you can also backup your files and folders, disks and partitions, and the entire system to keep data safe.