Error 50:DISM Does Not Support Servicing Windows PE (5 Solutions)
Are you troubled by the error of “DISM does not support servicing Windows PE”? Read this article to learn the reasons and 5 repair solutions to fix it. Also, you can protect or repair system in a safer way.
by Ivy Updated on October 17, 2022
Troubled by the Error of DISM Does Not Support Servicing Windows PE
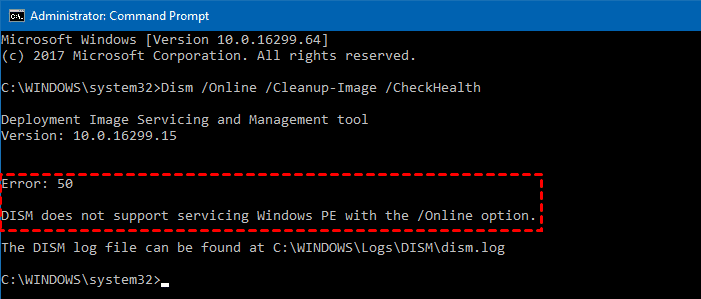
“When I try to run the following command from the recovery environment command prompt: dism.exe /online /cleanup-image /checkhealth, I only get an error message: Error 50: DISM does not support servicing Windows PE with the /Online option. Can anyone tell me how to solve this problem when the OS crashes?”
In fact, the "Error 50: DISM does not support servicing Windows PE with the /Online" option is not a real case. Not anxious now! We will introduce you to possible reasons and the corresponding 5 solutions in the next part. Please keep reading below to learn more.
Why does the “DISM does not support servicing Windows PE” Error Occur?
DISM is short for Deployment Image Servicing and Management (DISM.exe), which can help you service different Windows images with wim, vhd, vhdx formats, check the integrity of the operating system and repair corrupted or modified files, etc.
So many users may use it to repair errors such as system crashes, but sometimes you may receive the Error 50: DISM does not support servicing Windows PE with the following command.
- Dism /Online /Cleanup-Image /CheckHealth
- Dism /Online /Cleanup-Image /ScanHealth
- Dism /Online /Cleanup-Image /RestoreHealth
The reason for this error is that the DISM tool thinks you are running it on the recovery environment, not on a Windows system. Digging deeper, you can find this is caused by misplacing registry keys. Also, it is likely to be related a specific user.
How to Fix the Error of “DISM does not support Windows PE”
After understanding the reason for DISM Does not support Windows PE error, you can choose to delete it, refresh DISM, revert all the changes to the previous, create another user, etc. And there are 5 possible solutions in the following.
Solution 1. Delete the Related Windows PE Registry Key
The misplaced Registry Key is the direct cause of “DISM does not support servicing Windows PE” error. Therefore, you need to delete the associated Registry Key.
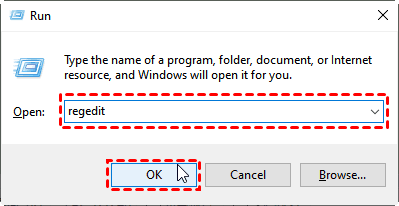
Step 1. Type regedit in the Run dialog and press Enter to run Registry Editor.
Step 2. Navigate to the following path. Find the MiniNT folder in the left window and right-click it. Then select Pemissions in the drop-down menu.
HKEY_LOCAL_MACHINE\SYSTEM\CurrentControlSet\Control

Step 3. Find and click on your UserName under the Group or user names list, check the Allow checkbox next to the Full Control option, and click OK.

Step 4. Now you can delete the MiniNT folder and restart your computer.
Solution 2. Refresh DISM
If this error still persists after deleting MiniNT registry key, the next move you can try is to refresh DISM. It helps you fix it by solving various minor software-related problems.
Step 1. Press Win + R keys together to open the Run dialog. Type cmd and press Ctrl+ Shift+ Enter together to run the Command Prompt as an administrator.
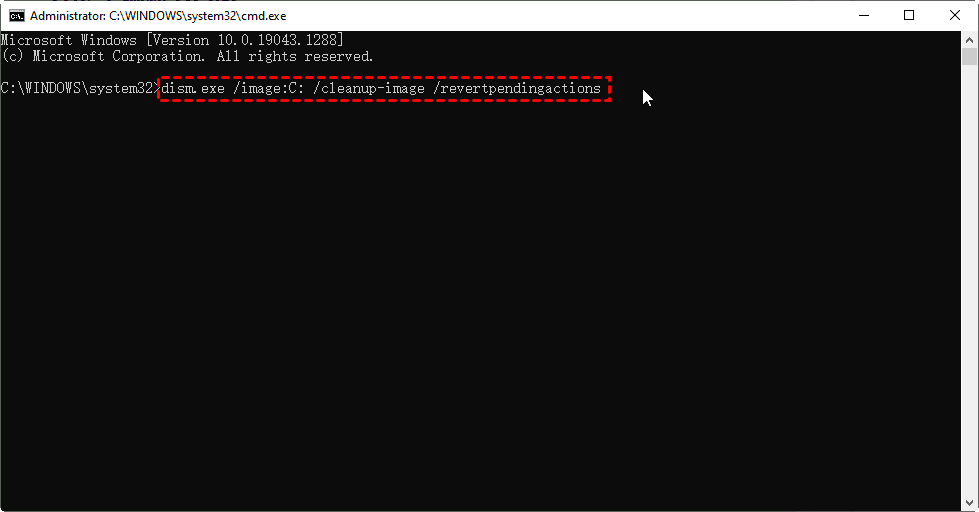
Step 2. Type the following command, and then press Enter to execute this order.
dism.exe /image:C: /cleanup-image /revertpendingactions
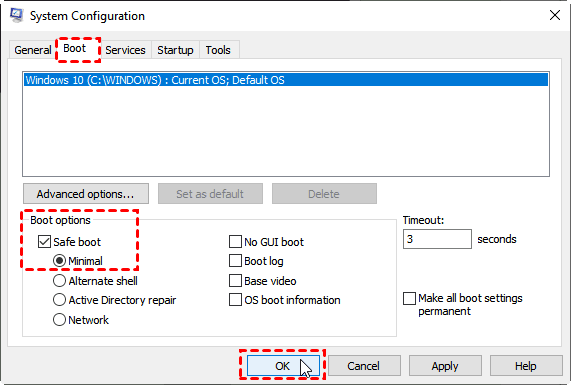
Step 3. Type msconfig in the Run dialog box and press Enter to start System Configuration.
Step 4. Switch to the Boot tab at the top of the window, check the Safe Boot option, and select Minimal. Then click OK to save the changes and exit. After restarting the computer, you will be in Safe Mode.
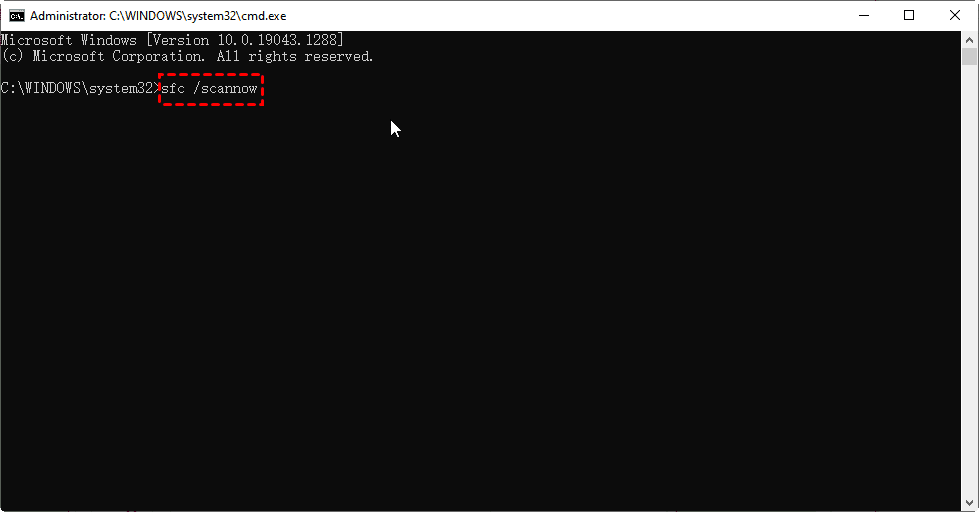
Step 5. In safe mode, refer to the above method to start the Command Prompt as administrator, type sfc /scannow and press Enter, and wait patiently for the command to complete.
Solution 3. Use the Command Prompt
When you run the Dism /Online /Cleanup-Image /RestoreHealth command, you may also get the DISM does not support servicing Windows PE error message. This is because there are problems with the /RestoreHealth parameters running the system. To fix them, you can run the command at the command prompt.
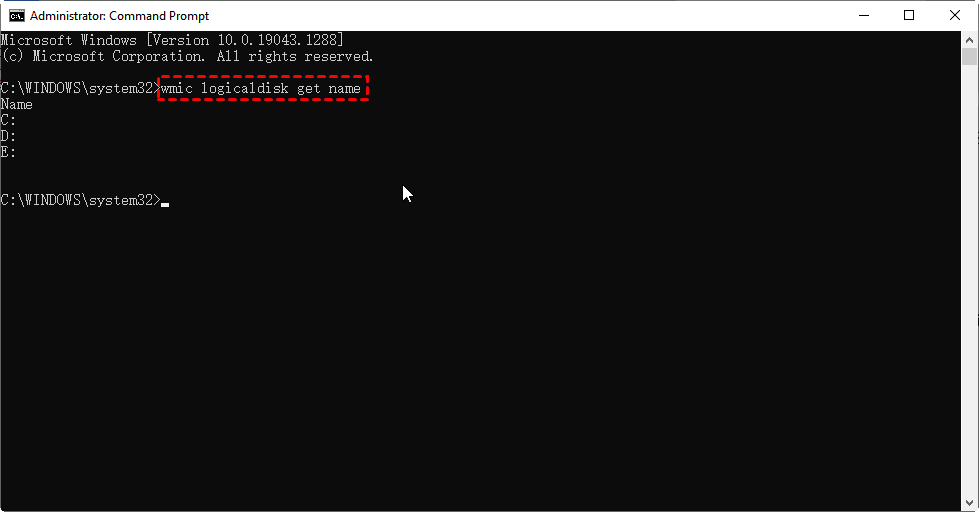
Step 1. Boot your computer from the Windows 10 installation disk and press Shift + F10 to open Command Prompt on the first installation screen. In the Windows RE Command Prompt window, enter wmic logicaldisk get name to get a list of all available system partitions.
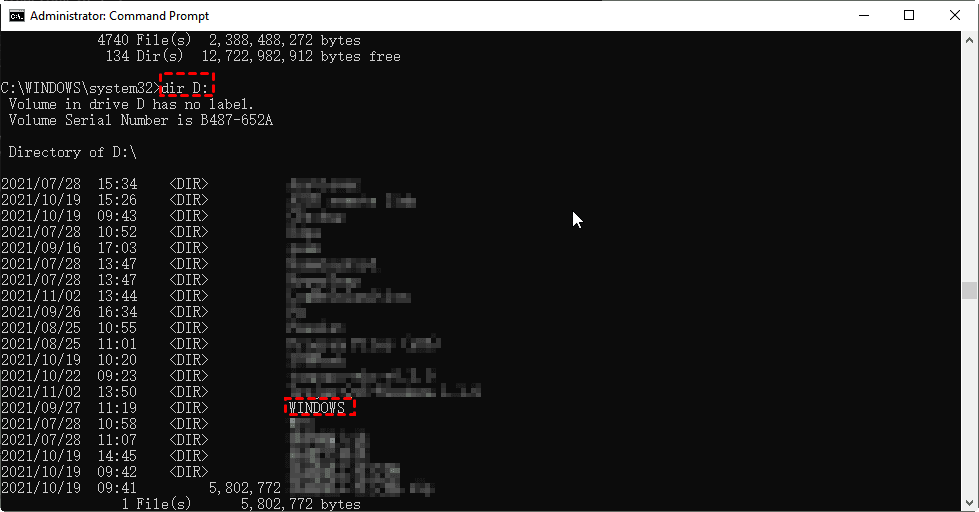
Step 2. Type dir drive-letter: to find the system partition containing the Windows folder, dir C:, for example. Please replace drive-letter with others if it is not. Here is D: drive.
Step 3. After locating the system partition containing the Windows folder, try DISM tool again. You need to replace /Online switch to Image: D, dism.exe /Image: D :\ /Cleanup-Image /Restorehealth, for example, to repair offline Windows images.
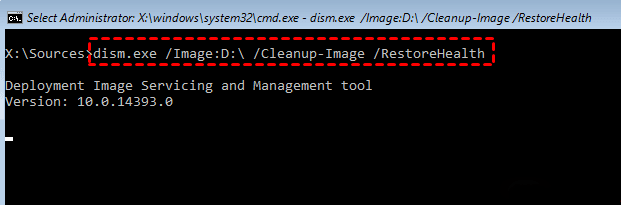
- ★Tips:
- The switch /Image: D: is the Windows image. Please replace the drive letter of the Windows image with yours.
- In addition, there is a space between \ / to ensure that the command is entered correctly.
- If you receive the error message "Error 0x800f081f", you should perform a repair upgrade. Click Next and follow the prompt until complete. Then, restart to saft mode and try the following command: DISM /Online /Cleanup-Image /RestoreHealth.
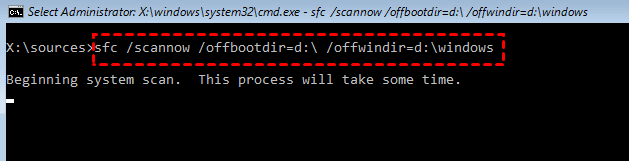
Step 4. Type the following command to complete the repair. Please remember to replace D with the disk letter of the Windows image.
SFC /SCANNOW /OFFBOOTDIR=D:\ /OFFWINDIR=D:\Windows
Solution 4. Reset BIOS
BIOS (Basic Input/Output System) is responsible for managing the flow of data between the operating system and external devices such as hard drives. Resetting the BIOS reboots the output/input system to the last saved configuration, which helps fix DISM does not support servicing Windows PE errors.
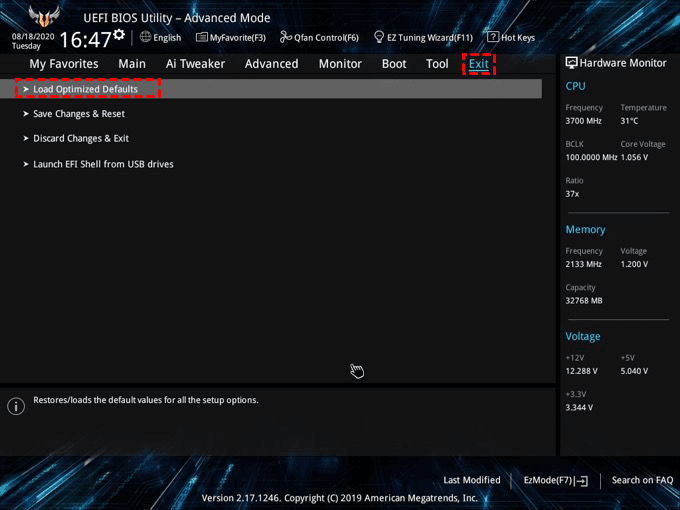
Enter the BIOS key and select the Exit entry, click on the Load Optimized Defaults. Please confirm to save the changes, and then restart your computer after the reset is complete.
Solution 5. Create Another User Account
In most cases, the DISM does not support servicing Windows PE error message is related to a specific user account. For this reason, you can create another user account and log in to your computer to avoid this error.
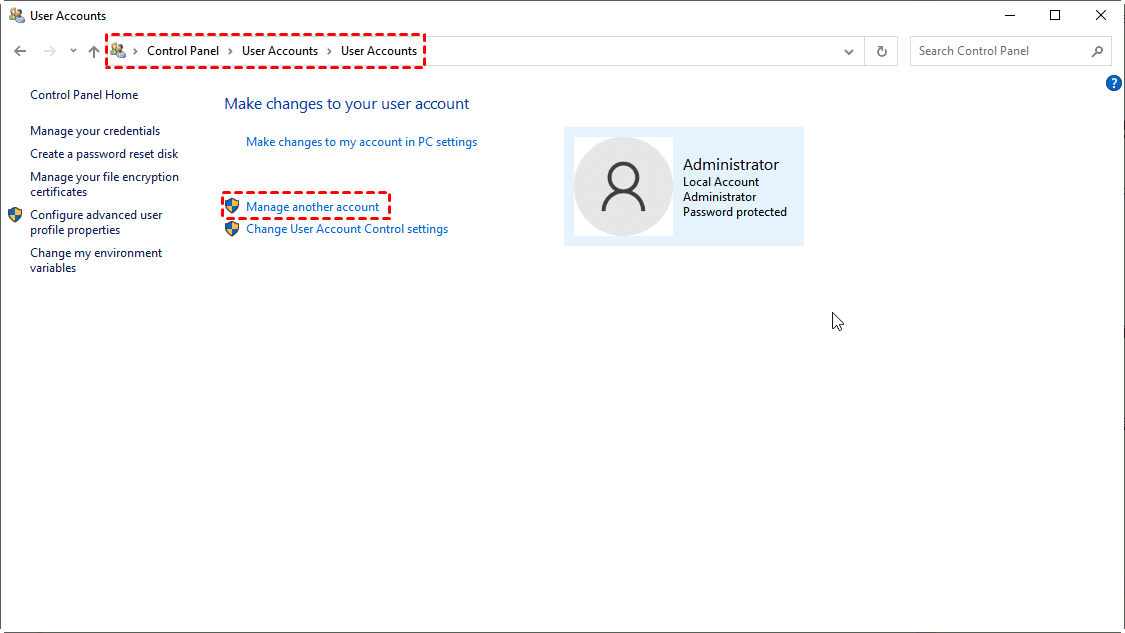
Step 1. Press Windows+R and then enter Control to open the Control Panel. Click User Accounts. Then click the Manage another account.
Step 2. Click Add a new user in PC Settings on the Manage Account page.

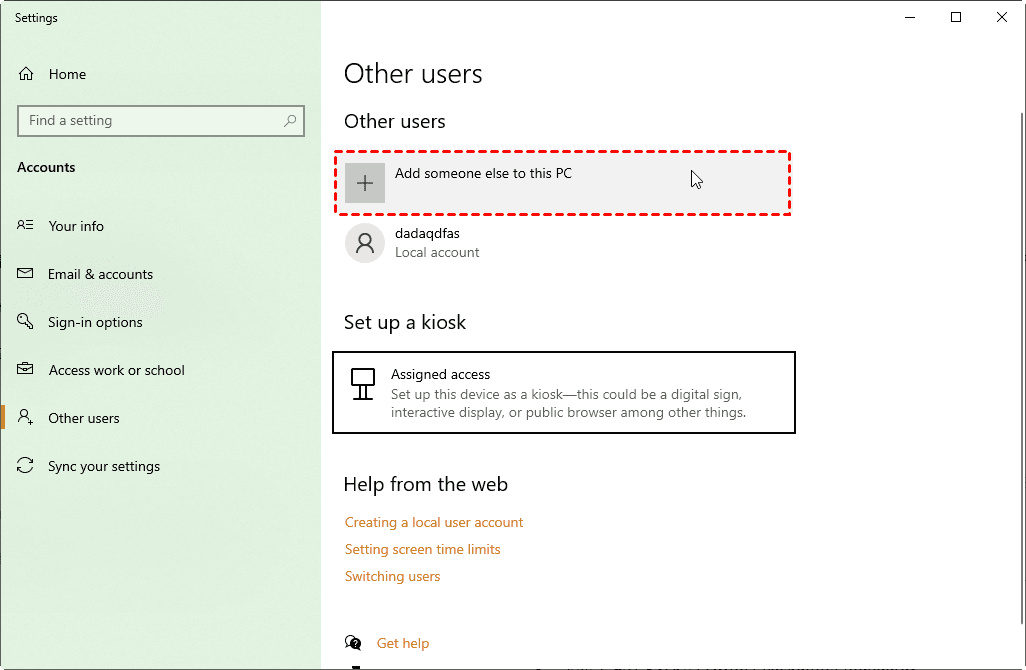
Step 3. Select Add someone else to this PC under the Other users category,
Step 4. In the left window, click Users and select the account described as a User account managed by the system. Then click More Actions in the right window, and click New User in the menu.
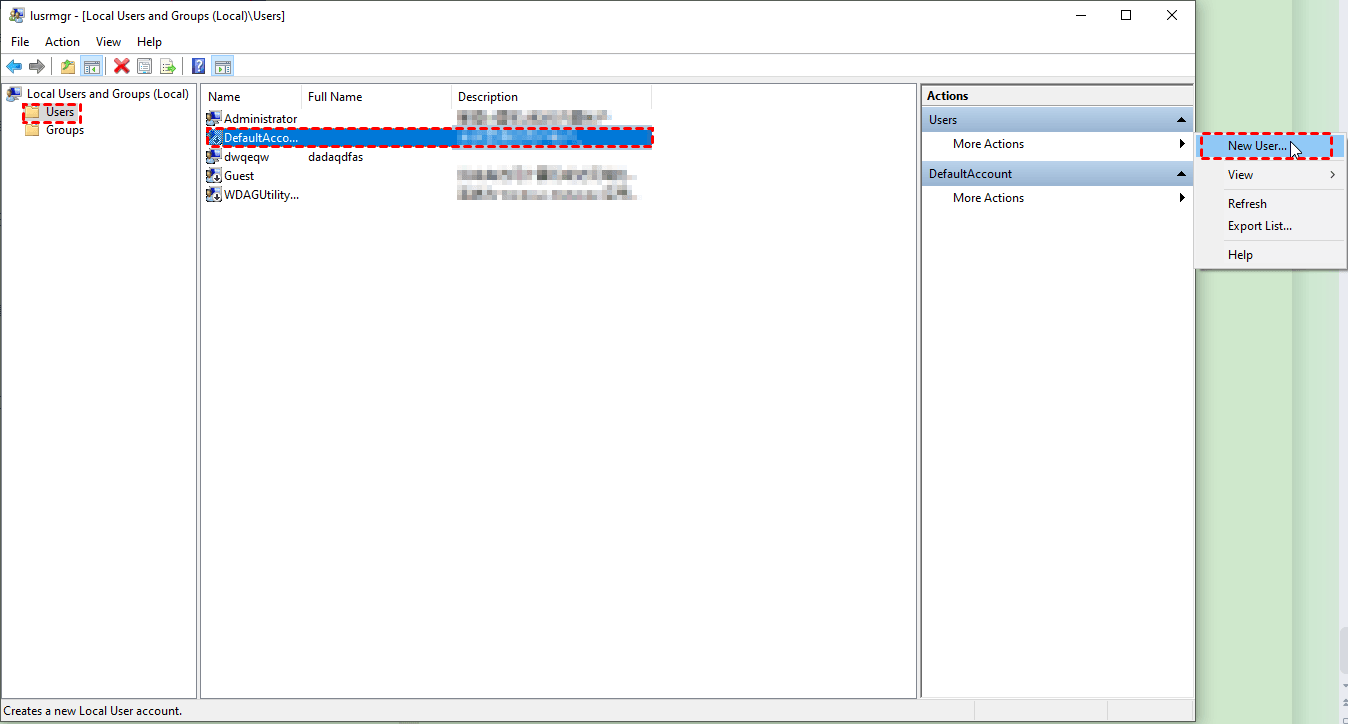
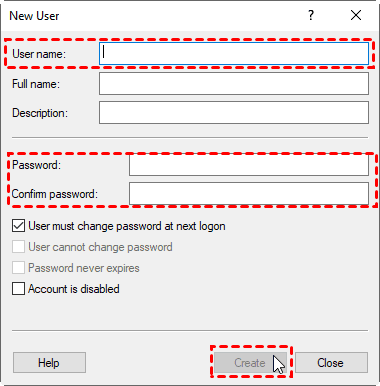
Step 5. In the pop-up window, fill in the User name, then Password and Confirm password, and click Create in the bottom right corner. Now you create another user account, and you can log the account on your computer.
A Safe and Reliable Way to Protect or Repair System
We hope you can solve the “DISM does not support servicing Windows PE” problem with 5 solutions above. But if not, or you want to protect it in a safer way, you could consider creating a system image in Windows 10 or 11. AOMEI Backupper Standard is a powerful free backup and recovery tool for Windows 11/10/8.1/8/7/Vista/XP.
With it, you can backup system, disk, partition or files and run it automatically with different schedule backup settings, thereby saving all the changes. And it helps you alleviate disk usage with different features, such as, normal compression, incremental backup, etc, even without human configuration.
Besides, there are special situations you may encounter. Please take precautions.
- If you are worried about your computer may fail or crash, you can choose to create a Windows PE bootable disk in advance.
- If you don't create a system image in advance, you can choose to create a backup image on another working computer and then restore the system to your computer with a dissimilar hardware feature. You need to upgrade to a professional version or higher before restoring.
Thus, we will introduce you to how to create a system image and bootable USB below. And then restore system to new computer.
Create a system image in Windows
Before creating system image, you need to prepare:
- An external drive like HDD or SSD, USB flash drive and be sure it's larger than or equal to system partition.
- Download and install AOMEI Backupper Standard for free and run it. If you are a server user, please try AOMEI Backupper Server.
Launch this software, click Backup and then System Backup. Then, you will be asked to select a destination path to save backup image. Set schedule backup settings (daily, weekly, monthly) to keep changes and click Start Backup.

Tips on how to make backup more efficiently:
- If you want to backup computer to USB flash drive, try the USB plug in feature in the Schedule Backup. It will automatically copy files to USB drive when it's connected.

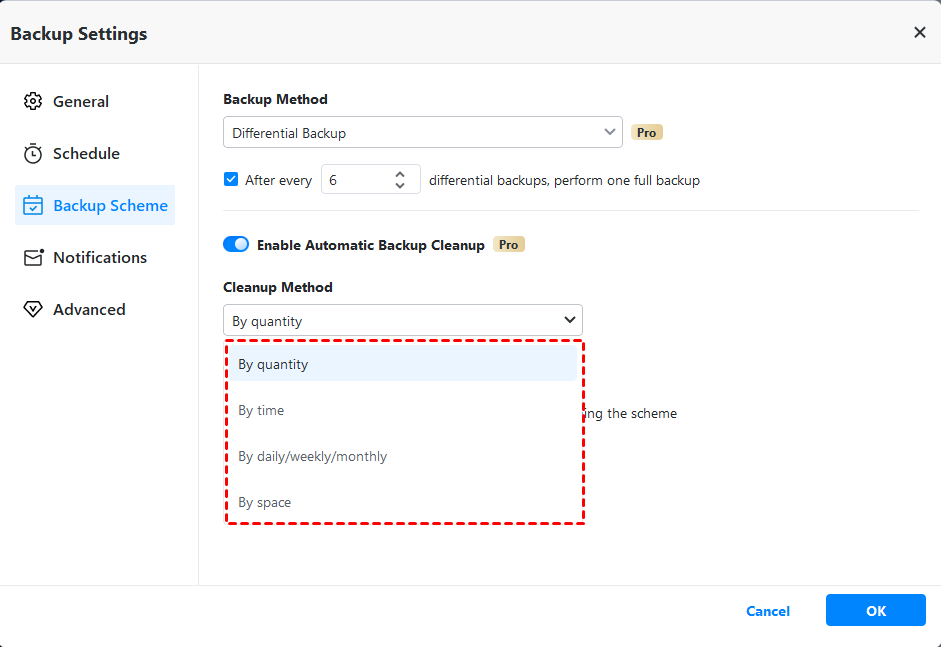
- To make backup image safer, it's suggested to use Differential Backup. Since all the differential backups are independent and do not affect each other, so missing any of them will not affect the restore process.
- To be sure your backup drive always have enough space for new backups, it's suggested to directly delete old backup with one of Automatic Backup Cleanup methods.
Create Windows PE Bootable Media
You need to prepare a USB flash drive (or CD/DVD), preferably larger than 16GB, and connect it to a well-functioning computer.
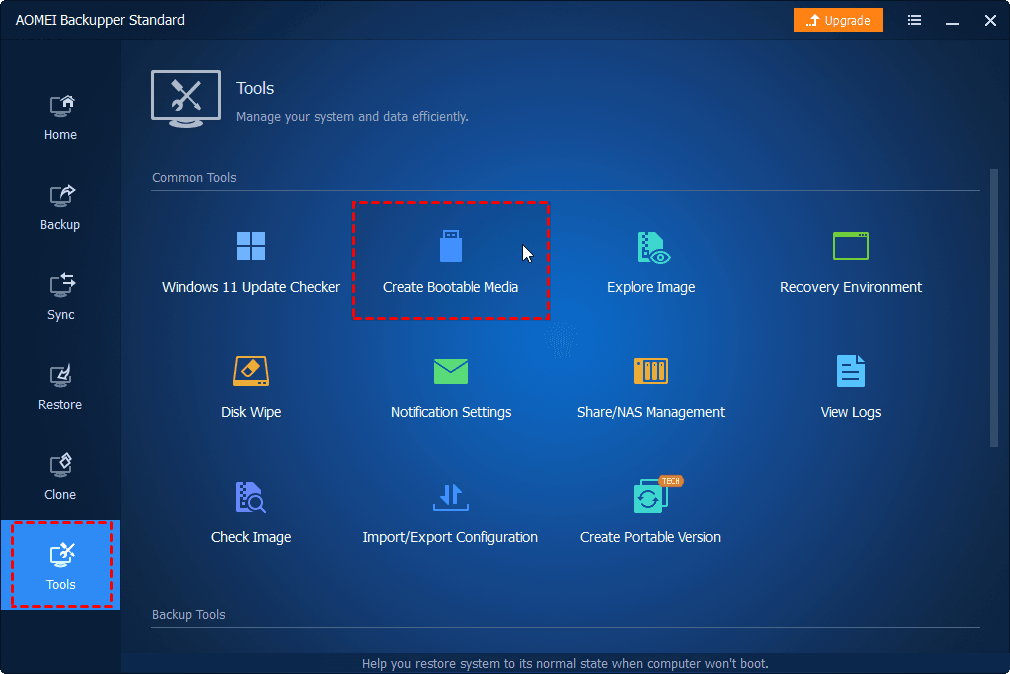
And then, switch to the Tools tab and select Create Bootable Media. Choose the bootable disc type (Windows PE or Linux), storage media (USB, CD/DVD or ISO file), and click Next.
- Note:✎...
- If your computer is Windows 7 and Windows 8 system, you need to download AIK or ADK).
Restore System to Previous Date
To restore system, whether on the same or different hardware, you need to be sure there is a valid backup image. If it is not bootable, you still need to prepare a bootable USB.
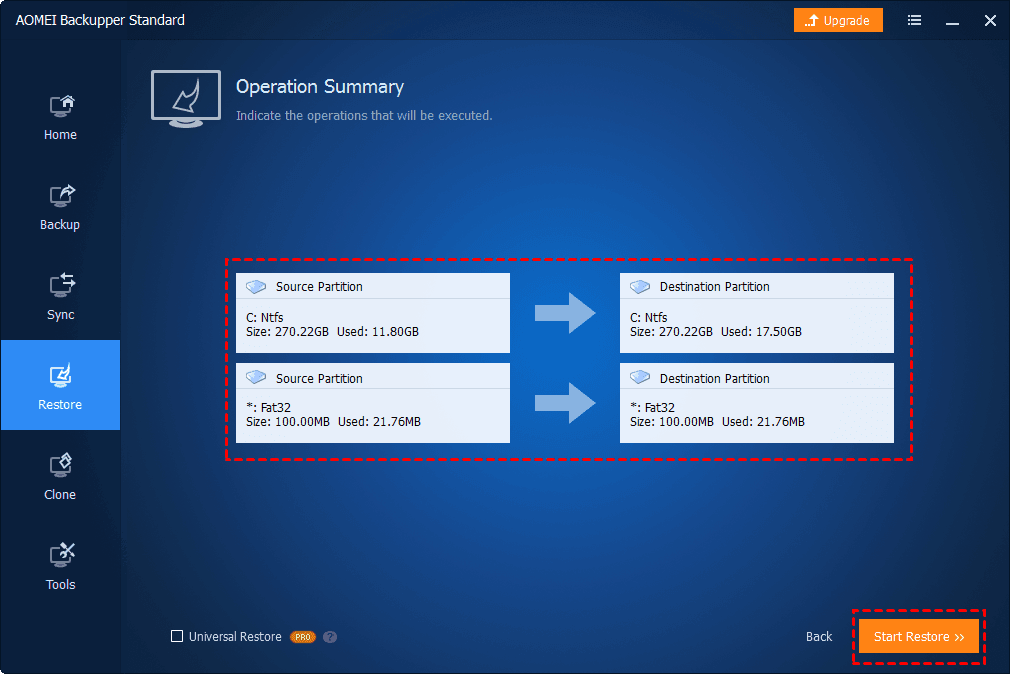
Switch to the Restore tab and click Select Task to find the system backup you created. And then, select the restore items (entire system or specific partitions) and new hard drive (if necessary), click Start Restore.
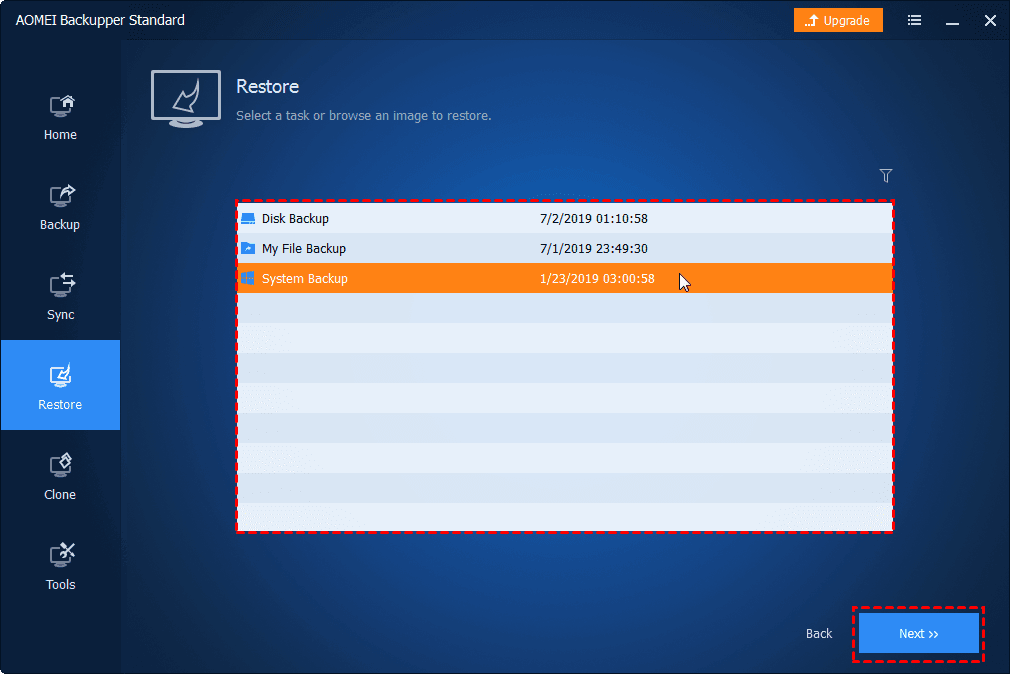
If you are restoring system to dissimilar hardware, please tick the Universal Restore feature before starting the restore. Note this feature is available on the professional version, you need to upgrade to the professional version or higher. And there is a 24 hour flash sale page for new users, up to 60% off.
If your computer fails, please modify the boot priority and boot from USB created by AOMEI Backupper. Insert the bootable disk into the crashed computer, start it and press a prompted key (eg: Dell, F11, F1, F2, etc) to access BIOS, set this drive as first boot option. And then, save changes and boot from it to restore system to previous date.

- Notes:✎...
- You can choose to schedule automatic backups, each of which generates an image at a given point in time. So there may be multiple backup points to choose from.
- When restoring the system, the target disc or partition will be completely overwritten. If the target disc or partition contains any sensitive data, you can use the File Backup function and copy it to another location.
- The program will prompt you to restart your computer during the system restore process and then enter " Restart Mode" to perform the restore.
- If your system adopts the "EFI partition + system partition + recovery partition" layout, there may be more than one EFI partition after restoration. In this case, the recovered system may not boot and you can try to delete the additional EFI partitions and keep only one.
Conclusion
If you are troubled by the error “DISM does not support servicing Windows PE”, you can try the 5 solutions mentioned in the article, in turn, to ensure that your computer can return to normal. Also, you can create a system image and or bootable USB to protect or repair your computer as well.
And it's a more powerful protection since it not only help you keep all the changes, but also alleviate or completely fix disk space issue. Thus, you will have multiple backups and can restore system easily and quickly, even if it fails. Also, you can choose to create disk backups to hold all data on the disk. All in all, it's worth trying software to protect data safety!