How to Create Bootable External Hard Drive Easily (3 Ways)
You can learn why do you need to create bootable external hard drive and 3 easy methods to achieve the goal. The stepwise tutorial will be included in each method. Please read on.
By Clytze Updated on March 28, 2024
Why Create Bootable External Hard Drive?
Nowadays, more and more users have the need to create bootable external hard drive. Usually, it comes for the 3 reasons below.
- Avoiding computer unavailability: When your computer does not boot properly due to disasters such as system corruption, hard drive failure or virus attack, the created bootable external hard drive can help you start your computer easily and quickly.
- Protect data: The created bootable external hard drive is equivalent to creating a disk backup, which you can use for disaster recovery to protect your data from being lost if anything goes wrong with your computer.
- Use system anywhere and anytime: When you create a bootable external hard drive, you can use your system anywhere and anytime even if you don't carry your computer with you.

How to Create Bootable External Hard Drive
Users who have this need to create a bootable external hard drive are classified into two types.
- The first scenario is to create an external hard drive that contains your operating system so that you can take it with you and use your system at any time, which is very convenient. If so, you can use Method 1 or Method 2 to help you.
- The second scenario is to create an external hard drive as a bootable disk and use this created bootable disk to repair your computer when it encounters problems and fails to boot. In this case, you can choose method 3 to achieve the goal.
Each method includes a graphical tutorial. You can choose according to your own needs. You can continue reading for detailed information.
Method 1. Create Bootable External Hard Drive by Reliable Cloning Software
The easiest and fastest way to make an external hard drive bootable is to use reliable software to create bootable external hard drive. AOMEI Backupper Professional is a great choice. It allows you to clone the disk containing your system to an external hard drive easily, and after cloning you can boot your computer directly from the cloned disk.
Thus, you can easily get a bootable external hard drive without a lot of complicated operations. As a professional disk cloning software, it also has the advantages below.

- Intelligent clone: Only clone the used sectors. Therefore, it allows you to easily clone larger drive to smaller drive.
- Liveclone: Allows the disk cloning tasks to work in the background.
- Various storage paths: Supports cloning disk to external hard drive but also internal disk, HDD, SSD, USB drive, network location, etc.
- SSD alignment: This feature can accelerate SSD reading and writing speed.
It is recommended that you make a disk backup for your external hard drive in advance because the cloning process will wipe the data on the target disk. Then you can follow the graphic tutorial below to create a bootable external hard drive simply. Download AOMEI Backupper Professional and install it. If you are a Windows Server user, please try AOMEI Backupper Server.
Step 1. Connect the external hard drive to your computer and make sure it can be recognized. Open AOMEI Backupper Professional and click Clone > Disk Clone.

The Professional edition supports cloning both data disks and systems disks from MBR to MBR/MBR to GPT, or GPT to GPT/GPT to MBR. If you only want to clone data disks, you can pick the complete free Standard edition.
Step 2. Choose the disk containing system as the source disk.
![]()
Step 3. Choose your external hard drive as the destination disk.
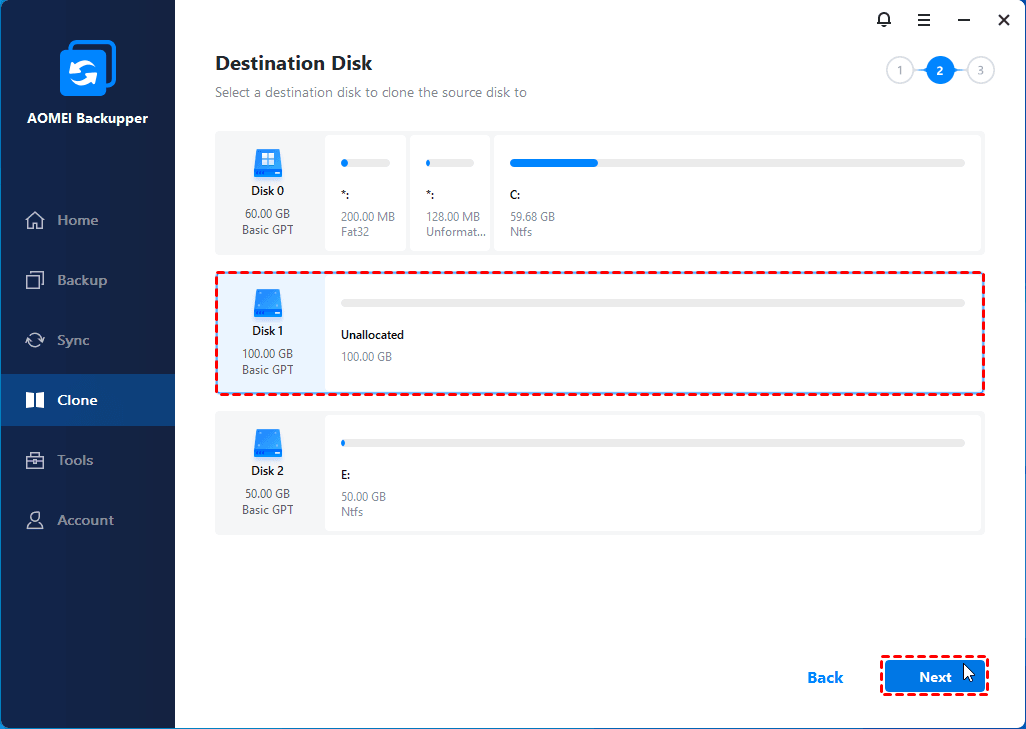
Step 4. Confirm your operations and click Start Clone to create bootable external hard drive.

Notes:
- Edit Partitions: You can adjust partition size when your target disk is larger than the source disk.
- SSD Alignment: If your target external hard drive is an SSD, you can tick the SSD Alignment option to make the SSD perform better.
- Sector By Sector Clone: It will clone all sectors, whether they are used or not. Even if the sector is blank or it is a logically bad sector. It requires your target disk the same as or larger than the source disk.
Method 2. Create Bootable External Hard Drive by Windows To Go
The second method is to use the Windows built-in feature Windows To Go to create bootable image of external hard drive. This feature copies all system-related files to the external hard drive to make it bootable. Thus, you can plug a USB drive into your computer and boot your computer from the external hard drive. But this method has these limitations below for the Windows version and USB drive you are using.
Requirements for Windows version.
- If you are using Windows 10, your Windows 10 should be Enterprise, Education or Professional edition.
- Windows 8/8.1 Enterprise edition has this feature.
- Other versions or operating systems don't have the Windows To Go feature.
Requirements for USB drives.
- A high random read/write speed to run Windows workloads smoothly.
- Have been tuned to ensure they boot and run on hardware certified for Windows 7 and higher.
- Have a manufacturer's warranty and should continue to run under normal usage conditions.
If you are using the correct version of Windows and have a certified external hard drive, you can follow the steps below to create bootable external drive. Please note that this process will format your external drive and you need to backup your important files on the external drive in advance.
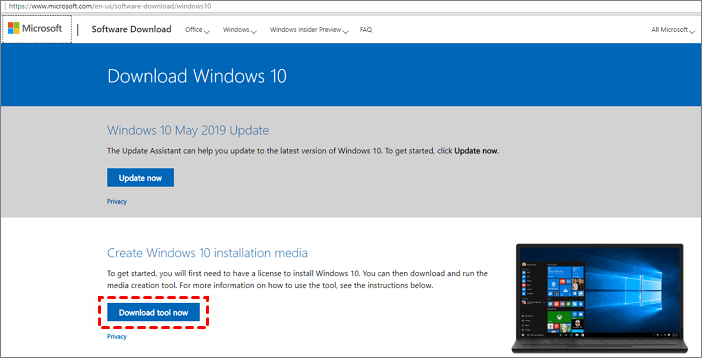
Step 1. Download the related installation ISO file from Microsoft. Connect the external hard drive to your computer and make sure it can be detected.
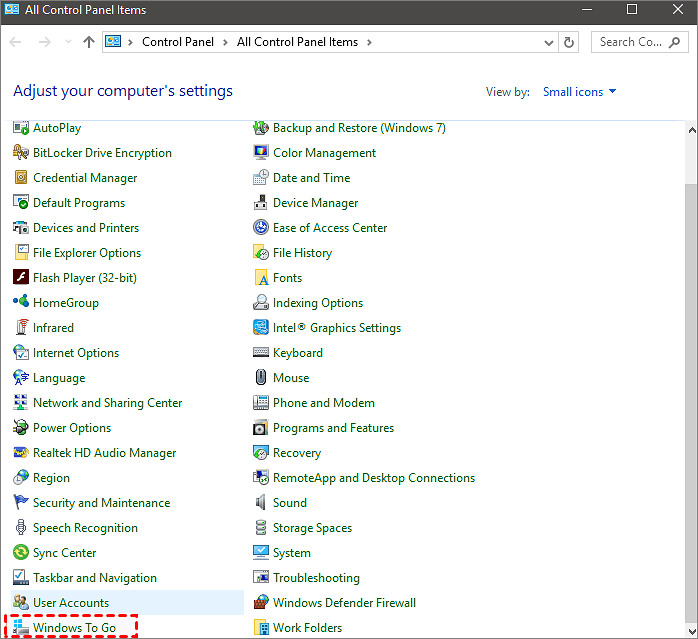
Step 2. Type control panel in the search box at first and click Control Panel to continue.
Step 3. Find Windows To Go feature and click it to continue.
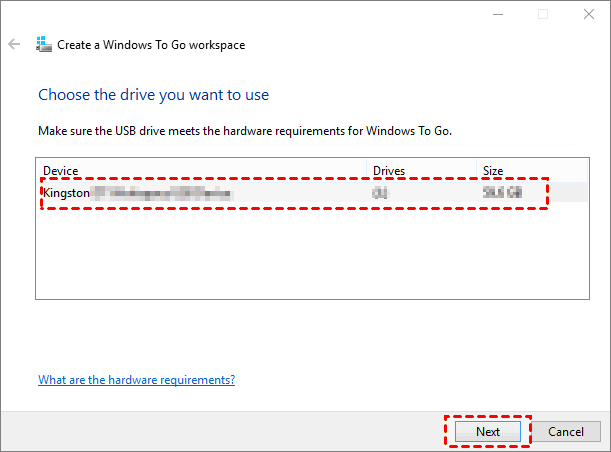
Step 4. Choose the external hard drive and click Next.
Step 5. Click Add search location to search for the ISO file.
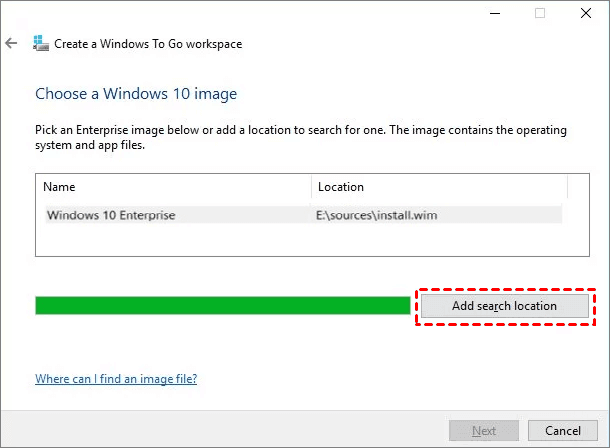
Step 6. Select the ISO file to make the external hard drive bootable.
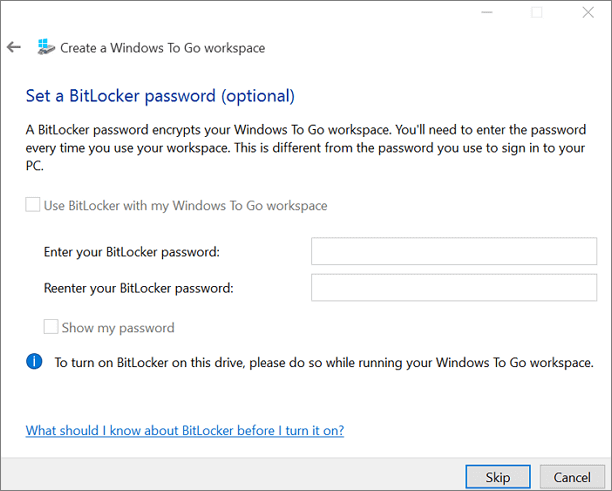
Step 7. Choose whether to set a BitLocker password. If you want to set a password, then enter your password, but you need to type your password to unlock the drive in the future. If not, click Skip to continue.
Step 8. Confirm all your operations and click Create.
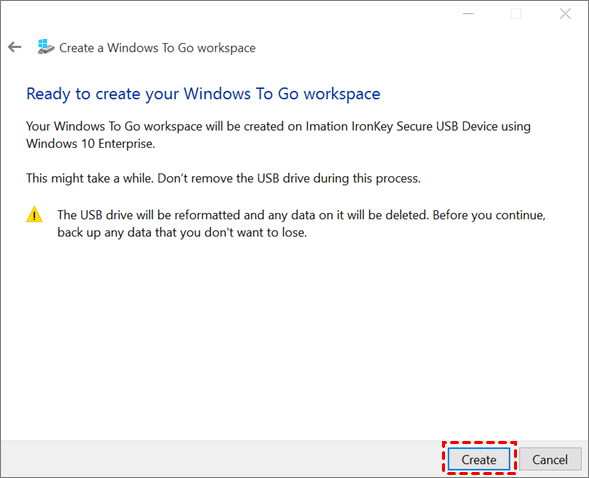
Wait for the process to finish. When it's done, a bootable external hard drive is successfully created.
Method 3. Create Bootable External Hard Drive by Command Prompt
If you want to create bootable external drive in Windows 10, 8, 7 and you are also good at using the command prompt, you can choose this method to help you. But this method is more complicated than method 1 and you need to be careful not to enter the wrong commands during the process to prevent losing data or damaging system files.
Step 1. Insert the external hard drive into your computer and make sure it can be recognized. Type cmd in the search box and right-click Command Prompt and choose Run as administrator to continue.
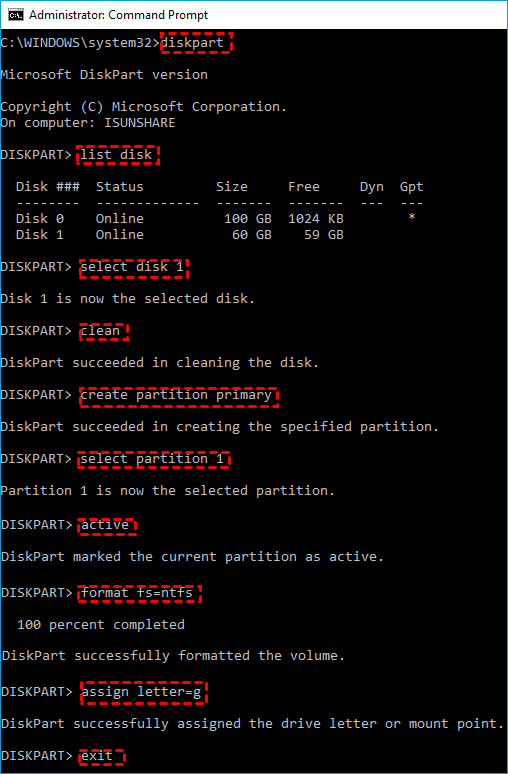
Step 2. In the Command Prompt window, enter the following commands in sequence and press Enter to execute them respectively.
- diskpart
- list disk
- select disk 1 (take disk 1 as an example, it stands for your external hard drive)
- clean (this command will clean the selected hard disk)
- create partition primary (make the disk primary)
- select partition 1
- active (boot partition)
- format fs=ntfs (makes the disk formatted as NTFS file system)
- assign letter=g (g is your drive letter for external hard drive)
- exit
Step 3. Insert the DVD with the Windows installation files into the computer and then run CMD again.
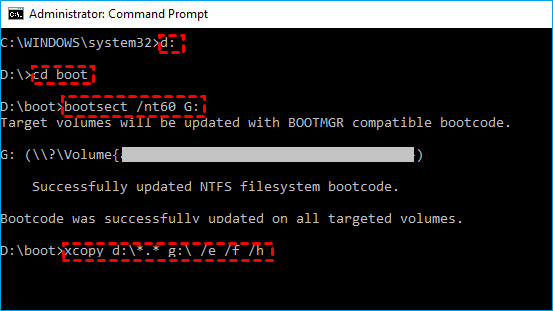
Step 4. Burn the installation files into the external hard drive with the commands below.
- d: (d is the drive letter of Windows installation DVD)
- cd boot
- bootsect /nt60 G: (G is the drive letter of the external hard drive)
- Xcopy d:\* . * g:\ /e /f /h (d stands for the letter of Windows DVD and g stands for the letter of the external hard drive )
If you consider this method is a little bit complicated, you can also try the software AOMEI Backupper Professional which is mentioned in method 2 to help you, its Create Bootable Media function will achieve the goal easily.
FAQs About Create Bootable External Hard Drive
Summary
This article shows you 3 ways to create bootable external hard drive. You can choose to use Windows built-in tool Window To Go to help you, but this method has some requirements for the system version and USB drive. You can also choose to create a bootable external drive using the Command Prompt if you are familiar with the command line, and be careful during the process to avoid data loss.
The easiest way is to clone the disk containing your system to an external hard drive using the reliable disk cloning software AOMEI Backupper Professional. After cloning, you can boot your computer directly from the cloned disk.
Besides, this software also offers System Clone and Partition Clone features to meet your different needs. You can download this software to discover more useful features.
Easy Hard Drive and SSD Cloning Software
Download this software now to unlock more useful features.

