How to Cleanup WinSxS Folder Safely (4 Ways 1 Tip)
If you are searching for ways to delete the WinSxS folder in your computer, please try the below several ways.
By Maggie Updated on December 26, 2023
User case: Cleaning up WinSxS Directory to reduce space Windows Server 2012 R2
I'm trying to reduce the amount of drive space taken up by Windows on my server C Drive - currently the entire drive is taking up 28GB of a 30GB drive... I've used the disk clean up tool that ships with Windows but it didn't identify anything that could be removed (really!)...
The Windows Directory is taking up 17.5GB of the 30GB drive so a big chunk. I've seen that you can reduce the size of the WinSxS directory within Windows which is currently taking up about 8GB, and this director (given it's size) seems a likely candidate for size reduction.
Is there is something I can do to reduce the data on my drive...?
- Question from Microsoft Community
If you are searching for ways to cleanup WinSxS folder, here are 4 built-in methods and one best third-party solution for you.
What Is the WinSxS Folder?
The WinSxS (Windows Side-by-Side) folder is a crucial component in Windows operating systems, containing various file versions stored together. It plays a vital role in updating and customizing the operating system, holding files involved in tasks like switching editions, recovering missing or damaged system files, and adding or removing features.

While the WinSxS folder can accumulate unnecessary files over time, cleaning it can help free up space on your computer. However, it's essential to approach this process carefully to ensure the safety and stability of your system. The following steps will guide you on how to clean up WinSxS.
How to Check the Size of the WinSxS Folder
To check how much space the WinSxS folder uses on your Windows PC, follow these steps:
Step 1. Open the Windows search bar using the Windows key + S combination.
Step 2. Type command prompt and right-click on the Command Prompt search result and choose Run as administrator.
Step 3. Click Yes when the User Account Control prompt appears.
Step 4. In the command prompt, type the following command and press Enter:
dism /Online /Cleanup-Image /AnalyzeComponentStore
Step 5. Wait for the process to complete. You will see the WinSxS folder's size under the Actual Size of Component Store section.

Additionally, you can check the Component Store Cleanup Recommended section to see if the operating system recommends cleaning up the WinSxS folder.
How to Clean Up WinSxS
To clean up WinSxS Windows 7/8/10, you can use built-in tools. Here are some methods:
Method 1. Use Task Scheduler
The Task Scheduler allows for the efficient removal of unnecessary files from the WinSxS folder. Here's how to use this method:
Step 1. Press the Win + R key combination to open the Run dialog box.
Step 2. Enter taskschd.msc and click OK.
Step 3. Navigate to the following location in the left sidebar:
Task Scheduler Library\Microsoft\Windows\Servicing
Step 4. Locate Start Component Cleanup in the right pane.
Step 5. In the Actions section, click the Run button.
Step 6. The Task Scheduler will initiate the cleanup process for the WinSxS folder. Wait for the completion of the process.
Method 2. Use DISM
The Deployment Image Servicing and Management tool can repair corrupted system images in Windows and also clean the WinSxS folder. Follow these steps:
Step 1. Open the search bar using the Windows + S keyboard shortcut.
Step 2. Type command prompt and select Run as administrator from the right menu pane.
Step 3. Click Yes on the UAC window.
Step 4. Enter the following command and press Enter:
Dism.exe /online /Cleanup-Image /StartComponentCleanup
Step 5. Allow the process to complete, then close the Command Prompt.
Method 3. Use Disk Cleanup
Disk Cleanup is a traditional tool that helps identify and delete unnecessary files on your computer. Here's how to use it for cleaning up the WinSxS folder:
Step 1. Press the Windows logo key + E to open File Explorer.
Step 2. Select This PC in the left menu pane.
Step 3. Right-click on Local Disk (C:) and choose Properties.
Step 4. Go to the General tab and click the Disk Cleanup button at the bottom.
Step 5. Navigate to the Files to delete section and check the boxes for the files you want to delete. Then, click OK.
Step 6. If you wish to free up more space, click on Clean up system files.
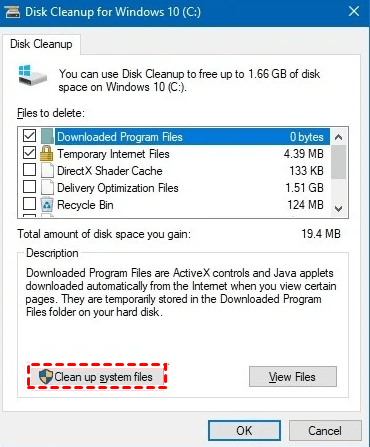
Step 7. Check the box for Windows Update Cleanup and other files you want to delete. Finally, click OK.
Method 4. Use Storage Sense
Another straightforward method to clean up the WinSxS folder is by using Storage Sense in Windows. Follow these steps:
Step 1. Press Windows + I to open Settings.
Step 2. Go to System > Storage.
Step 3. In the Local Disk C section, click on Temporary files. If you can't find this option, click on the Show more categories link.

Step 4. Clear the checkboxes for selected items and choose Windows Update Cleanup.
Step 5. Click the Remove files button at the top of the window when you're done.
Bonus tip: how to free up disk space automatically
Except from deleting WinSxS files with the previous 4 tips, you can also choose a third-party tool if you want to save time and energy and avoid unnecessary operation mistakes. The function of Disk Wipe in AOMEI Backupper Professional satisfies a such need. Disk Wipe in AOMEI Backupper is a tool to help you wipe the disk to wipe data and remove the virus permanently. With the tool, you can easily erase data on a partition, unallocated space, and disk.
Let’s download AOMEI Backupper Professional and have a try. If you want to clean WinSxS folder Server 2019, you can consider AOMEI Backupper Server.
Easiest Windows disk/partition wipe tool for personal use.
Here are the detailed steps on how to free up disk space on Windows with AOMEI Backupper Disk Wipe tool.
Step 1. Click Tools in the left tab, and then select the Disk Wipe tool under Common Tools.

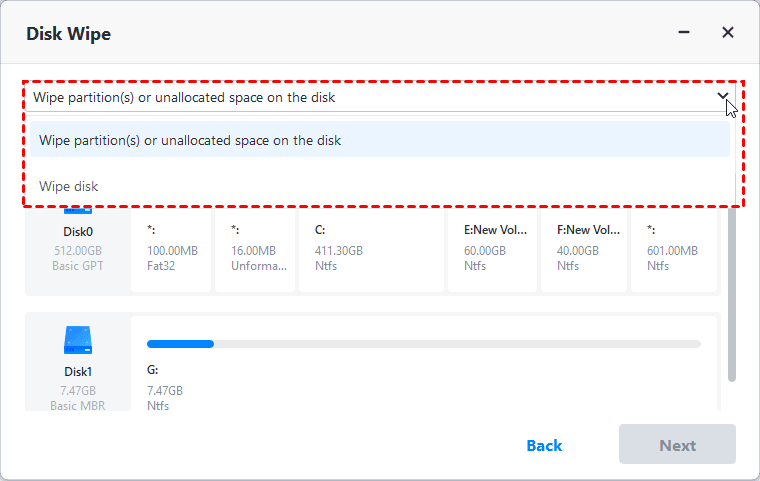
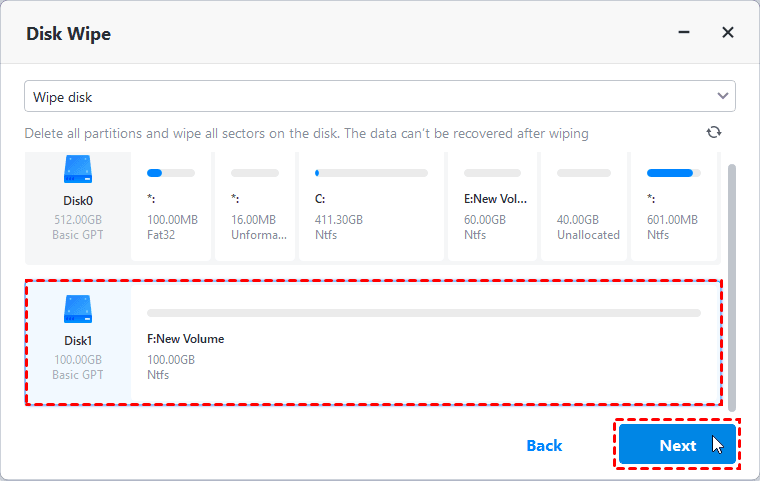
Step 2. After you click the Disk Wipe under Tools, you will enter the page to select Wiping Type. On the page of Wiping Type, select Wipe disk. After the selection is complete, click Next to continue.
Step 3. Once you select the desired wiping type, you will enter the page of Select the disk to wipe. On the page, you can choose to wipe any disk and also you can choose multiple ones at the same time.
Step 4. Then, you will enter the page of Wiping Method.
Please choose a method you want to wipe the selected data. There are four methods available that represent different degrees of overwriting:
Fill sectors with Zero (Safe, Quick)
Fill sectors with random data (Safe, Quick)
DoD 52220.22-M(Very safe, Slow)
Gutmann (35 passes, Very Safe, Very Slow)

Step 5. After selecting the wiping method, click Start at the bottom right corner of the page to enter the wiping process page.
Summary
Overloading disk space may cause a series of problems, so you need to cleanup WinSxS folder in order to keep it running smoothly. And here are 4 methods and 1 tip for you to free up space manually. What’s more, AOMEI Backuppre Professional is powerful and reliable disk cloning software that enables you upgrade your original disk to larger drive.