ASUS SSD Secure Erase SSD: How to Use It and Best Alternative
Most models of ASUS motherboards support the SSD Secure Erase function that can quickly wipe an SSD. But with its limitations of SSD compatibility, you should try another secure way to erase an SSD easily.
By Clytze Updated on December 16, 2022
User case
Need ASUS SSD Secure Erase SSD
Hello, short question: is it a safe bet to use the ASUS Secure Erase feature I have in my BIOS for a Samsung 870 QVO SSD drive? I'm trying to basically reset the drive to factory default. I find myself looking at my BIOS’s built-in secure erase feature as my only solution. ASUS says some SSDs are incompatible and to look online for a list first - yet I cannot find said list anywhere.
My motherboard is an ASUS Prime Z390-A if that helps. I also updated said motherboard to the latest BIOS version - so I'm thinking the secure erase tool should be able to handle the new 870 QVO without breaking anything... right? So what do you think? Will ASUS secure erase work here?
- Question from tom’s HARDWARE
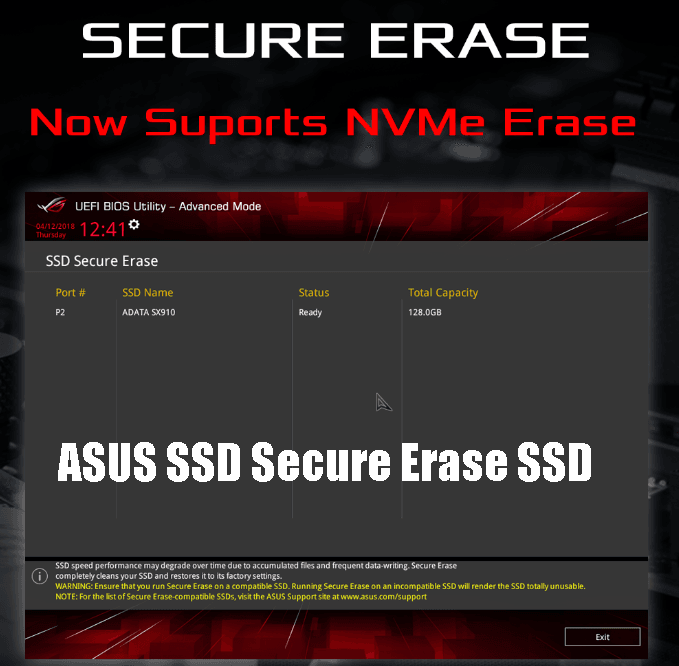
Most ASUS motherboards currently support the ASUS Secure Erase function in the BIOS, which can be used to quickly erase SSDs and can solve some problems with SSDs that are used abnormally, resold, or given away. ASUS Secure Erase completely and safely cleans your SSD, restoring it to factory performance levels.
But before you utilize this tool to wipe your SSD, you should check the ASUS support site for a full ASUS Secure Erase SSD list, because ASUS has incompatible SSD restrictions. For example, if you want to enable ASUS secure erase Samsung 980 pro, this process will fail because the SSD can not be detected.
But if your SSD is on the compatible list, you can follow the steps in the next section to secure erase SSD outside the list from ASUS BIOS.
How to erase SSD with ASUS Secure Erase
Here are the steps to use ASUS Secure Erase function to erase a compatible SSD in BIOS:
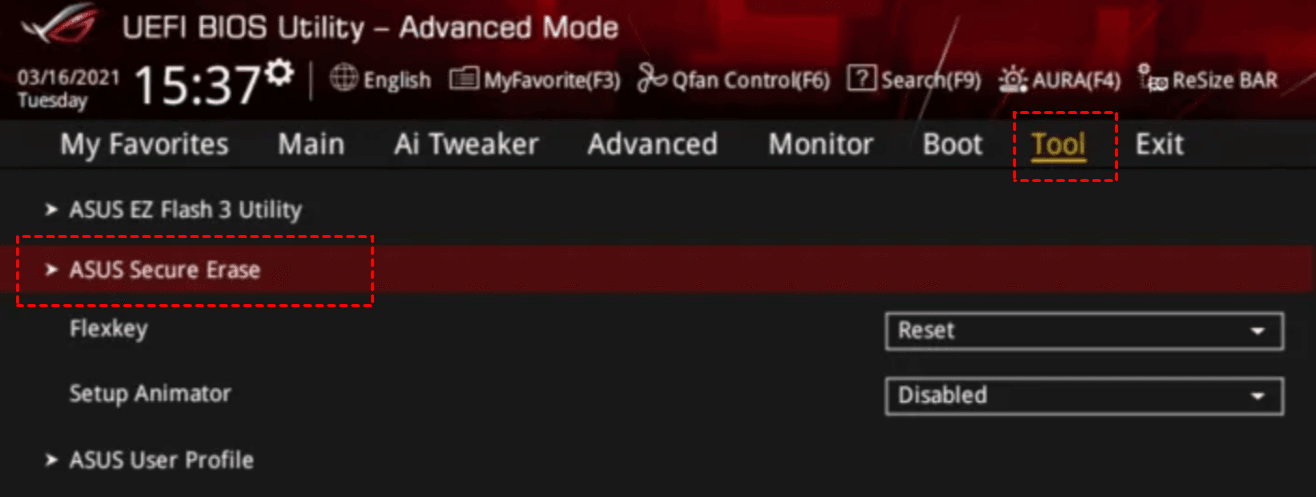
1. ASUS Secure Erase is only available in AHCI mode. Ensure to set the SATA mode to AHCI. Click Advanced > SATA Configuration > SATA Mode > AHCI.
2. Restart your computer. When you see the ASUS Logo appears on the screen, press Del button to enter BIOS, and click Tool > ASUS Secure Erase on the Advanced Mode menu.
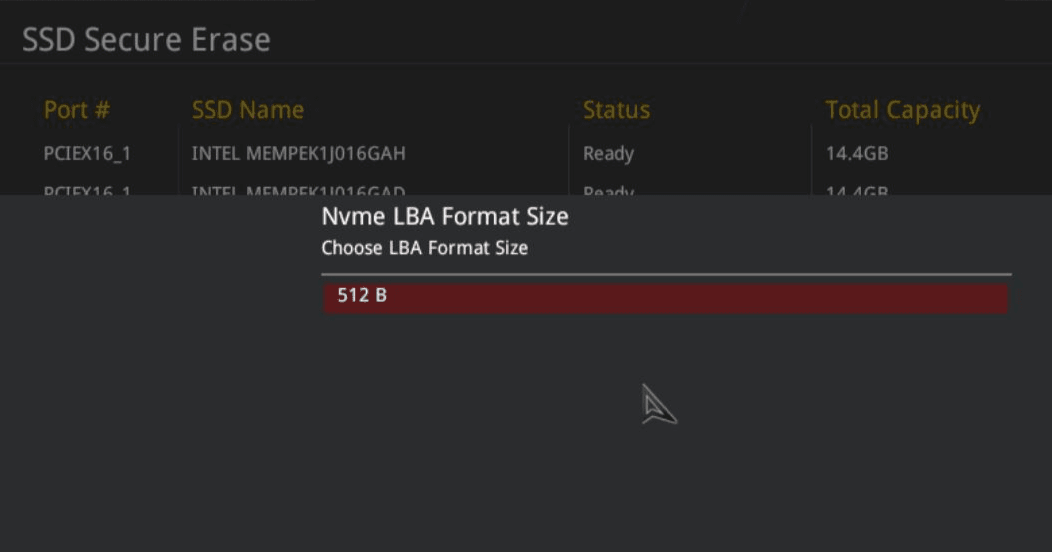
3. After entering, the installed SSD (both SATA and NVME SSDs are supported) is displayed in the interface.
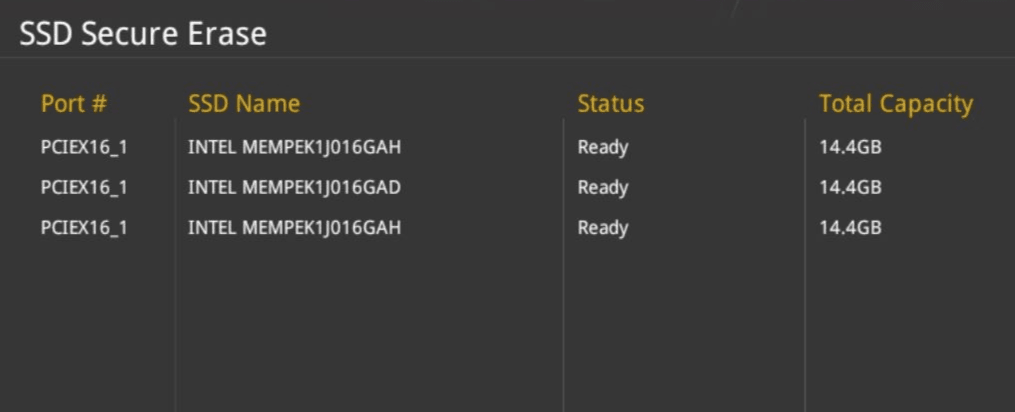
4. Select the SSD you want to erase with the cursor, enter and then a pop-up prompt will appear to select the format unit size, the default is fine.
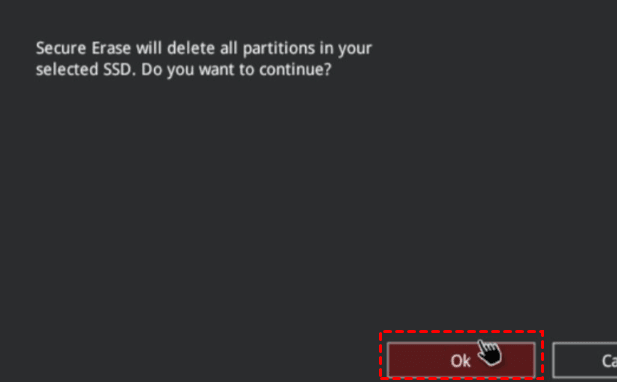
5. Then a warning message appears informing that “Secure Erase will delete all partitions in your selected SSD”, click OK to continue.
6. Confirm that all the data will be deleted and will not be recoverable, click OK to continue the process. Then machine will automatically reboot after completion.
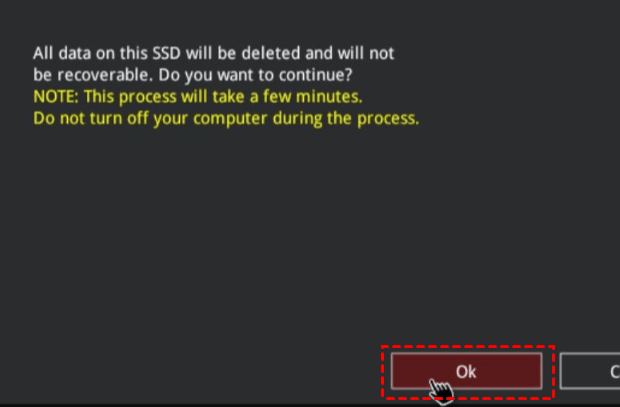
The time to erase the contents of your SSD may take a while depending on its size. Do not turn off the system during the process.
More flexible way to secure erase an SSD with AOMEI Backupper
Since ASUS motherboards have ASUS SSD Secure Erase compatibility restrictions, if your SSD is outside the list, then you may fail to use the tool to erase your disk. In such a case, you need to apply for a more flexible way to erase an SSD securely. Luckily, AOMEI Backupper Professional can help you a lot. It has the following powerful features you can benefit from:
✨ Disk Wipe feature. It allows you to erase an internal or external hard drive, SSDs, USB flash drive, SD card with the Disk Wipe feature, or you can also wipe free space on Windows 11.
✨ No SSD brand restriction. It supports erasing all-branded SSDs, such as Samsung, ASUS, WD, HP, Dell, Seagate, etc.
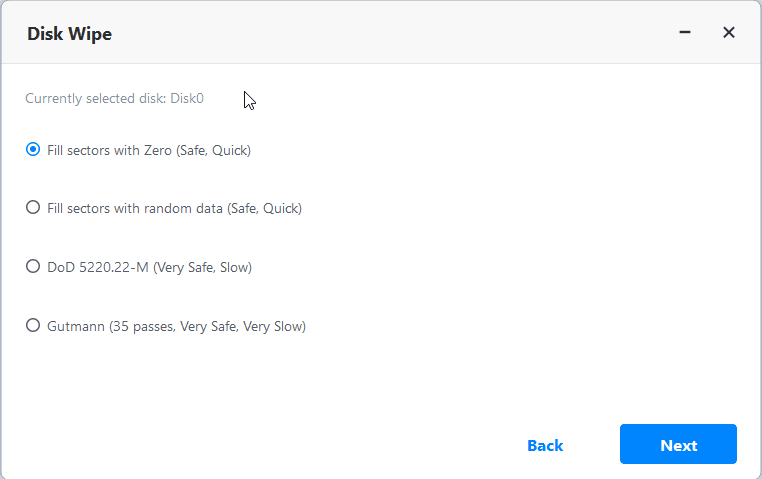
✨ Multiple wiping methods. It offers you 4 wiping types to choose, such as, fill sectors with zero or random, DoD 52220.22-M (with 7 passes) or Gutmann (with 35 passes).
✨ Flexible wiping types. It allows you to wipe specific partitions or unallocated space, or entire disk, which makes the disk wiping process more flexible according to your needs.
✨ Wipe without Windows. You are able to create a bootable disk so that you can wipe a hard drive when there’s an accident occurs on your computer.
✨ High compatibility. It is designed for Windows 11/10/8.1/8/7/Vista/XP systems.
Now follow the step-by-step guide to wipe any brand SSD with AOMEI Backupper Professional edition with just a few clicks.
Tip: Please note that the wiping process will erase all your data on SSD and it cannot be recovered. It’s suggested to backup SSD in advance.
Step 1. Download this reliable SSD eraser on your PC, install and launch it.
(💥 You can only preview the wiping process in the trial version. To conduct the operation, please upgrade to the full version.)
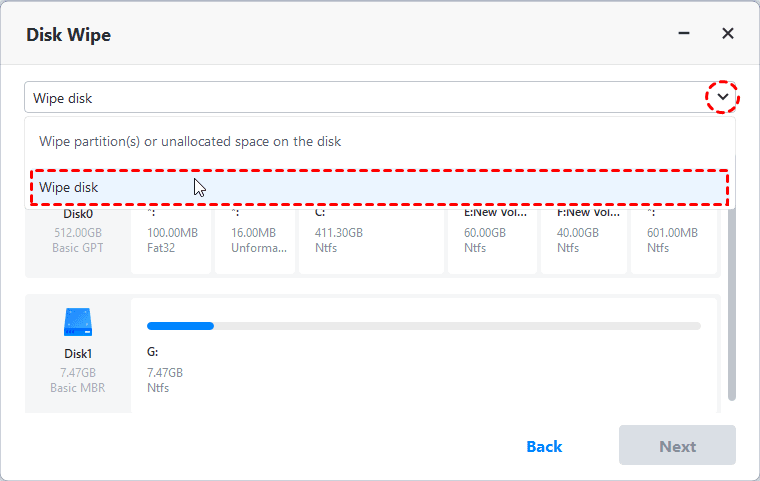
Step 2. Open this tool, click Tools in the left tab, and then select Disk Wipe.

Step 3. Choose wiping type. Choose Wipe disk to erase the entire SSD, then hit Next.
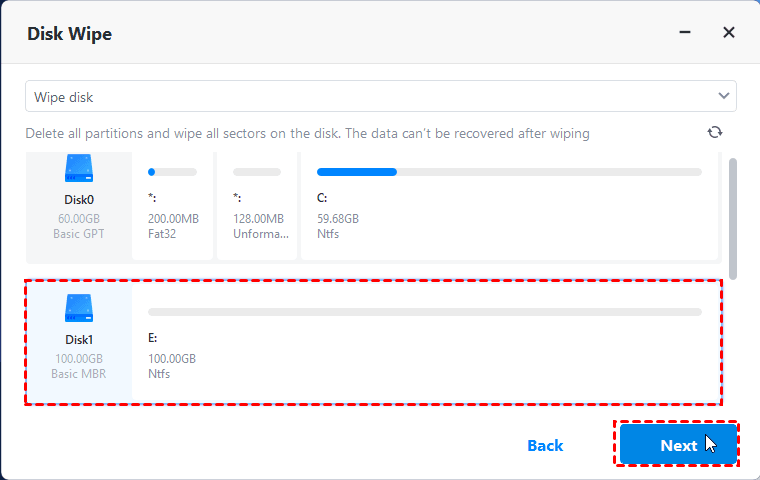
Step 4. Select the SSD you want to erase and click Next to continue.
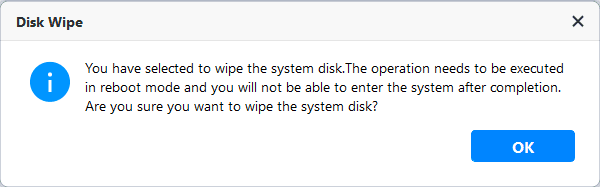
Note✍: if you are choosing to wipe the system disk, a popup window will prompt you that wipe boot drive will run in reboot mode, press OK to confirm.
Step 5. Choose the wiping method you want. Click Start to execute this process.
Summary
That’s all about ASUS Secure Erase SSD from the above contents. You can check the list from ASUS support site to see if your SSD is compatible with this utility in BIOS. If it is unluckily not, you can choose to use the best disk wiper – AOMEI Backupper, which offers you powerful wiping types and methods to make your erase task flexible and secure.
Moreover, it integrates backup and restore features, which allows you to create a full backup of your computers for continuous protection. When you encounter ASUS laptop stuck on logo screen on Windows 10 issue, you can use this image to restore your computer to normal use.

