Easiest | Windows Server 2012/2008 Backup Restore to Different Computer
Looking for a way to make Windows Server Backup restore to a different computer that may be with different hardware configurations in Server 2012/2008? You can learn the detail steps from this page.
By Yuka Updated on December 13, 2023
Is it possible to make Windows Server Backup restore to different computer?
"We've created backups with Windows Server Backup feature on Server 2012 on a regular basis. System restoring on the same machine has been performed several times successfully due to different reasons like hardware failure or user error. So that is tested backup for sure.
Now, we'd like to restore the system image to a different computer, running Server 2008. However, the Windows Server Backup on Server 2008 would not recognize the backup we created on Server 2012 and the restoring process cannot continue. I guess there is a different hardware configuration on Server 2008 which results to restoring failed. Is there any simple way to do the restoring on a Server with different hardware?"
Is it possible to restore Windows Server Backup on a different computer? Absolutely, the answer is positive. You can achieve this goal with the help of different tools, including Windows Server built-in tools.
Restore Windows Server backup to another machine (common)
When you encounter one of the problems like hardware failure, software failure, computer theft, natural disaster or user error, Windows Server allows you to restore a system state backup to the same physical computer which the system state backup was created, or to a different physical computer that has the same make, model, and configuration (identical hardware).
To restore Windows Server 2003 backup to different computer, you might need to use the Automated System Recovery (ASR) feature. To restore Windows Server 2008/2012 backup to different computer, a Bare Metal Restore (BMR) is commended.
BMR will freshly format boot volumes and system volumes on the same server that the original backup was take from. Therein, the volume layouts and identifiers are identical to those used during the backup of the original computer. Besides, you can perform a BMR that uses ASR to a computer that has different hardware than the original computer. For detailed steps of Window Server Bare Metal Restore, please follow the provided link.
In general, the BMR method is a little bit complicated for most users, that’s why this article been produced. What’s worse, you’ll receive the error: Could not complete the server restore when the source disk is larger than the destination disk.
Besides, you cannot backup UEFI and then restore it to a BIOS based disk. That is to say, both the target machine being backed up and the destination machine receiving the restore have to be either UEFI or BIOS. They cannot be mixed up in a BMR scenario.
In that case, you may want to check out easy and efficient ways to complete dissimilar hardware restore on Windows Server.
Let Windows Server 2012/2008 backup restore to different hardware (easier)
AOMEI Backupper Server is easy-to-use yet powerful backup restore software that designs for Windows Server operating systems in particular. It allows you to backup Windows Server 2012/2008 system or disk and then restores it to a different computer, with different makes, models, or hardware configurations.
The “Create Bootable Media” feature helps restore images on bare metal machine or a computer where operating system fails to boot. It also supports restoring MBR system image to GPT disk. The partition style conversion will be completed during the restoring process.
While restoring, you can restore selective files instead of the entire backup if you want Windows Server backup to restore files to different computer. Download its 30-day free trial to complete your task.
Preparations: to perform a successful dissimilar hardware restore, you may need to prepare following things.
-
An USB flash drive, greater than 16GB, which will be used as bootable media.
-
A path to store Windows Server Backup images, NAS, network share, or external storage. Any place you could access from the destination machine.
-
Download and install AOMEI Backupper Server on your machine.
Restore Windows Server backup to different computer step by step
This part will take Windows Server 2012 backup and restore to different computer for example. It will create bootable media and system backup image, and then restore the image from the bootable media.
- Insert the USB drive to Server 2012 and make sure it can be detected. Run AOMEI Backupper Server on the Server too. Click Tools > Create Bootable Media to create a bootable USB drive. Complete the creation with the on-screen instructions.

- Connect external storage to the Server 2012 if necessary. In AOMEI Backupper, click Backup and then System Backup. The boot related drives are selected by default. Follow the wizard to complete system backup. Be sure you know the path the image stores.

- Insert the bootable USB drive on destination machine. To boot from the bootable drive, you may need to change boot priority. If you place system image on external storage, connect the storage to the destination machine as well.
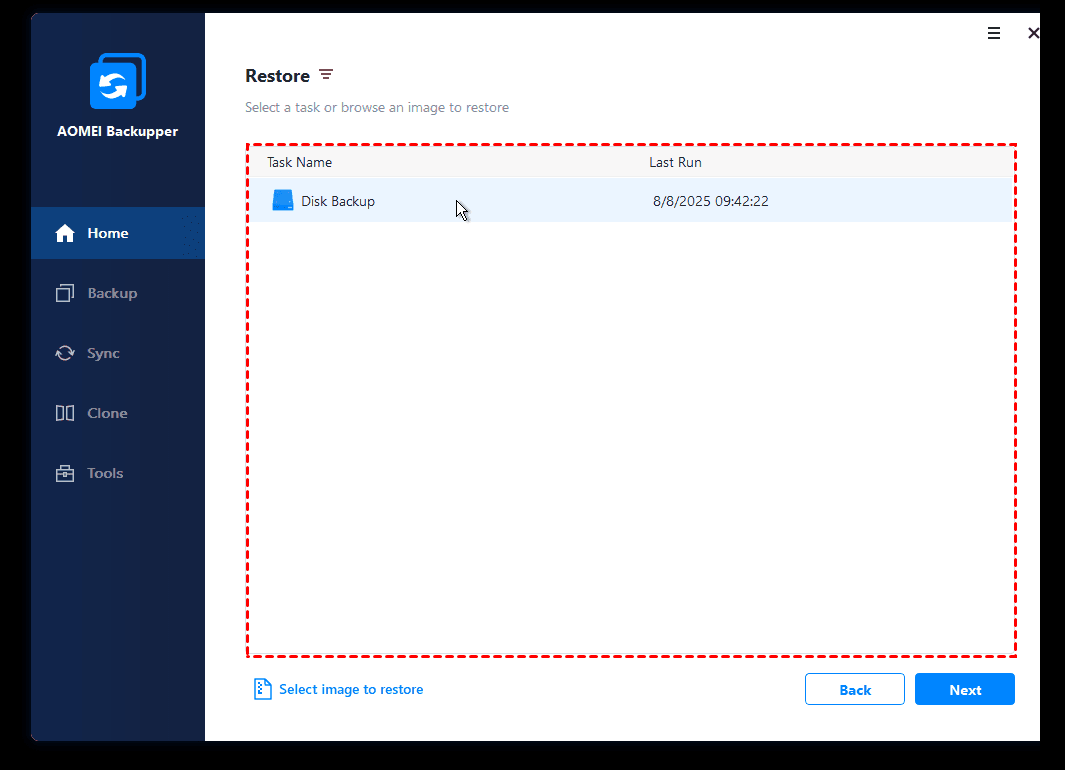
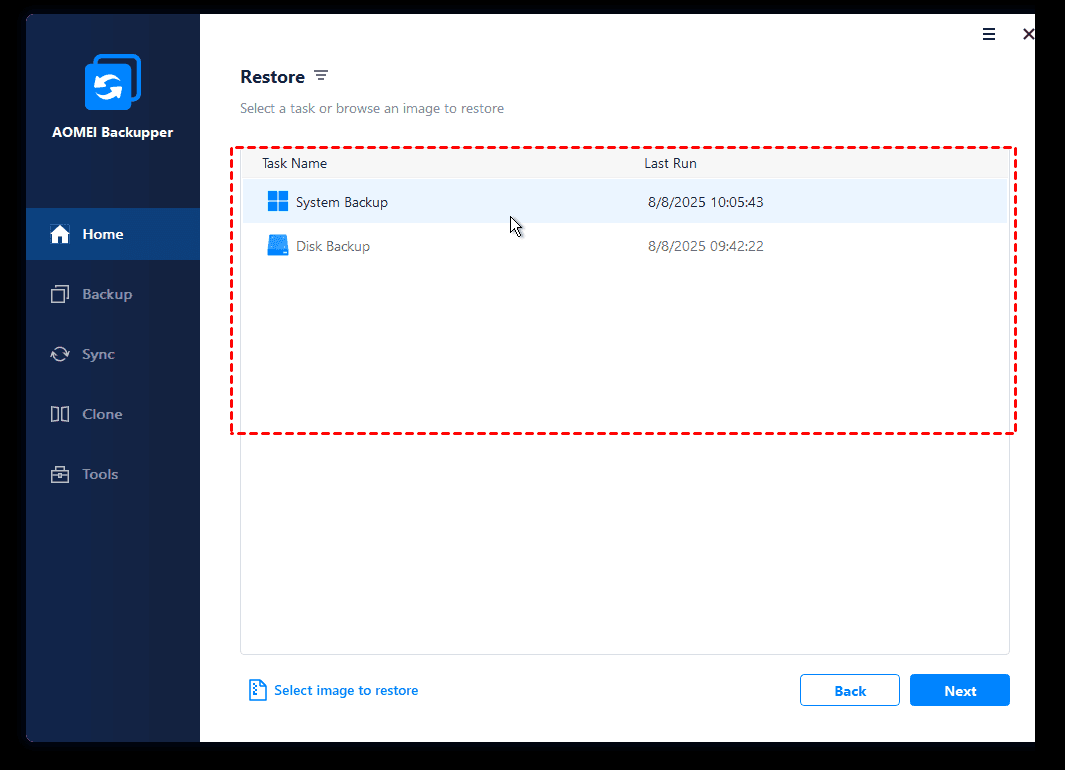
- Once startup, you’ll see loaded AOMEI Backupper Server. Click Restore and Select Task to select your system image. The backup image should be detected automatically if it is stored on the connected storage. If not detected, click Select Image File to manually navigate to the image.
- Then, select System Backup and click Next.
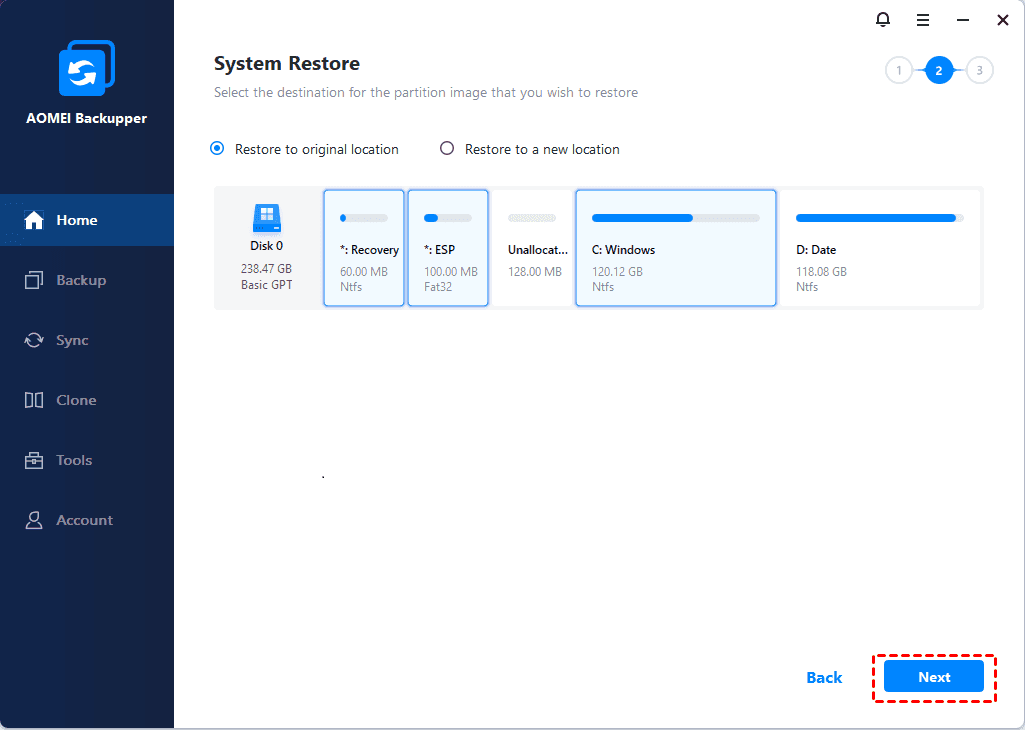
- Tick Restore this system backup and then Restore system to other location at the bottom, click Next.
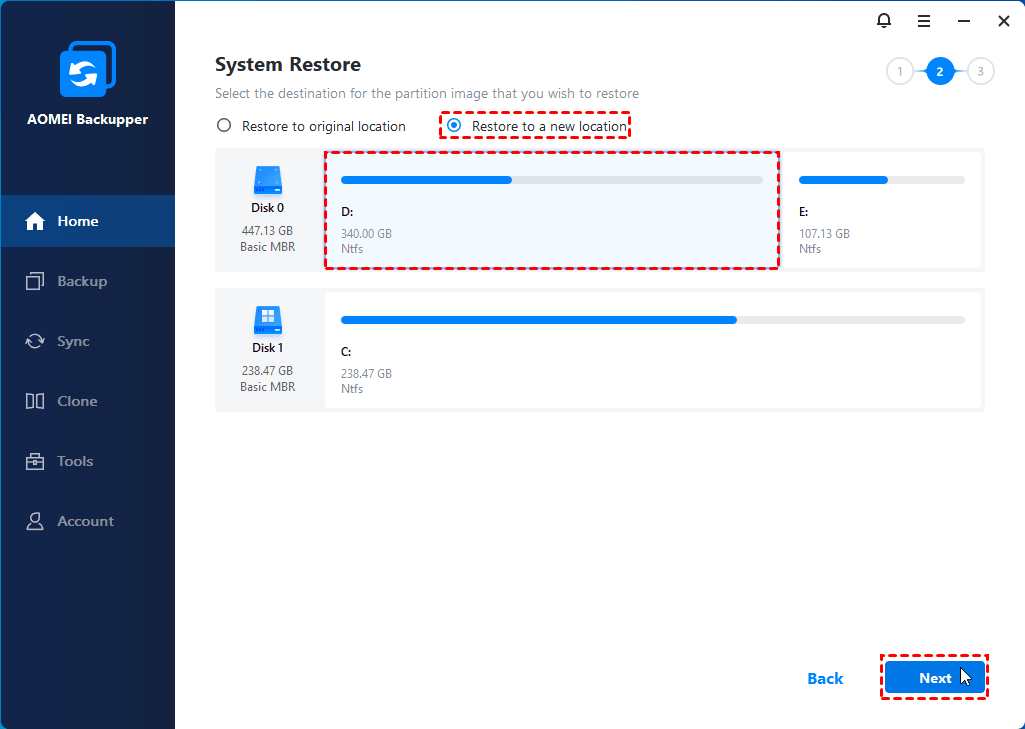
- Select the destination disk to restore image, and click Next.
- On the summary page, make sure the “Universal Restore” option is checked. If the selected disk is an SSD, the “SSD Alignment” option will emerge, and check it as well to improve SSD performance.
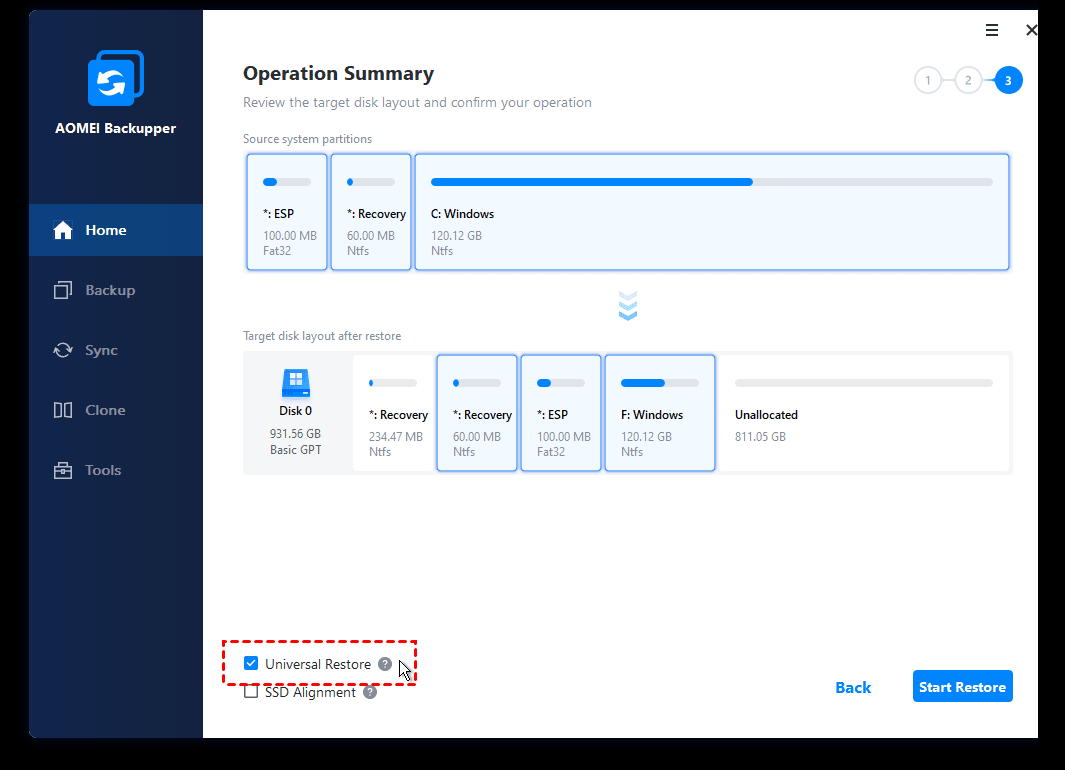
- Click Start Restore, grab a cup of coffee and wait for it completes. The time varies from minutes to hours, depending on the size of backed up system.
- Disconnect the bootable drive and restart the destination Server from the restored system.
Tips:
-
Above steps also apply to Windows Server 2008 backup restore to different hardware.
-
To restore entire disk to new computer, please select Disk Backup in step2.
-
It is suggested to keep AOMEI Backupper Server installed to protect your computer after the restoring. You are also allowed to create a recovery environment to run backup and restore operations without loading the OS.
-
For Enterprise users, like restoring system image to all computers within company, the Technician Plus edition is recommended. It allows booting target computers from network and performs the restoring massively simultaneously.
Restore Windows Server backup to different computer (remote)
If you don’t have a USB drive for bootable media creation, you can restore Windows Server backup to another computer using the best enterprise backup software - AOMEI Cyber Backup. It provides a convenient and reliable solution for centralized backup management of all Windows operating systems.
- It enables you to create system/disk/partition backup for a bunch of Windows PCs and Servers from one central console.
- You can schedule a backup task to run daily/weekly/monthly using the full/incremental/differential backup method.
- You are allowed to restore the backup image to the same computer or another computer with dissimilar hardware.
- If your backup has multiple versions, you can choose to restore from any point you want.
Download this powerful enterprise backup software now to have a try!
Let’s say you have already created a system image with AOMEI Cyber Backup. Follow the steps below to restore Windows Server backup to a different computer.
1. Run and log in AOMEI Cyber Backup.
2. Click Source Device > Windows > Add Windows Device to add the target server device. You need to enter the IP address, username and password of it.
Note: You need to turn on the target device before you add it.
3. Start system restore.
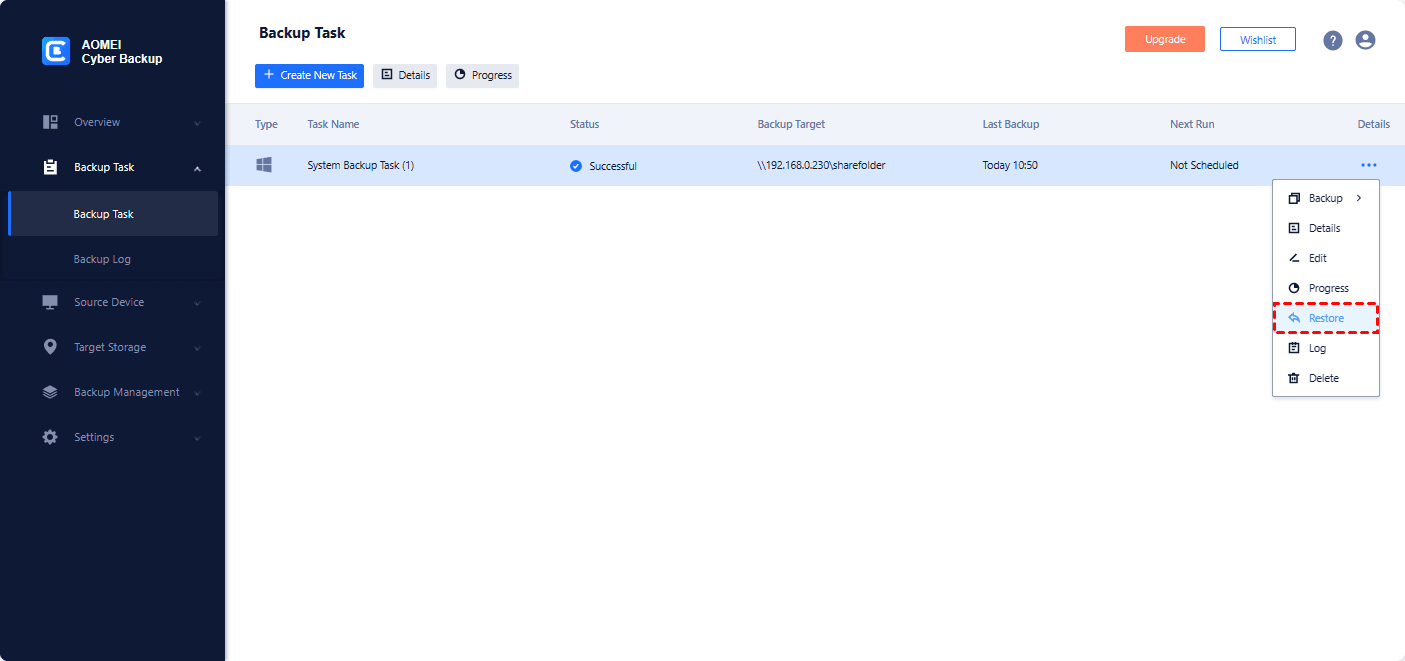
- Click Backup Task on the left menu bar and click the three dots icon on the system backup task you created before. Then select Restore.
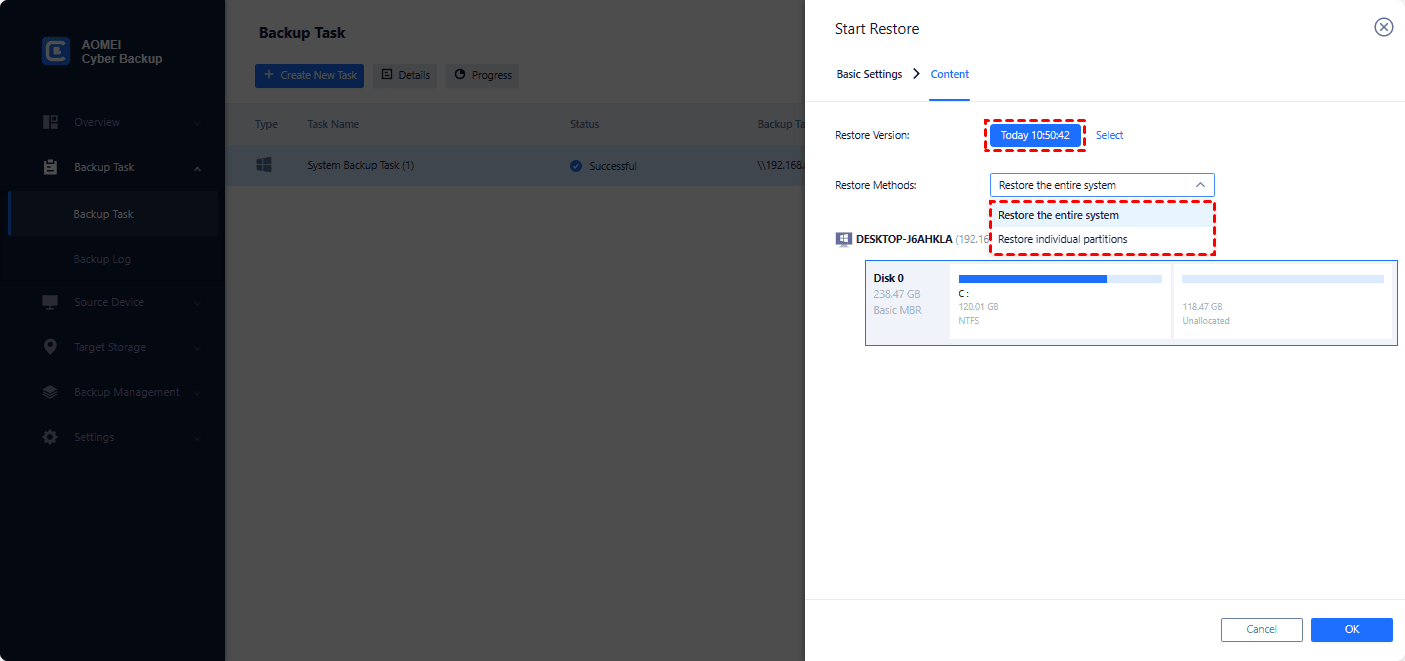
- Select the restore content, including the restore version and restore method. You may choose the latest version and Restore the entire system.
- Select the target location. Choose Restore to new location and select the target device and target disk.
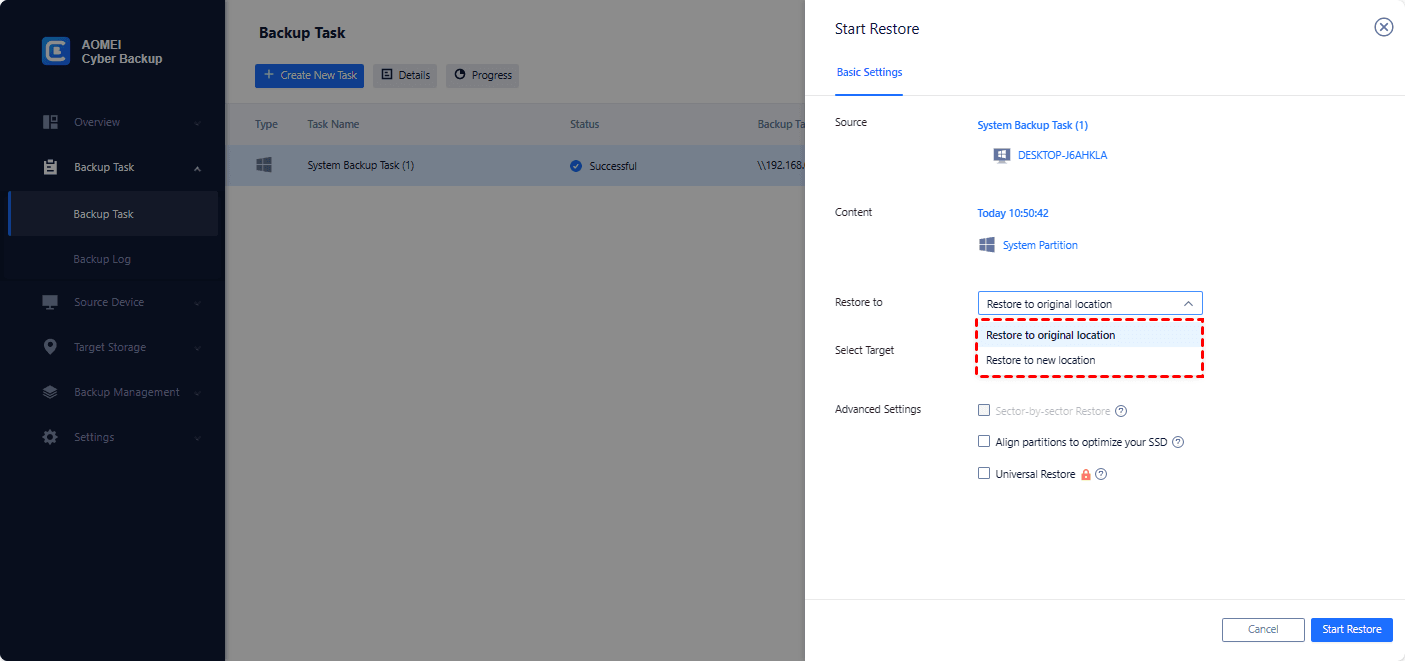
- Check the Universal Restore option to ensure a secure boot after recovery.
- Click Start Restore to launch the system recovery process.
If you don’t know how to choose between AOMEI Backupper and AOMEI Cyber Backup, check the comparison table on page Windows Server Backup.
Summary
To make Windows Server Backup restore to different computer, you may pick built-in tools or third-party tools. It is recommended to use AOMEI Backupper Server or AOMEI Cyber Backup to perform dissimilar hardware restore due to their simple operations.
The bootable media creation in AOMEI Backupper Server helps a lot when the target machine refuses to boot. Except for backup and restore, AOMEI Backupper plays an important role in hard drive upgrading. You can clone hard drive to SSD in Windows Server without reinstalling. Get it and discover more.