Windows Server 2012 (R2) Backup to USB Drive [3 Ways]
This article will introduce how to create Windows Server 2012 backup to USB drive or other external hard drives with detailed steps.
by Lily Updated on December 12, 2023
Why Backup Windows Server to USB Drive?
As we all know that creating Windows Server 2012 backup is very essential. If any emergency happens like hard failure, system crash, you can restore system and disk to its previous state and do not need to worry about data loss. Besides, choosing a safe place to store system image backup is even more critical. There are so many destination places to choose from. You can backup system image to NAS, local drive, CD/DVD, etc.
Think about this: if you save your backup to the internal hard drive, you may risk losing all the backups if the hard drive failure occurs. Also, backing up to NAS is not safe too. It may be infected by malware and virus if the shared location is always connected.
Considering all factors, it’s a safe and reliable way to backup Windows Server 2012 to external hard drives like USB flash drive. There are many advantages to backup to USB drive.
-
First and foremost, as USB drive is separate from computer, once the backup is done, your data is safe from hard failures, virus and malware.
-
Almost all computers have USB ports. It is also very common on other devices such as pads and video game consoles. You can connect a USB drive to different devices very easily.
-
USB drive is small and portable. You can carry it easily in a corner of your pockets.
Then, how to create Windows Server 2012 (R2) backup to external hard drive? Three ways will be described in the following.
Method 1. Create Windows Server 2012 Backup to USB Drive with Windows Server Backup
Microsoft offers Windows Server Backup (WSB) to help users backup their server data. It is not difficult to use. However, Windows Server Backup has default limitations.
◈ The unused space of USB must be equal to or more than 64GB. Otherwise, you cannot find your USB drive at local drive. It is a default limitation of Windows Server. Here I recommend using a 128GB USB drive (The bigger, the better).
◈ Basically, Windows backup has no compassion. If you set a scheduled backup, the backup disk is very easy to become full.
If you are OK with these issues, try the following steps to backup Server 2012 to a USB drive. If you want a backup tool without limitation for free storage space on the USB drive, go to Method 2 to learn more.
Step 1. Press Win + R and type “wbadmin.msc” to open Windows Server Backup. Or you can open it by clicking Start and selecting Administrative Tools. Find Windows Server Backup and click it. Install Windows Server Backup first if you did not install it.
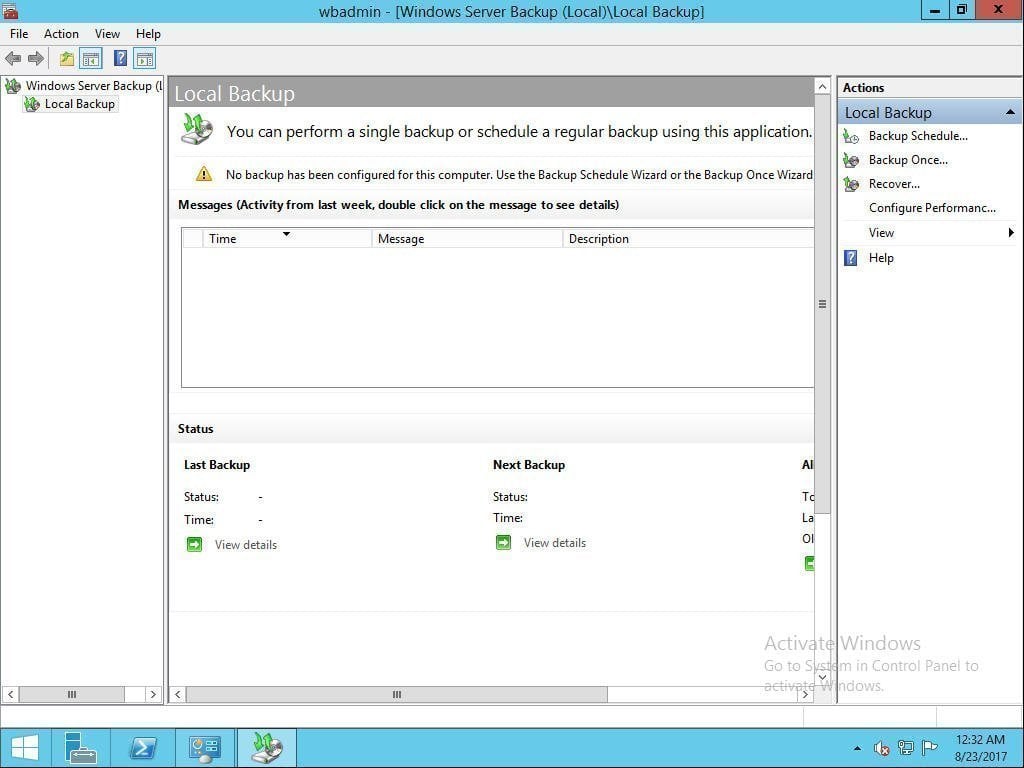
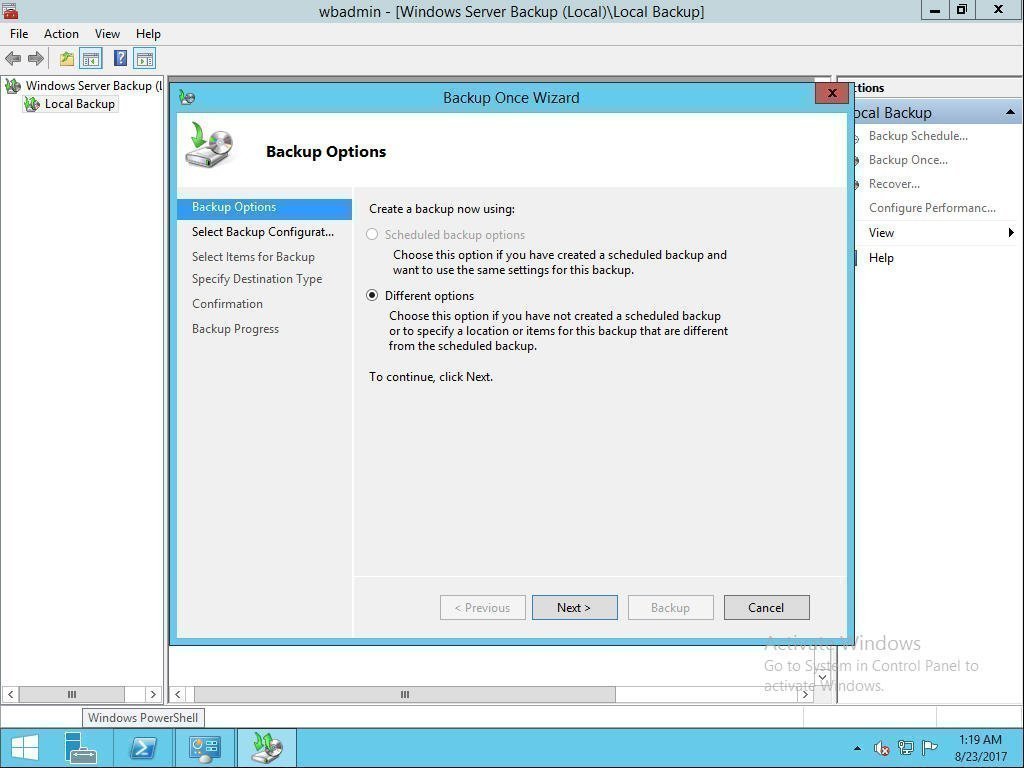
Step 2. On the Right Panel, click Backup Once option. By default, it will tick create a backup now using Different options, just click next.
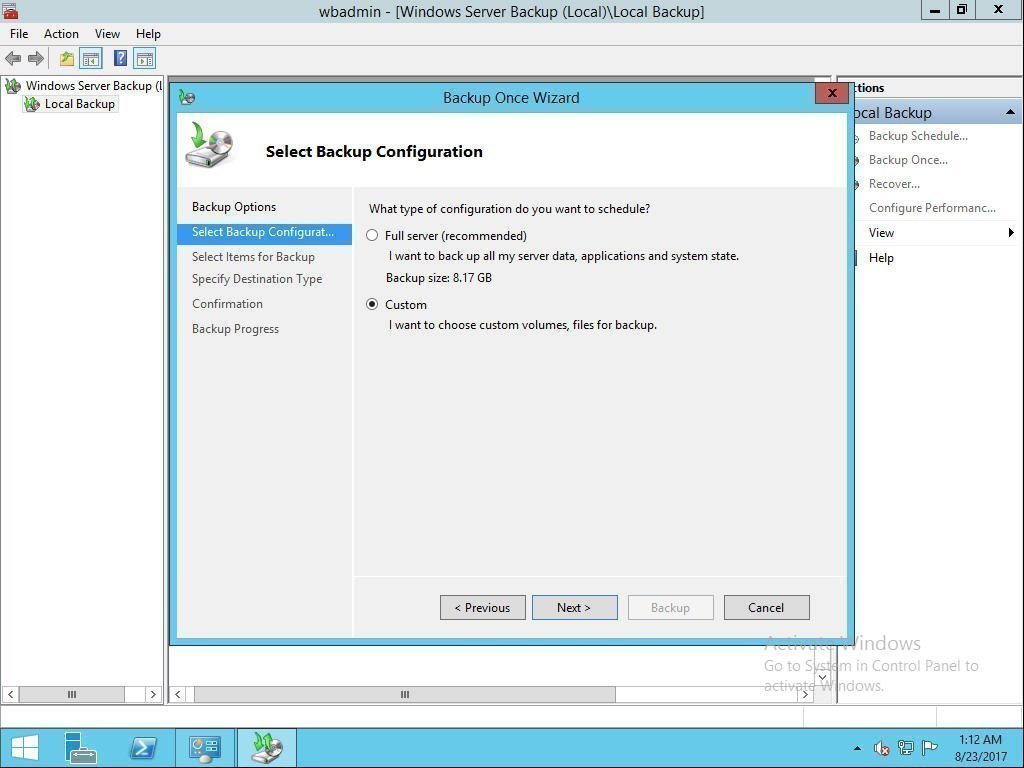
Step 3. Then you come to Select Backup Configuration. Tick Custom and click Next.
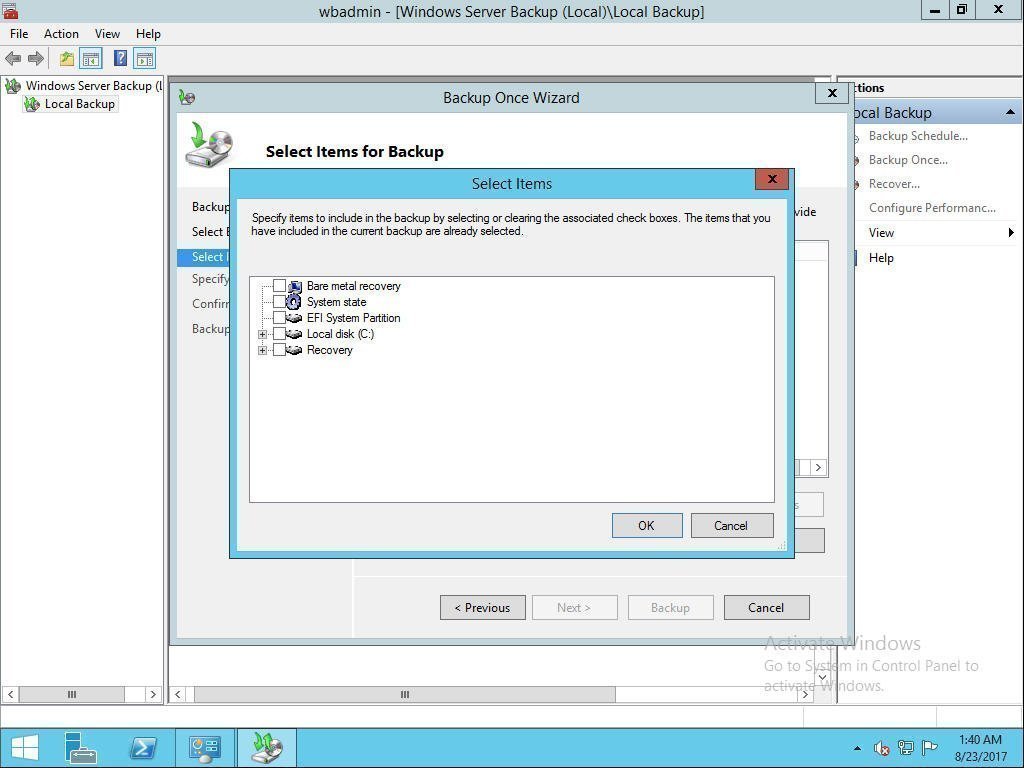
Step 4. Then come to Select Items for Backup. Click Add Items and select System state and click OK. Then click Next to continue.
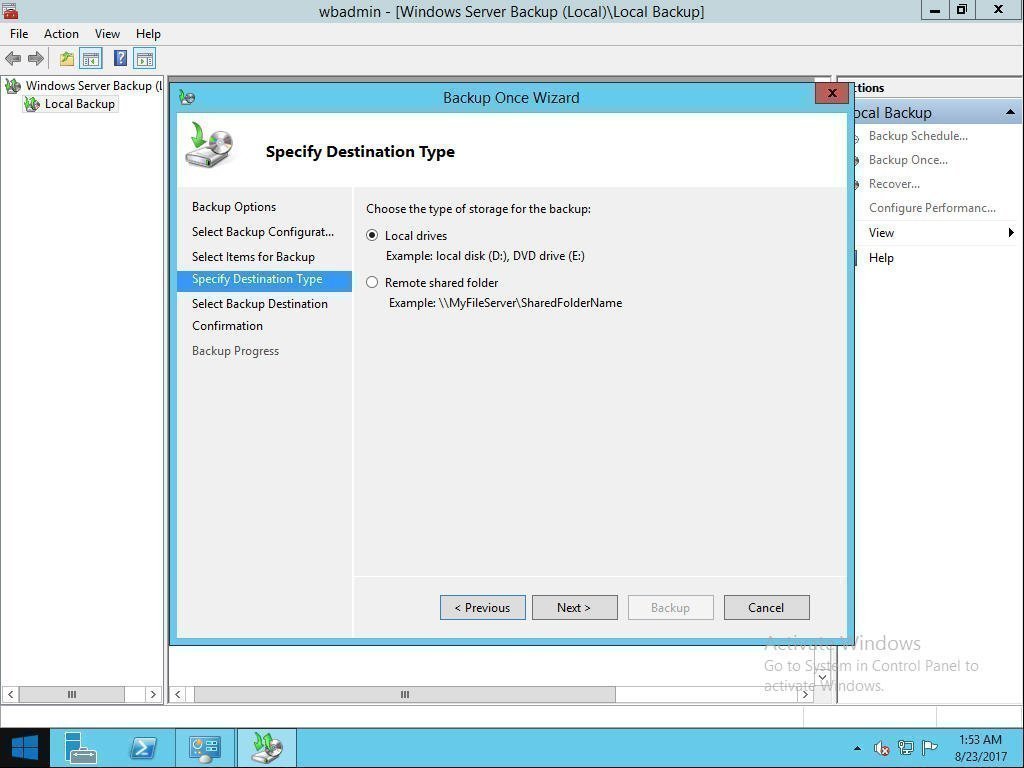
Step 5. Then choose the type of storage for the backup. There are two options: local drive and remote shared folder. Choose Local drive and select USB drive.
Method 2. Create Windows Server 2012 Backup to USB Drive with AOMEI Backupper🔥
There is an easier way to create Windows Server 2012 (R2) backup to USB drive: use AOMEI Backupper Server. With it, you do not need to worry about USB storage problem. You can backup to USB as long as it has enough space to store system image backup.
✧ Multiple types of backup strategies
It provides system backup, disk backup, partition backup, and file backup. No matter what you want to backup, it will content you.
✧ Abundant backup schedules
It lets you create Windows Server Backup multiple schedules: daily/weekly/monthly/event triggers/USB plug in. It also allows you to do full/incremental/differential backup for the scheduled task as per your needs.
✧ Smart backup schemes
It will delete old backup images automatically to help you free up disk space. There are four backup schemes offered for you.
With only a few clicks, you can backup Windows Server 2012 to external hard drive. If any emergency happens to your computer, you can perform a quick recovery to the previous state.
Let’s take a look at how this software works to create system image backup. Besides Server 2012, it also supports Windows Server 2003, 2008, 2011, 2016, 2019, 2022 (including R2), SBS 2003, 2008, 2011 and Windows PC systems.
Step 1. Install and run the tool. Click the System Backup under the Backup tab.

Step 2. You do not have to choose source data, because the software has chosen it automatically for you. Just click the marked box to select USB drive as destination path. Finally, click Start Backup.

System image backup allows you to restore your server system from USB easily if a disaster happens. To restore system when your server fails to boot, you need to create a system repair disc in advance.
★ System restore from AOMEI bootable media
1. Connect the bootable media to the computer. Start your computer and press a specific key (usually Del or F2) to boot into BIOS. Switch the bootable media as the first boot option.
2. It will bring you to the main interface of AOMEI Backupper. Click Restore at the interface of AOMEI Backupper and then click Select Image File. Navigate to the system image on the USB drive and follow the instructions step by step to complete the process.

Method 3. Backup Windows Server 2012 to USB Drive with AOMEI Cyber Backup👍
The best enterprise backup software - AOMEI Cyber Backup provides a convenient and reliable solution for centralized backup management of all Windows operating systems.
- It enables you to create system/disk/partition backup for a bunch of Windows PCs and Servers.
- You are allowed to save backup images on a local disk, USB stick, external hard drive, network share or NAS device.
- You can schedule a backup task to run daily/weekly/monthly using the full/incremental/differential backup method.
Follow the instructions below to backup Server 2012 to a USB flash drive.
Step 1. Connect the USB drive to your computer. Download, install and run AOMEI Cyber Backup. Log in with AOMEI Cyber Backup account or Windows account.
Step 2. Click Source Device > Windows > Add Windows Device to add the Windows Server 2012 device that you want to backup. You need to enter the IP address, username and password of it.
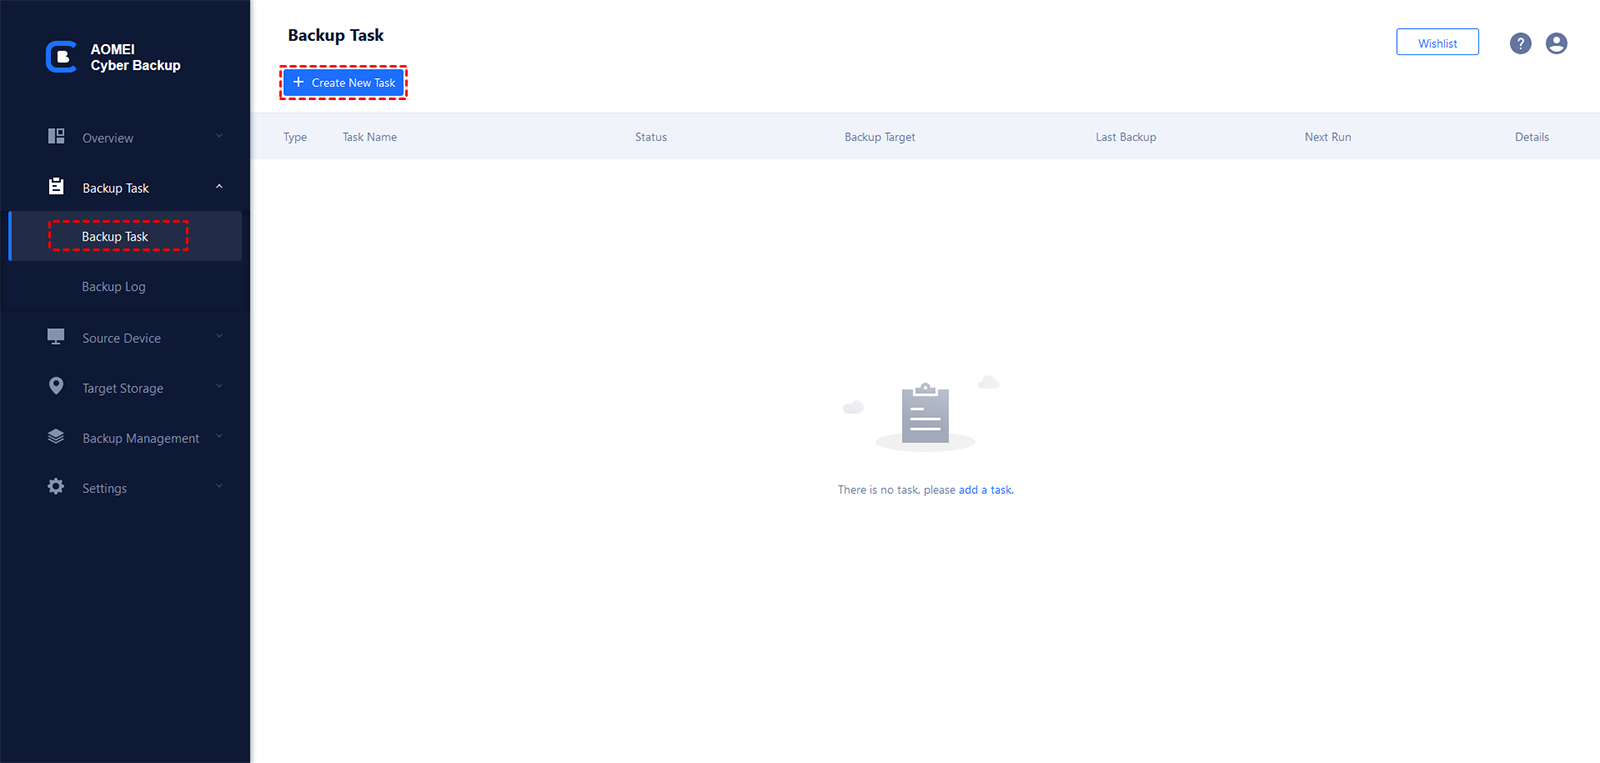
Step 3. Create a new backup task.
- Click Backup Task on the left menu bar and select Backup Task > Create New Task.
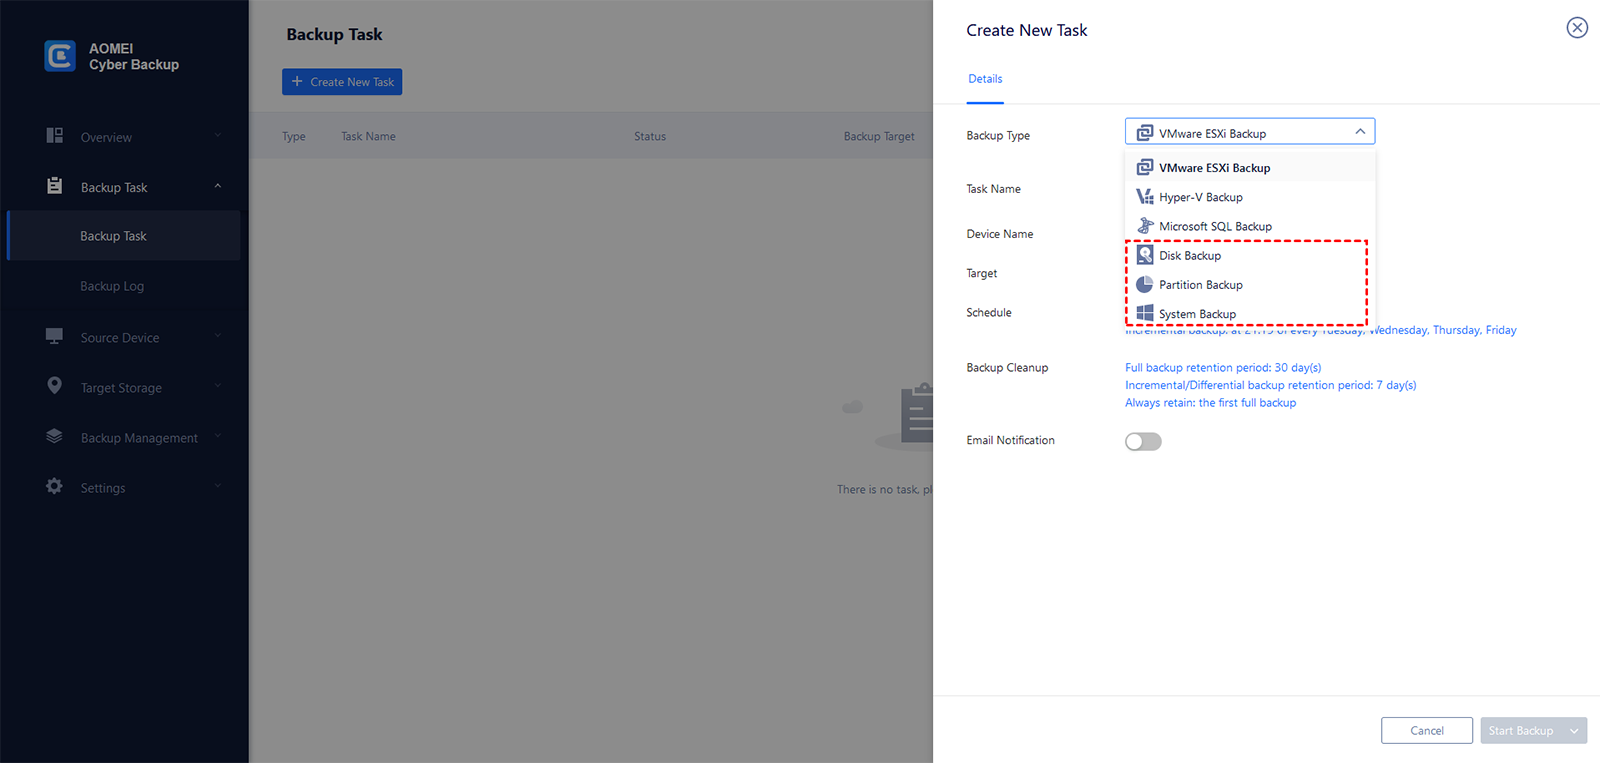
- Choose System Backup as the Backup Type.
- Edit Task Name based on your need.
- In the Device Name field, click Select + to select the device you just added.
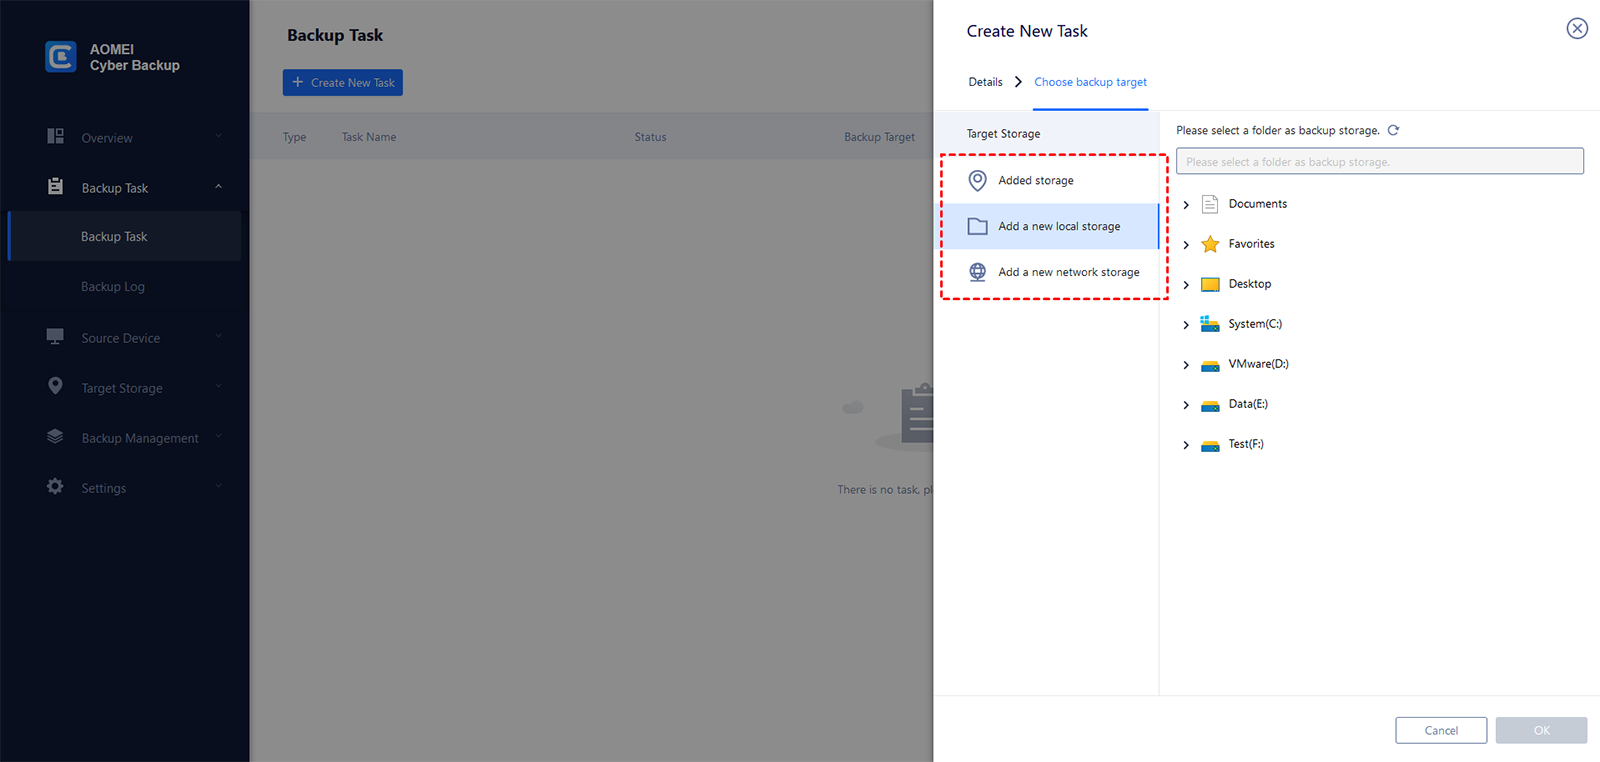
- In the Target field, click Select + > Add a new local storage. Then choose the USB flash drive you connected before.
- Change the default schedule settings in the Schedule field.
- Click Start Backup > Add the schedule and start backup now to run your first backup.
Conclusion
That’s all for how to create Windows Server 2012 (R2) backup to USB drive. These methods apply to creating Windows Server 2016 backup to USB drive as well. Compared to Windows Server Backup, AOMEI Backupper Server can help you finish the job in an easier way. There is no need to consider the storage space of the USB and it provides more powerful functions that WSB does not have.
To protect unlimited PCs and servers within your company, you may choose AOMEI Backupper Technician Plus. It offers unlimited billable technical services to clients. It also enables you to copy installation directory for portable version creation.