How to Take System State Backup in Windows Server 2012 (R2)
How to take system state backup in Windows Server 2012 (R2)? This article provides you with three methods to accomplish this. Master at least one to protect your computer with this system state backup.
by Miya Updated on December 12, 2023
What is system state backup?
Windows Server 2012 allows you to take system state backup, which backs up operating system files, enabling you to recover when a machine starts but you've lost system files and registry.
Specifically, the system state is composed of the following data:
● Boot files, including the system files, and all files protected by Windows File Protection (WFP).
● Active Directory (on a domain controller only).
● Sysvol (on a domain controller only).
● Certificate Services (on certification authority only).
● Cluster database (on a cluster node only).
● The registry.
● Performances counter configuration information.
● Component Services Class registration database.
The system state data can be backed up in any order. Restoration of the system state replaces boot files first and commits the system hive of the registry as a final step in the process.
How does system state backup and restore work?
System state backup and restore operations include all system state data, you cannot choose to backup or restore individual components due to dependencies among the system state components.
However, you can restore system state data to an alternate location in which only the registry files, Sysvol directory files, and system boot files are restored. The Active Directory database, Certificate Services database, and Component Services Class Registration database are not restored to the alternate location.
Although you cannot change which components of the system state are backed up, you can back up all protected system files with the system state data by setting advanced backup options.
Take system state backup in Windows Server 2012 (R2) with inbuilt tool
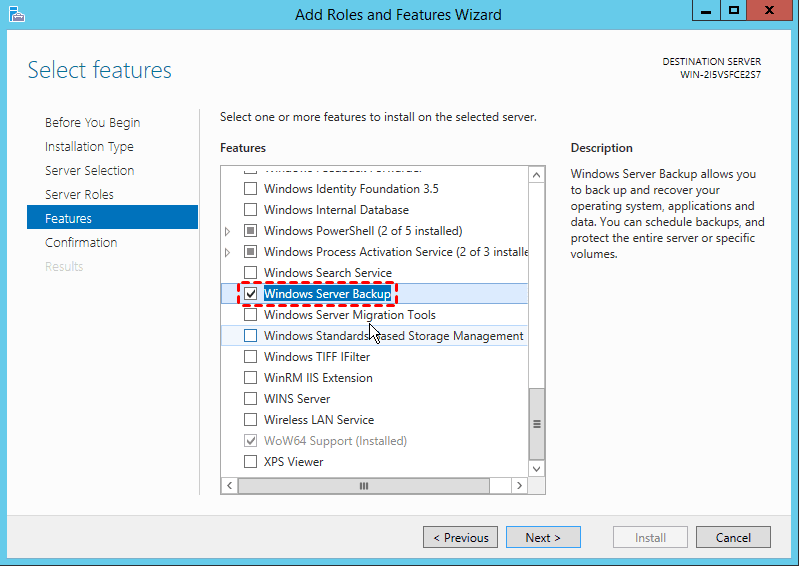
First, install the feature of Windows Server Backup on Windows Server 2012 and then follow the steps below to take system state backup.
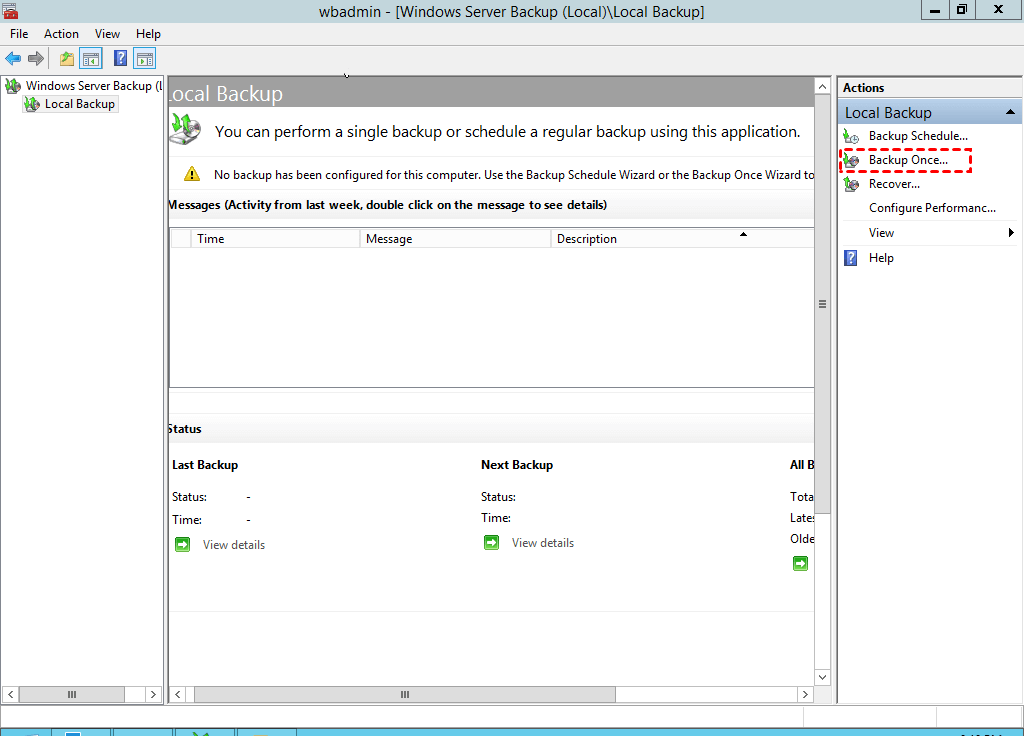
1. Open Server Manager and enable Windows Server Backup from the features. Click Start -> Administrative Tools, and then select Windows Server Backup.
2. On the Windows Server Backup page: click on Backup Once. You can also make a scheduled backup by clicking Backup Schedule.
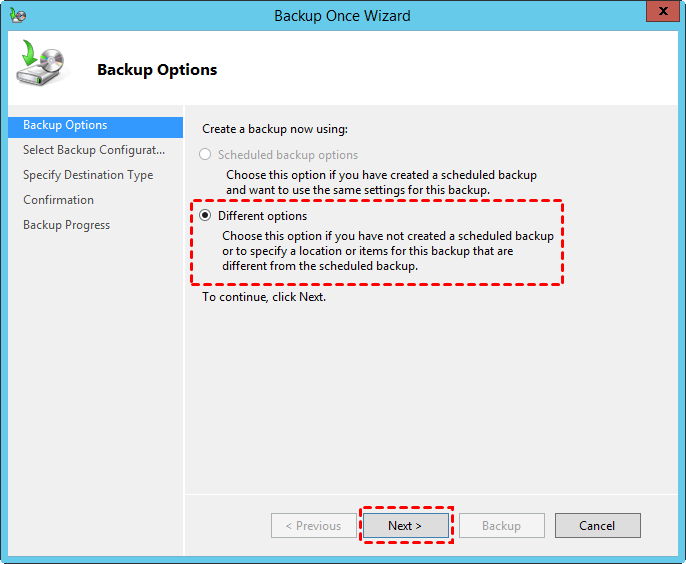
3. On the Backup Options page: choose Different options and click Next.
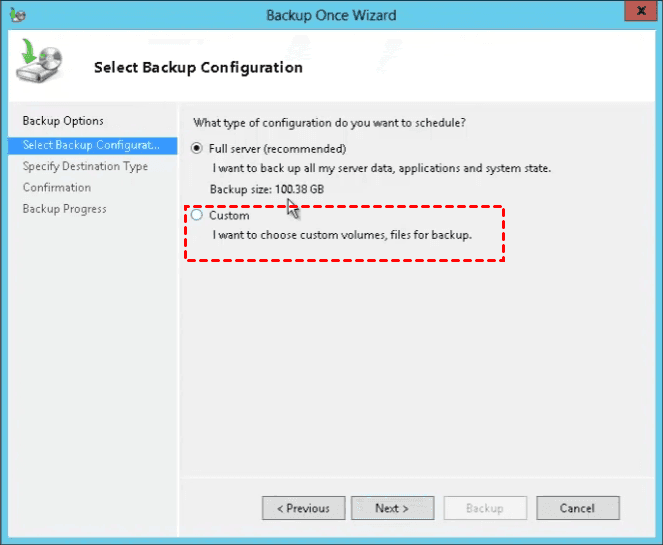
4. On the Select Backup Configuration page: select Custom and click Next.
5. On the Select Items for Backup page: click Add Items to select the option of System State Backup.
6. On the Select Items page: select System state and click OK.
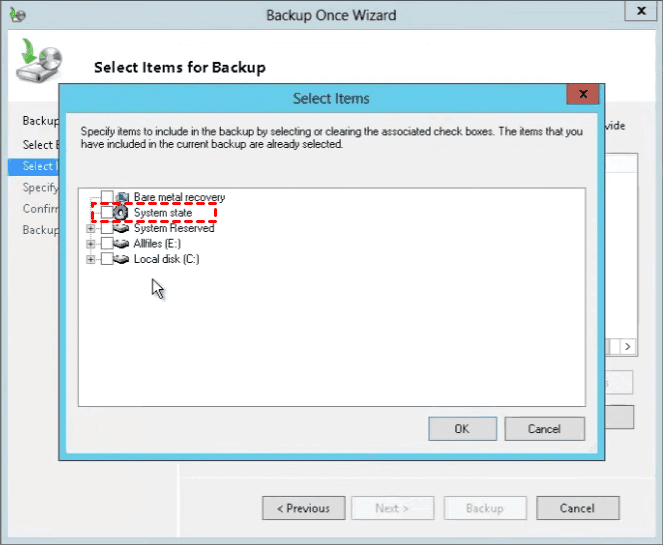
7. On Select Items for Backup page: confirm the items to be included in a backup and click Next to continue.
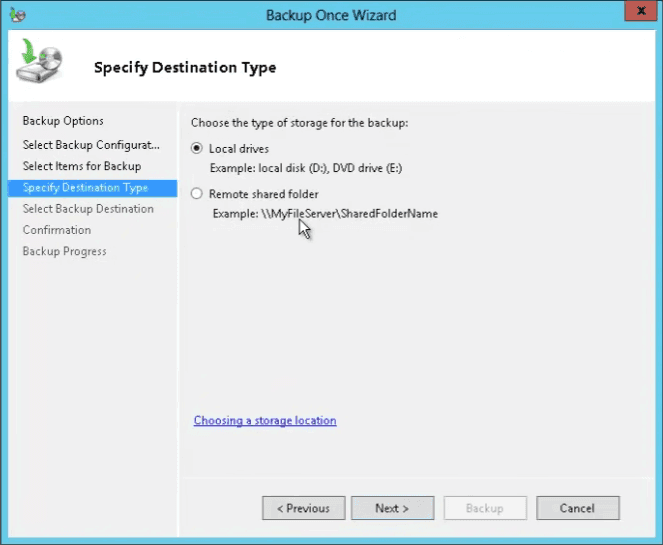
8. On the Specify Destination Type page: choose Local drives and click Next. Or you can select Remote shared folder to store the backup to any share folder.
9. On the Select Backup Destination page: choose the destination drive and click Next.
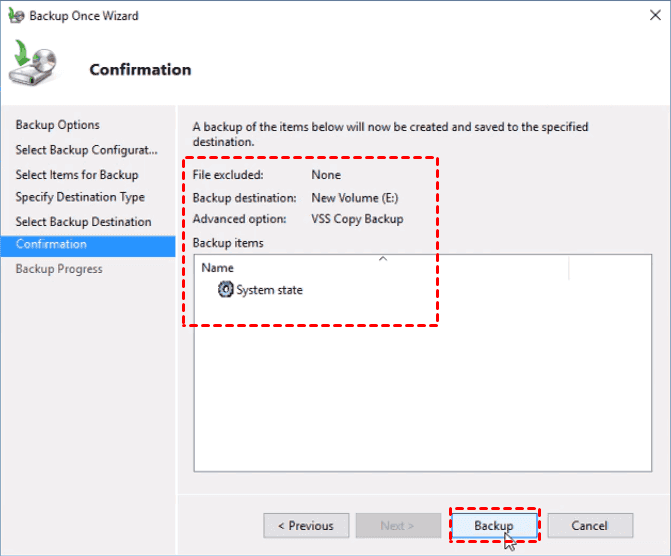
10. On the Confirmation page: verify all options and click Backup to start.
11. When the backup is completed, click Close to close the window.
It may take a long time to finish the backup. And there are two points you should pay attention to:
☢ Once the backup is complete, if you want to create another backup, you must specify the destination to another location because the new backup will overwrite the previous backup on the same location.
☢ If what you created is a scheduled backup, you can modify or delete the task when you want to create a new scheduled backup.
Wanna get rid of these restrictions? Keep reading to get one third-party tool that can help you take system state backup in Windows Server 2012 in an easier way.
Backup Windows Server system state 2012 (R2) with AOMEI Backupper Server🔥
AOMEI Backupper Server is a comprehensive and reliable backup software for Windows Server 2003, 2008, 2012, 2016, 2019, 2022, SBS 2003, 2008, 2011, and Windows PC systems. It can help you backup system state in Windows 2012 (R2) with no effort.
✬ It lets you configure daily/weekly/monthly/event triggers with multiple backup schedules.
✬ It allows you to set full/incremental/differential backup for the scheduled task.
✬ It can help you automatically delete older backup images to manage backup disk space.
Moreover, AOMEI Backuppper Server has a user-friendly interface. You can backup system state of Windows Server 2012 in a few clicks. The following are the steps to create system backup of Windows Server 2012 with this tool.
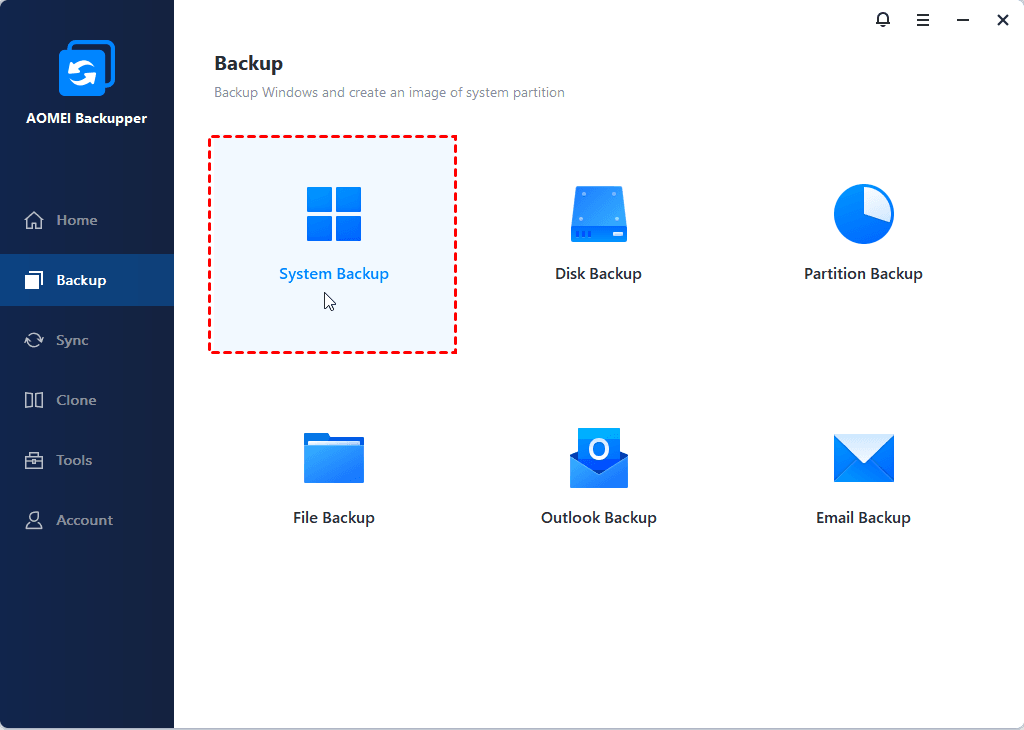
Step 1. Download the software, install and open it. On the main interface, choose System Backup.
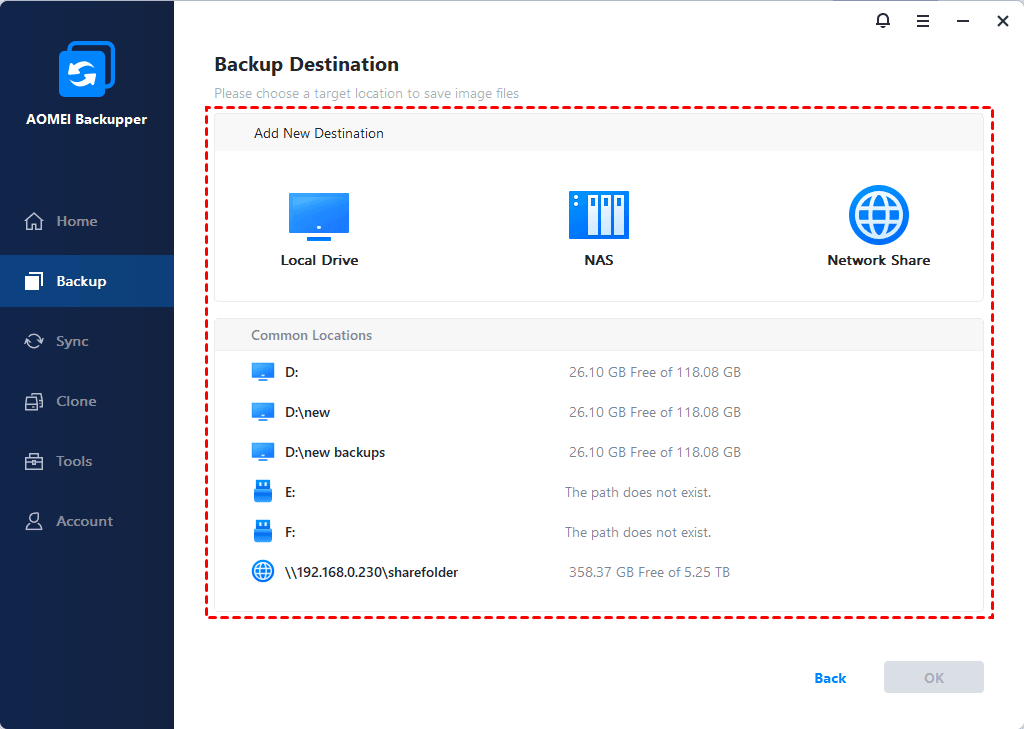
Step 2. Name the task, then select the destination path for your backup. AOMEI Backupper has automatically chosen C-drive for users, thus you don't need to choose the system manually.
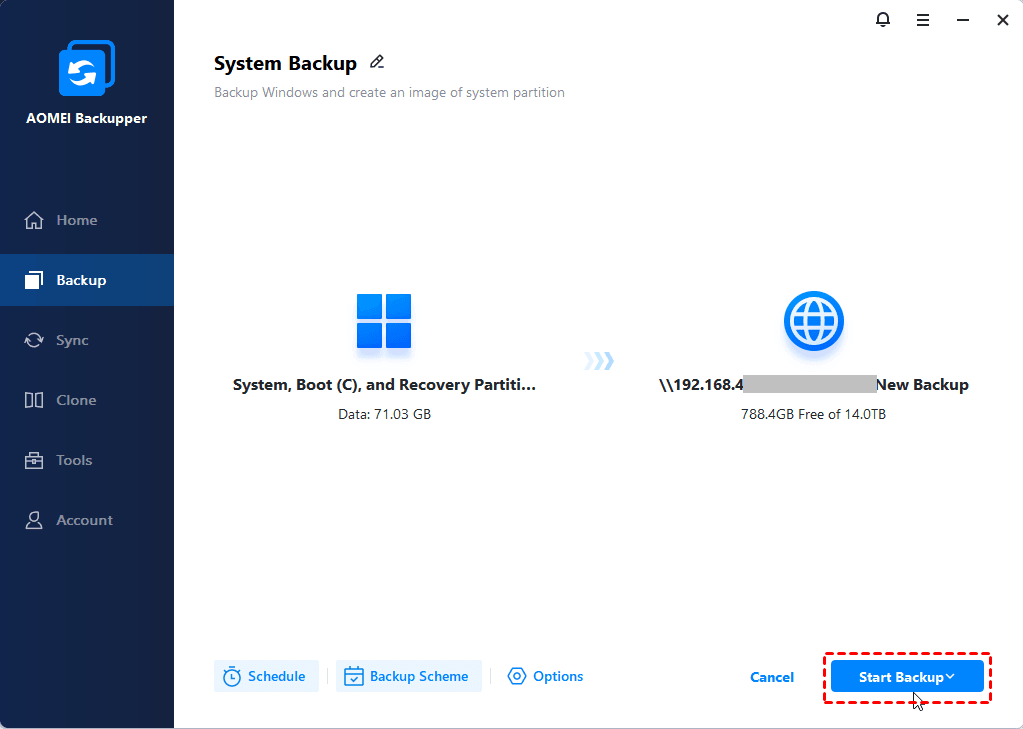
Step 3. Confirm the operation and then click Start Backup.
Notes✍:
1. If you want to enable encryption for the backup, you can click Options to make it.
2. Click Schedule Backup to make a custom scheduled backup. And we will show you the next three options.
-
Event Triggers: You could trigger the backup event by the following events: User logon, User logoff, System startup, System shutdown.
-
USB plug in: It's convenient to backup data to USB drive or backup data on USB to other location once detecting the USB device of the task is plugged in.

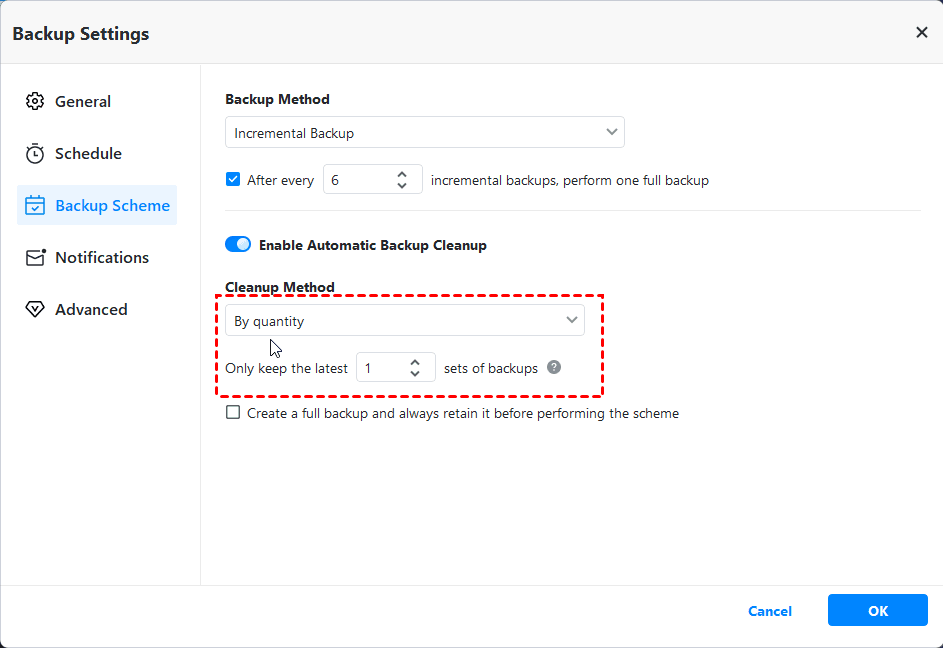
3. Click Backup Scheme -> Enable Automatic Backup Cleanup to let the tool delete old image files automatically. There are 4 schemes to help you to delete old backup image to free up space: By quantity, By time, By daily/weekly/monthly and By space.
4. When you want to restore the system backup, please go to Home -> find the backup you created > click Restore.
Create Windows Server 2012 (R2) system state backup with AOMEI Cyber Backup👍
The best enterprise backup software - AOMEI Cyber Backup provides a convenient and reliable solution for centralized backup management of all Windows operating systems.
- It enables you to create system/disk/partition backup for a bunch of Windows PCs and Servers.
- You are allowed to save backup images on a local disk, external hard drive, network share or NAS device, etc.
- You can schedule a backup task to run daily/weekly/monthly using the full/incremental/differential backup method.
- You can also use it to backup VMware, Hyper-V and MSSQL Servers.
Download this powerful enterprise backup software now and learn how to run system state backup for Server 2012 below.
1. Install and run AOMEI Cyber Backup. Log in with AOMEI Cyber Backup account or Windows account.
2. Click Source Device > Windows > Add Windows Device to add the Windows Server 2012 device that you want to backup. You need to enter the IP address, username and password of it.
3. Create Windows Server 2012 system backup.
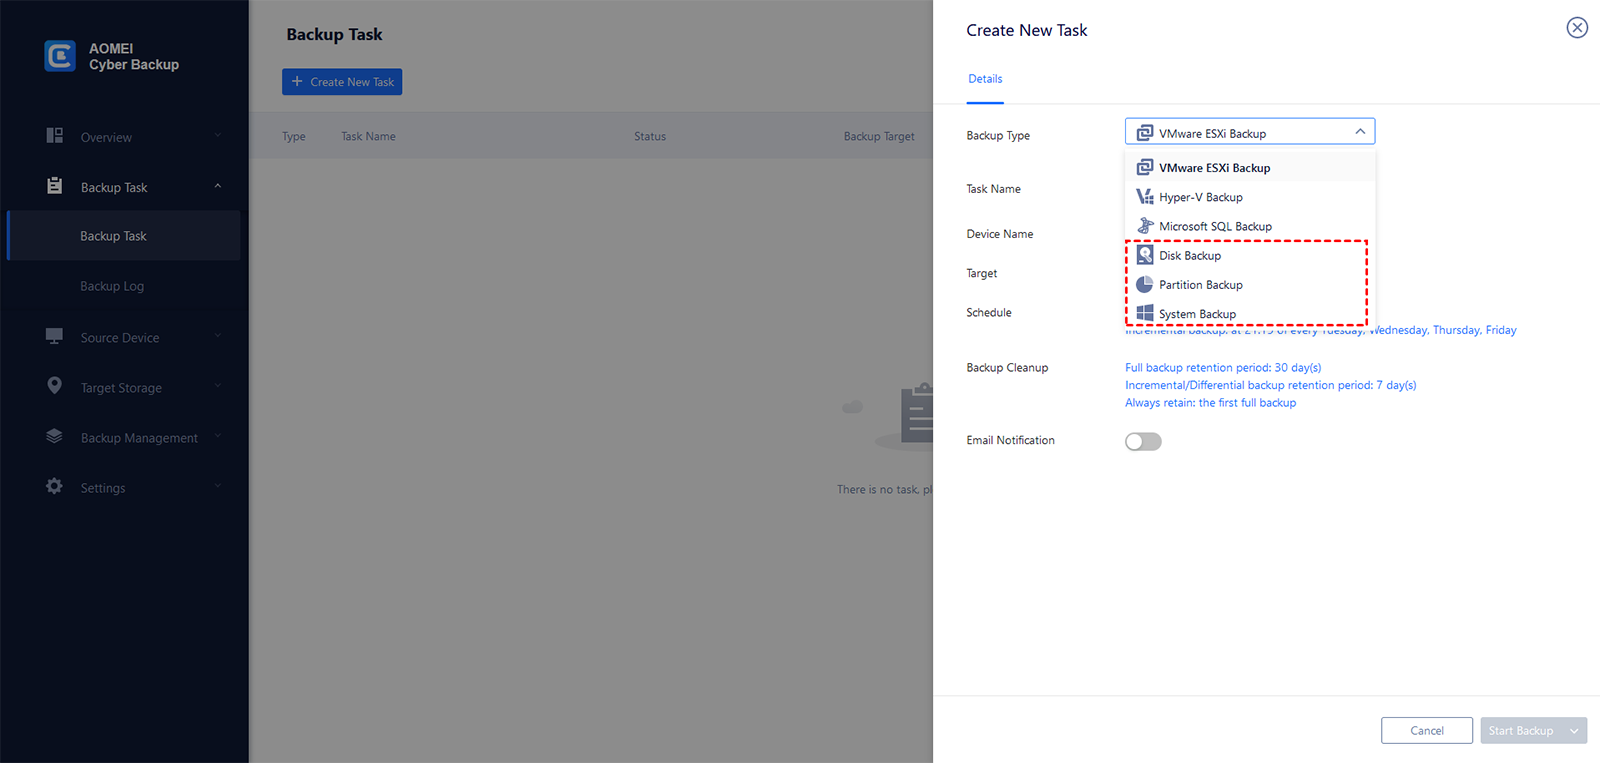
- Click Backup Task on the left menu bar and select Backup Task > Create New Task.
- Choose System Backup as the Backup Type.
- Edit Task Name based on your needs.
- In the Device Name field, click Select + to select the device you just added.
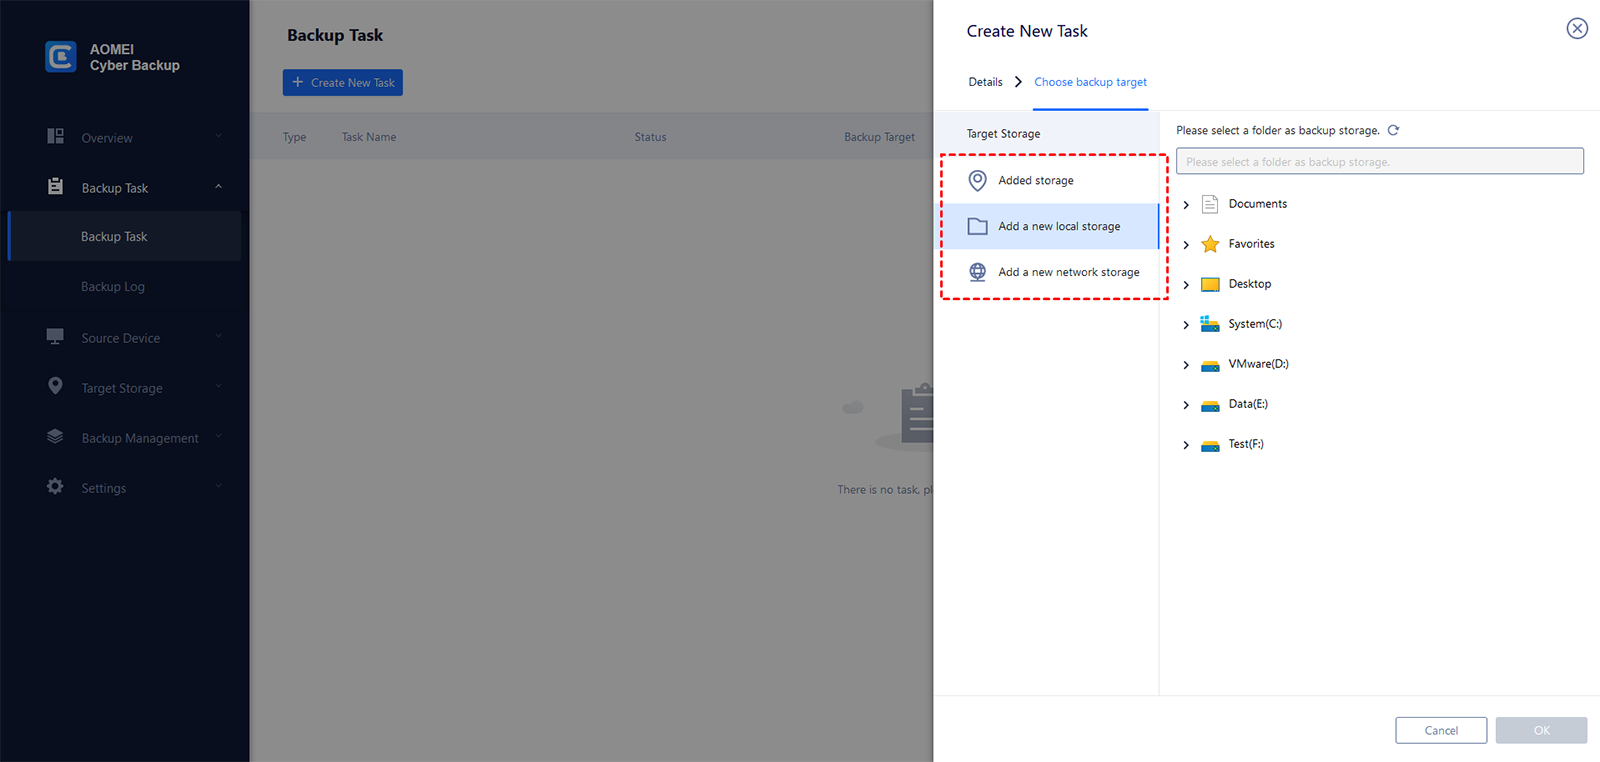
- In the Target field, click Select + and Add a new local storage or Add a new network storage to specify a destination path.
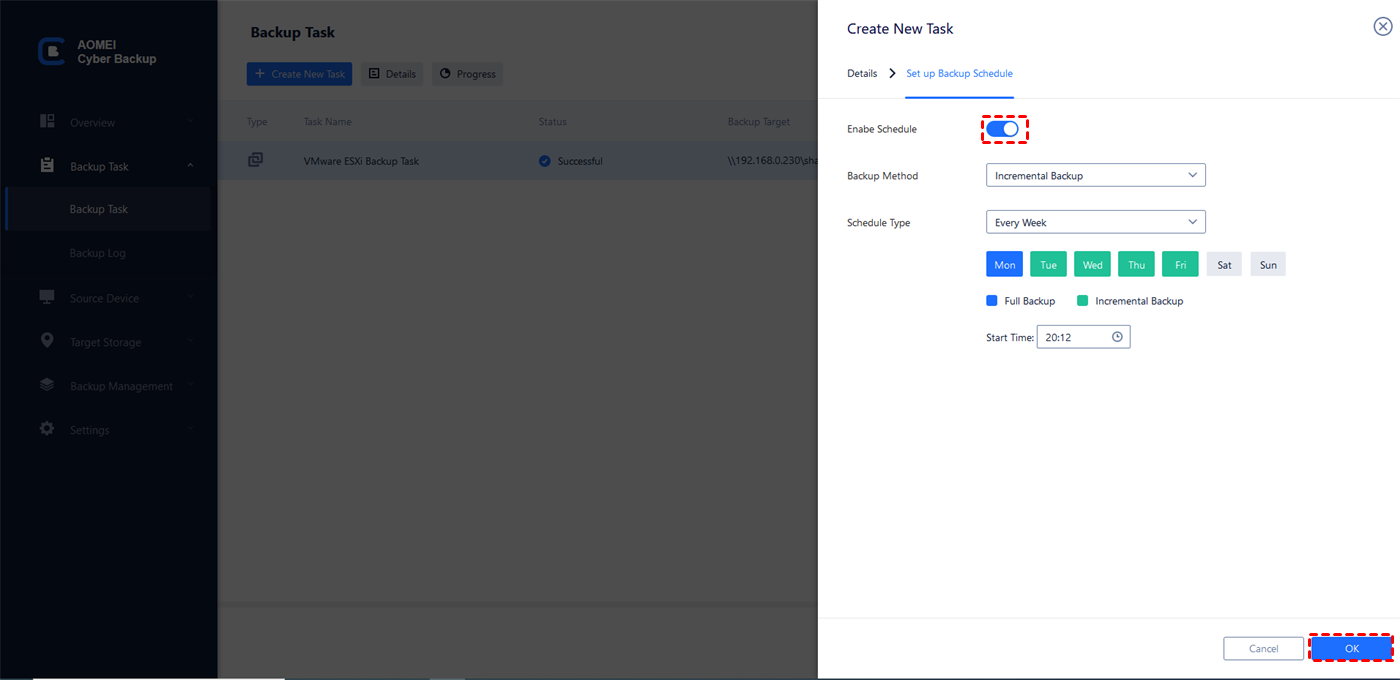
- Change the default schedule settings in the Schedule field.
- Click Start Backup > Add the schedule and start backup now to run your first backup.
Conclusion
According to the explanation above, compared to Windows built-in tool, it's easier to backup system state of Windows 2012 with the assistance of AOMEI Backupper Server Edition. If you are an enterprise user who has multiple devices that need to be backed up, AOMEI Cyber Backup is suitable for you. Why not try it now?