Bare Metal Restore in Windows Server 2008 (R2) | 2 Ways
Want to figure out more information about bare metal restore in Windows 2008 (R2)? This article will help you solve the most often asked questions about bare metal recovery under Windows Server 2008 (R2) operating system.
by Lily Updated on June 25, 2023
Introduction of bare metal restore in Windows 2008 (R2)
Sometimes, you may be confronted with software and hardware problems and consequently some irretrievable damage would occur to your Server 2008 (R2) operating system. If a bare metal recovery image has been created in advance, you could easily restore the whole server backup image to regain the appointed system state. Generally, there are four major reasons for running bare metal restore:
-
Small download package
-
Without reinstalling operating system
-
Fast and easy recovery operation
-
Able to restore to dissimilar hardware
How do I restore bare metal Windows backup? Two methods are offered for your reference:
-
Bare metal recovery in Server 2008 (R2) without loading Windows
-
Restore Windows Server 2008 (R2) to different hardware without CD
Bare metal recovery in Server 2008 (R2) without loading Windows
To practice bare metal restore in Windows 2008 (R2) without loading the operating system, you need to enter Windows Server 2008 (R2) Recovery Environment, and there are some preconditions:
-
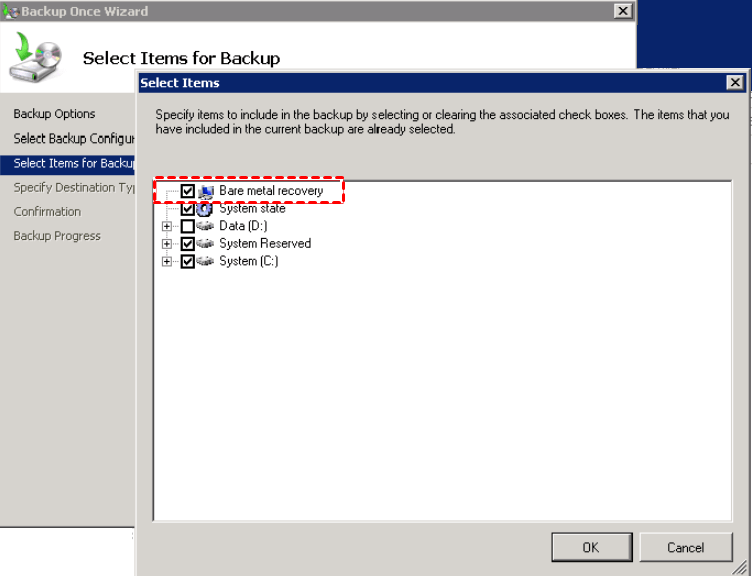
A bare metal backup image. To perform bare metal backup in Server 2008 (R2), you can create a full server backup using Windows Server Backup (WSB) or Wbadmin command lines. A full server backup in WSB will include all critical items, such as “Bare metal recovery” and “System state”.
-
Installation disc of Windows Server 2008 (R2).
-
Big enough destination drive. If you are recovering to a new hard disk, make sure the disk is at least as big as the disk that contains the volumes that were backed up, regardless of the size of those volumes. For example, if you only backed up a 200 GB volume on a 1 TB disk, you should use a destination disk that is at least 1 TB.
Follow the steps below to run bare metal restore in Windows 2008. If you are running Windows Server 2008 R2, the steps are similar.
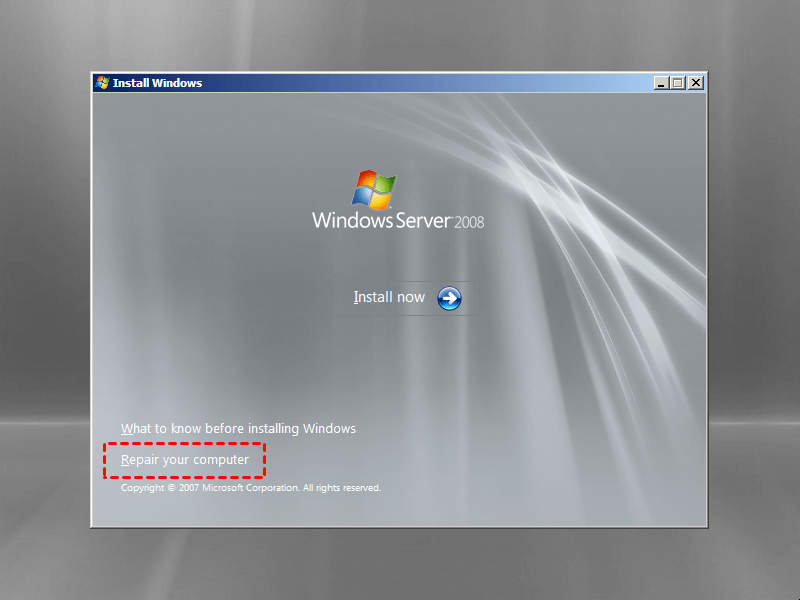
Step 1. Start from Server 2008 installation disc. Then choose the proper language and click Next.
Step 2. On the next screen, you will see a Repair your computer option. Click it to go to the next step.
Step 3. Select the operating system to repair and click Next.
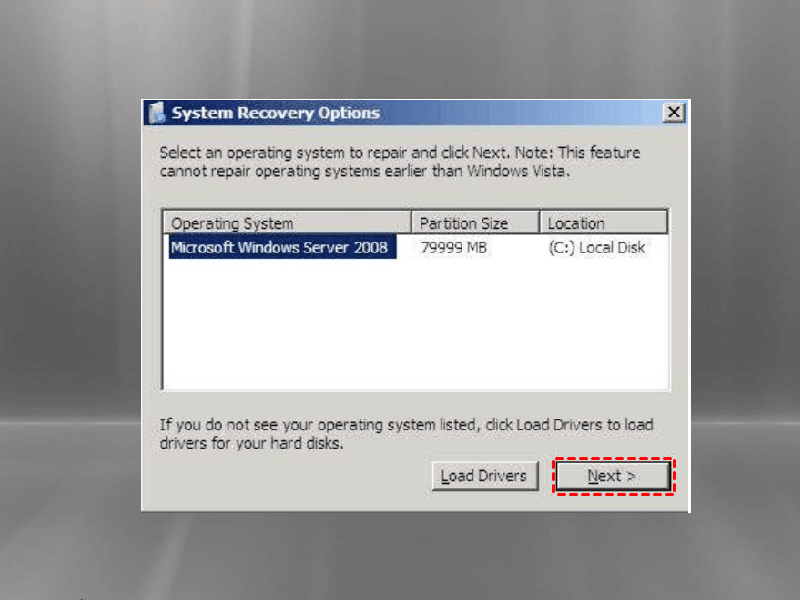
Tips:
● If you don’t see your operating system listed, click Load Drivers to load the demanded drivers.
● If you are restoring Server 2008 onto separate hardware, the list should be empty (there should be no operating system on the computer).
Step 4. In the System Recovery Options window, choose Windows Complete PC Restore.
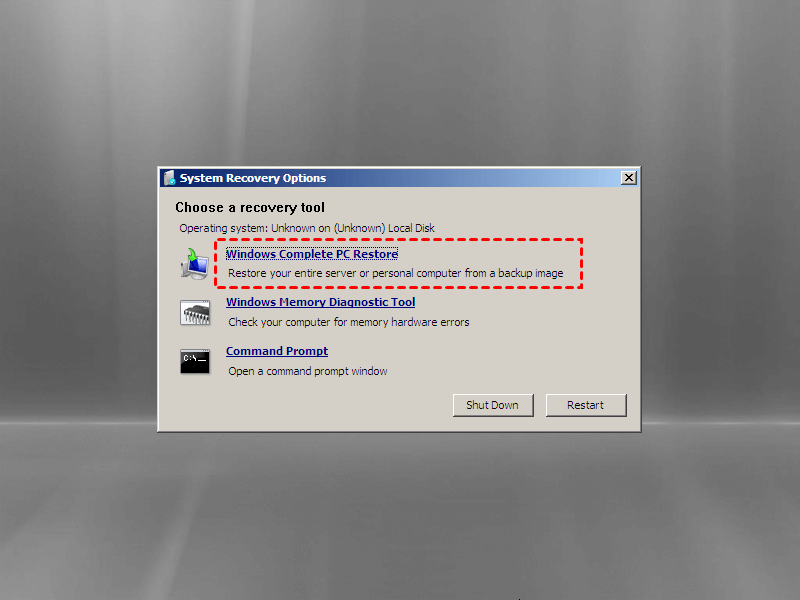
Note: To run bare metal recovery in Windows Server 2008 R2, you should choose System Image Recovery here.
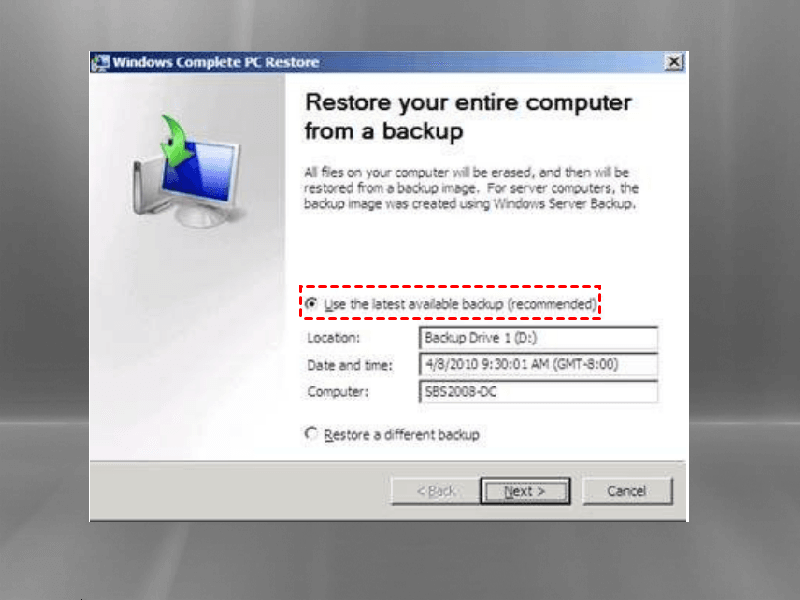
Step 5. In the Windows Complete PC Restore window, there are two options available: Use the latest available backup and Restore a different backup. You are advised to choose the first one.
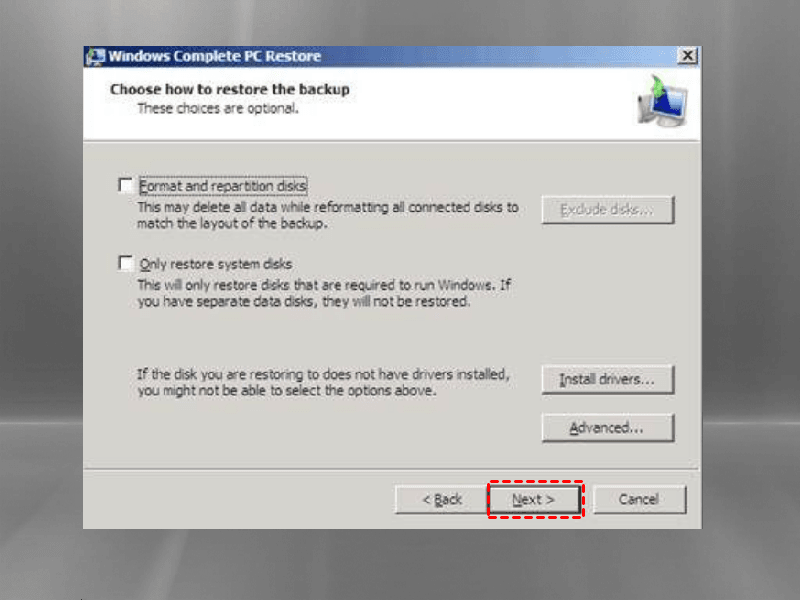
Step 6. On the next screen, you have several options to choose from. Click Next after making your selections.
-
Format and repartition disks: check it to delete existing partitions and reformat the destination disks to be the same as the backup. This enables the Exclude disks button which can be used to exclude certain disks from being formatted and partitioned.
-
Only restore system disks: check it to only restore the disks required to run Windows. No separate data disks will be restored.
-
Install drivers: click it to install device drivers for the hardware that you are recovering to.
-
Advanced: click it to specify whether you want restart and a hard disk scan upon completion.
Step 7. Confirm the details for the restoration, and click Finish to proceed.
Restore Windows Server 2008 (R2) to different hardware without CD
As you see, the process of performing bare metal recovery in Windows Server 2008 or 2008 R2 is not complicated. However, the installation disc is a must. What if you don’t have an installation disc? Powerful server backup software - AOMEI Backupper Server can help you out under this condition.
✦ It offers one-click backup for all server systems, including Windows Server 2003/2008 (R2)/2011/2012 (R2)/2016 (R2)/2019/2022 as well as SBS 2003/2008/2011.
✦ You are allowed to do backup for multiple volumes, documents and files through all your server disks.
✦ It provides the Schedule feature to do automatic backup tasks. If you are not in the mood for full backup, AOMEI Backupper still makes the top choice for differential backup or incremental backup.
✦ You are able to perform bare metal restore to dissimilar hardware with the Universal Restore feature, and you won’t be troubled by boot issues.
✦ It enables you to create Windows Server 2008 (R2) recovery disk so that you can boot your server in case of boot failure without installation disc.
Download AOMEI Backupper now to have a try!
To perform Windows Server 2008 (R2) backup and restore to different hardware via AOMEI Backupper, you should do the following preparations:
1. Create a bootable USB drive on your original server.

Tip: If you don’t have a spare USB drive, you can also create a recovery environment with AOMEI Backupper to boot your computer.
2. Backup system volumes via System Backup or backup full server via Disk Backup. You may save the backup image on an external hard drive or a network share.
Let’s say you have backed up your old server system on an external hard drive. Now follow the steps below to run bare metal restore to a new server with different hardware via AOMEI Backupper:
Step 1. Connect the bootable USB drive and the external hard drive that contains system image to your new server. Then, boot from the USB.
Step 2. AOMEI Backupper will load automatically. Select Restore on the left pane and click Select image file.
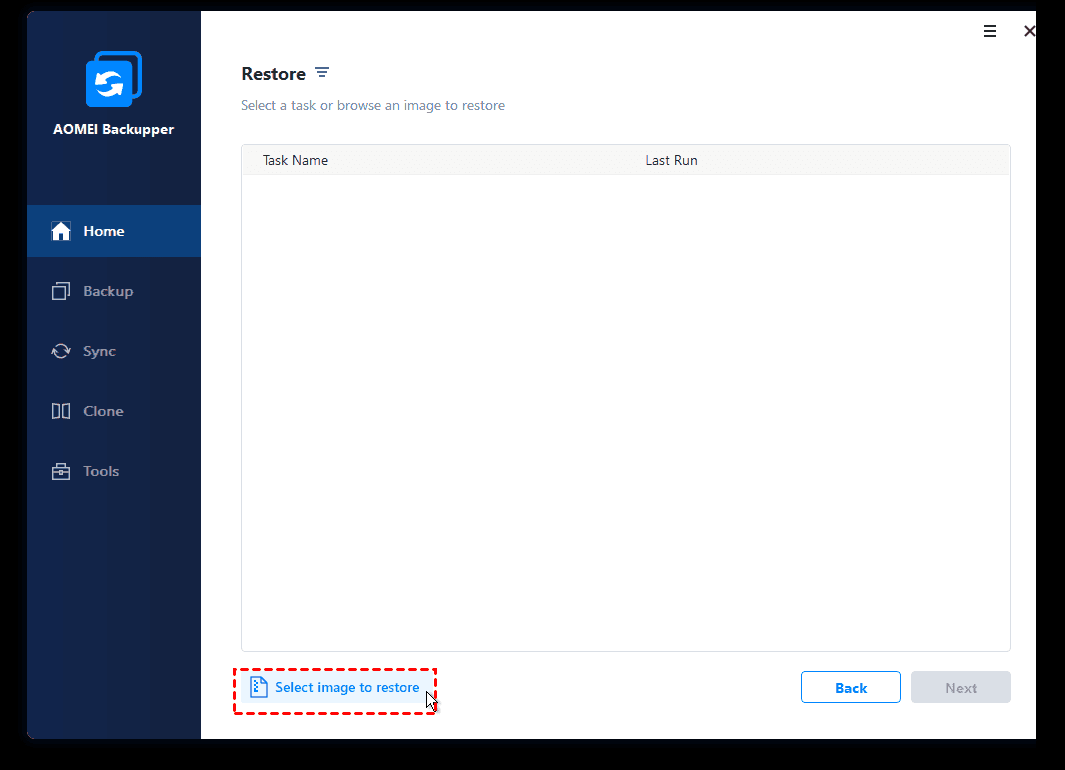
Step 3. Locate the system image file on the external drive and click Open.
Step 4. Select Restore this system backup and tick Restore system to other location. Then, click Next.

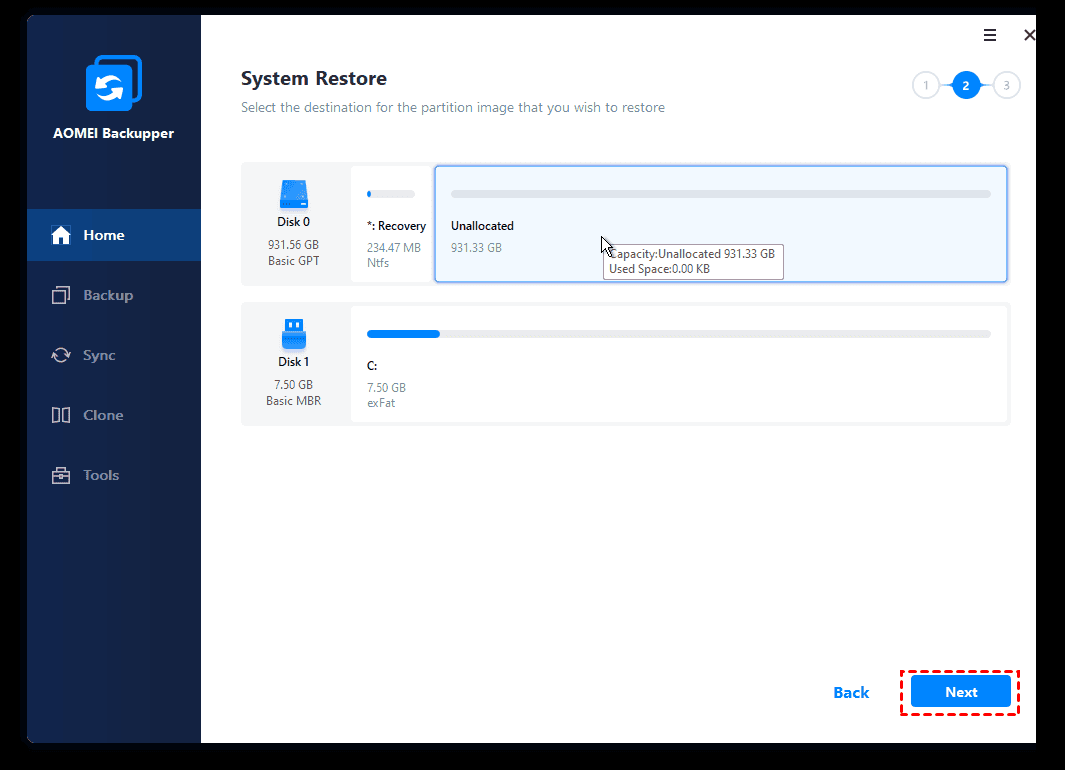
Step 5. Select the hard drive on the new server to restore system image to and click Next.
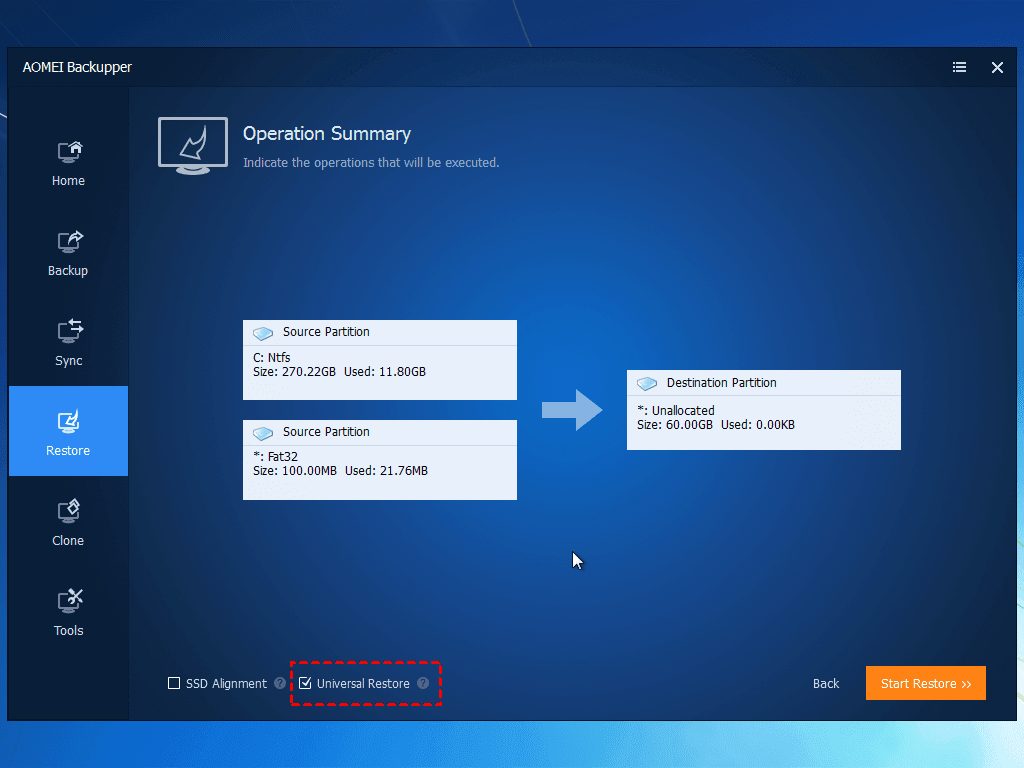
Step 6. In Operation Summary page, check Universal Restore to ensure the system is bootable after recovery. Then, click Start Restore to begin bare metal recovery.
Conclusion
That’s all about how to run bare metal restore in Windows 2008 (R2). You can either take advantage of Windows built-in feature or third-party software AOMEI Backupper. AOMEI Backupper can be used in case that you don’t have an installation disc.
Apart from the backup and restore features, AOMEI Backupper owns the clone and sync functions. It can help you synchronize files between Windows Servers effortlessly. If you want more advanced server backup strategy, then AOMEI Centralized Backupper is offered to you.