How to Backup Windows Server 2008 (R2) to External Hard Drive
Backing up Windows Server 2008 or 2008 R2 to an external hard drive can give a big benefit to server users. It can solve the most headachy thing when system crashes.
by Lily Updated on July 6, 2023
Why Should We Backup Windows Server 2008 to External Hard Drive?
Backup is never strange to computer users. We all know that in order to keep data safe, backing up to another space is more clever. When you backup important data, it will create a backup image file. You can backup to local disk, CD/DVD, NAS/Network, or external hard drive.
For Windows Server, backing up to external hard drive has the following advantages.
💛 Ensure the safety of your business data
There are many situations that can cause data loss, such as system crashes, virus infection, hacker attacks, wrong operations, hard drive damages, and even natural disasters. The image on external hard drive can help to restore the server when accidents happen.
💛 Avoid reinstalling system and programs
After upgrading the old hard drive to a new drive, you can restore the backup image on the external hard drive to get back a working server. There's no need to reinstall the system or commonly used programs, which saves you much time and effort.
How to Backup Windows 2008 (R2) to External Hard Drive with Snap-in Tool
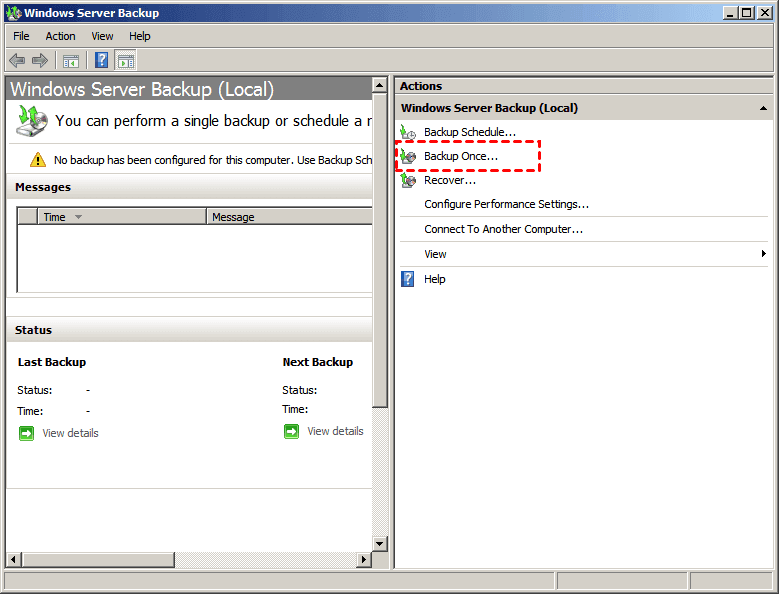
Unlike Windows 2003, Windows 2008 doesn’t built-in a backup software intuitively. You can install the Windows Server Backup in Add Features Wizard first. Then, click Start -> Administrative Tools -> Windows Server Backup to open it. To backup to external hard drive in Server 2008 (R2), follow the steps below:
1. Choose Backup Schedule or Backup Once according to your requirement. Here take Backup Once as an example.
2. Tick Different options and click Next.
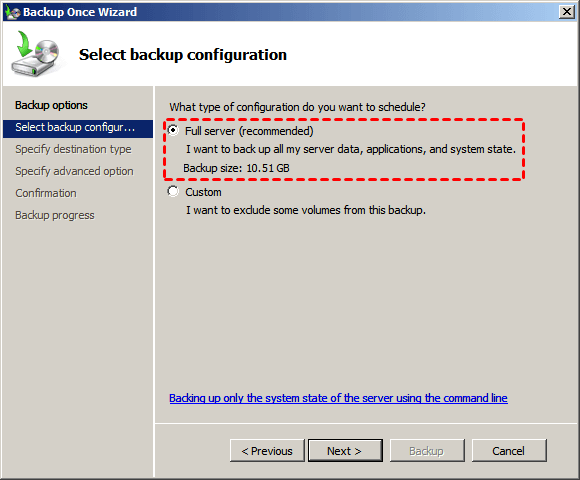
3. Select what you want to backup and click Next. Here I choose Full server.
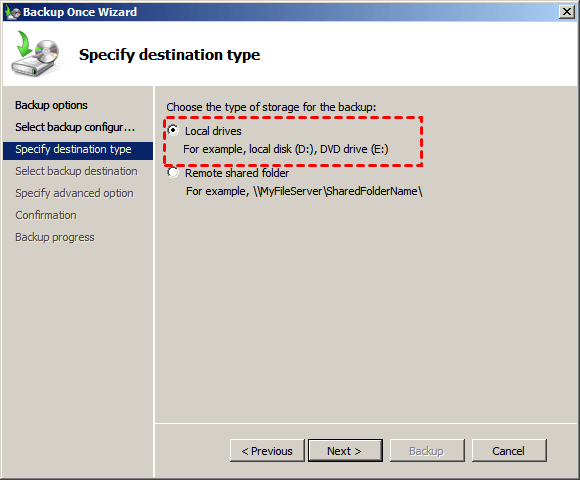
4. Choose where you would like to store the backup image, and click Next. You can choose the external hard drive you prepared after selecting Local drives.
5. Select VSS copy backup (recommended) and click Next.
6. Here you have almost done the job. Confirm the backup items and click Backup to begin backing up Server 2008 (R2).
However, this Windows 2008 snap-in backup tool isn't suitable for everyone. It has many limits.
-
You must be a member of the administrators or backup operators group.
-
The created backup set will not be upgraded when you upgrade your system to Windows Server 2008, and you will need to reconfigure the settings.
-
You can only backup NTFS format volumes with it.
-
The schedule backups can only run with a separate, dedicated disk.
Luckily, you can hire a third party server backup software to help you get out of those kinds of troubles. Considering the safety and price, here we recommend AOMEI Backup Server to you, which has wide features more than backup.
Windows Server 2008 (R2) Backup to External Hard Drive via AOMEI Backupper
As we mentioned above, AOMEI Backupper Server has wide features. You can use it to do backup, clone, restore, and others. All the operations are simple and easy. So, it has a very good reputation. Learn about its backup feature below:
- It allows you to create system or disk image backup. You can also backup specific files in server as you want.
- You are able to backup to an internal/external hard drive, USB pen drive, network share, or NAS device, etc.
- You can create Windows Server differential backup or incremental backup as per your need.
- Multiple backup schedules are available: Daily, Weekly, Monthly, Event triggers and USB plug in.
Want to have a try? Download it now!
Using AOMEI Backupper Server to backup Windows Server 2008 to external hard drive is easy too. Here will introduce the detailed steps. Before you do, prepare a large enough external hard drive.
Step 1. Install and launch AOMEI Backupper Server, click Backup to open the main interface, and you can choose the backup type which you need. Here take Disk Backup as an example.
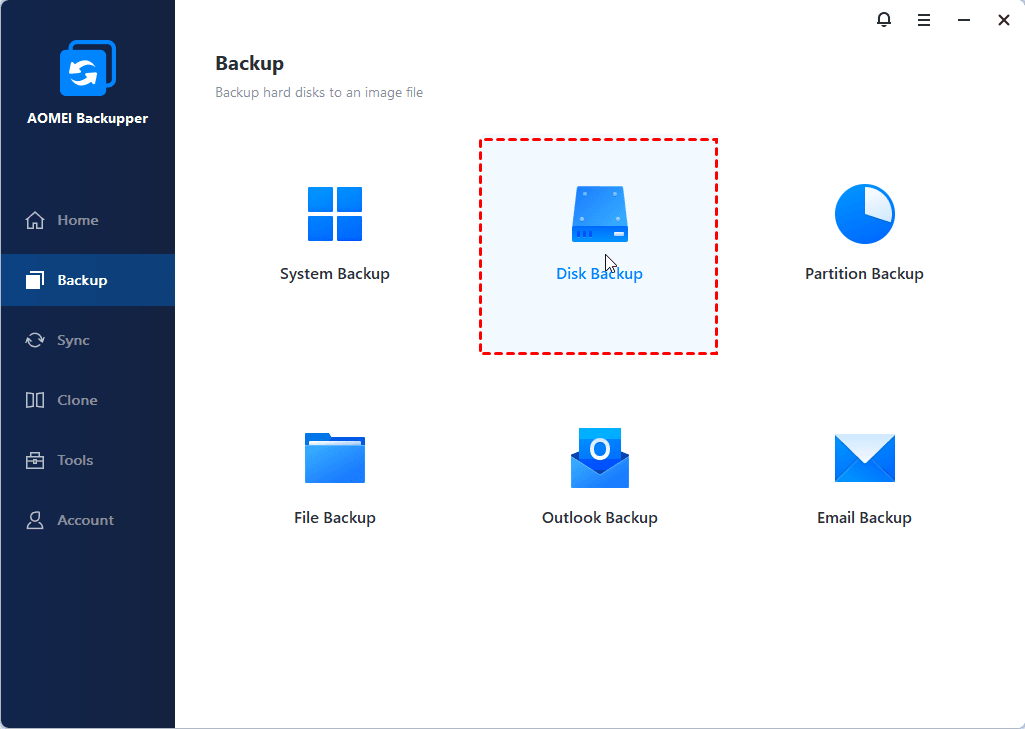
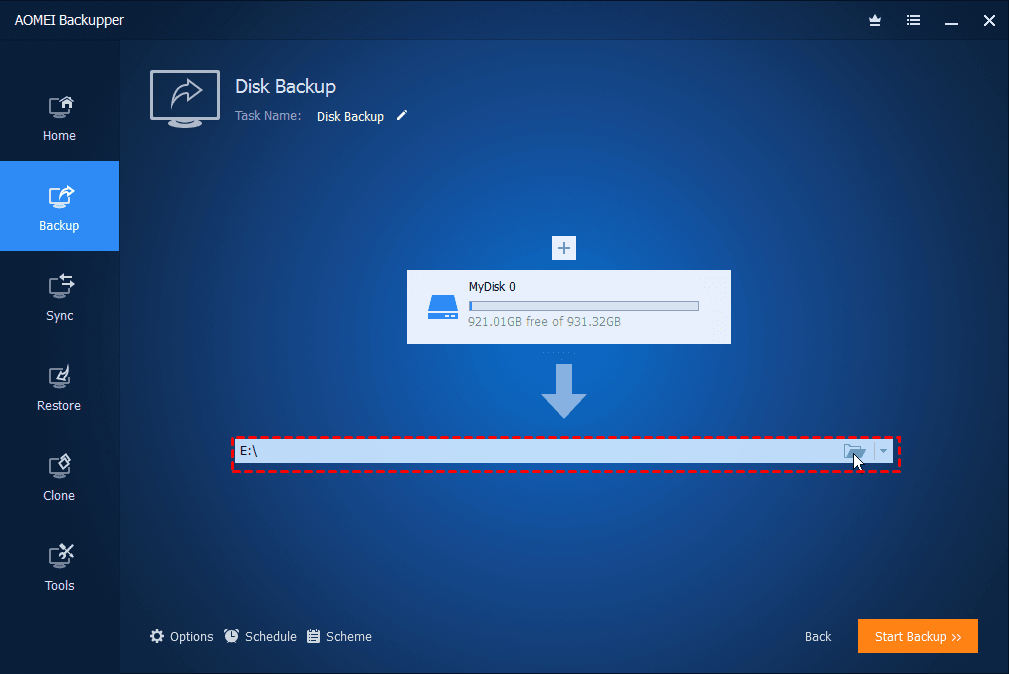
Step 2. After you click Disk Backup, it will take you to the disk backup interface as the following picture shows. You can set the backup details here.
- Choose the disk which you want to backup. Here I choose the system disk (Disk 0).
- Choose the external hard drive as the destination path.
- Click Start Backup to proceed.
Tips:
- If you want to set up more details such as encryption, you can click Options at the left bottom.
- Click Schedule Backup to create an automatic backup or click Backup Scheme to enable automatic backup cleanup.
Step 3. After the process reaches 100%, click Finish to end the operation.
You see, with the easy-to-use interface, even a non-technician can use it to backup Windows Server 2008 (R2) to external hard drive in a few minutes. What's more, AOMEI Backupper is powerful cloning software that can help you clone hard drive in Server 2016, etc. Why not give it a try?