3 Useful Ways to Install Windows 7 to NVMe SSD
Windows 7 setup does not recognize NVMe drive? This article will tell you how to install Windows 7 to NVMe SSD in 3 ways step by step.
By Lily Updated on December 21, 2023
Why is Windows 7 installation not showing my NVMe drive?
Non-Volatile Memory Express (NVME) is a communications interface/protocol developed especially for SSDs, which is regarded as the future of SSDs. As a more than 9-year-old operating system (OS), Windows 7 does not have native support for NVMe drives.

Based on different motherboards you use, you will meet two kinds of problems when you try to install Windows 7 on NVMe SSD.
- For 100/200 serial motherboard, all the USB ports will not work in the Windows Setup screen due to lack of USB 3.0 driver.
- For other motherboards, the NVMe SSD cannot be recognized in the Windows Setup due to lack of NVMe driver.
Depending on what situation you face, you need to prepare differently.
👉 Method 1: Add NVMe driver to Windows 7 ISO
👉 Method 2: Manually load NVMe driver at Windows Setup
👉 Method 3: Transfer Windows 7 to NVMe SSD🔥
Method 1: Add NVMe driver to Windows 7 ISO
What you need to prepare:
-
Windows 7 64-bit ISO.
-
A USB drive or disc as the installation drive.
-
A tool like Rufus or UltraISO to burn ISO to USB drive.
-
Window Installation tool provided by the motherboard manufacturers. For example, for MSI motherboard, you can use MSI Smart Tool.
-
NVMe driver for your SSD. You can download from the SSD provider.
The process
After preparation, you can follow the process below to install Windows 7 on NVME drive:
1. Create bootable USB from ISO in windows 7 by burning the Windows 7 ISO to USB flash drive.
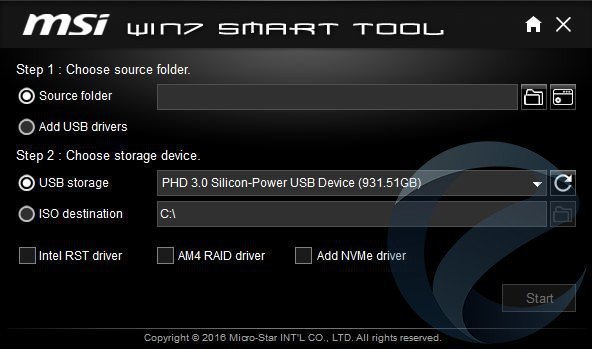
2. Use the Windows Installation tool to add USB3.0 driver and NVMe driver to USB drive. Here, we take MSI Smart tool as an example. In Step 1, select the USB3.0 driver and in Step 2 select the USB flash drive that you use to install Windows 7 and check the option “Add NVME driver”. Then click Start.
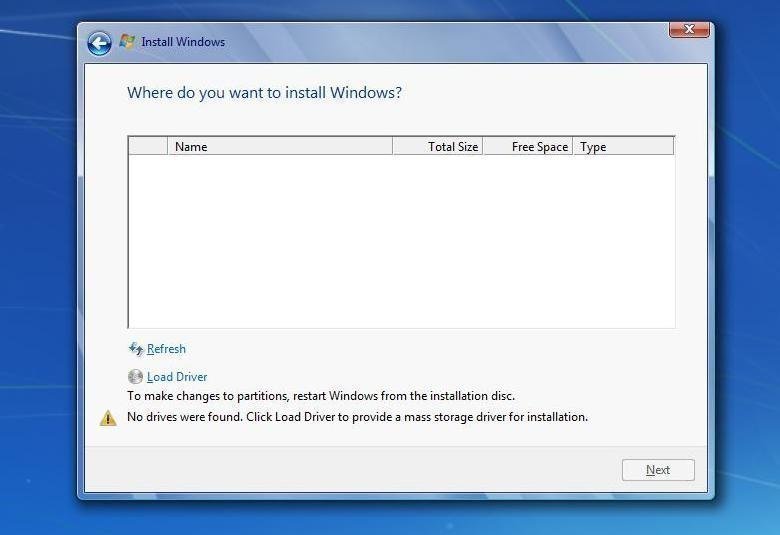
3. When it finishes, you can boot your computer from this USB flash drive to install Windows 7 on an NVMe SSD. From the Windows Setup screen, you will see the NVMe SSD finally appears.
Method 2: Manually load NVMe driver at Windows Setup
If your motherboard is not 100/200 serial, then you can use this method, which is much easier.
1. create a Windows installation USB drive as in Method 1.
2. Connect your NVMe SSD as a secondary drive on a working Windows 7 PC.
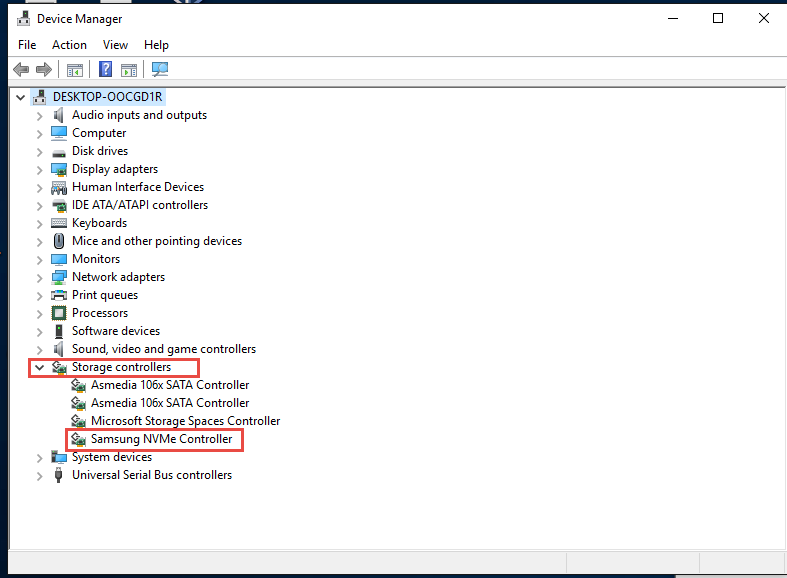
3. Download and install the correct NVMe driver for your SSD. Locate the driver and then copy it to the USB bootable drive you just created.
4. Boot your computer from the bootable drive. In the Windows Setup, Load driver to manually load the NVMe driver for the install. After loading the driver, you should be able to select the NVMe SSD to install Windows 7.
Method 3: Transfer Windows 7 to NVMe SSD
Besides these two methods, there is an easier way - cloning Windows 7 to NVMe SSD with AOMEI Backupper Professional, the best disk cloning software for Windows PC. It is easy to use. And it allows you to clone larger hard drive to smaller SSD by cloning only used sectors with Intelligent Clone feature.
The main process:
1. Install Windows 7 on a regular drive.
2. Then connect the NVME SSD as a secondary drive to your computer.
3. Install the proper driver for the NVMe SSD.
4. Clone Windows 7 with NVMe driver to NVMe SSD.
After the clone, you can set Windows 7 NVMe SSD as the boot device and boot your computer from the cloned drive because the needed driver is also cloned over.
Clone Windows 7 to NVMe SSD
For those who are not familiar with hard drive cloning or system migration, you can follow the instructions below and clone Windows 7 to NVMe SSD in simple steps. These steps are applicable to clone Windows 10 to NVMe SSD and other operating systems as well, including Windows 8/8.1/11.
Note that the cloning process will delete all the data on the NVMe SSD before starting to clone. If there is any data on it, make sure to backup the SSD.
1. Download the disk cloning software and run it.
2. Under Clone tab, select Disk Clone. If you only need to clone Windows 7 system, you can choose System Clone.

3. Select the current boot drive as the source disk and then select the NVMe SSD as the destination disk.

4. Check the option “SSD Alignment”, which will improve the performance of the destination SSD. If you are trying to clone smaller SSD to larger NVMe SSD, you can click “Edit Partitions” to resize partitions on the cloned SSD. After that, click on Start Clone to start the clone.

When the cloning process finishes, you can reboot your computer into BIOS and change the first boot device to the cloned NVMe drive. After that, you can enjoy the fast speed. Above steps also apply to clone NVMe to NVMe SSD.
Summary
Among these three ways to install Windows 7 to NVMe SSD, you can choose the best one that suits you. Besides the cloning function, AOMEI Backupper is also regarded as a backup and restore tool. You can use it to backup system on your old HDD in case of system crash and backup external hard drive to another, etc.
If you want to protect unlimited computers within your company, you can pick AOMEI Backupper Technician. With the inbuilt AOMEI Image Deploy tool, you are also allowed to deploy/restore system image file on server-side computer to multiple client-side computers over network.