How to Stop Backup in Progress in Windows 7 Effortlessly?
How to stop backup in progress in Windows 7? The answers will be presented in this article. For system backup, you can turn to AOMEI Backupper Standard.
by Yuka Updated on October 28, 2022
Scenario: “backup in progress” always running
“I have attempted to schedule a backup to an external HD. After the 1st attempt was unsuccessful I aborted the backup (I thought). The ‘backup in progress’ has been running for 5 days now. My brand new laptop runs like an old 486 and I can't download any updates… everything else, though slow, is working. How can I just abort and eliminate this message?”
Need to stop backup in progress in Windows 7
If you are a computer user, it is critical to ensure your data are backed up, especially the operating system. Once you’ve got a system backup, you can restore your system to the last-saved state. Fortunately, Windows has its own backup tool.
Windows Backup brings great convenience, but it brings troubles at the same time. Some users mentioned that whenever they hovering mouse pointer over the Windows 7 Action Center icon in the Taskbar, it displays a small box and says “backup in progress”. In fact, there is no backup in progress at all.
In the meantime, the computer is so sluggish that you can't do anything you want. This issue can be caused by a variety of factors, such as software conflicts, schedule backup, some special components that cannot be copied and so on.
If you want your computer to work normally, the backup process must be turned off. How to stop backup in progress in Windows 7? Efficient methods will be shown below.
How to stop backup process in Windows 7?
You can stop backup in progress in Windows 7 effortlessly as long as you take the right measures. Here are two efficient solutions. You can choose one based on your own situations.
Solution 1. Stop backup in progress by turning off Windows Backup
The first method is to disable Windows Backup. To do this, follow this quick guide.
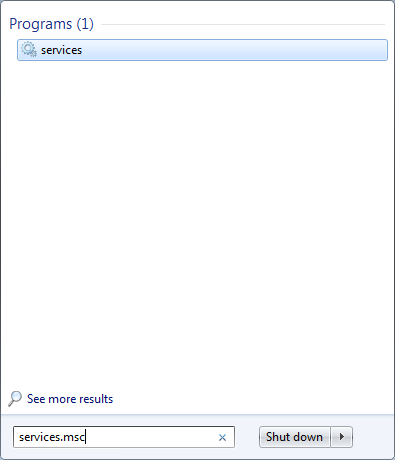
Step 1. Click Start in the lower left corner of the computer. Then type services.msc and press Enter.
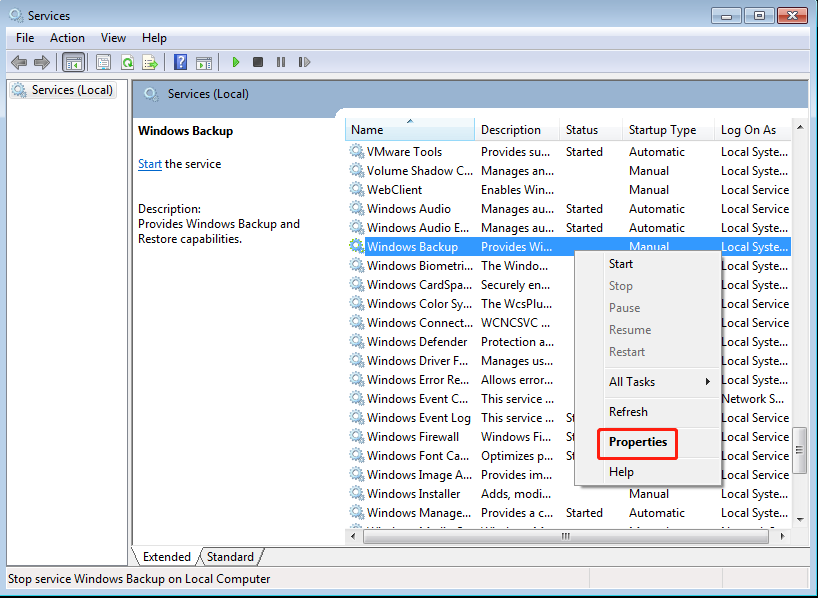
Step 2. Scroll down to find Windows Backup and right click it. Then click Properties.
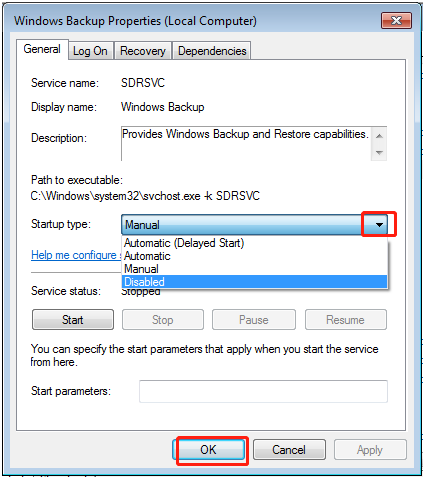
Step 3. Click the inverted triangle under General tab. Choose Disabled. Then click OK.
Some people tried to disable Windows Backup but backup in progress still running. Don’t worry. Try next method!
Solution 2. Disable backup in progress via clean boot
To stop Windows backup in progress, you can start Windows 7 by using a minimal set of drivers and startup programs. Simply put, you can perform a clean boot. Here are detailed steps.
Step 1. Sign in to the computer as an administrator.
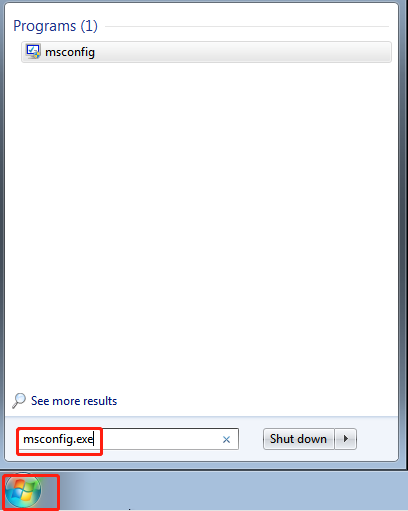
Step 2. Click Start in the lower left corner of your computer. Type msconfig.exe in the search box. Then press Enter.
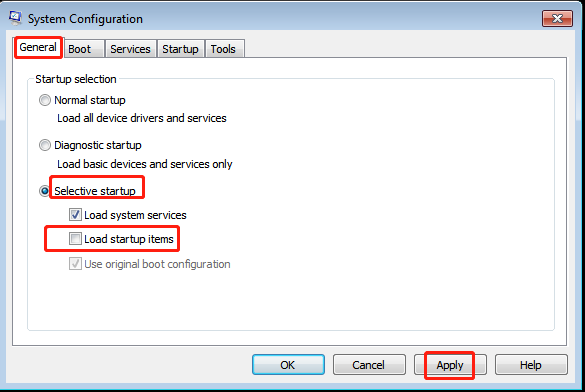
Step 3. Choose Selective startup under the General tab. Click to clear the Load startup items check box. Then press Apply.
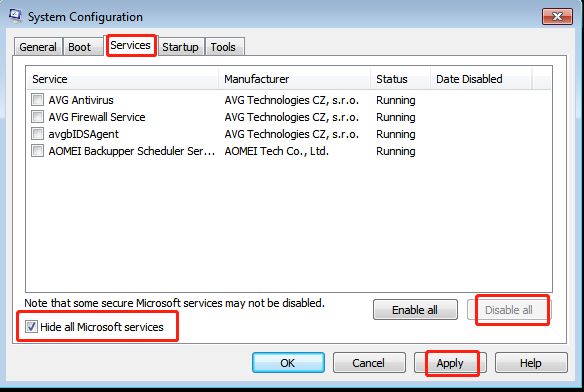
Step 4. Click Hide all Microsoft services under the Services tab. Choose Disable all. Then click Apply.
Step 5. Click OK and Restart subsequently.
Now you know how to disable backup in progress in Windows 7. Care must be taken to use these methods, because serious problems might occur if you select options incorrectly. Also these methods are complicated and time consuming.
How to turn off backup in progress in Windows 7? In order to avoid this issue, it is recommended that you use an alternative to create system image.
Manage backups with more advanced utility
As one of the best free backup utility, AOMEI Backupper Standard provides users with system backup feature in Windows 10/8.1/8/7, Windows Vista/XP. Its VSS (Volume Shadow Copy Service) technology allows you to continue working while the backup is in progress.
Like Windows built-in tool, this freeware also offers schedule backup that can help you backup system automatically. If you don’t need an automatic backup later, you can cancel the schedule task. For those data that are modified frequently, this utility provides you with incremental backup and differential backup.
To create system image, you can follow these steps:
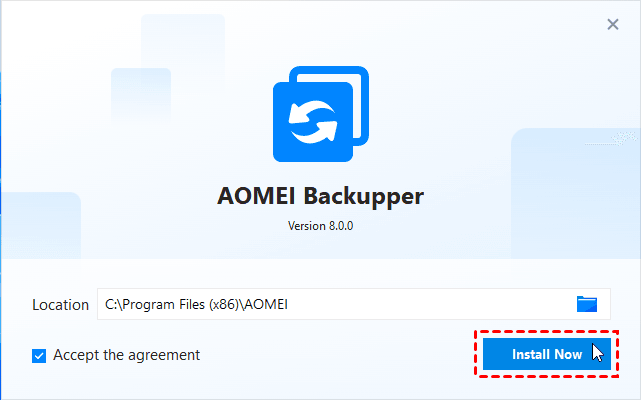
Step 1. Download, install and launch this freeware.
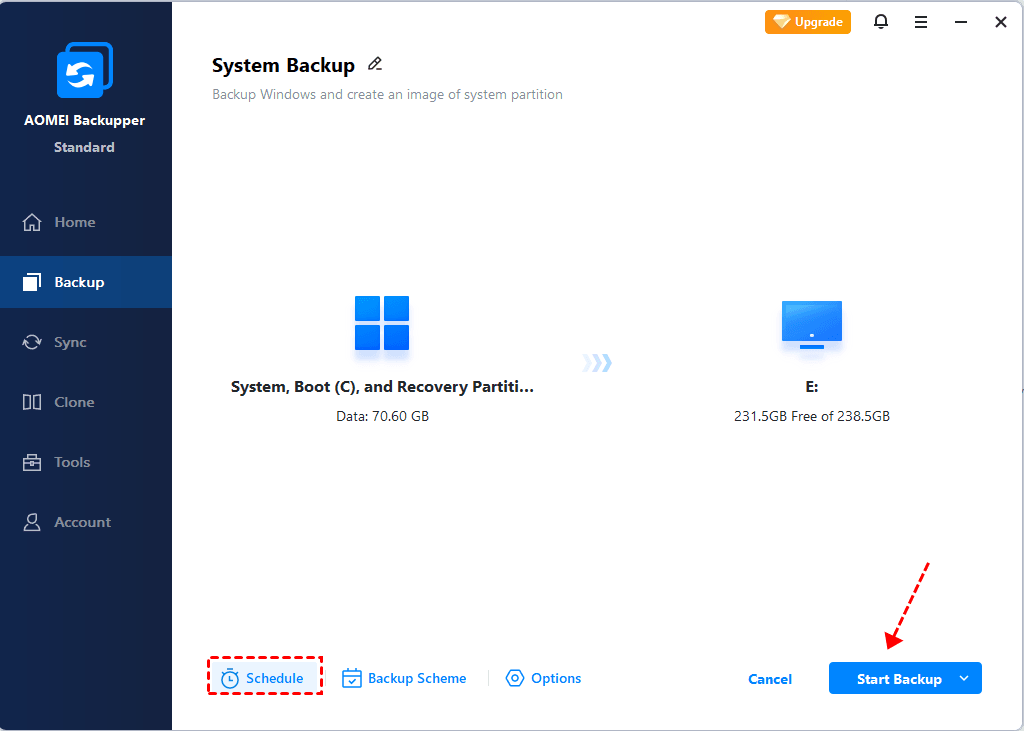
Step 2. Click Backup and System Backup subsequently.

Step 3. You can change Task Name as you like. The related system partitions are selected by default. Select the destination path (F:\) at the lower location.

Step 4. You can create an automatic backup based on Daily, Weekly or Monthly by clicking Schedule. Then click Start Backup.
Notes:
-
There are six options under Backup Options in Step 4: General, Compression, Splitting, Intelligent Sector, VSS and Other. These features can be set by your needs. If you want to prevent unauthorized access, you can set up a backup encryption by clicking Enable encryption for backups (supported by AOMEI Backupper Professional) under General tab.
-
In Step 4, if you want to choose Event triggers, USB plug in or Real-time Sync under Schedule tab, you need to upgrade to the advanced version.
-
Scheme (in paid version) in Step 4 can help you delete older backups automatically.
-
If you want to restore system later, you can go Home ﹥ the System Backup task ﹥ Restore.
-
If you want to cancel schedule tasks, please go Home ﹥ the System Backup task ﹥ Advanced﹥ Schedule Task ﹥ Do not schedule.
Verdict
How to stop backup in progress in Windows 7? This annoying message can be eliminated by the solutions mentioned in this article. Next time when you want to backup your system, you can turn to AOMEI Backupper Standard. If you are a Windows Server user, you can use AOMEI Backupper Server.