How to Delete System Restore Points in Windows 7, 8,10, 11
You may want to delete system restore points to free up disk space on your drive. Here you will find a more powerful way to automatically do this work for you.
by Yuka Updated on October 28, 2022
Why delete system restore points?
Without doubt, system restore is one of the most useful features in Windows as it can roll backup Windows to the previous state if an emergency happens to the system. Powerful as it is, you still have to delete system restore points in Windows 7/8/8.1/10 sometimes, just like the user case in the following.
"Hi, I just used System Restore a couple days ago to recover from a bad Windows Update install. It was good to use and it has saved me from troubles a few times.
But these restore points have accumulated over time and are about to reach its capacity. After it reaches this threshold, I fear that my manual updates are going to be eaten away. I need a way to delete all but my most recent restore points in Windows 7 to save space. Is there any way to automatically delete system restore points?"
As times go by, you may run into troubles: the disk that your backup is saved on doesn’t have enough free space, and backup failed due to lack of space. As the restore points accumulated day by day and the size of disk space is limited, your backup disk will run out of space quickly or someday. To save disk space, you need to delete old restore points.
Manually delete system restore points in Windows
There are two options. You can delete either all restore points or delete all but the most recent restore points.
Delete all restore points
1. Type system restore in the search box and then select Create a restore point to open the System Properties window.
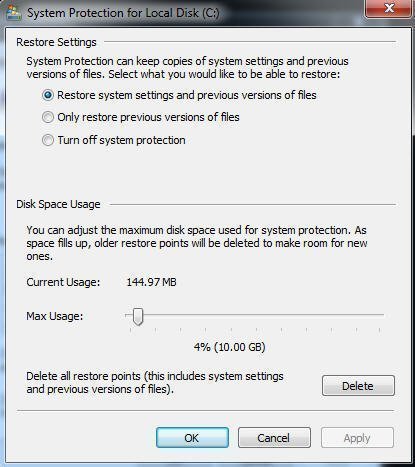
2. Click the Configure button in the System Properties window.
3. Click the Delete button in the System Protection window. Then, click Continue to confirm the operation and this will remove all the restore points.
Delete all but the most recent restore point
1. Click Start > All Programs > Accessories > System Tools > Click Disc Cleanup. Select the drive on which you wish to clean up all but the most recent restore point. Then switch to the "More Options" tab.
2. Click Clean up under "System Restore and Shadow Copies" tab. A message will popup - Are you sure you want to delete all but the most recent restore point? Click Delete then OK. Finally, another message will pop up - Are you sure you want to perform these actions? Click Yes.

It seems that manually doing this work is troublesome. System protection is always on to protect the system, and system restore points are becoming more and more. You have to delete them from time to time. But that's not the biggest problem. You may feel upset if there are no system restore points when you need to restore your computer to an earlier date or it does not work for your situation.
For example, your computer fails to boot, you cannot use system restore points to recover it. It only keeps a track of a snapshot of your computer state, not everything. At this time, only a system backup can get your computer back. Then, how to protect your system without disk space issues? You can try a professional backup software in the next part.
More powerful way to protect your computer and manage disk space
AOMEI Backupper Professional is a powerful backup software for Windows 11/10/1/7/XP/Vista. Its backup and deletion mechanisms can help you protect your system but not worry about the backup disk space. And it works on a much broader scale, you can get your computer even if it fails. It works as follows:
Its Schedule Backup feature will create multiple backups for you while its Backup Scheme feature allows you to specify backup deletion policy. It will delete the backups within a specific backup time, and keep other backups after that.
Then, Let’s take system backup as an example and delete restore points in Windows 7/8/8.1/10/11 automatically via AOMEI Backupper. You can set the deletion mechanisms either during or after creating a backup.
Method 1: During the process of creating a scheduled backup task
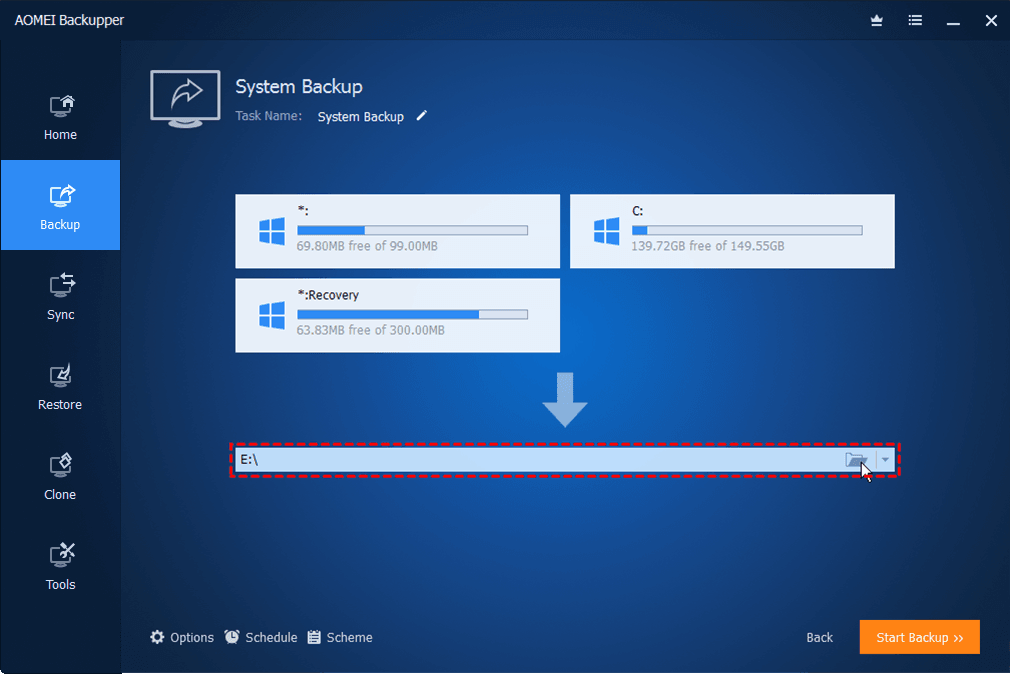
1. Download and install this software on your computer. Then, select System Backup under the Backup tab, it will choose the system partitions and other partitions required to start Windows.

2. Choose a destination path to store the backup image. You can backup system to USB flash drive, external hard drive, network drive, NAS, etc.
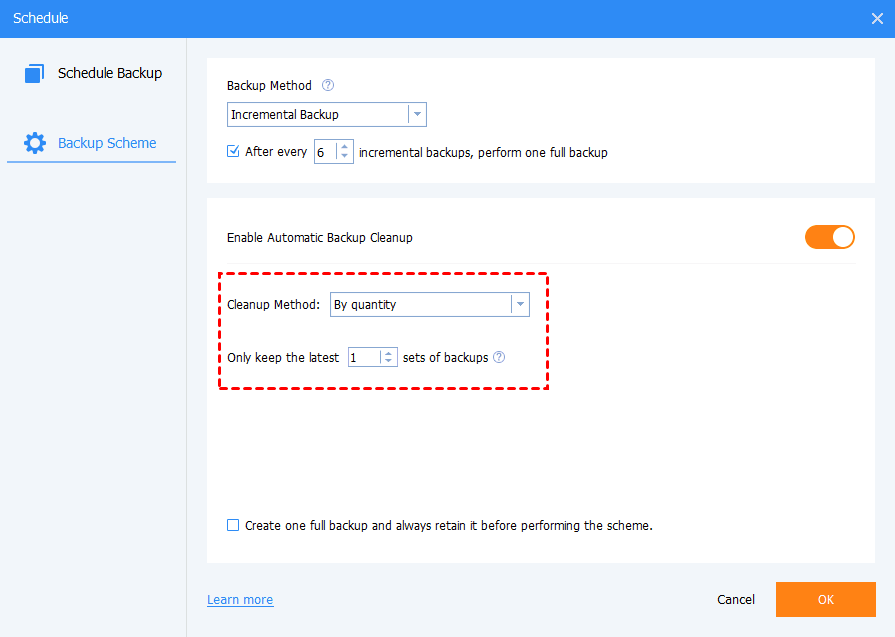
3. Click Scheme in the bottom and then Enable Automatic Backup Cleanup, you have three options, including By quantity, By time, By daily/weekly/monthly. Specify the retention policy you want to use and click Start Backup to complete this configuration.
-
Options: you can set email notification, backup compression and encryption, etc.
-
Schedule Backup: you can set backup settings - daily, weekly, monthly, event trigger, and USB plug-in.
-
Full/Incremental/Differential Backup: except for cleanup method, you still can choose how to backup your system, either make a full backup or backup only changed files.
Method 2: After creating a backup task
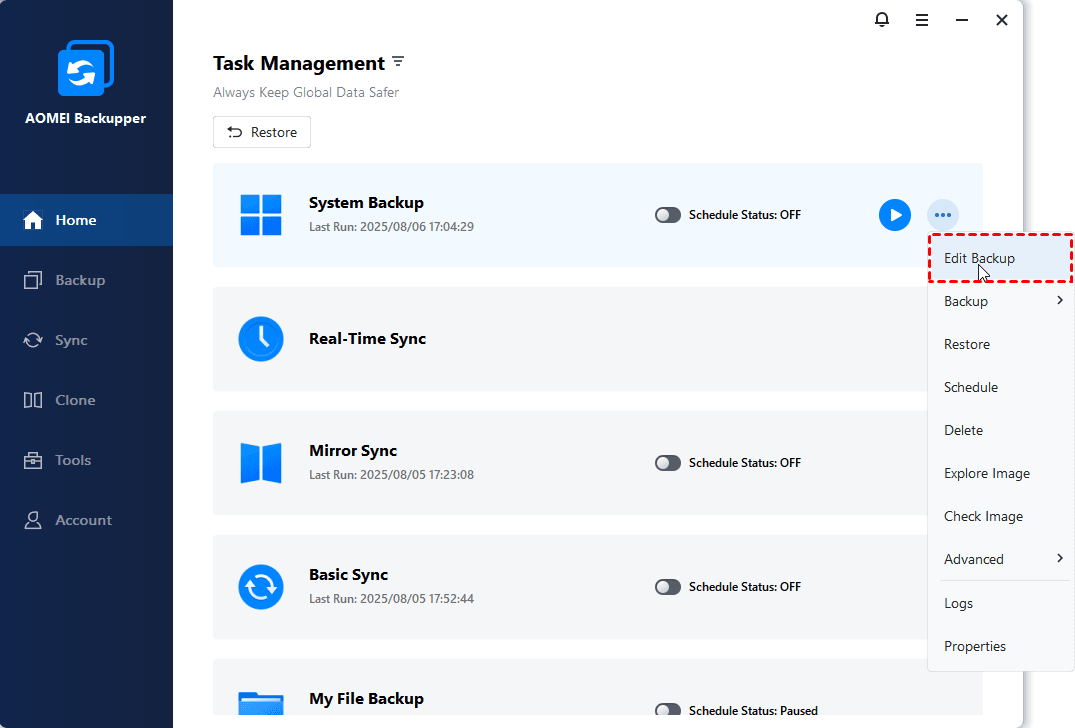
All your backups created by AOMEI Backupper are listed under Home tab. Select the previously created system backup, click the three-line button and select Edit Backup. In the pop-up window, click Backup Scheme and set a backup retention policy to delete old backup files for reuse.
Summary
System restore points are very useful to help you save your computer from an emergency, but sometimes you need to delete it due to insufficient disk space. You have two ways but all of them require human intervention every time.
If you don't want to do it manually every time or need a guaranteed way to save your computer, wether it's a problem related to Windows updates, drivers, software or something more serious that even makes your computer unbootable, you could choose to create a system image backup rather than just a snapshot of current state of your computer.
Then, no matter what happens, you can restore system image to new hard drive and then make your computer work as it was. More surprising, you can use it to restore system image to another computer with dissimilar hardware, you just need to check "Universal Restore" feature before restoring. For IT technician, you could use AOMEI Backupper Technician.