Guide | Backup Windows 7 to NAS like Synology [3 Free Ways]
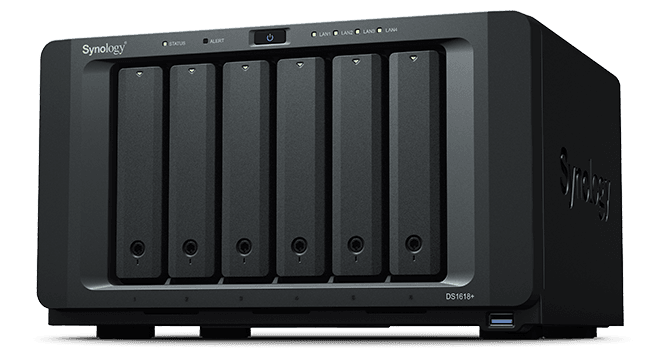
You are probably considering backup Windows 7 to NAS like Synology for better data protection. But among all these possible approaches, what’s the best free way to implement it?
Should I backup Windows 7 data to NAS?
According to 3-2-1 backup rule, it's safer to have at least three data copies - one for local and two for different devices. You may not have to follow the strategy closely, but in Windows 7/8/10, backing up data to NAS (like Synology NAS) is definitely a good idea, no matter it’s a system image or a batch of important files.
NAS is short for Network Attached Storage. As the name suggests, it’s a network connected storage that can be accessed via Internet. There are some significant advantages to back up PC to NAS:
-
It’s easier for file sharing between connected clients.
-
You can access the data through network remotely.
-
Compared with PC, NAS storage is less likely to be damaged by accidents.
-
When your Windows computer crashes, you can restore the system or files from NAS.
But what's the best free way to backup data to Synology and suchlike NAS in Windows 7?
How to backup Windows 7 to NAS like Synology?
What do you care about most when performing backup to NAS in Windows 7? Transferring speed, data safety, or the ease of use? In fact, all these requirements can be met. I’ll introduce 3 free ways as following:
-
Method 1. Use effective freeware to backup Windows 7/8/10 to NAS
-
Method 2. Use Synology Drive Client to backup data to NAS in Windows 7
-
Method 3. Backup Windows 7 computer to NAS with Backup and Restore
Method 1. Use effective freeware to backup Windows 7/8/10 to NAS
This is the fastest method with the widest range of applications, so I put it in the first place.
It works on all Windows OS including Windows 7/8/10/etc., and allows you to backup important data to not only Synology, but other NAS, network locations, cloud drives, external hard drives and so on. Therefore, you can easily implement 3-2-1 backup strategy with this freeware - AOMEI Backupper Standard.
In addition to the intuitive interface, it also provides various options and auxiliary functions to save you from cumbersome operations. For example, you can schedule a daily backup to let it run automatically.
Another thing I like about it is that, the free version already meets your basic need to backup operation system or important files to NAS. So you can simply download it and give it a shot.
How to backup data to NAS in Windows 7/8/10 within 5 steps:
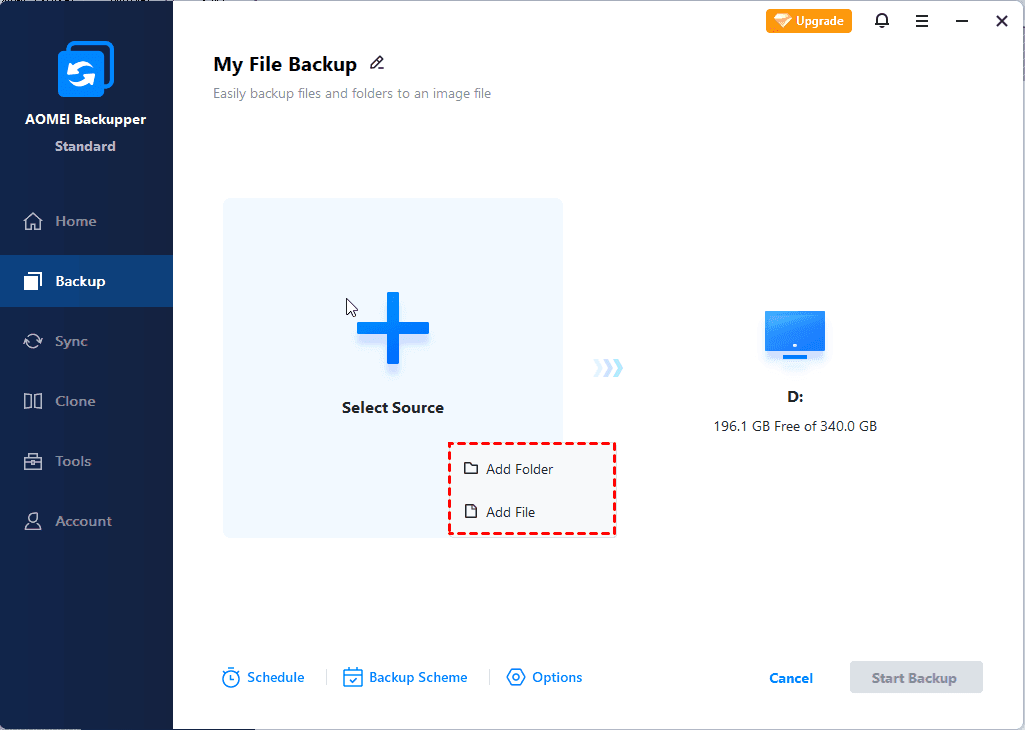
1. Make sure you can connect to your Synology or other NAS, install and launch the tool. Then switch to Backup tab and choose File Backup.
Here you can see some other choices like Partition Backup or Disk Backup. If you want to backup only OS to NAS in case of Windows failures, choose System Backup instead.
2. Click Add Folder or Add File to specify what you want to backup. If you choose System Backup in last step, the system partition will be automatically selected as source.
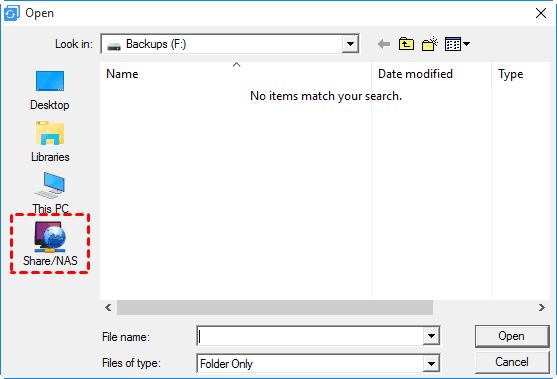
3. Click the destination box and choose Share/NAS in the popping out window.
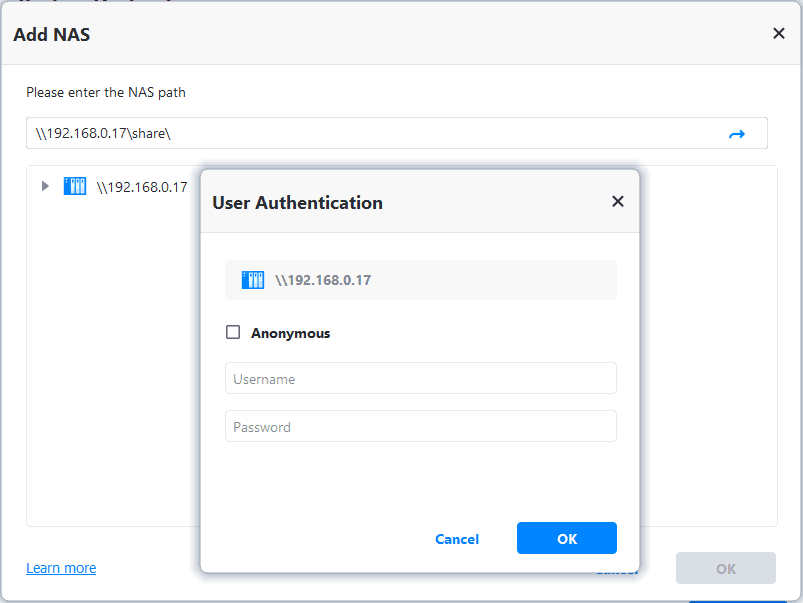
4. Click Add Network Location to input your IP address, username and password of Synology NAS, then click OK to confirm it.
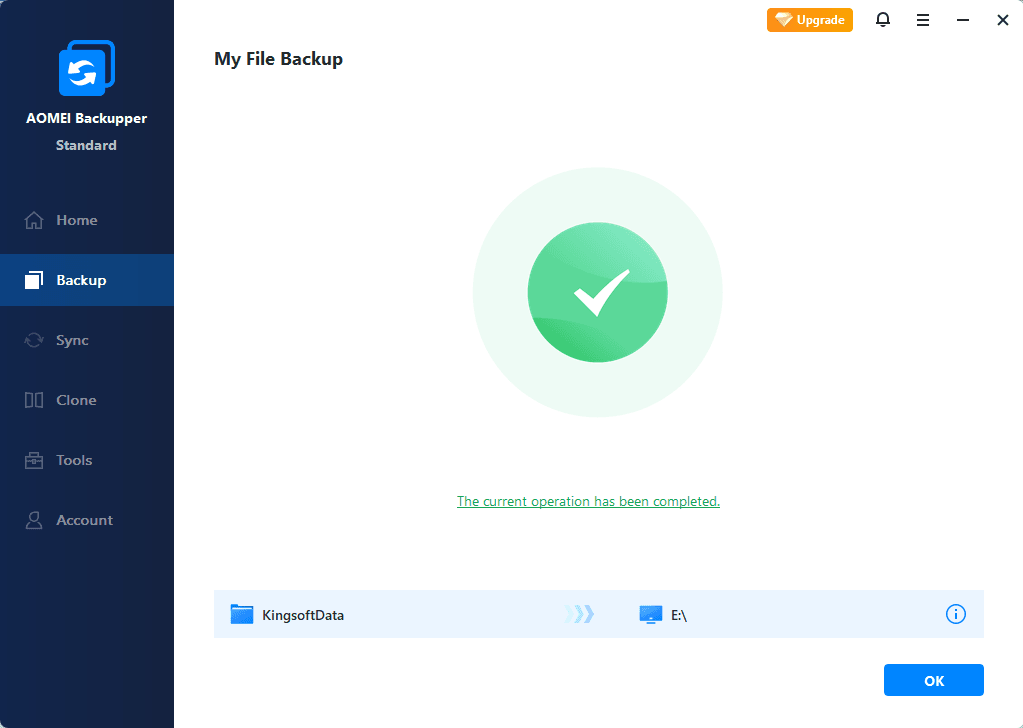
5. Optionally, you can Schedule an automatic backup, Set up a Scheme to auto delete older backups, or manage more backup Options. Then click Start Backup and wait till the process ends.
If you are backing up Windows 7 OS to NAS, try creating a bootable media as well. Thus you can boot a crashed computer to Windows PE and restore it to an earlier state with the system image stored on NAS.
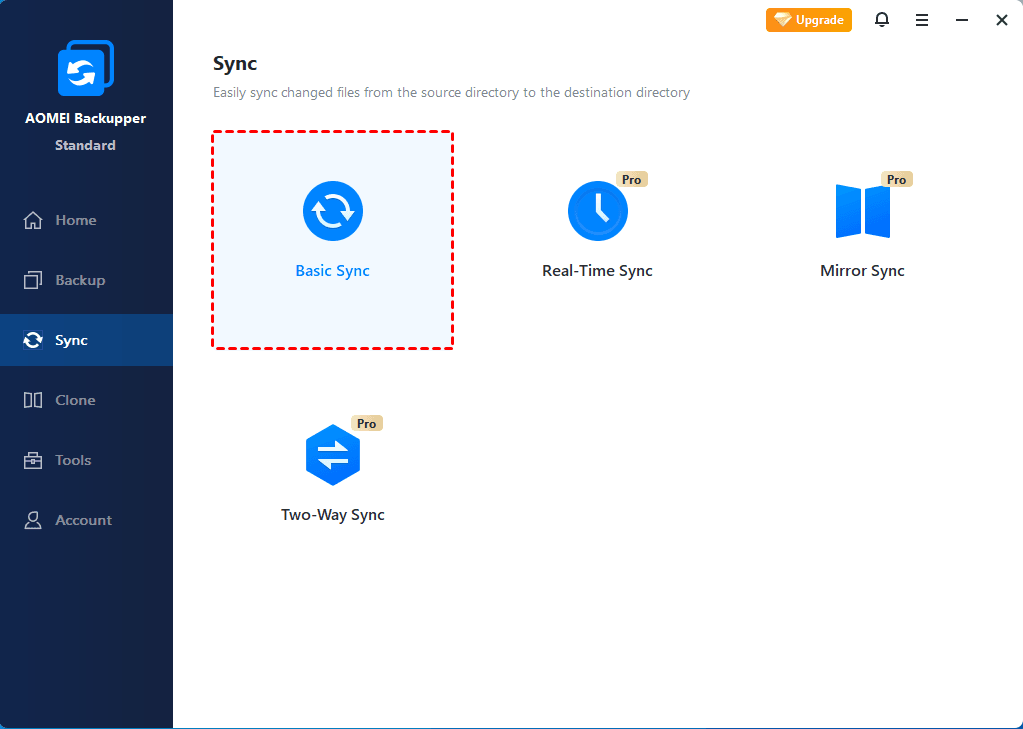
If you want to replicate files to Synology NAS with original format so that you can view and use them directly, use Basic Sync instead of backup. It will sync changed files from source directory to the destination. In Professional or higher edition, you can even Real-Time Sync changed files without setting up a schedule.
Related tips:
-
Schedule: you can choose from Daily, Weekly, Monthly, Event triggers and USB plug in, the last two are only available in Professional or higher editions. If you are worried about insufficient NAS space caused by long-term automatic backup, you can use another advanced feature Scheme to auto delete older backups.
-
Different backup modes: in addition to full backup, incremental and differential backup are both available in AOMEI Backupper, you can make your choice according to actual needs.
Method 2. Use Synology Drive Client to backup data to NAS in Windows 7
If you are a user of Synology NAS, you should be familiar with DSM (DiskStation Manager), which is a web-based operating system specially designed for Synology NAS. You can log into DSM and download Synology Drive Client as well as other tools in Package Center.
Synology Drive Client is an instantaneous and bandwidth-saving backup solution to keep your important data safe, but there are some deficiencies. First of all, it can only be used on Synology NAS, and only provides limited backup or sync options. Also, it sometimes won’t work properly due to various reasons.
Anyway, I’ll introduce its basic workflow here for your reference.
Backup Windows 7 computer to Synology NAS with Synology Drive Client:
1. Find and install Synology Drive Server in Package Center. Three required packages will be downloaded together.
2. Launch it and download Synology Drive Client through the prompt or click Client > Download client on the bottom-left corner.
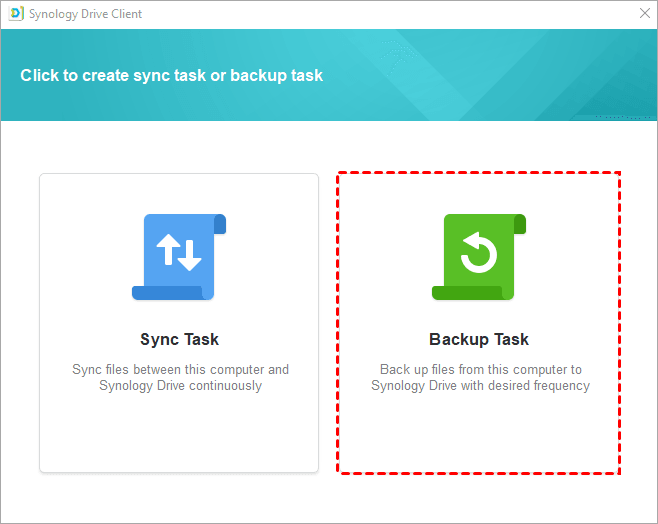
3. Install Synology Drive Client following the wizard and select Backup Task on the main interface.
4. Enter the required account information to connect to your Synology NAS.
5. Specify the source data you want to backup and select a backup destination. The home folder will be selected by default. Then click Next.
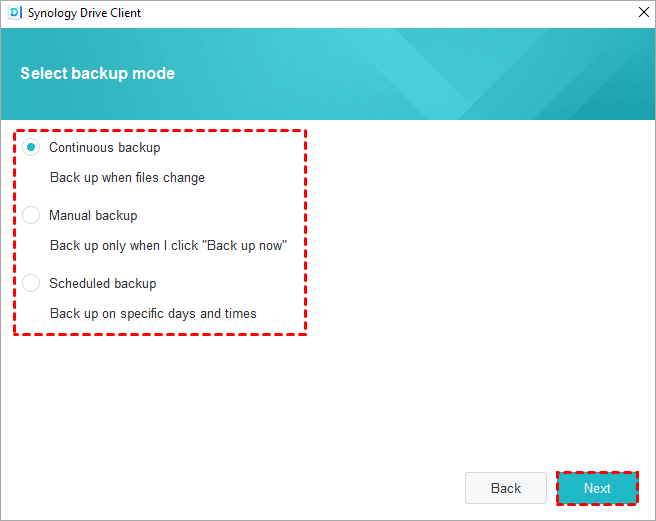
6. Choose a backup mode and click Next.
7. Confirm your operation and click Done to get started. Wait for the backup to complete.
You can read this article to learn more about backup from Windows 7 computer to Synology NAS.
Method 3. Backup Windows 7 computer to NAS with Backup and Restore
In windows 7, you can backup data to Synology NAS or other network location through the built-in feature Backup and Restore, the same goes for Windows 10.
You can use it to backup selected files or system image to NAS without the need to download and install third-party tool, but the disadvantages are also obvious: the speed isn’t very satisfying (I can hardly do anything else during the backup), the backup modes aren’t flexible enough, you can’t schedule automatic system image backup, etc. So the decision is yours.
Backup data to NAS with Windows 7 Backup and Restore:
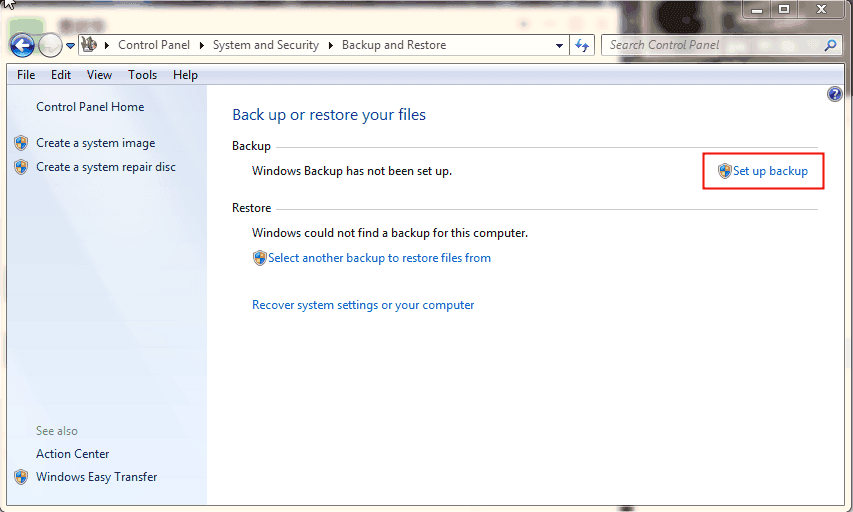
1. Find Backup and restore in Start > Control Panel > System and Maintenance, or by direct searching.
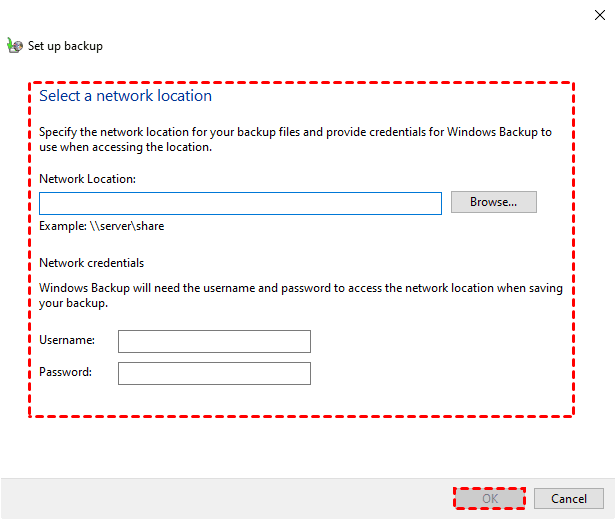
2. Click Set up backup and choose Save on a network... to specify a network destination. You will be required to enter the location and account information of your Synology NAS or whatever. Then hit OK and click Next.
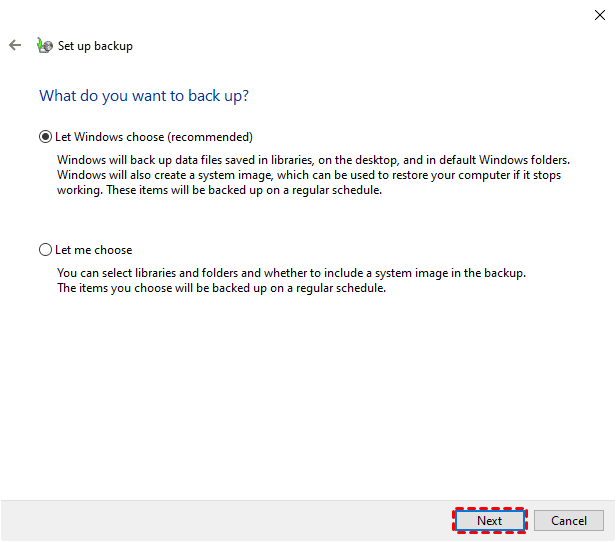
3. Choose what to backup and click Next. You can either let Windows choose or manually select the files/partitions.
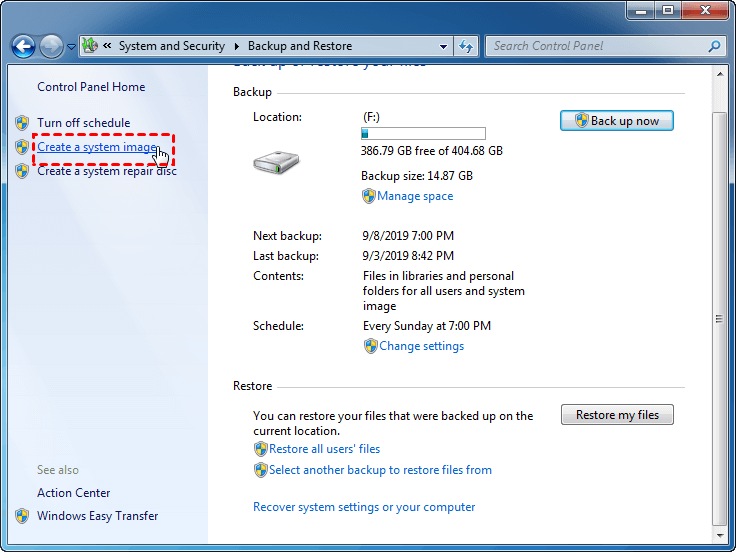
4. Confirm your operation and click Save settings and exit to start backup. In this step, you can also click Change schedule to set up an automatic backup.
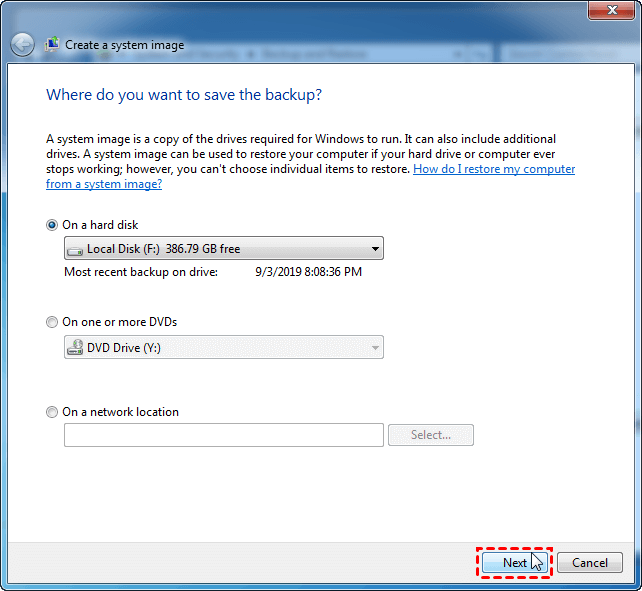
5. Alternatively, you can click Create a system image to backup OS to NAS.
The detailed steps are listed in this guide of Windows 7 System Image Recovery. You just need to choose On a network location when it asks where to save the backup, and then enter the required information.
If the built-in backup feature won’t work, try these solutions: How to Fix Windows 7 Backup and Restore Not Working.
Conclusion
3-2-1 backup strategy is a reliable way to protect your important data. So in addition to creating local copy, it’s more reassuring to backup computer to network location as well, Synology NAS, for example.
There are several ways to perform backup to NAS in Windows 7/8/10, the easiest way is using the free backup & restore software, AOMEI Backupper Standard. Compared with other methods, it stands out with the fast transfer speed, high compatibility and flexible backup modes.
Besides, it also supports you to backup Synology NAS to external hard drive, sync Synology NAS to Google Drive, perform mirror backup between two NAS, etc. If you are a Windows Server user, you can also backup Windows Server to NAS with the Server backup edition.
