[Solved] Windows Easy Transfer Is not Available in Windows 10
Now that Windows Easy Transfer is not available in Windows 10, how can you transfer files from PC running earlier OS to PC running Windows 10? Here’s the answer.
Note: Windows Easy Transfer is not available in Windows 10
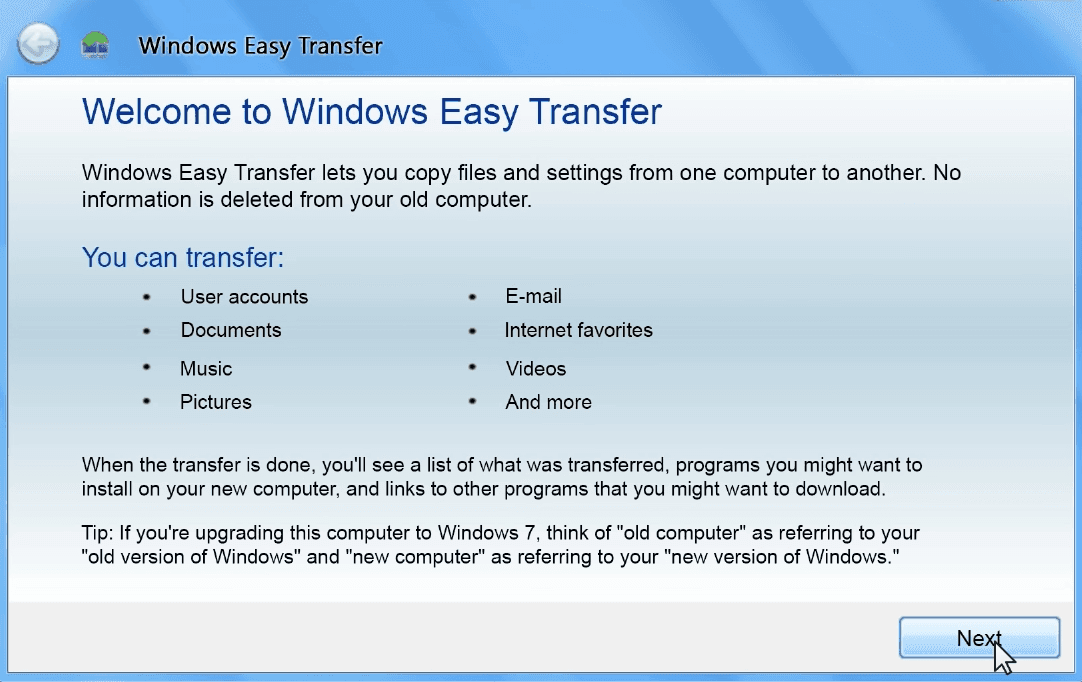
Windows Easy Transfer is a utility tool allowing you to copy files and settings from a computer running earlier Windows version to a computer running newer version. More specifically, it supports the migration from Windows XP (SP2 and higher) to Windows 7, and Windows Vista (SP1 and higher) to Windows 7.
With it, you can transfer selected files in batch with USB Easy Transfer Cable, removable media or across a network, which is much more convenient than manual copying. Even today, many people will first think of using it to migrate data between computers with different OS, like Windows 7 to Windows 10, Windows 8 to Windows 10, etc. But they will soon be disappointed by the fact that Windows Easy Transfer is not available in Windows 10.
Best free Windows Easy Transfer alternative in Windows 10
While I agree Windows Easy Transfer is an easy-to-use tool, it also has some defects such as not being able to transmit installed applications, or transfer files between 64-bit version of Windows and 32-bit version. Most of all, it doesn’t support recent Windows versions.
Therefore, you may need to find an adequate alternative to Windows Easy Transfer in Windows 10.
It’s true that Microsoft has partnered with Laplink to bring you a Windows 10 tool named PCmover Express. It can transfer selected files, folders and settings from old Windows PC to the new Windows 10 PC as well. However, it’s not a freeware and the functions are also limited.
Personally, I prefer a tool with fast transmission speed and convenient process in addition to reasonable price. And that makes a freeware stand out from similar products on the market - AOMEI Backupper Standard. It has many advantages, which I summarized as follow:
-
Compatibility: it can transfer all kinds of files including programs between PCs running Windows 10/8.1/8/7/Vista/XP.
-
Flexibility: it provides different modes and options to suit your needs, such as setting up automatic backup.
-
Usability: the operation is really simple with an intuitive interface and a satisfying speed.
-
Price: it’s a completely freeware.
For these reasons, I consider AOMEI Backupper Standard as the best free Windows 10 Easy Transfer alternative, and would like to introduce its workflow below.
How to transfer files from earlier Windows PC to Windows 10 PC?
As the Windows Easy Transfer alternative in Windows 10, AOMEI Backupper Standard provides two basic approaches to transfer data between computers - file sync and file backup.
The former will create a copy of the files with original format, so that you can directly access and use them on the destination computer. The latter will create a compressed backup image of the files, and you need to restore them to the destination computer.
Either way, you should download and install the software at first.
Case 1. Sync files to Windows 10 PC from an earlier PC
Normally you can sync files via removable media, NAS, cloud drive and so on, but the simplest way is to sync folders between computers over network.
To do that, you should firstly make sure the two computers are on the same wireless or wired network. Then create a network shared folder on the source computer (with earlier OS), turn on network discovery on both computers. If you don't know how, click here to learn more. After that, you can try following steps to transfer files.
Steps:
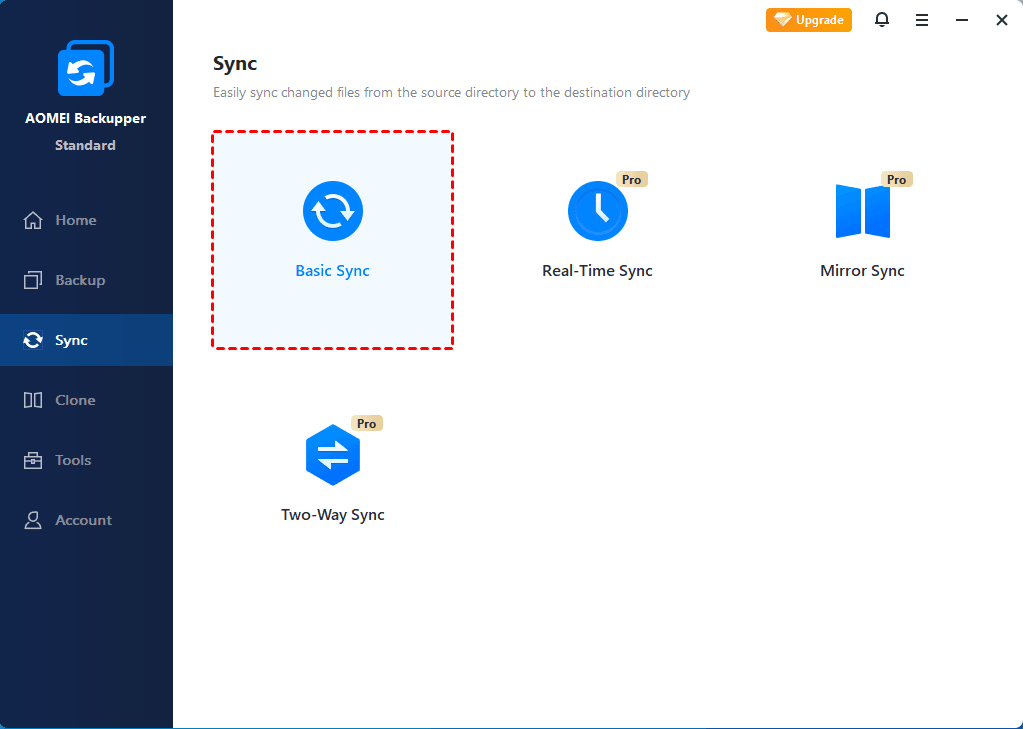
1. Launch AOMEI Backupper Standard, navigate to Sync and choose Basic Sync.
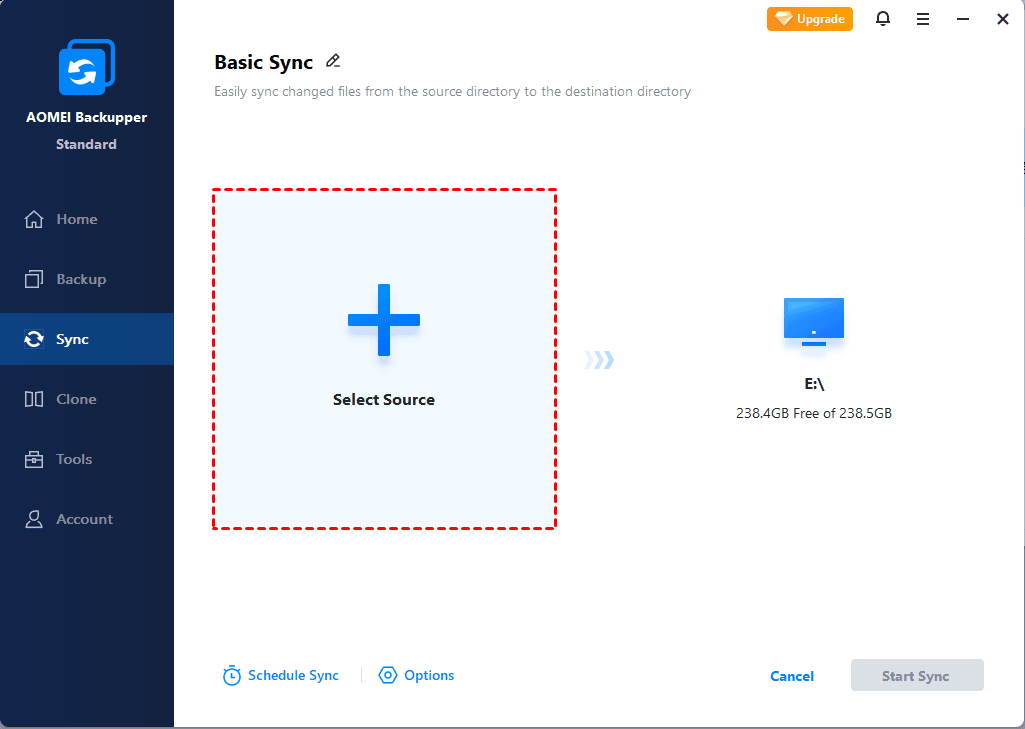
2. Click Add Folder to select the folders you want to sync.
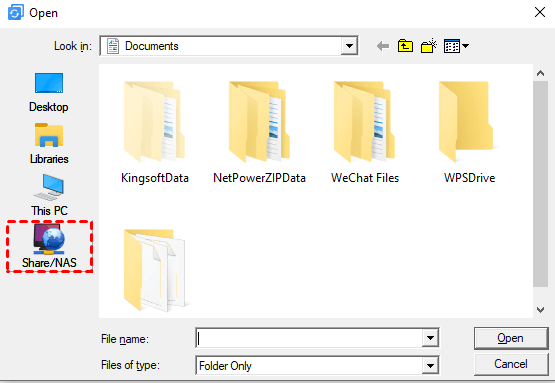
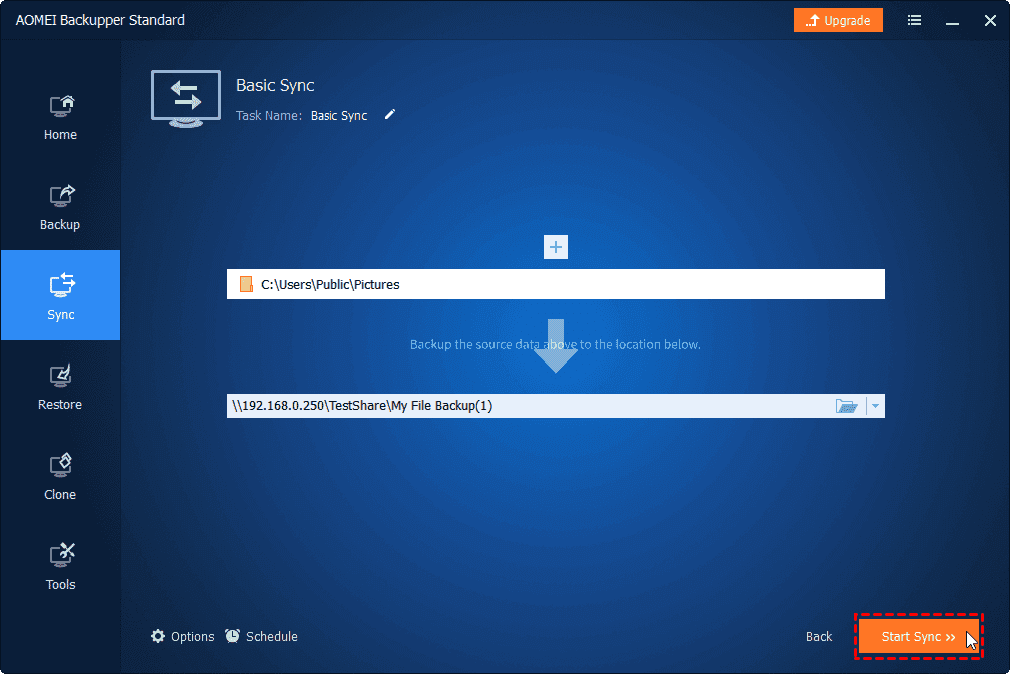
3. Click on the destination select box, choose Shared/NAS in the popping out window.
4. Click Add Network Location and enter the IP address of the source computer, hit OK to confirm it.
5. Then you can choose a shared folder as the destination path of synchronization, and click Start Sync to begin. Alternatively, you can click Options to manage more settings or set up a Schedule for automatic sync.
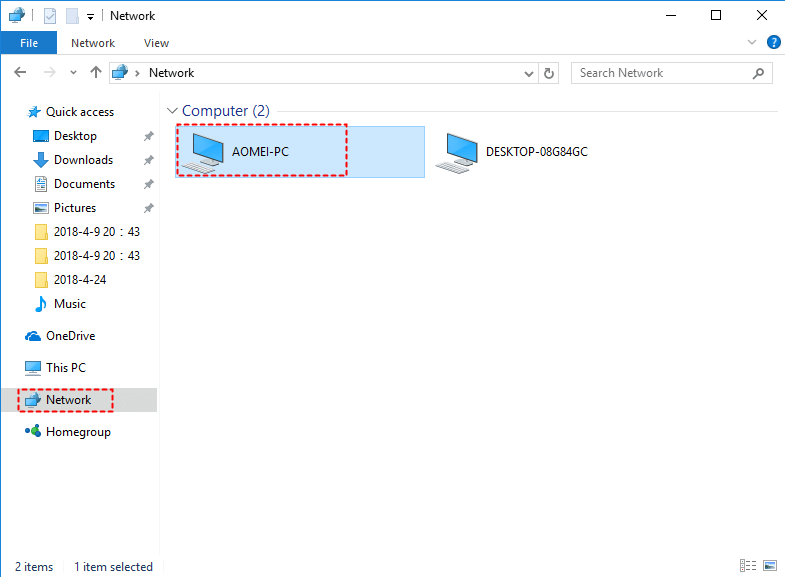
6. When the process is complete, open This PC in the destination computer running Windows 10, and find the source computer’s name under Network. Thus you can get access to the synchronized files.
Unlike Windows Easy Transfer, you can also use AOMEI Backupper Standard to transfer programs, but some paid programs may need to be reactivated on the destination PC after transferring.
Tips:
◉ If you are still using the older computer and want to keep the data on Windows 10 computer up to date, it’s highly recommended to set up a Schedule for sync task. There are 5 options in total: Daily, Weekly, Monthly, Event triggers and USB plug in, the last two are only available in advanced editions.
◉ There are 3 advanced sync modes that may suit your further requirements. You should upgrade to higher editions like AOMEI Backupper Professional to enjoy them:
Real-Time Sync: Automatically sync changed files from the source directory to the destination directory in real time.
Two-Way Sync: Sync changed files in source directory or target directory to the other side mutually.
Mirror Sync: Keep the files in target directory always consistent with the source directory. For example, if you accidentally add a new file to the destination directory, it will be deleted at the next sync.
Case 2. Backup files to a new PC running Windows 10
This approach is less straightforward, but more flexible in choosing what to transfer. You can create an image file of specific files, partitions or the entire disk, and then restore it to the destination computer. Also, you can perform incremental and differential backup to save only changed files each time, and keep different version of data for accurate recovery.
Now I’ll take file backup as an example.
Steps:
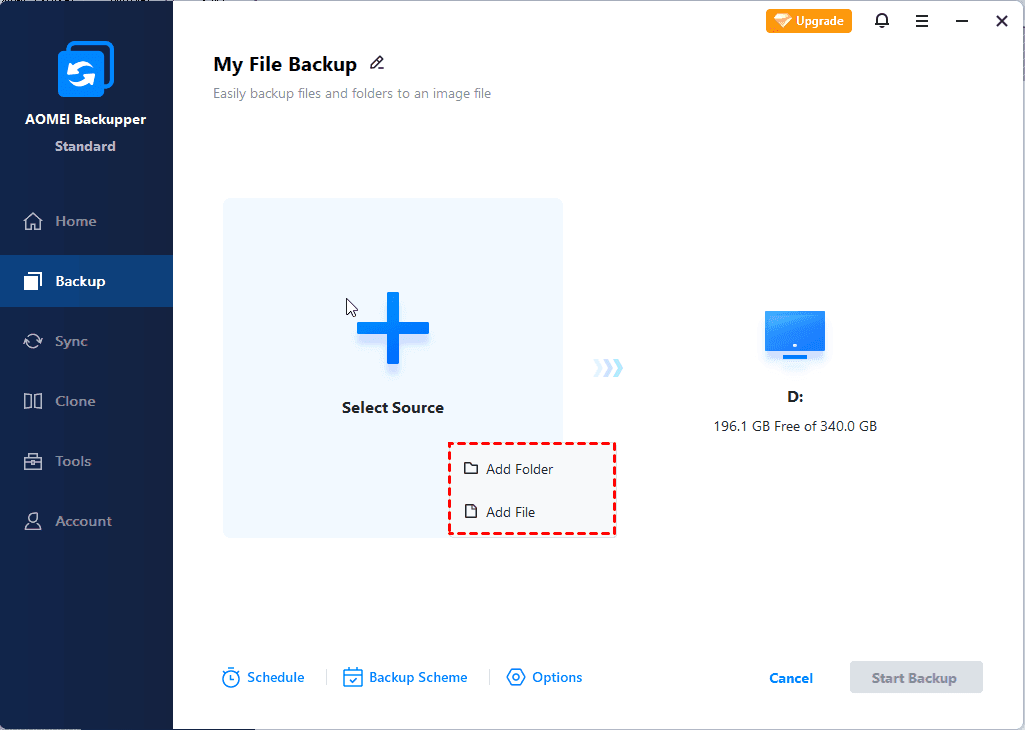
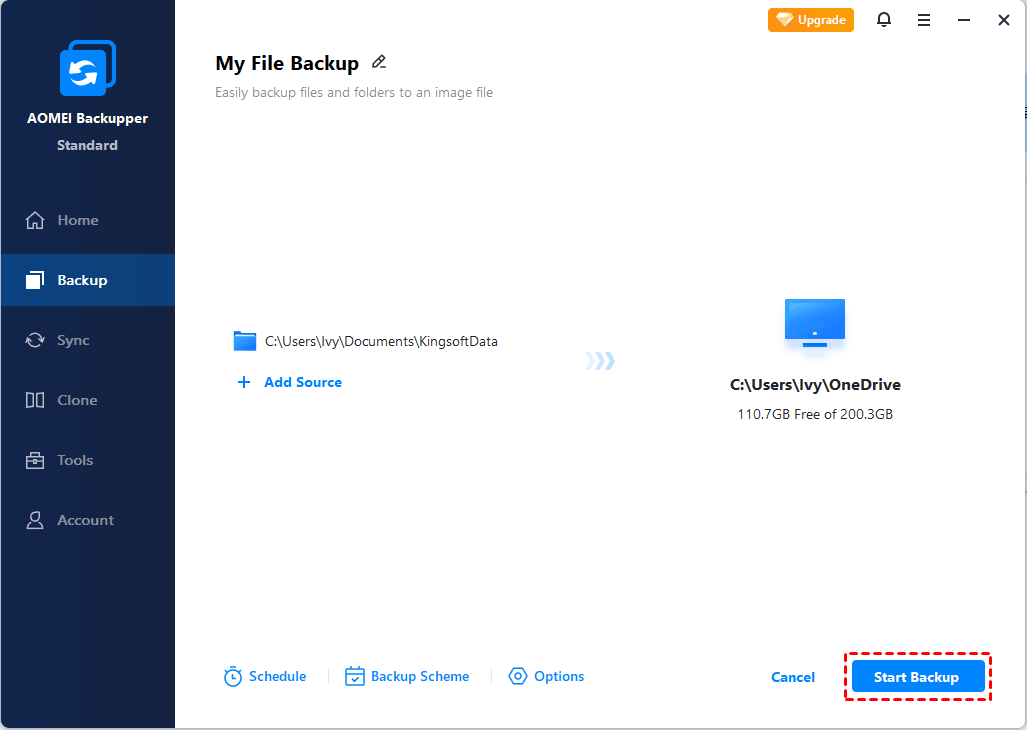
1. Launch AOMEI Backupper Standard. Go to Backup and File Backup.
2. Click Add Folder or Add File to select the files you want to transfer.
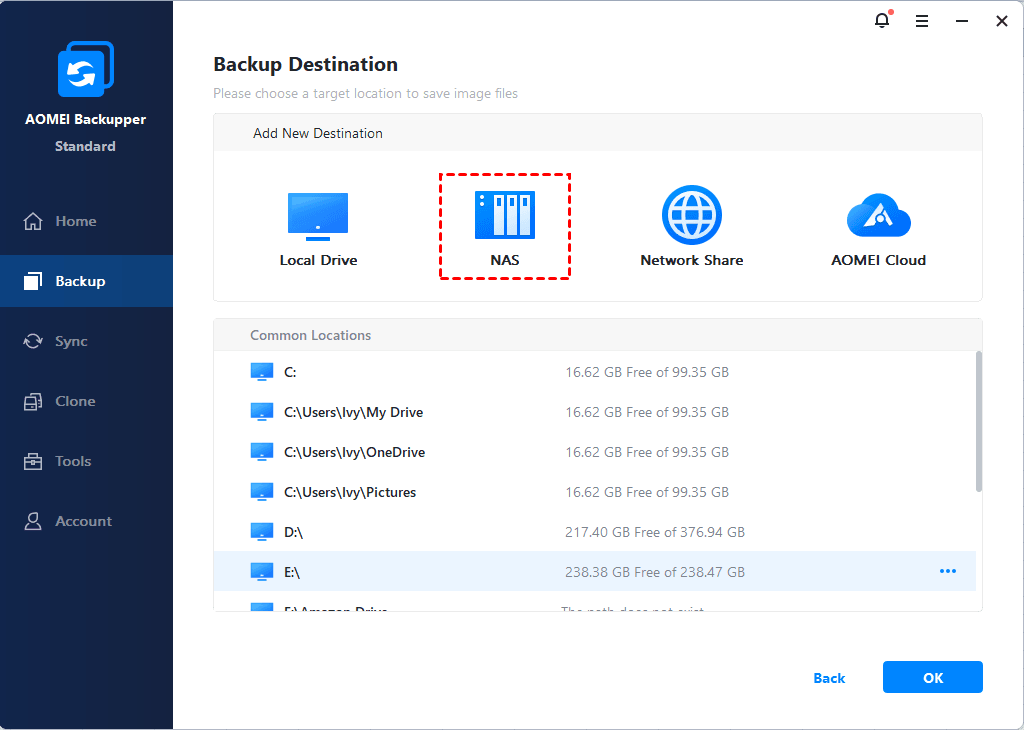
3. Select the backup destination as an external hard drive, USB, NAS, cloud drive, etc., then click Start Backup. Before that, you can also edit the Task Name, adjust backup Options, set up Schedule, etc.
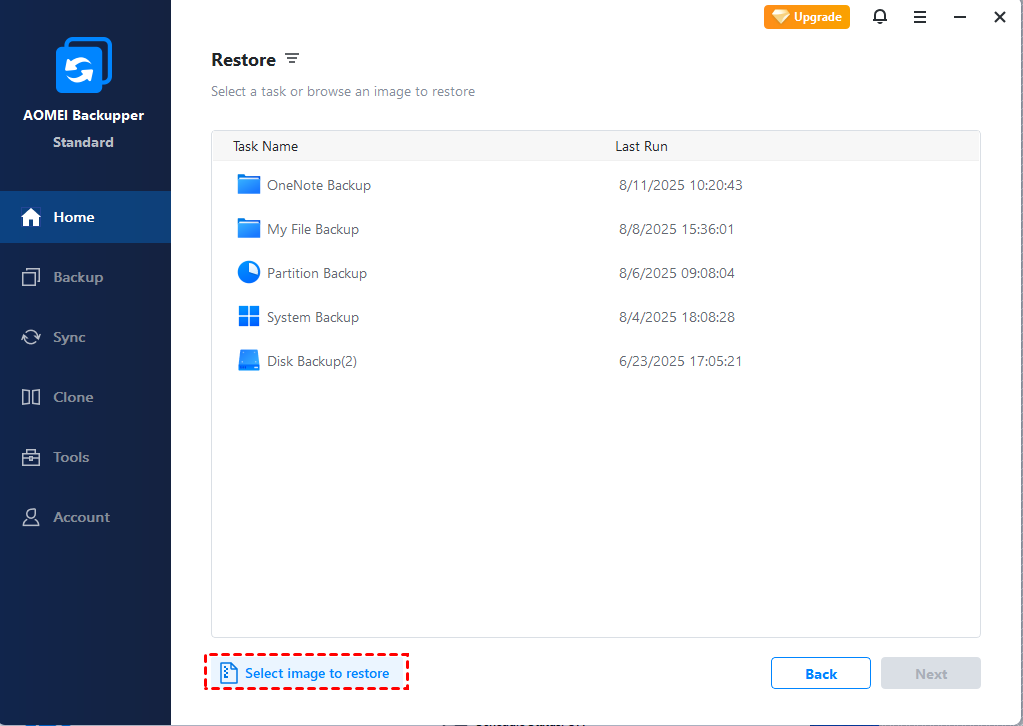
4. After finishing backup, restore the image to the Windows 10 computer through the media you choose.
Tips:
- If you create an AOMEI account, you can also backup old PC files to AOMEI Cloud and then restore them on the new PC. You'll get 1TB free storage for 15 days after you sign up for an AOMEI account.
- It’s possible to transfer Windows system from one computer to another with this software, but remember to tick Universal Restore (advanced editions only), which enables you to restore system to different computer, so that the destination PC can boot after recovery.
Conclusion
Windows Easy Transfer is not available in Windows 10 anymore, but you can reach the same goal with a free Windows 10 Easy Transfer alternative, AOMEI Backupper Standard. It enables you to transfer files between computers running different OS, and offers options to manage the transferring flexibly.
Beyond that, it also has the ability to clone hard drive to SSD, migrate OS to another hard drive, or even transfer Windows Server to new hardware with AOMEI Backupper Server.
