Disable Windows 10 Backup Notification and Protect Your Files
You will learn 3 helpful ways to disable Windows 10 backup notification and one simple and effective backup software to protect your files.
by Ivy Updated on October 27, 2022
User case
"The new downgraded notification center keeps nagging me about not taking a backup. That's because I use other software to take my backups.
How can I turn this particular notification off? I suspect that regedit is likely to be involved which strikes me as a seriously retrograde step (the new Settings thingie is seriously dumbed down compared to the old Control Panel stuff).
Maybe I should look to the Enterprise Edition, as I can't see corporate customers lying down for the retrograde changes."

In fact, many users are bothered by this issue - Windows 10 backup notification always asks you to create a file backup, but you may already use other backup software to protect your files. Thus, you don't need to back up your files with the built-in tools.
However, it appears after seven days if you don't do so or when you connect an external hard drive to this computer. And it will constantly keep showing the message: back up your files. This makes you annoyed every time you see the notification, and you end up having to turn it off completely.
How to Disable Windows 10 Backup Notification
Here I'll introduce you to 3 helpful ways to disable Windows 10 backup notification if you don't want to get the backup notification. And all of them applies to Windows 10 turn off backup reminders.
Way 1: Disable Windows 10 backup notification via Security and Maintenance
To disable Windows 10 backup notification, you need to open Security and Maintenance at first. You have 2 ways in the following:
#1: Through Control Panel. Type control panel in the search box and select it. Then, in the All Control Panel Items window, select Security and Maintenance.
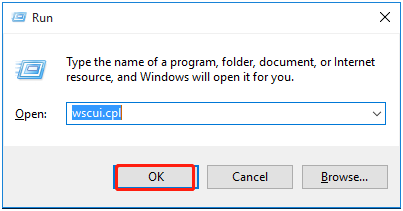
#2: Use the shortcut keys. Press Win + R, type wscui.cpl in the Run window and click OK to open Security and Maintenance window.
After getting into the Security and Maintenance window, follow the steps below to disable Windows 10 backup notification.
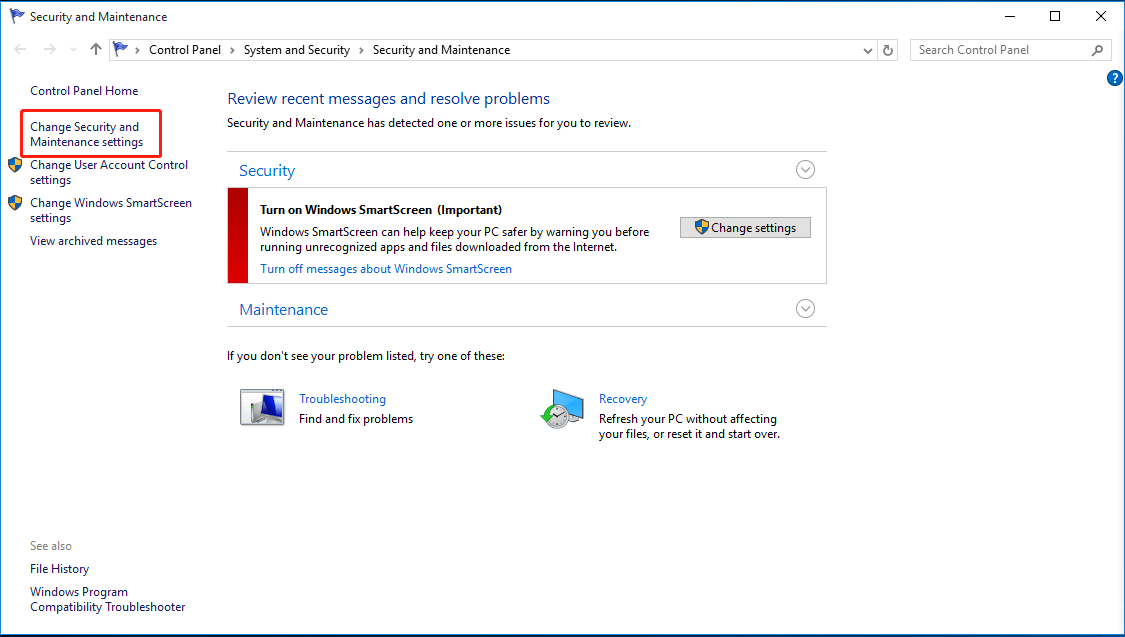
1. Select Change Security and Maintenance settings.
3. Scroll down to Maintenance messages and uncheck Windows Backup. Then, click OK to confirm you want to stop Windows 10 backup notification.
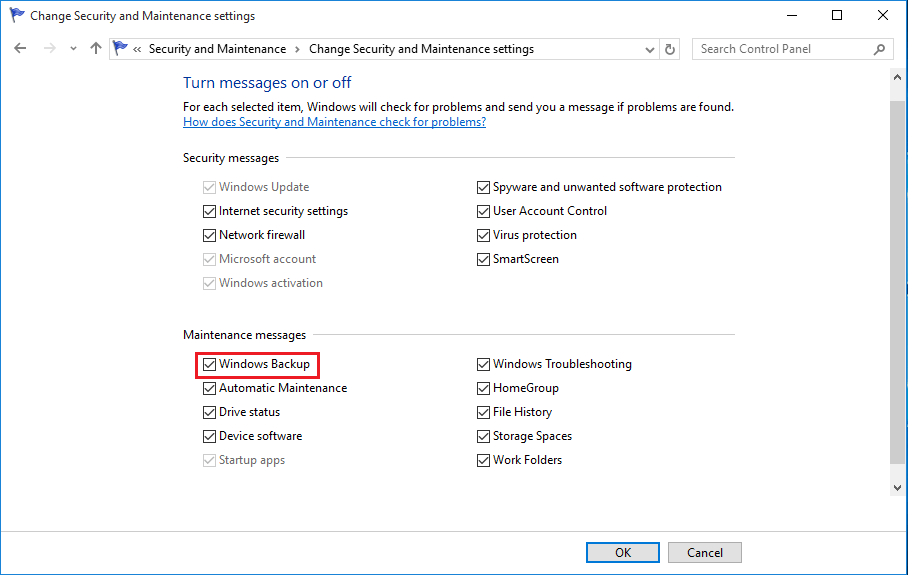
★ Tip: You could check Windows Backup to enable Windows 10 backup notification if you want to use built-in tools for bakcup.
Way 2: Turn off the backup notification in the Action Center GPO
This method works on turning off the backup notification in Windows Pro and Enterprise. At first, you need to open group policy editor.
#1: Through shortcut keys. Press Windows+R and type gpedit.msc in the Run window, then click OK to open it.
#2: Use command prompt. Type cmd in the search box and select Run as administrator. Then, type gpedit or gpedit.msc in the command prompt window and hit Enter.
After getting into Group policy, please follow the steps below to turn off the backup notification.
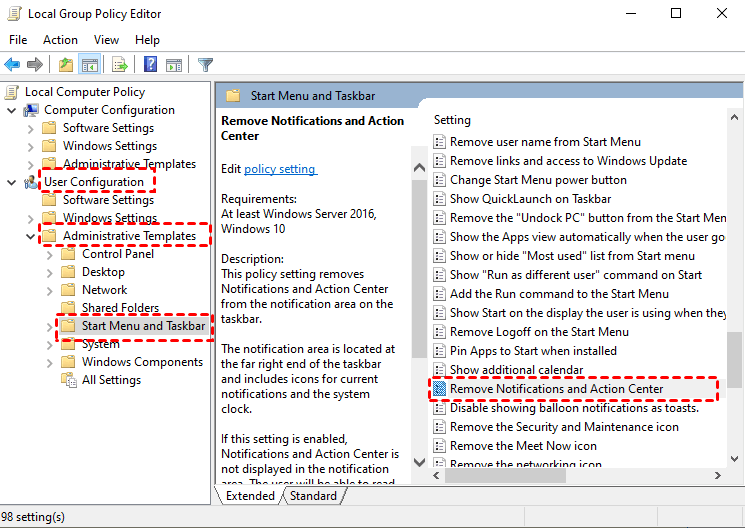
1. Navigate to User Configuration > Administrative Templates > Start Menu and Taskbar.
2. Then, double-click the Remove Notifications and Action Center in the Settings box.
3. In the Remove Notifications and Action Center window, check Enabled and click OK > Apply.
4. Restart Windows 10 for the changes to take effect.
★ Tip: You could change the notification and action center settings to Not configured or Disabled if you want to enable Windows 10 backup notification again.
Way 3: Stop backup notification in Windows 10 using Registry Editor
Besides, you still can stop backup notification in Windows 10 using Registry Editor. In the begining, you need to open registry editor with one of the following methods.
#1: Through search box. Type regedit in the search box on the taskbar and then select Registry Editor from the results.
#2: Use shortcut keys. Press Win + R and type regedit in the Run windows, then click OK to open it.
After getting into Registry Editor, please follow the steps below to stop Windows 10 backup notification.
1. Navigate to the following registry key. Then, right-click on the Windows folder and select New > Key to create a new key. Here we name it Explorer.
Computer\HKEY_CURRENT_USER\SOFTWARE\Policies\Microsoft\Windows
2. Right-click on the Explorer folder and select New > DWORD (32-bit) Value to create new value on the right side. Here we name it DisableNotificationCenter.
3. Double-click the DisableNotificationCenter value and change its value data to 1.

4. Close the Registry Editor and restart Windows 10 to make changes take effect. for the changes to take effect.
★ Tip: You could set the DisableNotificationCenter value data to 0 if you want to enable Windows 10 backup notification.
How to Protect Your Files in Windows 10 Safely with Notification
If you don't want to backup files with built-in tools, you still can try third-party backup software. AOMEI Backupper Standard is a great option, and it is simple, effective, and feature-rich. Below are advantages you can enjoy in this software.
- Back up files automatically with less space. It allows you to back up files using daily, weekly, or monthly schedule backup, which will keep all the changes made in a scheduled task. And it usually use incremental backup to backup only changed files. This combination greatly reduces the backup image size and disk space you will use, especially in the long run.
- Besides incremental backup, it still use normal compression and automatic splitting to further reduce backup image and disk space usage.
- Get backup success or failure notification timely. It is capable of notifing you the backup success or failure if you enable email notification in Windows 10.
- Multiple file restore methods. It is able to restore files from all backup solutions (file/system/disk/partition backup), even without booting into Windows.
And all the operations are based on intuitive interface, so all users can easily and quickly understand it. Please download it to have a try!
(Note: The free version only supports Windows 11/10/8/7/XP/Vista. For server users, try AOMEI Backupper Server.)
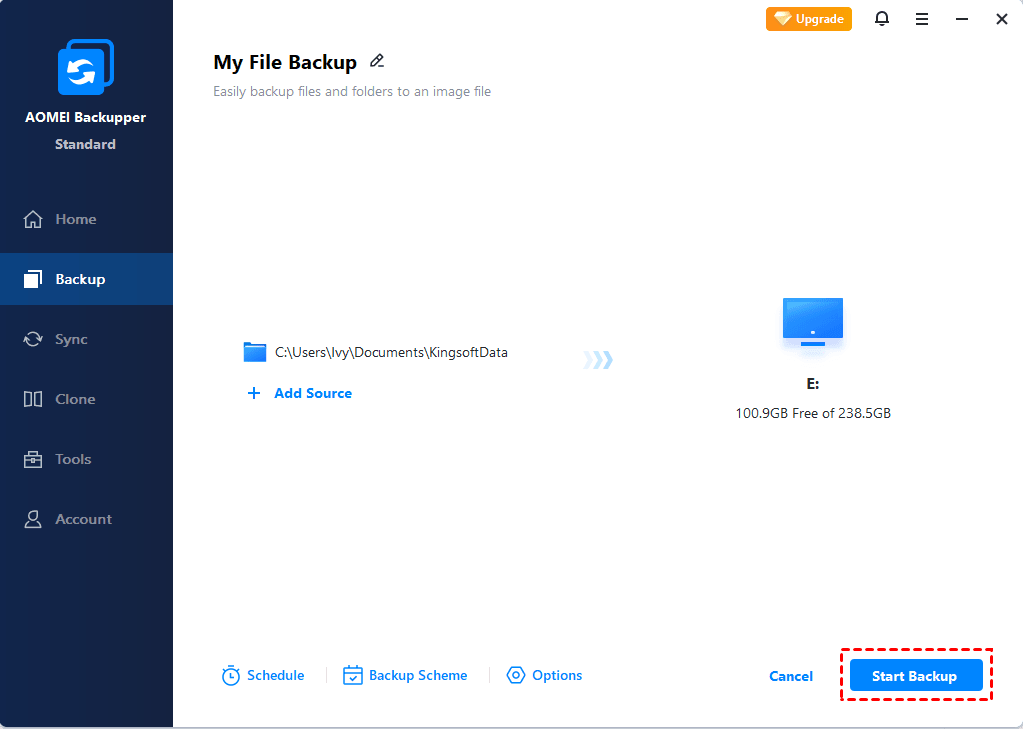
1. Launch this software, choose "Backup" and "File Backup" subsequently.

2. Click “Add File” or “Add Folder” to select files you want to protect.

3. Click the folder-shaped button to select a destination path. You can choose to backup files to external hard drive, USB flash drive, network drive, NAS, etc.

4. In daily use, you need to set more advanced features.
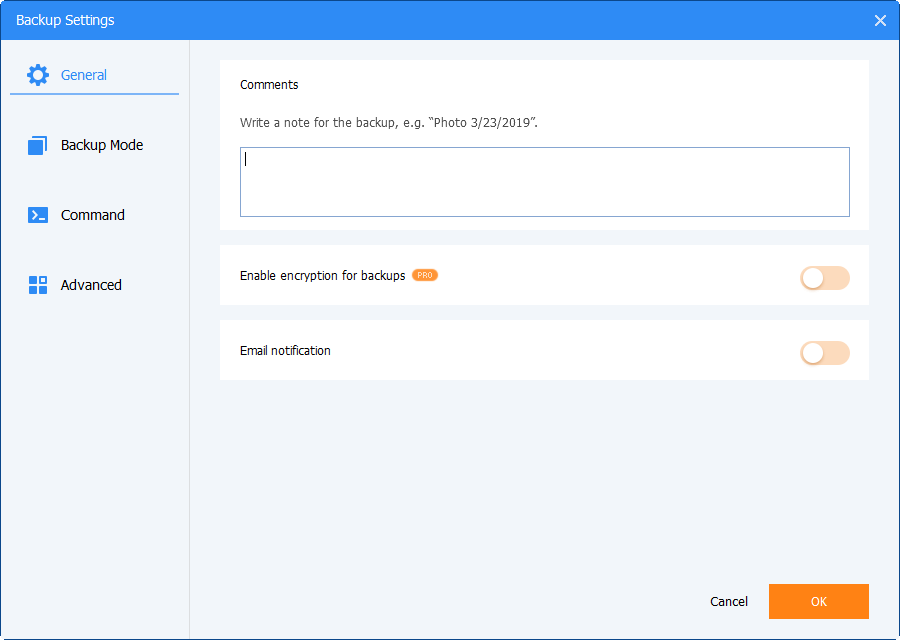
To get backup success or failure notification, click Options -> General -> Email notification to turn on email notification in Windows 10. Also, you set high compression, customized splitting, etc here.
★ Tips:
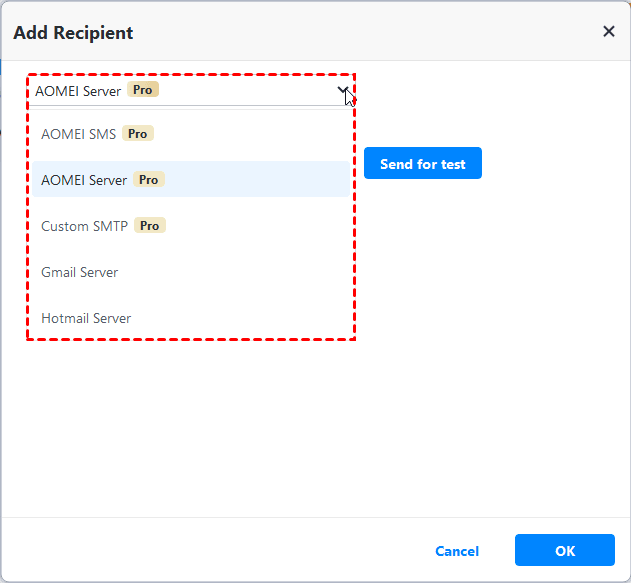
✿ To configure your mailbox and email server, you could click Settings on the title bar and choose Notification -> Enable email or SMS notifications. After setting up, you could send the notification for test in advance.
✿ For Standard edition, you could only use Gmail Server, Hotmail Server to specify your corresponding email to get the notification.
✿ For advanced editions (paid version), you could use AOMEI SMS, AOMEI Server, Custom SMTP to configure your phone number or email to get noticed.
✿ Notification settings: specify what conditions AOMEI Backupper will send you the notification, and choose an email form for you.
✿ Besides, this notification can be used in all the backup and sync task, including system backup, disk backup, partition backup, real-time sync (paid version), etc.
To backup files automatically, click Schedule Backup > Enable Schedule Backup and select "Daily", "Weekly", "Monthly", "Event trigger", "USB plug in". The last two options are only available on the professional version.

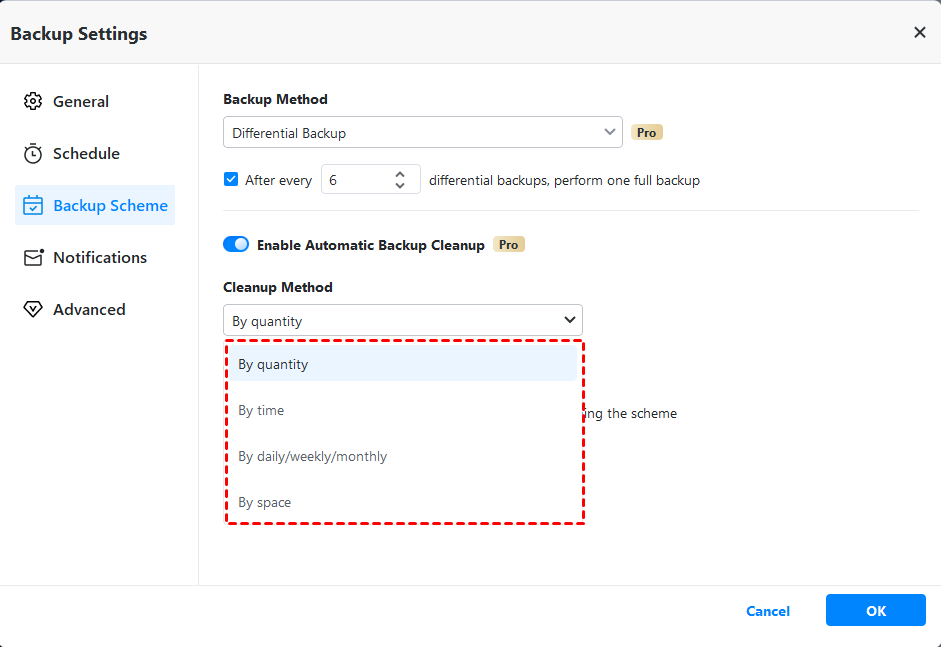
If you upgrade now, you still can enjoy more advanced features, such as, differential backup, automatic backup cleanup (by quality/by time/ by daily/weekly/monthly), etc. The latter is the most complete way to fix backup disk full issue due to accumulated backups and limited space.
5. Afterward, click "Start Backup" to back up files automatically. Wait for a few minutes, you will get the email/SMS notification to inform you of the status of backup task: Success, Failed, or others.
★ How to backup files to AOMEI Cloud
There is a growing trend to backup files to cloud storage. You can backup files to AOMEI Cloud if you have an AOMEI account. You'll get 1TB free storage for 15 days after you sign up for an AOMEI account.
Conclusion
This article introduces you to 3 helpful ways to disable Windows 10 backup notification, so you don't need to receive this notification. But if you don't have a file backup, you will lose all your files in a disaster. In view of this, it's suggested to use one simple and effective backup software to help you protect files safely. AOMEI Backupper Standard is a great option.
It not only allows you to backup files automatically, but also reduces disk space you will use as much as possible. And it allows you to enable email notification to get backup status. This way, you can determine if you have an available copy and restore to the latest file if something goes wrong. All in all, it's worth trying backup software!