Always Protect Windows 10 with Backup and Restore (Windows 7)
You will learn the stepwise to use Windows Backup and Restore (Windows 7) and another reliable backup software to protect data. Select one of them and get started!
By Ivy Updated on October 20, 2022
Overview of Windows 10 Backup and Restore
Backup and Restore (Windows 7) in Windows 10 as a Microsoft Windows component inherits the functionality of Windows 7, which allows you to backup and restore files as well as create system images. If you backup files or create system image with Backup and Restore in previous version of Windows, you could still recover these backups in Windows 10.
In addition, Windows 10 also includes another backup and recovery tool - File History, it backs up versions of your files in the Documents, Music, Pictures, Videos, and Desktop folders and the OneDrive files available offline on your PC by default. And you can backup specific folders on other location using its "Add a folder" option.
The best two destinations to save the backups are external hard drive (such as USB flash drive) and network location or NAS. Since it completely avoids data loss due to system or disk crash, virus attack, etc. And I'll introduces you to both software and perform Windows 10 backup and restore.
How to Use Backup and Restore (Windows 7) in Windows 10
Backup and Restore (Windows 7) is very useful whether you want to backup system or all the user files. The steps have a little difference, you can choose the way you want.
>> Create a system image in Backup and Restore (Windows 7). In this way, you need to create a backup manually every time and the backup image is not compressed.
>> Backup usef files, system or other non-system partition. This way is automatic and the scheduled settings are at every Sunday 7:00 am. And the backup method is incremental backup by default.
Create a backup image with Backup and Restore (Windows 7)
Here take the second way as an example.
1. Open Backup and Restore (Windows 7), you have two ways in the following.
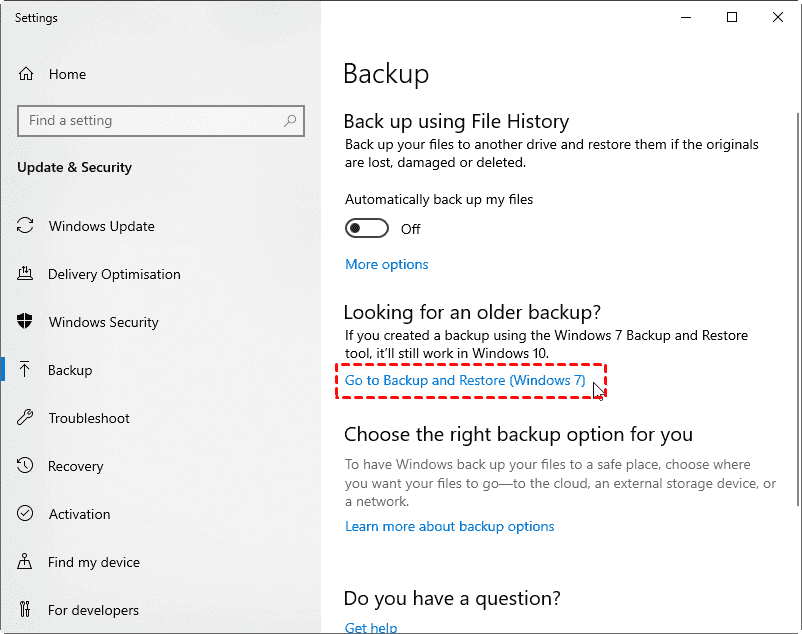
Way 1: Through backup settings. Type “Backup” in Windows 10 search box, and select “Backup Settings” in the pop-up list. Then, scroll down to Looking for an older backup setion, and click “Go to Backup and Restore (Windows 7)”.
Way 2: Through Control Panel. Type control panel in the search box, select System and Security and Backup and Restore (Windows 7).
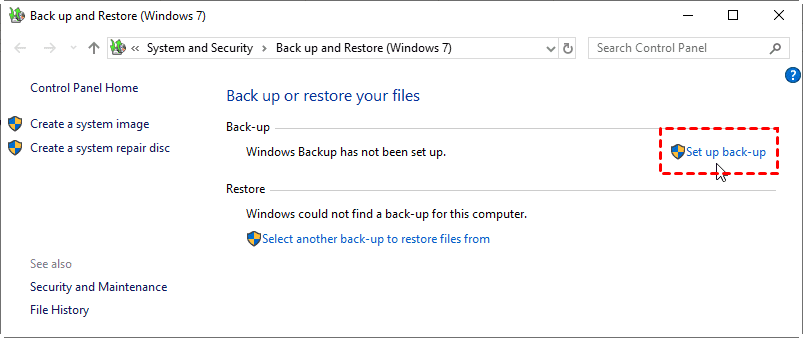
2. In the Backup and Restore (Windows 7) window, click “Set up back-up”.
3. All the available drives will be listed in the following window, please select an external hard drive to store backup image.

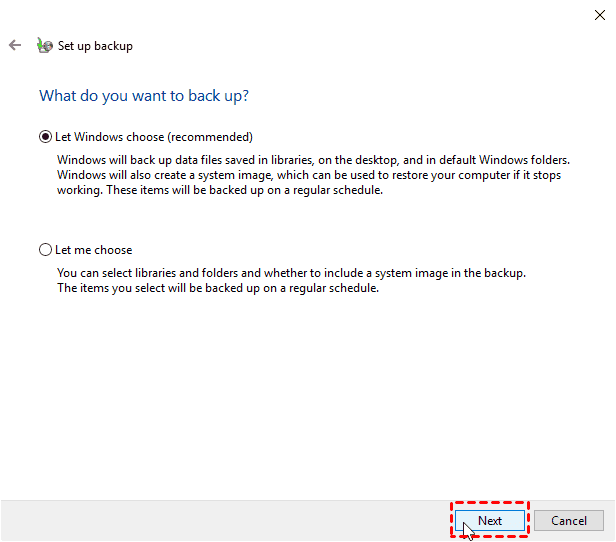
4. Choose “Let Windows choose (Recommended)” to backup all the user files and system partition. Also, you can select “Let me choose” if you want to customize backup items.
5. Review the backup settings and click Save settings and run backup to start Windows 10 Backup and Restore (Windows 7).
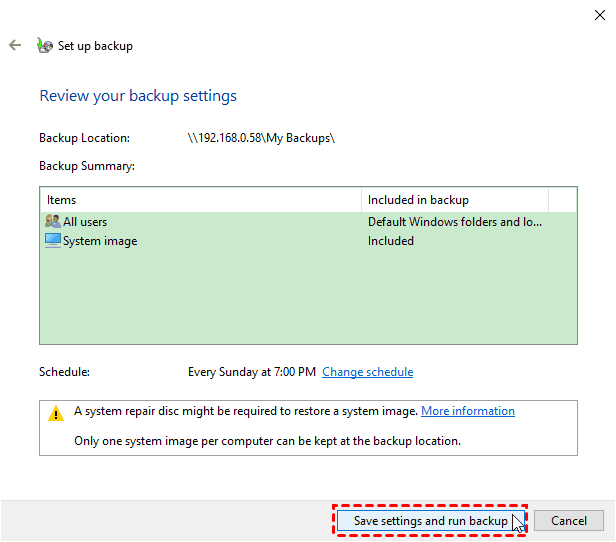
★Tips:
✍A system image cannot be saved on a drive that your computer boots from or that Windows is installed on.
✍If you just want to backup your files only, please try File history or Select Let me choose option at the step 5 with Windows 10 backup and restore.
Wait for a couple of hours, the Windows 10 system backup and data backup will be finished. By default, it will keep multiple versions of backup image until disk space is needed. But if you create a system image in Windows 10 and save it to a network location, you can only keep one backup image at the destination.
Restore files from Windows 10 backup
You can easily get your files back if created a file backup in advance.
1. Go to Backup and Restore (Windows 7). Then, scroll down to the Restore section, click “Restore my files” .

2. In the Restore files page, you can search or browse files or folders to restore. You have three options in the following, select one of them.
Browse for files: You can search the folder containing files you want to restore and then select it -> click Add Files.
Browse for folders: You can add entire folder to be restore.

3. Select the restore location, you can choose either "In the original location" or "In the following location". Afterward, click Restore to start the pending operation.
Perform system image recovery in Windows 10
Windows does not provide you a way to restore system image to new hard drive or SSD within Windows, but you can use the System Image Recovery option in the recovery environment. It requires you to have an installation disc or recovery drive (at least 16GB). And the recovery drive only works for the computer you created it.
Please prepare a bootable media and follow the steps below to perform system image recovery in Windows 10.
1. connect the installation disc or recovery drive and boot from it. Remember to change boot priority for it in advance.
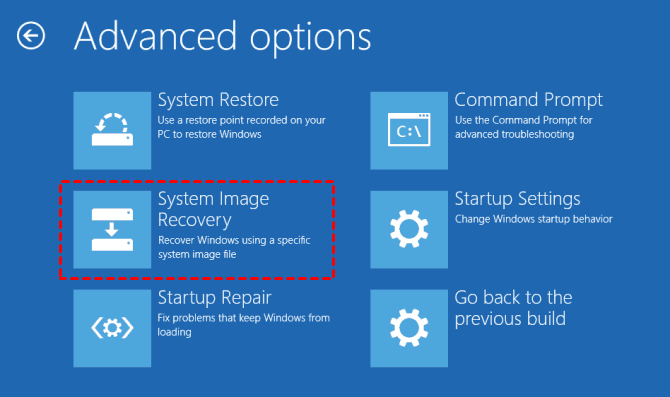
2. After loading files, you will see the initial Windows Setup window. Click Next and then Repair your computer > Troubleshoot >Advanced options > System Image Recovery > Windows 10 subsequently.
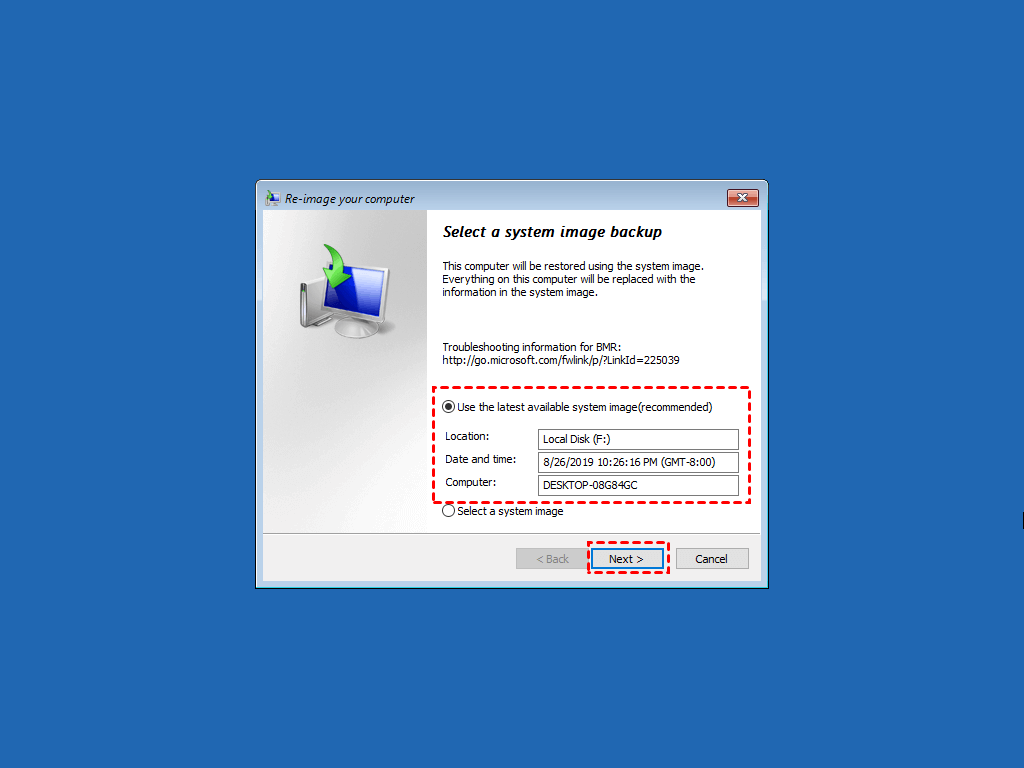
3. In the Re-image your computer window, tick Use the latest available system image. Then, then click Next and follow on-screen instructions to complete the recovery process.
Windows 10 Backup Failed Error and Solutions
However, you may get Windows Backup failed error with Backup and Restore in Windows 10, like the following errors:
-
The backup application could not start due to an internal error: A Volume Shadow Copy Service component encountered an unexpected error. Error code: 0x80042302
-
A shadow copy could not be created. Please check “VSS” and “SPP” application event logs for more information. Error code: 0x81000019.
Solution 1: Enable Volume Shadow Copy
The volume shadow copy service error 0x80042302 may be caused by disbled VSS. So, you could enable the Volume Shadow Copy service.
1. Please enter services.msc in Windows 10 search box to open Services window.
2. Scroll down to find the Volume Shadow Copy, and double click it.
3. Change the Startup type from Disabled to Automatic.
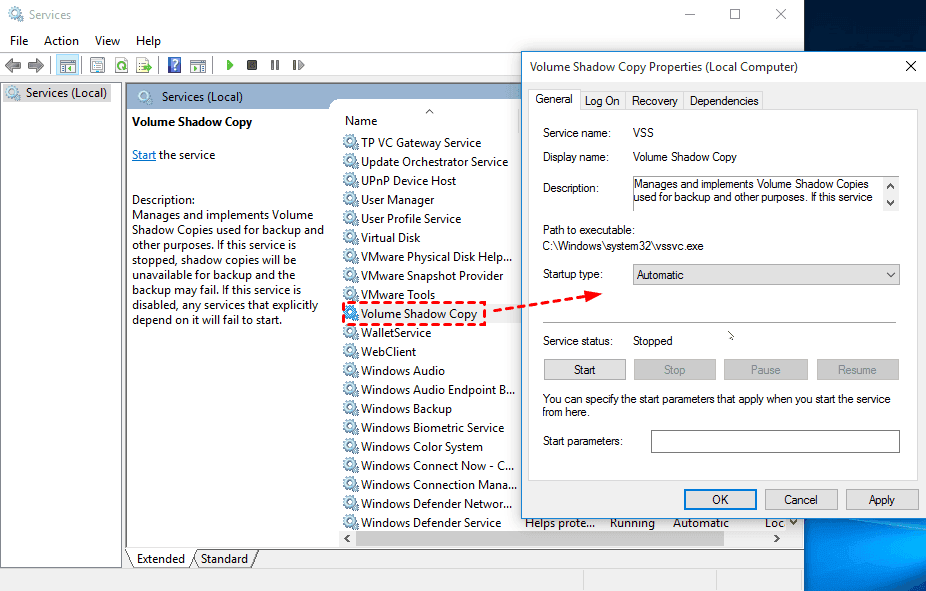
Then it will be solved quickly.
Solution 2: Restart SPP (Software Protection) Service
1. Press Windows + R to open run dialog, type regedit and press Enter to open Registry Editor.
3. Go to HKEY_LOCAL_MACHINE\SYSTEM\CurrentControlSet\Services\sppsvc in the left pane
4. Click on the sppsvc folder, then double-click on Start. Change the Value data to 4 and press OK to disable the SPP service.
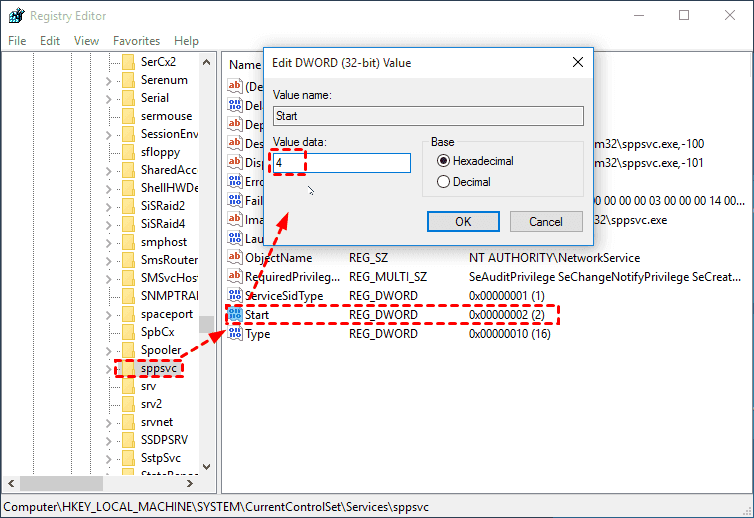
5. And then change the Start Value data to 2 (automatic) to restart SPP service.
By the way, restart the SPP service, you could also fix the SPPsrc.exe uses too much CPU problem. Then, try to create a Windows 10 backup now and check if it is solved.
However, you may meet other backup failed errors like There was a failure in preparing the backup image of one of the volumes in the backup set. (0x807800C5), The system cannot find the file specified (0x80070002), Windows 10 backup disk cannot be found (0x80780081), etc. Just find other Windows 10 backup failed solutions here.
Reliable Way to Perform Windows 10 Backup and Restore
Since the Windows Backup and Restore (Windows 7) has many restrictions and it's not stable, it's a good choice to try another professional yet free Windows backup software - AOMEI Backupper Standard. It is highly recommended by millions of users due to its reliable performance and easy-to-use features. Below are some useful features for you to protect data.
- It is able to backup Windows operating system, entire hard disk, partition(s), personal files.
- It supports daily, weekly, monthly schedule backup, so you can keep your data intact as much as possible.
- It minimizes backup image size and disk space with multiple features, including incremental backup, normal compression, automatic splitting, etc.
- It is capable of restoring files (from file backup or other backup types) or system within Windows, at any time, even to smaller drive.
- It supports a quick recovery solution by cloning hard drive or system partition.
And this software supports Windows XP, Vista, 7, 8, 8.1, 10, 11 (32-bit & 64-bit). If you are currently using one of the operating system, download this software to have a try! For server users, try AOMEI Backupper Server.
Create a Windows 10 System Image
Similar to Backup and Restore (Windows 7), you need to create a backup image at first. Then, you can restore files or system from it. Here take Windows 10 system backup as an example.
1. Perform AOMEI Backupper Standard, select Backup > System Backup in turn.

2. Choose the destination to save the Windows 10 system backup file. You can backup your computer to external hard drive, USB drive, network drive, NAS, etc. Change the Task Name to differ from other backups if needed.

3. Press Start Backup >> to create a Windows 10 system image. In daily use, you need to set more advanced settings.
✍ Schedule Backup: It allows you to backup system on a regular basis, and you have 3 totally free options, including daily, weekly, monthly. Also, you can use Event Triggers, USB plug in on the professional version.
✍ Backup Scheme: It has 3 backup methods (full/incremental/differential) and the last two options backup only changed files. Also, you can automatically delete old backup images if you enable automatic backup cleanup. Most features in it are only available on the professional version.

After the Windows 10 system image created successfully (30 minutes or more, depending on your data capacity).
Windows 10 Restore from Backup (within Windows)
For system image recovery in Windows 10, you have two options in the following:
- If your computer is bootable, you can directly launch this software and perform system restore within Windows.
- If your computer is unbootable, you need to create a WinPE bootable rescue media. It contains this software and allows you to boot from the recovery environment for system image recovery.
Here take the first situation as an example. Please connect the disk containing system image to your computer and be sure it's recognized.
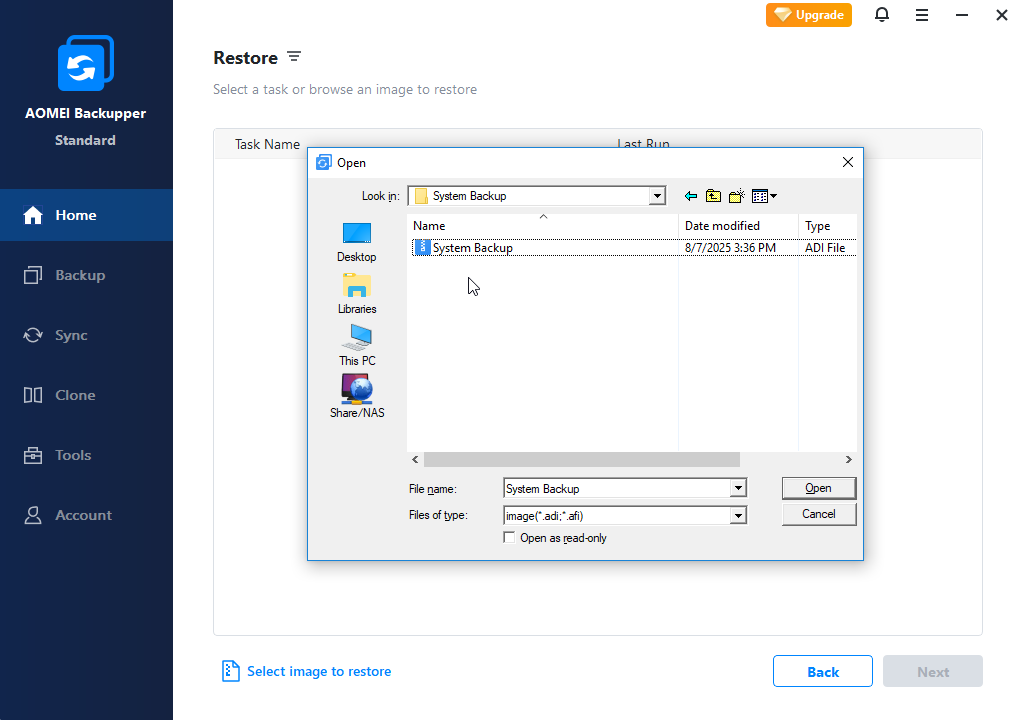
1. Launch AOMEI Backupper Standard. Then, click Restore and then Select Image File to locate the backup image manually.
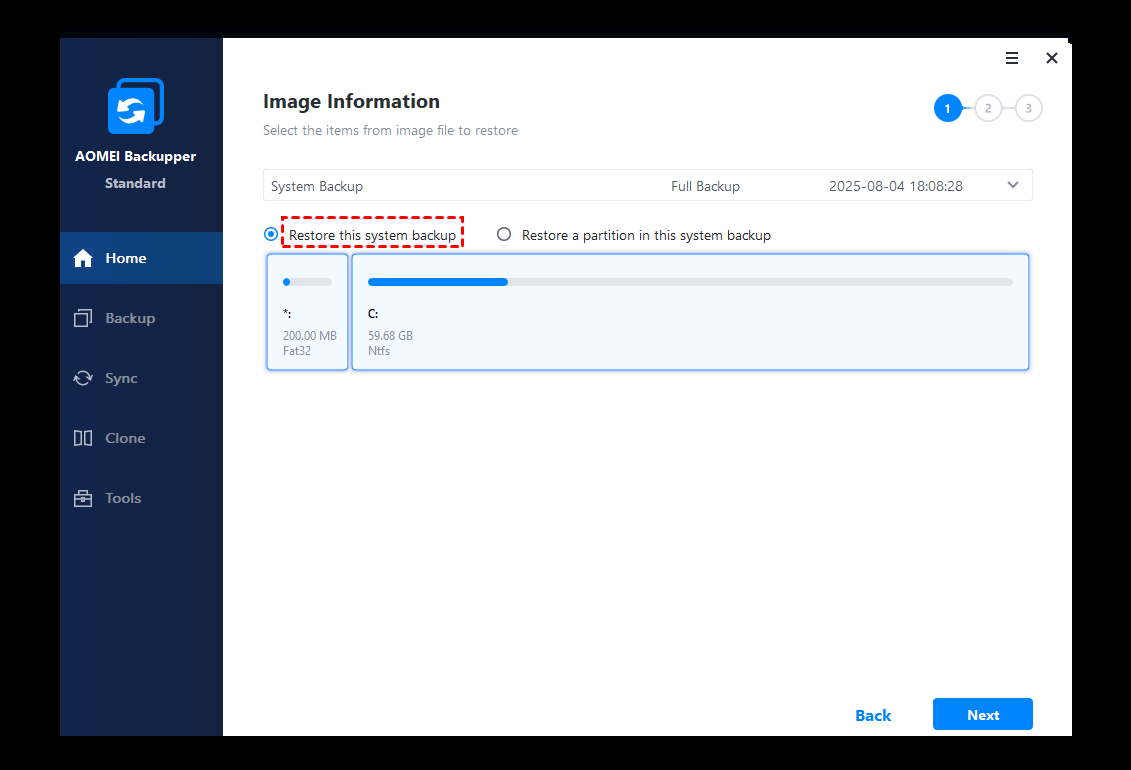
2. Tick the Restore this system backup option and hit Next. If you want to restore Windows 10 image to new hard drive, you still need to connect the drive you want to save image and tick Restore system to other location.
3. Select a partition or entire disk if tick "Restore system to other location" option. Then, click Next and press Start Restore to do system image recovery in Windows 10.
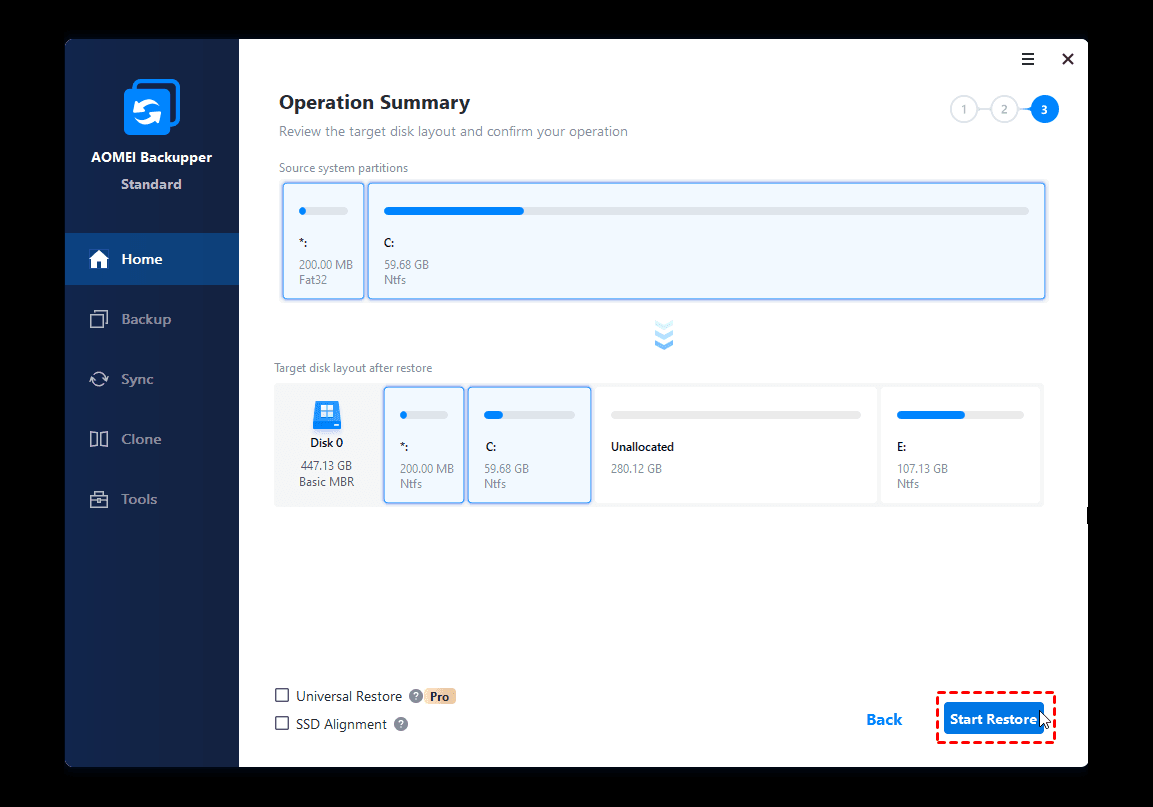
This software will check the Universal Restore option if you restore system image to new computer with different hardware. And it will ask you to upgrade now after clicking Start Backup.
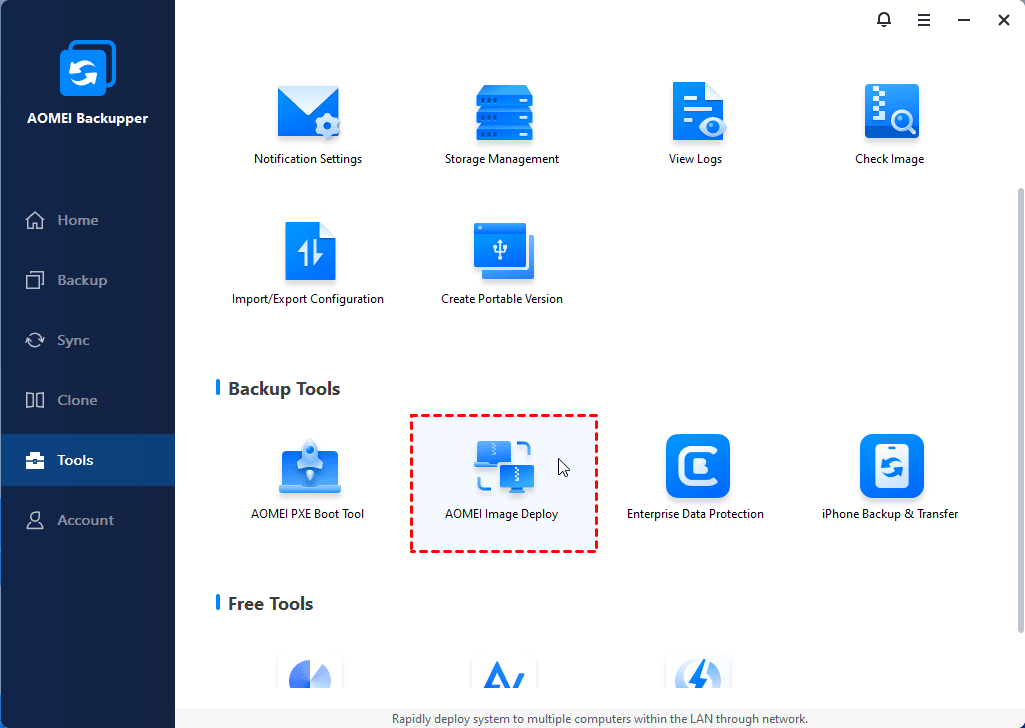
If you want to deploy system image to multiple computers, even with different hardware, this software still helps you. Its technician or techplus edition integrates image deployment software to restore system (disimilar hardware is supported) while presenting the IP address and computer name. It's simply two birds with one stone!
In the End
Windows 10 Backup and Restore (Windows 7) helps you create a system image and backup user files for data protection. However, it has many restrictions and it is not working sometimes, so it's a good choice to use another professional yet free backup software - AOMEI Backupper Standard.
It supports all the backup solutions and features to make it automatically. Besides, the most advantage of it is to use multiple disk space savior features by default, which prevents the biggest question for backup - backup disk full issue. Among them, automatic backup cleanup is the most complete way and it's available on the professional. Then, you can restore files or system at any time.