Can I Use Recimg Windows 10 to Create a Custom Recovery Image
Is Recimg in Windows 10 available? Learn to create a custom recovery image in Windows 10 that is used to reset this PC like the way you did with Recimg in Windows 8.
by Yuka Updated on November 1, 2022
Is Recimg available in Windows 10 for custom refresh image?
In Windows 8/8.1, you can use the built-in feature Refresh your PC to reinstall Windows and keep your personal files and settings if you have problems on your PC. You can use Recimg command to create a custom refresh image used to refresh your PC, so you can keep the apps and settings that did not come with your PC after refreshing your PC.
However, when you run the Recimg command in Windows 10, it tells you that 'recimg' is not recognized as an internal or external command, operable program or batch file.

If you try to run this command from Windows recovery environment, you will get the same result. Why does Windows 10 remove such a great feature to create custom recovery image? Windows removed the Refresh your PC feature but keeps the Reset this PC.
Therefore, instead of using Recimg.exe Windows 10 to create custom refresh image, you can use DISM image management to create a recovery image used for Reset this PC. This can be regarded as a Recimg equivalent.
If you use the custom recovery image captured by DISM command to reset your Windows 10, then your PC will be restored to the state when the image was captured. All the files and programs saved will remain intact.
Create custom image used for Reset this PC
Because the files may be used by other processes, it is recommended to run the DISM command from Windows recovery environment (WinRE).
Open command prompt in WinRE
To boot your Windows 10 into recovery mode, you can click Restart while keeping the Shift key pressed. You can also boot from a Windows 10 recovery drive and then it will directly enter Recovery mode.
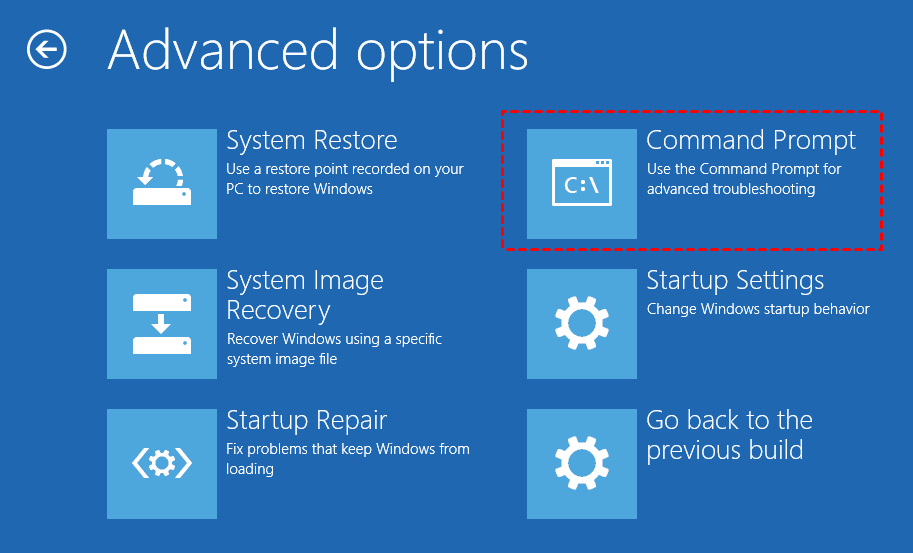
In the Recovery Mode, select the following in order:
Troubleshoot > Advanced options > Command Prompt. You may need to enter your account password to use command prompt.
Capture custom recovery image
If you are boot from recovery drive or installation disc, the drive letter assigned to each drive may be different from that in normal Windows 10. To distinguish each drive, you can run the commands below:
- Diskpart
- List volume
- Exit
After that, you can type the command to create a custom recovery image for Windows 10 referring to the syntax: Dism /Capture-Image /ImageFile:/CaptureDir:/Name:[/Description:][/ConfigFile:] {[/Compress:{max|fast|none}] [/Bootable] | [/WIMBoot]} [/CheckIntegrity] [/Verify] [/NoRpFix] [/EA]
For example, to backup current system drive to E:\windows10 folder with a task name: windows10 and description: 2018-01-10, run this command:
- dism /Capture-Image /CaptureDir:C:\ /ImageFile:D:\windows10\install.wim /Name:windows10 /description:2018-01-10
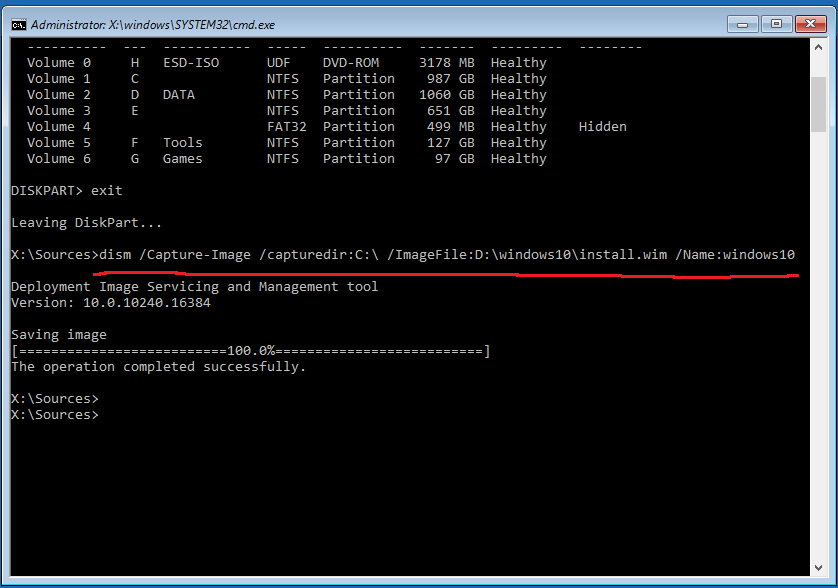
When it reaches 100%, then you have a custom recovery image that can be used to reset your Windows 10 PC.
Use the custom recovery image as the Reset image
To configure the image that you just created as the push-button reset recovery image, you can use REAgentC command-line option. You can use command “reagentc /info” to display the current status of Windows RE and any available recovery image.
If the status is disabled, run command “reagentc /enable” in an elevated command prompt to enable it. Then you can type “reagentc /setosimage /path D:\windows10 /index 1”to use the custom image as the reset recovery image.

Remember to change the /path to the location where you saved the recovery image file (install.wim). This may seem a little complicated if you are not familiar with command line utility. As you can see this works like Recimg in Windows 8. You can take this DISM command as another form of Recimg in Windows 10.
Besides this reset recovery image, you can also create system image backup with a free Windows backup and recovery tool AOMEI Backupper, which comes with a user-friendly interface.
Easier way to restore your Windows using custom image
AOMEI Backupper Standard is free backup and recovery software that helps you restore everything back when your system runs into serious issues like Windows 10 Reset, but only much easier and more custom options.
AOMEI Backupper allows you to choose backup source in a more flexible way. You can choose System Backup (including boot and system partitions), Disk Backup, File Backup and Partition Backup.
You can create multiple scheduled backup tasks. Incremental backup and differential backup are both supported, so you do not need a very larger backup disk to save multiple backup versions.
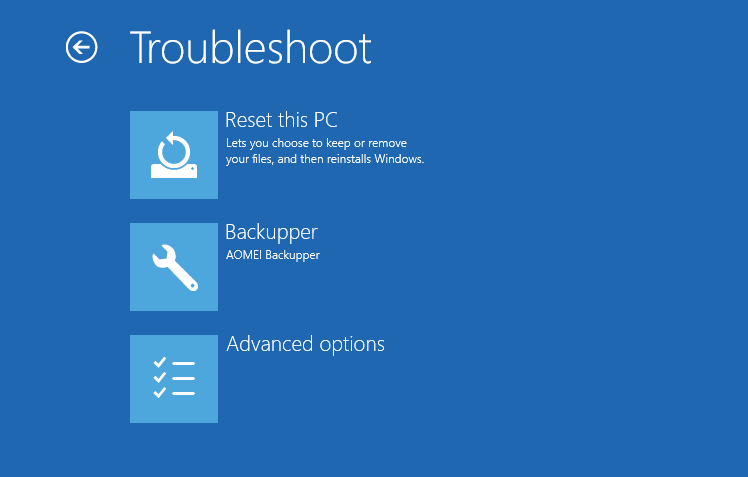
You can integrate AOMEI Backupper into WinRE, so you can restore your PC from WinRE if you cannot boot Windows 10 normally. You can also create a bootable media that can be used to boot your PC and perform restore task.
Let’s see how easily you can create a custom recovery image with AOMEI Backupper:
Step 1. Download and install AOMEI Backupper.
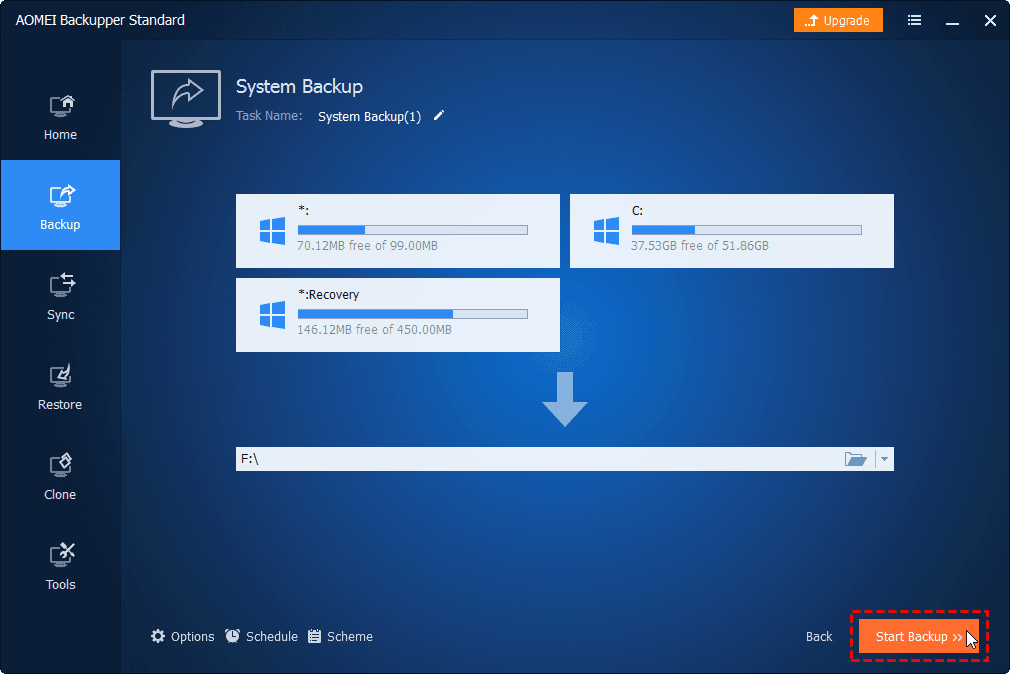
Step 2. At Home screen, click the Backup tab and choose System Backup.

Step 3. Select a destination location to receive the backup image by clicking Step 2. You can backup to local disk, external hard drive, NAS, network drive, etc.

Step 4. In the next screen, click Schedule to configure scheduled backup settings if need be. After that, click Start Backup to start the backup.
In a short time, the backup will be created. If there is a problem with your computer in the future, you just need to click the Restore tab and select a backup image to restore your PC. If your system cannot boot and you have not created a bootable media, you can create a AOMEI boot media from another computer, regardless of its Windows version.
Conclusion
After reading this article, you can understand that you can use DISM command as a Recimg alternative in Windows 10. As for creating custom refresh image in Windows 10, you can use DISM command or AOMEI Backupper to create system image backup. But after comparison, it is easier to use AOMEI Backupper to create a custom recovery image.