How to Run Automatic File Backup in Windows 10 (2 Free Ways)
Running automatic file backup is a good way to prevent data loss. Learn how to backup files in Windows 10 with two efficient ways from this page.
by Lily Updated on October 25, 2023
Why to backup files in Windows 10?
We save a lot of files on our PCs, including working documents, precious photos, favorite music, etc. Those files are important for us. However, we may lose our files for following reasons:
-
The computer suffers from a crucial error, such as system crash, hard drive failure and so on.
-
We delete files with Shift + Delete or delete files from the Recycle Bin.
-
Virus attack…
How painful it is if you find your files missing all of a sudden! To prevent potential data loss, you should create file backup in Windows 10. Besides, new files are added and old files are modified frequently. It would cost much time and efforts to run file backup manually after each change. In this case, what you need is automatic file backup.
What files should be backed up?
Now you know the importance of auto Windows 10 file backup. Following files are recommended to be backed up regularly:
-
User folder: it includes Desktop, Downloads, Documents, Music, and Pictures, etc.
-
Program files: the files generate after you install certain applications, which will help you get back your applications without reinstallation.
-
Important files you save on other internal drives.
Then, how to perform auto backup files in Windows 10? Please move on to the next part.
How to automatically backup files in Windows 10
Here I’m going to show you two efficient ways to run automatic Windows 10 file backup. Two tools will be used. One is a powerful backup freeware, and the other is Windows built-in tool File History.
Way 1: Auto backup files in Windows 10 via a handy freeware🔥
AOMEI Backupper Standard, the best free backup software, offers you full backup solutions: System Backup, Disk Backup, Partition Backup, File Backup and Cloud Backup. You can also backup files in Windows 10 with the Sync feature. The difference between File Backup and Sync is that File Backup creates an image file for the backed up files while Sync copies those files to another place directly.
You are allowed to set the backup/sync task to run automatically using the Schedule feature. All Windows PC operating systems like Windows 11/10/8.1/8/7/Vista/XP are supported. Follow the guidance below to perform automatic file backup in Windows 10 via AOMEI Backupper.
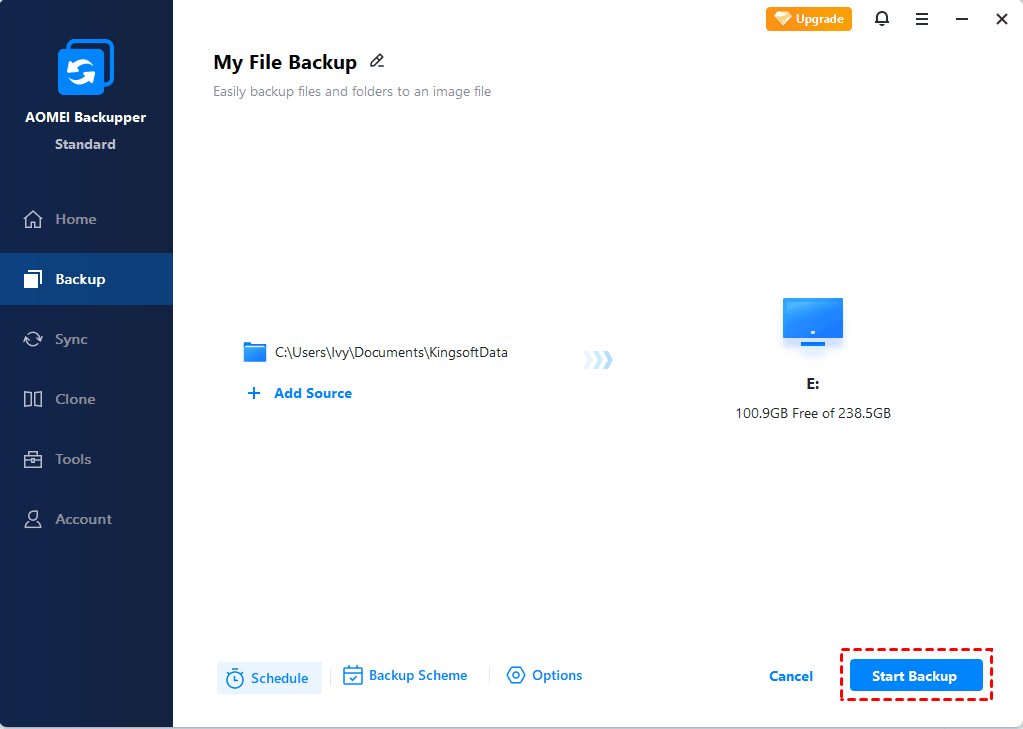
Step 1. Download, install and launch AOMEI Backupper. Click “Backup” and select “File Backup”.

Step 2. Name the task so that you can distinguish it from other backup tasks. Click “Add File” or “Add Folder” to select the files/folders you want to backup.

Step 3. Select a destination path to store the image file. You can backup files to USB drive, external hard drive, NAS device, and network share, etc.

Step 4. Tick “Schedule Backup” in the bottom. In the pop-up window, you can set the frequency of the task to run.

Tips:
Schedule Backup: There are five schedule modes you can choose from—Daily, Weekly, Monthly, Event triggers, and USB plug in.
Backup Scheme: You can choose backup methods here - Full Backup, Incremental or Differential Backup. The latter two methods can help you save disk space on the target disk. You can also enable auto cleanup in the pro version to automatically delete old image files to save you disk space.
Step 5. Confirm the operation and click “Start Backup”.
>> Options: you can enable email notification, compress or split your backups here.
Note: To retrieve lost files from the backup you’ve created, you can perform file restore.
Way 2: Backup files in Windows 10 with File History
File History, Windows 10 primary backup software, takes a regular backup of your desktop, documents, music, photos and other files contained in your user folder. Follow the steps below to set up your first File History backup:
- Connect an external drive to your computer and make sure it is detected.
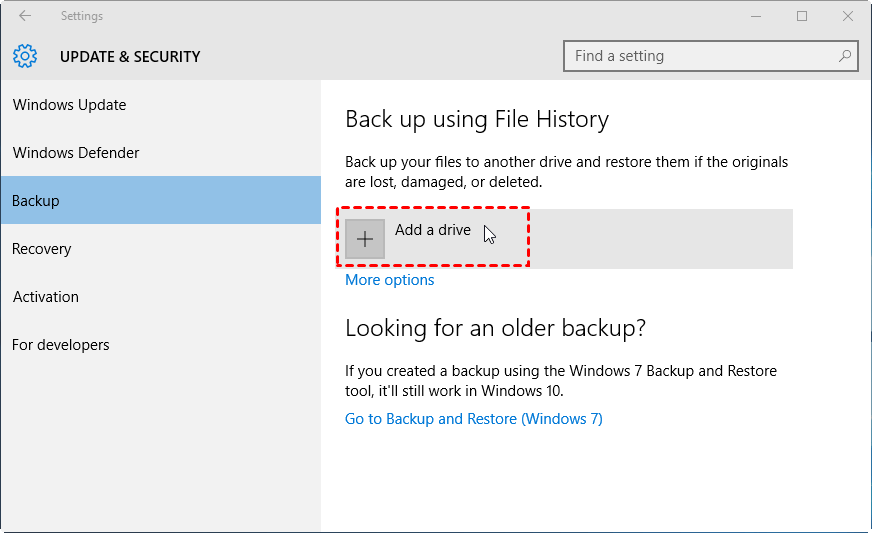
- Open the Settings app and go to Update & Security > Backup.
- Under “Back up using Fiile History”, click Add a drive. Select the drive you have connected to your computer.
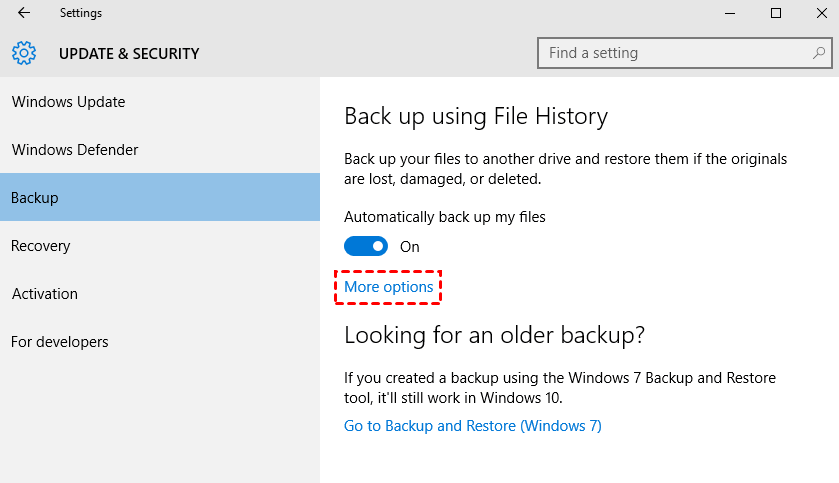
- You’ll see a new heading called “Automatically back up my files”, and the switch is automatically turned on. Click More options under the switch.
- In the “Backup options” window, click Back up now to run your first backup.
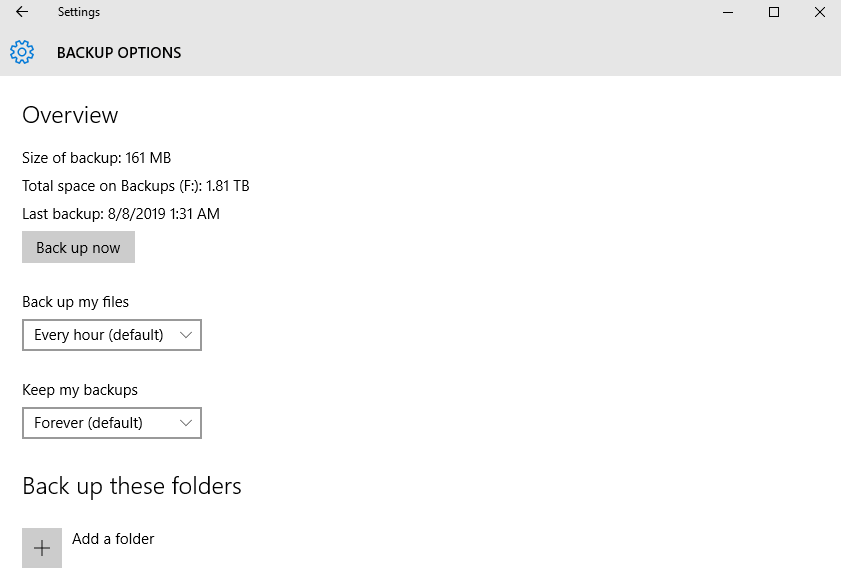
Tips: You can change backup options based on your needs. For example, you can choose how often to back up your files, and how to keep your backups. You can also add or exclude certain folders to be backed up.
AOMEI Backupper vs. File History
Both AOMEI Backupper and File History can help you backup files in Windows 10. Then, how to choose between them? Let’s make a comparison:
1. Backup destination
File History can only backup to external hard drives or network location, no internal drives while AOMEI Backupper supports them all.
2. File type
File History can only backup whole folders, no individual files whereas AOMEI Backupper supports both folder-level backup and file-level backup.
So if you want to backup to internal drives or backup certain files, you should use AOMEI Backupper.
To sum up
You have learned two efficient ways to run automatic file backup in Windows 10. Choose one way that fits your need best. AOMEI Backupper is not only a backup utility but also hard drive transfer software. You can use it to clone HDD to SSD or clone SSD to larger SSD, etc. Don’t hesitate to get this tool and discover more!