How to Backup Windows 10 to NAS (Synology) | Top 4 Ways
With the popularization of NAS device, plenty of people choose to backup Windows to NAS. Learn how to backup Windows 10 PC to Synology, QNAP and other popular NAS easily from this page.
By Lily Updated on April 9, 2024
Why backup Windows 10 to NAS?
Nowadays, more and more users realize the importance of backup. They backup the operating system, user folder or the whole PC to prevent unexpected data loss, system failures, and possible problems caused by Windows 10 update. As for the backup destination, many users choose to backup to external hard drives so that the backup file won’t be affected by computer errors.
Apart from external drives, NAS (Network Attached Storage) has gained popularity among computer users. You may want to backup Windows 10 to NAS for following reasons:
-
No juggling with removable drives. As long as you’re on your network, you’re connected to your NAS device.
-
Centralized backups. You can save all your data backups and manage them on one NAS device. Some NAS devices have several drive bays which enable you to enlarge the storage space as per your need.
-
Data security. A NAS device is placed at home and won’t be carried around. Therefore, you won’t lose your backups due to losing the backup drive.
Since backing up Windows to NAS is advantageous, how to perform it exactly? Please read on.
Set up your NAS device before Windows backup
To perform Windows 10 backup to NAS, the first thing you should do is to choose a reliable NAS device and set it up. Synology NAS is favored by a lot of users. I’ll show you how to set up Synology NAS step by step:
Step 1. Add drives and connect cables to your Synology NAS referring to the Hardware Installation Guide for your model.
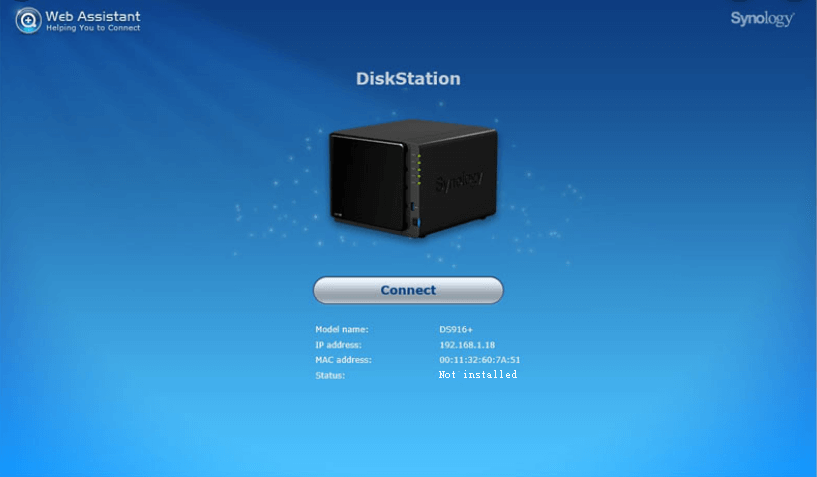
Step 2. Power on your Synology NAS. Open a web browser on a computer connected to the same network as the NAS.
Step 3. Go to finds.synology.com. Web Assistant will find your Synology NAS within the local network.
Step 4. Click Connect to start the setup process and follow the onscreen instructions to install DSM (DiskStation Manager).
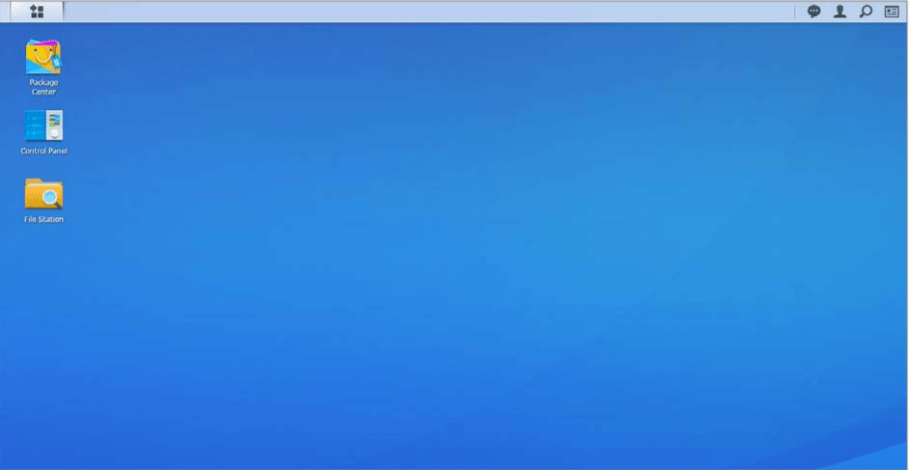
Step 5. After DSM is installed, you’ll be prompted to take a look at the DSM interface. You’ll see three frequently used apps at the “desktop”: Package Center, Control Panel, and File Station. To logout, you can click the person-shaped icon at the top right.
Step 6. Go to This PC > Network, and you can see your NAS device there.
How to backup Windows 10 to Synology NAS
To perform Windows 10 automatic backup to Synology NAS, there are four efficient ways for your reference. In fact, these methods can also help you backup Windows 10 to QNAP NAS, WD, Buffalo and other popular NAS devices.
👉 Method 1: Backup Windows 10 to NAS with a free backup utility
👉 Method 2: Backup Windows 10 to NAS via centralized backup software
👉 Method 3: Windows 10 backup to NAS by creating a custom backup
👉 Method 4: Windows 10 backup to NAS through creating a system image
Method 1: Backup Windows 10 to NAS with a free backup utility🔥
To use Synology NAS for Windows backup, the best free backup software - AOMEI Backupper Standard can do you a favor. Following are its main features:
◈ Help you with all kinds of backups in Windows, such as system backup, disk backup, partition backup and file backup (to set Windows 10 backup files to NAS).
◈ Support various backup destination - you can backup to local disks, external hard drives, network location or NAS devices.
◈ Run Windows 11/10/8/7 automatic backup to NAS with the Schedule Backup feature. You can choose the Daily, Weekly, or Monthly mode based on how often you change the backed up data.
Follow the steps below to perform Synology backup Windows 10 to NAS via AOMEI Backupper:
Step 1. Download, install and launch this free software to backup Windows 10 to NAS - AOMEI Backupper.
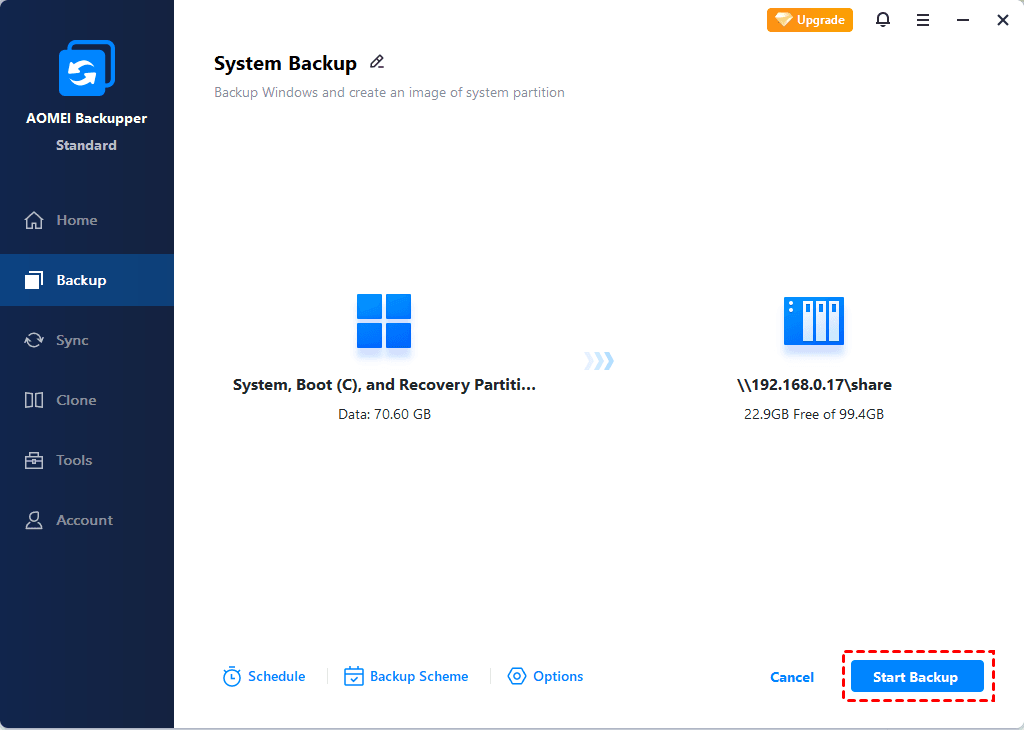
Step 2. Click “Backup” and select “System Backup”.

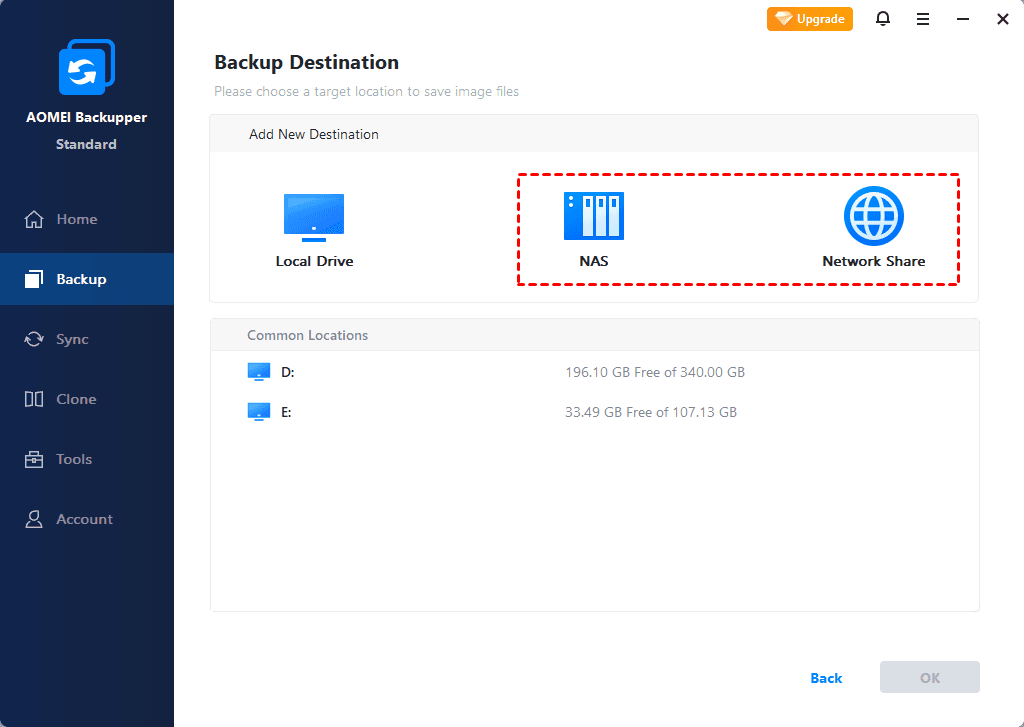
Step 3. The required system partition(s) is (are) selected by default. Click the inverted triangle at the right edge of the second bar and choose “Add Share or NAS Devices”.
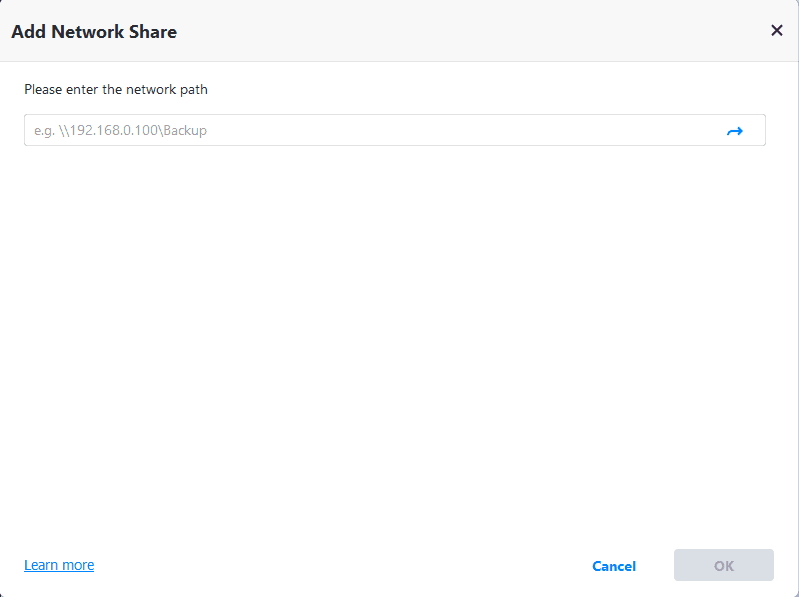
Step 4. In the Add Share or NAS Devices window, type the IP address of the Synology NAS and click the blue button at the right. Type username and password if it prompts.
Step 5. After the IP address has been added, all network-shared folders under it will be listed. Choose one folder on the NAS as the destination path to store the backup image and click “OK”.
Step 6. Confirm the operation and click “Start Backup” to backup Windows 10 to Synology NAS.
✎ Tips:
- You can compress/split backup images using Options.
- You can set Windows 10 incremental/differential backup to NAS to backup only changed files in Backup Scheme. And you can delete old backups automatically. (Some features are available in AOMEI Backupper Professional.)
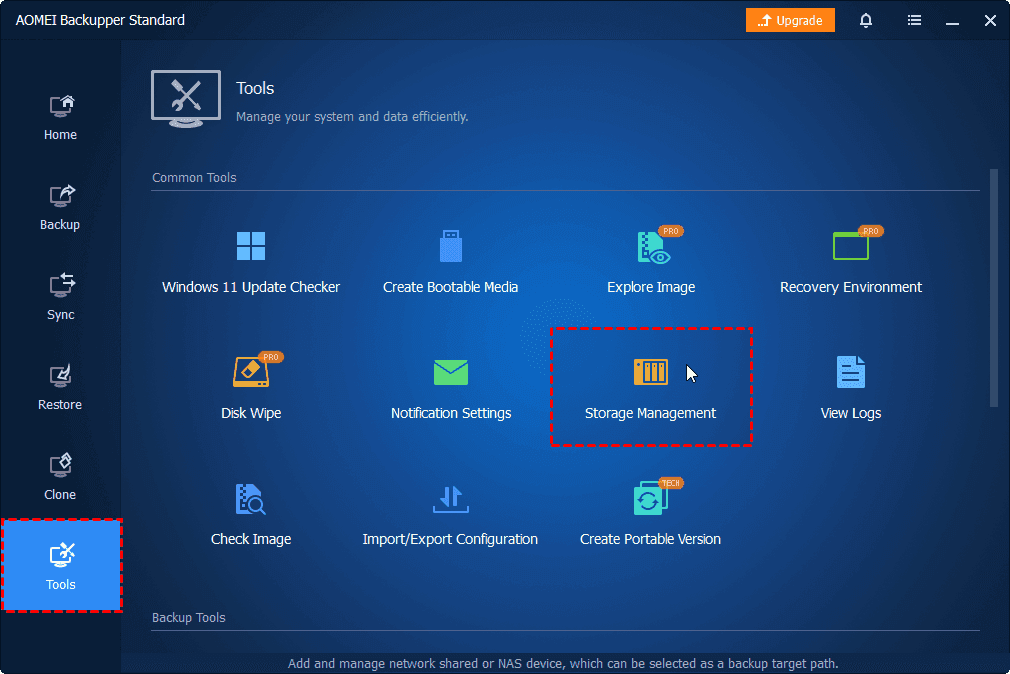
- If you have created backup tasks with different NAS devices, you can go to Tools > Storage Management to manage your NAS storage space.
Method 2: Backup Windows 10 to NAS via centralized backup software👍
The best enterprise backup software - AOMEI Cyber Backup provides a convenient and reliable solution for centralized backup management of all Windows operating systems.
- It enables you to create system/disk/partition backup for a bunch of Windows PCs, supporting Windows 11/10/8.1/8/7.
- You are allowed to save backup images on a local disk, external hard drive, network share or NAS device, etc.
- You can schedule a backup task to run daily/weekly/monthly using the full/incremental/differential backup method.
Download AOMEI Cyber Backup now to try it out!
Learn how to backup Windows 10 to NAS as follows:
Step 1. Run AOMEI Cyber Backup. Log in with AOMEI Cyber Backup account or Windows account.
Step 2. Click Source Device > Windows > Add Windows Device to add the Windows 10 device that you want to backup. You need to enter the IP address, username and password of it.
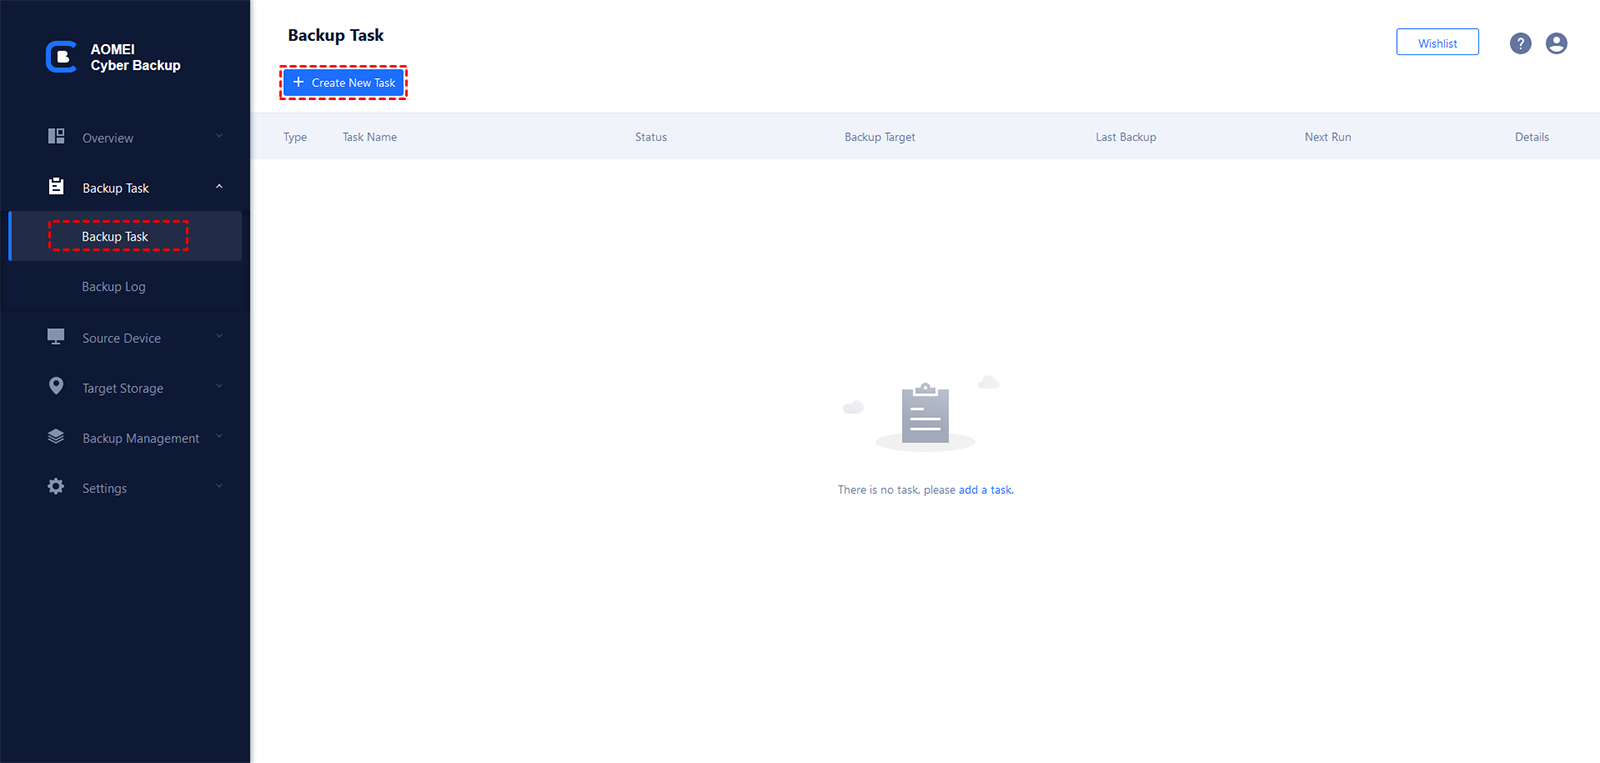
Step 3. Create a new backup task.
- Click Backup Task on the left menu bar and select Backup Task > Create New Task.
- Choose System Backup as the Backup Type.
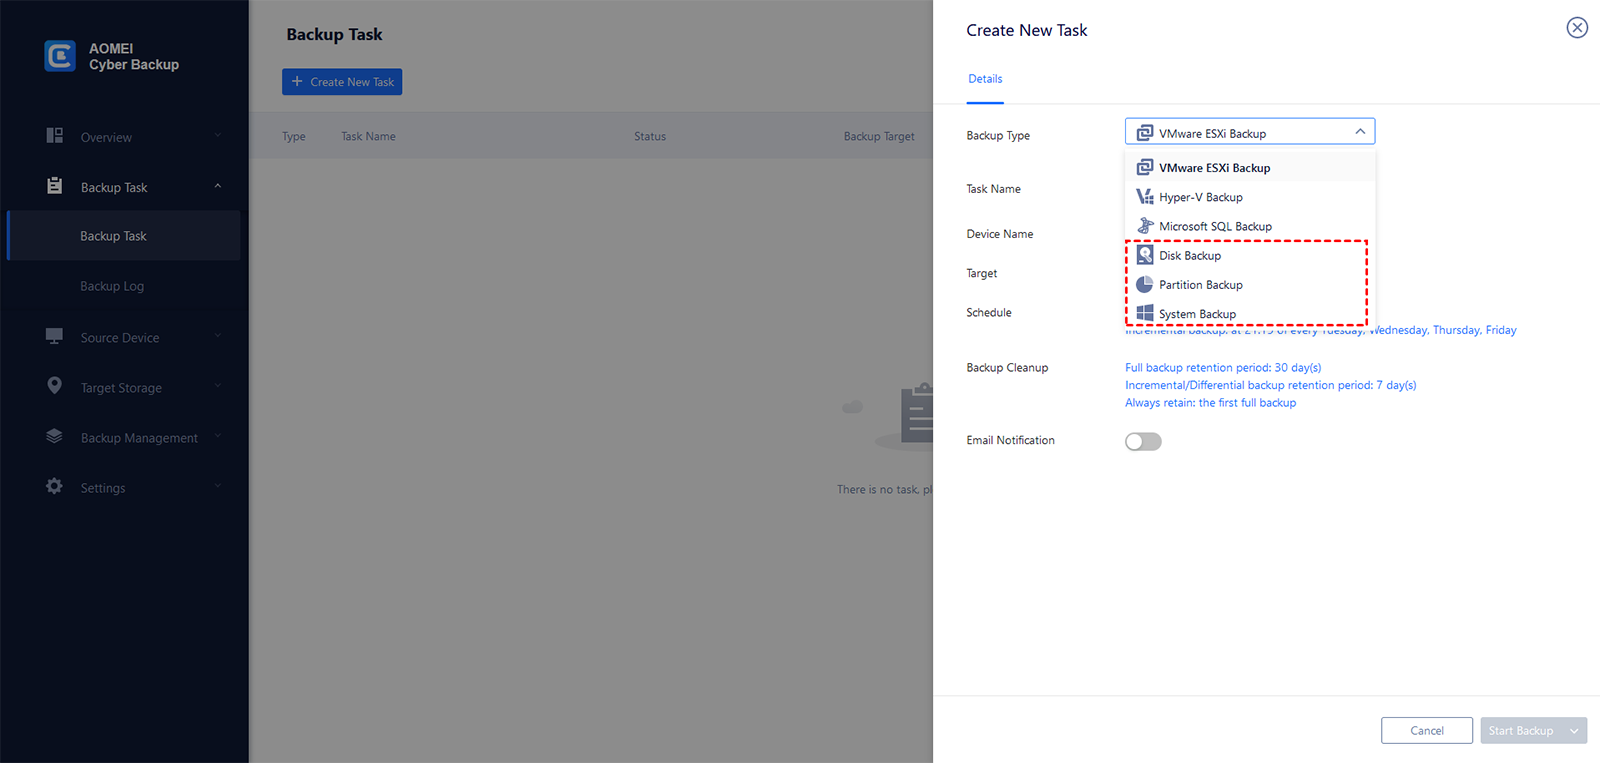
- Edit Task Name based on your need.
- In the Device Name field, click Select + to select the device you just added.
- In the Target field, click Select + > Add a new network storage to choose a NAS folder as the backup target.
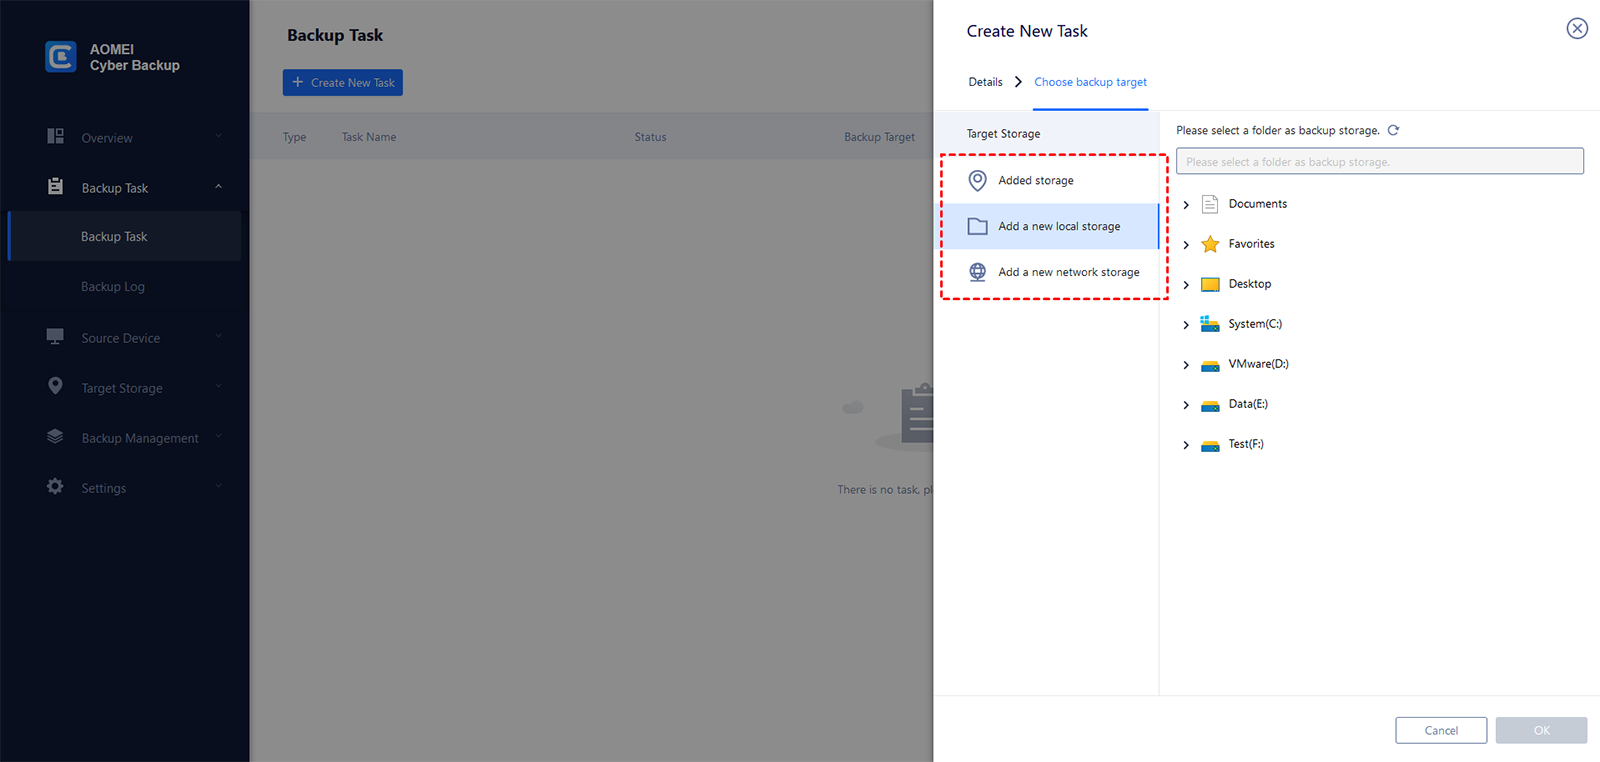
- Change the default schedule settings in the Schedule field.
- Click Start Backup > Add the schedule and start backup now to run your first backup.
If you don’t know how to choose between AOMEI Backupper and AOMEI Cyber Backup, check the comparison table on page Windows PC Backup.
Method 3: Windows 10 backup to NAS by creating a custom backup
Windows 10 has inherited the Backup and Restore tool from Windows 7. Follow the guidance below to run Windows 10 backup to Synology NAS by creating a custom backup using this tool:
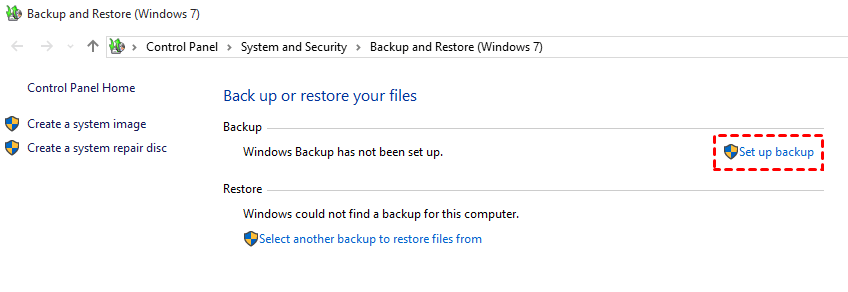
Step 1. Tap the Search button on the taskbar and type “backup” in the search box. Select Backup and Restore (Windows 7) from the search results.
Step 2. Click Set up backup.
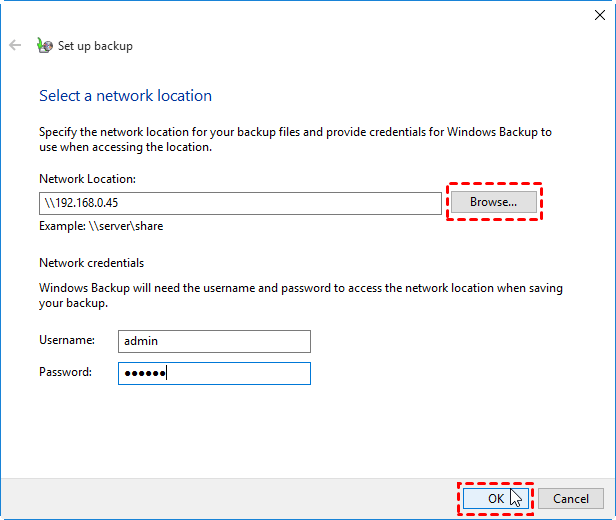
Step 3. Click Save on a network.
Step 4. Type the IP address of the Synology NAS and click Browse to select a folder as the destination path. Type username and password and click OK.
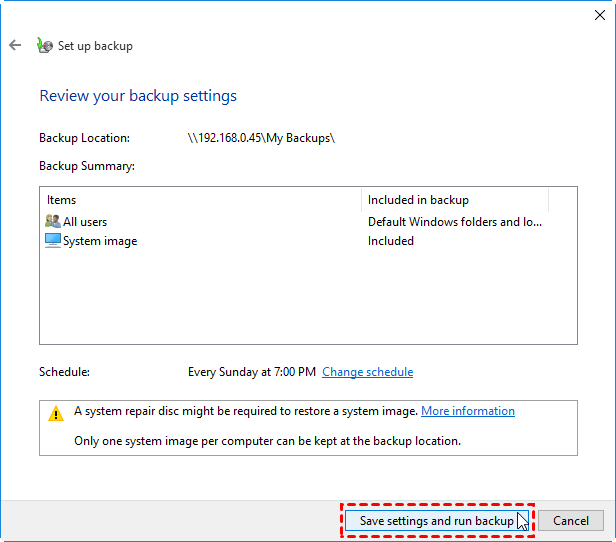
Step 5. Select the newly-added network location and click Next.
Step 6. Select Let Windows choose (recommended) so that Windows will select the files to be backed up for you. Click Next to continue.
Step 7. Click Save settings and run backup to backup Windows 10 to NAS drive.
Tips:
★ The default schedule is “Every Sunday at 7:00 PM”. You can change it by clicking “Change schedule” at Step 7.
★ This method also applies to backup Windows 11 to NAS. You can find this software by clicking Settings -> System -> Storage -> Advanced Storage options > Backup options, then scrolling down to Looking for an older backup and selecting Go to Backup and Restore (Windows 7).
Method 4: Windows 10 backup to NAS through creating a system image
Besides creating a custom backup, you can use the "Create a system image" feature in the built-in backup tool.
Step 1. Go to Backup and Restore (Windows 7) and select Create a system image from the left pane.
Step 2. In the next window, click On a network location and then the Select button.
Step 3. Enter “\\Synology NAS IP address\shared folder name” in the Network Location field and enter username and password for network credentials. Click OK. Then click Next.

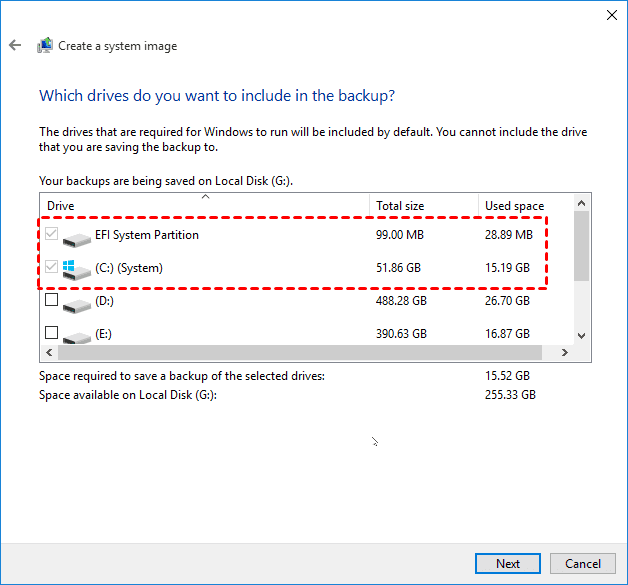
Step 4. Click Next to accept the default drives to be backed up. Finally, click Start backup to execute it.
Summary
You may pick one of the tools mentioned above to backup Windows 10 to NAS like Synology, QNAP, etc. Compared to Windows built-in tools, AOMEI Backupper and AOMEI Cyber Backup offer you more advanced features with flexible options. They enable you to backup only changed files and compress the backup image.
What’s more, AOMEI Backupper owns the clone feature. You can use AOMEI Backupper to clone NTFS drive, run sector-by-sector clone, etc. Why not try it now?