2 Ways to Move Existing Windows 7 to a New Computer
Wanna move existing Windows 7 installation to a new computer? Read this article patiently to learn the top two ways.
By Lily Updated on September 1, 2023
Can I transfer Windows 7 from one computer to another?
“Currently, I have a Windows 7 32-bit installation on my PC, now I plan to transfer my present Windows 7 to a new computer to continue using it. Because my present system has several years worth of installed some related working software, which would take a really long time to install them again. So in order to reach my goal, how can I transfer Windows 7 installation to a new computer?”
How to transfer Windows 7 to another computer step by step
Usually, if you want to use the old system and applications after replacing your old computer with a new one, the direct way is to reinstall system and other applications on the new PC. But the fact is that users don’t expect to reinstall system or important programs because it’s really a laborious and time-consuming process. Luckily, there are 2 other methods that can help to transfer Windows 7 to a new computer. Compared with Method 1, Method 2 is much easier.
Method 1. Windows built-in tool - Sysprep (System Preparation Tool)
Windows 7 System Preparation Tool (Sysprep) is a powerful built-in tool which is able to transfer existing Windows 7 to a new computer, maintaining all installed programs, user profiles and program settings. Learn how to use Sysprep and deploy Windows 7 installation to another computer in detail below:
✎Note: If your Windows 7 is OEM version, you may not be able to reactivate it. On the other hand, an ungraded Windows including a repair install can’t be sysprepped, so in this situation, this tool is unavailable.
#1. Generalize the Windows installation on your old PC
- Browse to “C:\Windows\System32\Sysprep” folder and run the sysprep.exe.
- In the System Preparation Tool window, select Enter System Out-Of-Box Experience (OOBE) from the System Cleanup Action drop down, check the Generalize checkbox, and select Shutdown in the Shutdown Options.
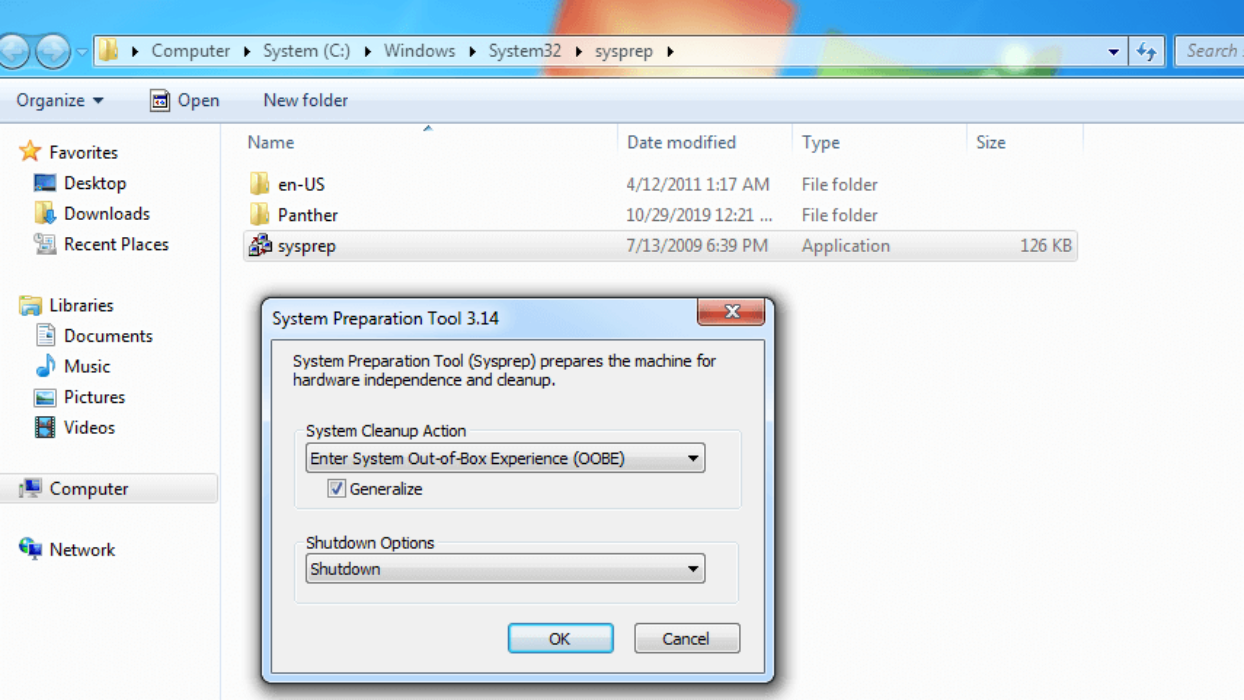
- Click OK to generalize the Windows image and shut down the PC.
#2. Capture the Windows image on your old PC
- Connect a USB flash drive to your old computer to save the Windows image.
- Boot the device from a bootable WinPE drive. If you don’t have one, you may create bootable WinPE media first.
- When you see the Windows Setup window, press Shift + F10 to launch Command Prompt.
- (Optional) In the Command Prompt window, type dism /image:C:\ /optimize-image /boot and press Enter to optimize the image to reduce the time it takes your new PC to boot after you apply the image.
- Type dism /Capture-Image /ImageFile:D:\Images\win7.wim /CaptureDir:C:\ /Name:win7 and press Enter to capture the Windows partition (C drive).
✍Tips:
● “D:” is the drive letter of the USB drive you just connected. To figure out the drive letter, you can run the command diskpart > list volume > exit before running the DISM command. You may get an indication from the disk type and size.
● There may be Windows, system, and recovery partitions on your PC. If you are not sure whether to capture them all, check it out here.
#3. Apply the Windows image to your new PC
- Connect the USB drive with the Windows image to your new computer.
- Boot your new computer using the bootable WinPE drive and open Command Prompt as mentioned above.
- In the Command Prompt window, type the following commands and press Enter after each to wipe the hard drive on your new PC and set up new hard disk partitions.
-
diskpart
-
list disk
-
select disk 0 (“0” is the disk number of the main hard drive on your new PC)
-
clean
-
create partition primary
-
format fs=ntfs quick label=Windows
-
assign letter=W
-
exit
- Type dism /Apply-Image /ImageFile:D:\Images\win7.wim /Index:1 /ApplyDir:W:\ and press Enter to deploy the Windows image to your new PC.
✍Tips: Replace “D:” with the drive letter of the USB drive in your situation.
- Reboot your new computer to see if it can boot successfully.
Method 2. Specialized backup software - AOMEI Backupper Professional
AOMEI Backupper Professional is all-in-one PC backup software which is able to protect data completely.
-
It offers System/Disk/Partition/File Backup which can meet your different needs.
-
When performing system restore, you are allowed to enable Universal Restore which makes transferring Windows 7 installation to a new PC easy and safe. After the transformation, Windows 7 can boot from the new PC normally.
-
It provides the Create Bootable Media feature that can help to boot your computer in case of boot failure.
Download AOMEI Backupper now to have a try.
Before you do:
● Create a system image backup for Windows 7 on your old PC. You are suggested save the system image in a network location so that it can be accessed easily from your new PC.
● Create a bootable USB or CD/DVD on your old PC.
How to migrate Windows 7 to a new computer
- Boot your new computer from the bootable drive you’ve created. (If there are more than 2 new computers, you can use PXE boot to open new computers.)
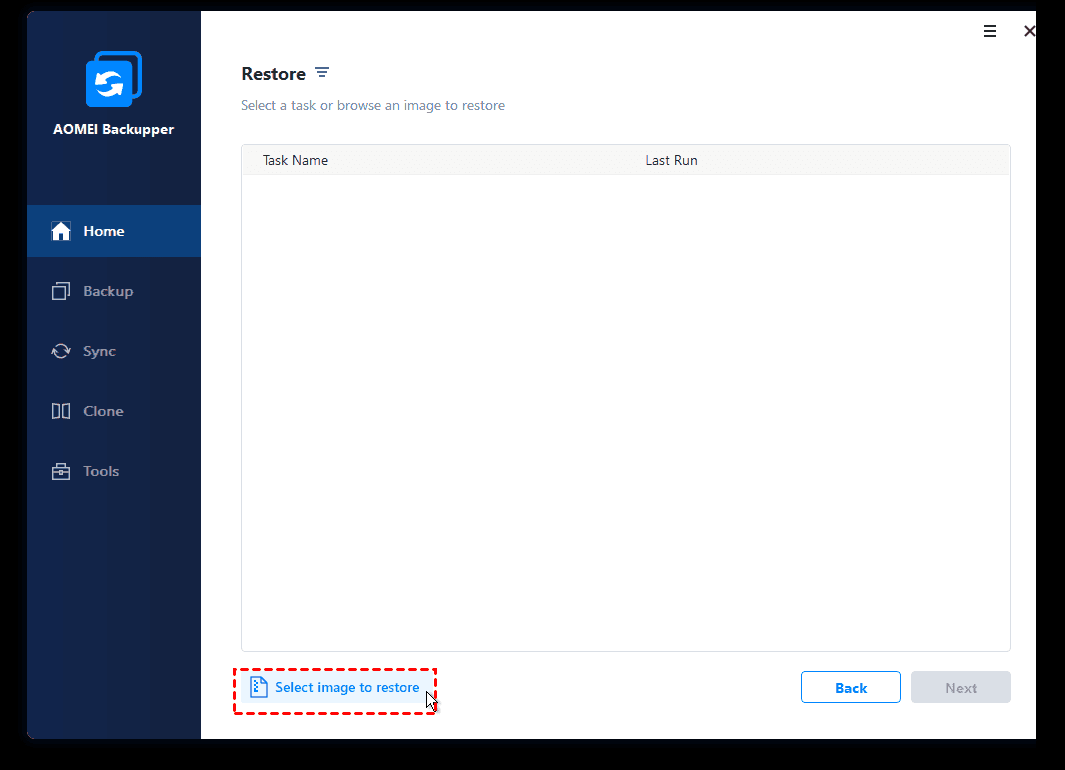
- You’ll see loaded AOMEI Backupper once login. Click Restore and then Select Image File.
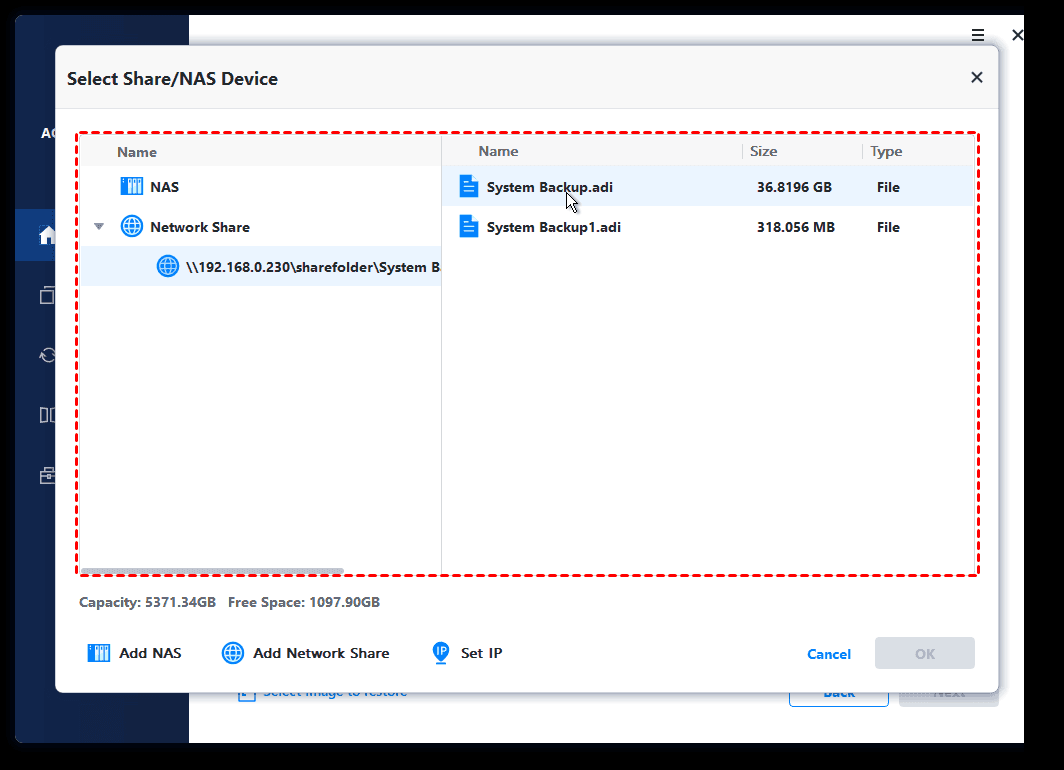
- In the pop-up window, select the place where you save the system image. Here system image is stored in network, so I go to Share/NAS > Add Network Location. Then, type the network path for the system image and click OK.

- After the network location is added, all shared folders will be shown. Navigate to the system image folder, select the right image and click OK.
- Select Restore this system backup, tick Restore system to other location in the bottom and click Next.

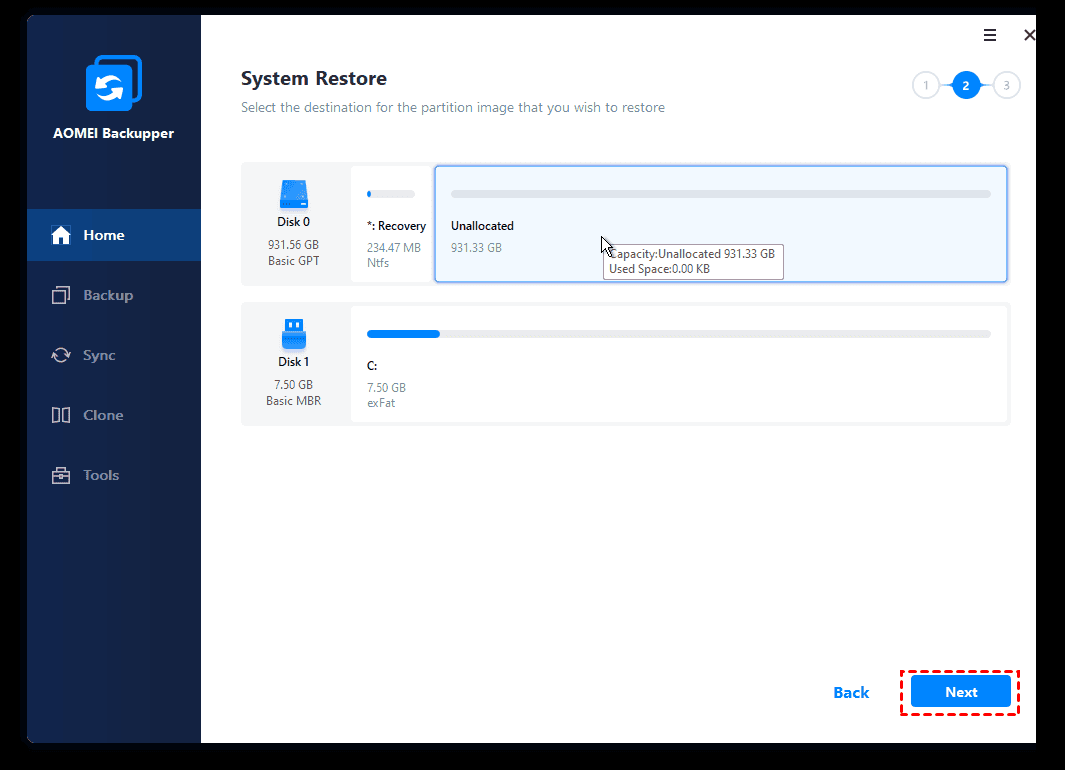
- Select a destination for the Windows 7 system image to be restored to and then click Next.
- After setting all the things, please tick Universal Restore and click Start Restore. When the progress gets to 100%, click Finish to exit the operation. Now you have moved existing Windows 7 installation to your new computer.
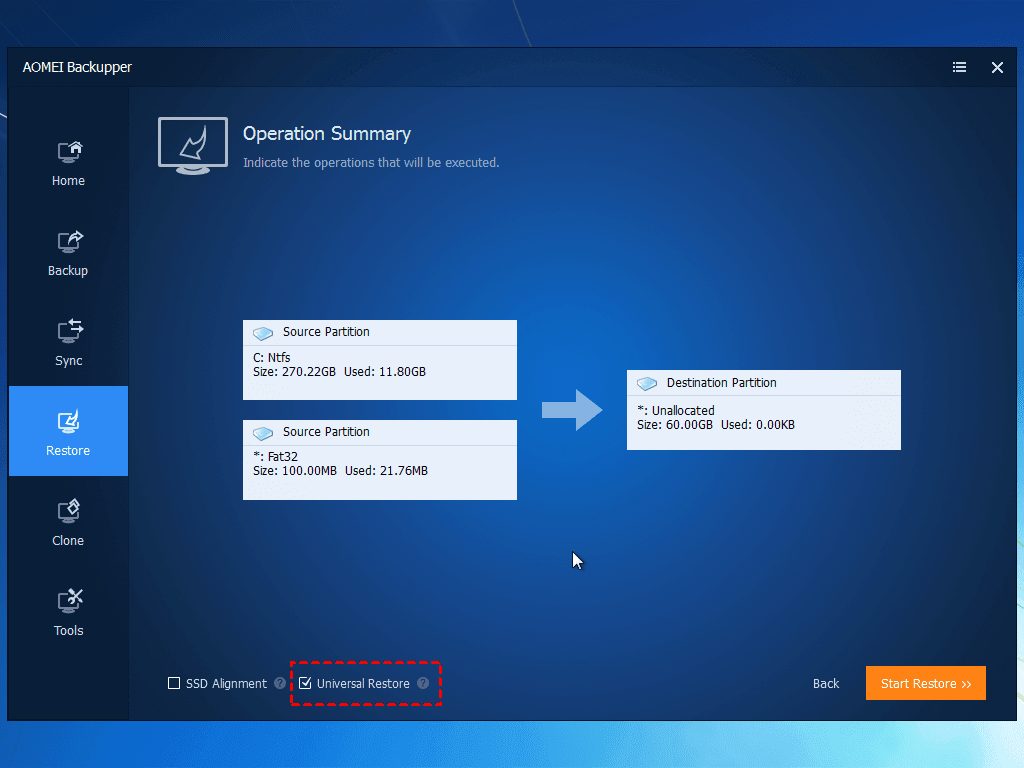
✎ Note: If the destination disk is an SSD, it is suggested to tick SSD Alignment to optimize SSD performance.
Summary
Both of the methods mentioned in this page allow users to move existing Windows 7 installation to a new computer. However, if you compare the 2 ways, you will find AOMEI Backupper Professional is easier to use. Furthermore, you can use AOMEI Backupper to clone HDD to SSD, migrate OS to SSD, clone partitions and so on. If you want to migrate to a new server, you may choose AOMEI Backupper Server.