Disable Offline Files in Windows 7 Even This Button Greyed Out
You will learn 3 effective methods to disable offline files in Windows 7, even this button greyed out, and sync only certain files to free up disk space and reduce unnecessary network traffic.
by Ivy Updated on October 20, 2022
What Is Offline Files in Windows 7?
Offline Files in Windows 7 is a sync folder for Sync Center to store network files or folders available offline, activated after enabling offline files in it and restarting your computer. And It is saved in C: Windows\CSC folder by default.
Once you activate this folder, you can go to the network drive, right-click the files or folders you want to sync to local drive, and select always available offline. And then, when it completes, you can use network files or folders locally, even without an internet connection.

Conversely, when there is an Internet connection, this software will sync the network files or folders locally to the server for updating. All in all, it's a useful feature to sync network files to a local drive and vice versa.
Disable Offline Files Greyed Out
"Every so often I have a user who says that their network drives are not showing all the folders they are supposed to. Usually, they'll see one folder instead of the dozens that are there. Almost every time, this is from something to do with Offline Files and today a new user had the same problem.
I generally just disable offline files in Sync Center and this has always fixed the problem, but when I went to disable it on their computer, the button was grayed out. Does anyone know how to get that button to turn back on? Causes, and more importantly, a fix to make it clickable, let me know. Thanks."
In fact, there is no feasible way to solve this problem so far. But you still can try to disable offline files via registry or group policy or directly sync network files you want to local drive instead of all of them, which occupy much disk space.
Besides, there are other related errors you may encounter:
- The specified network name is no longer available. In general, this error will occur in Windows 7 or Windows Server 2008 R2 when you start offline files sync.
- Sync conflicts. If the file sync process has conflicts, the remaining offline files will be canceled.
- Activation issue. Usually, Sync Center will ask you to restart your computer, otherwise Offline files will not be activated. However, sometimes, it still says “Offline files is enabled but not yet active. Restart this computer to activate Offline Files” after you restart your computer again and again.
- File extension like .mdb, .ldb, .mdw cannot be synced by default.
- The option always available offline not showing when you try to make network files available on the local computer.
How to Disable Offline Files in Windows 7
Usually, the method to disable offline files in Windows 7 is through Sync Center, however, many users report the Disable offline files button greyed out. In this case, you could consider using Registry or Group Policy.
Method 1: Disable Offline Files using Sync Center
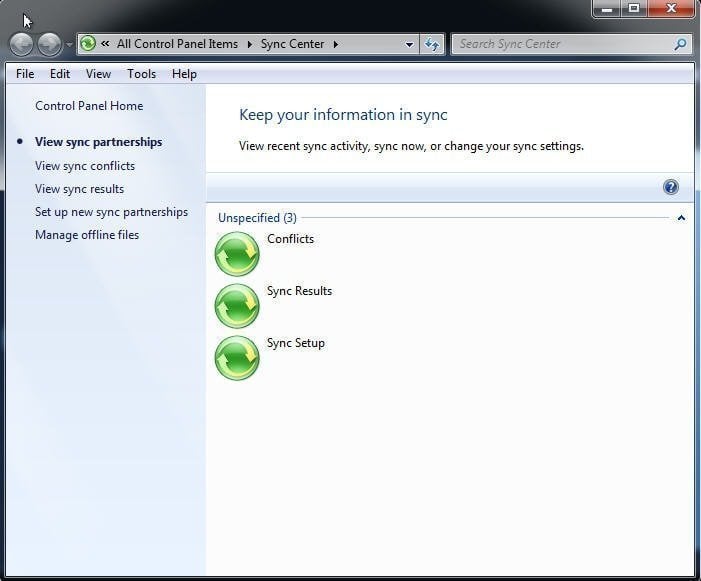
Step 1. Type Sync Center in the search box, and select it from the context menu. And then, click Manage offline files under the Sync Center window.
Step 2. Click Disable offline files in the Offline Files window.
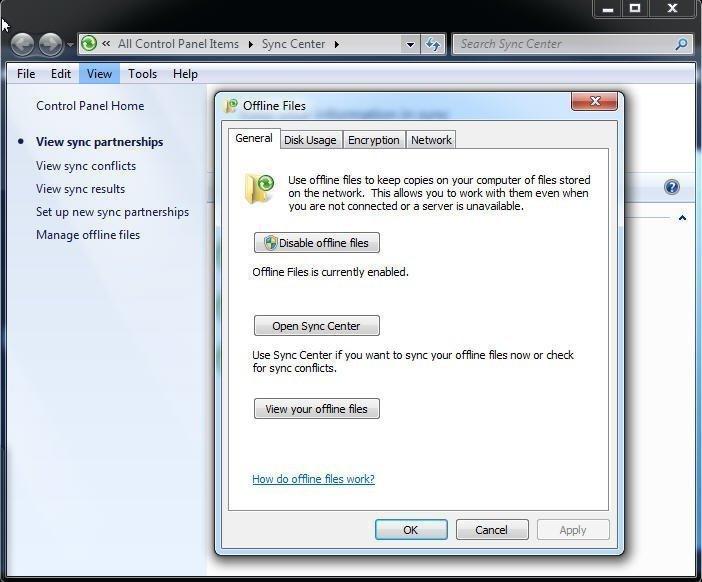
Step 3. Restart your computer to make the changes take effect.
Method 2: Disable Offline Files via Registry
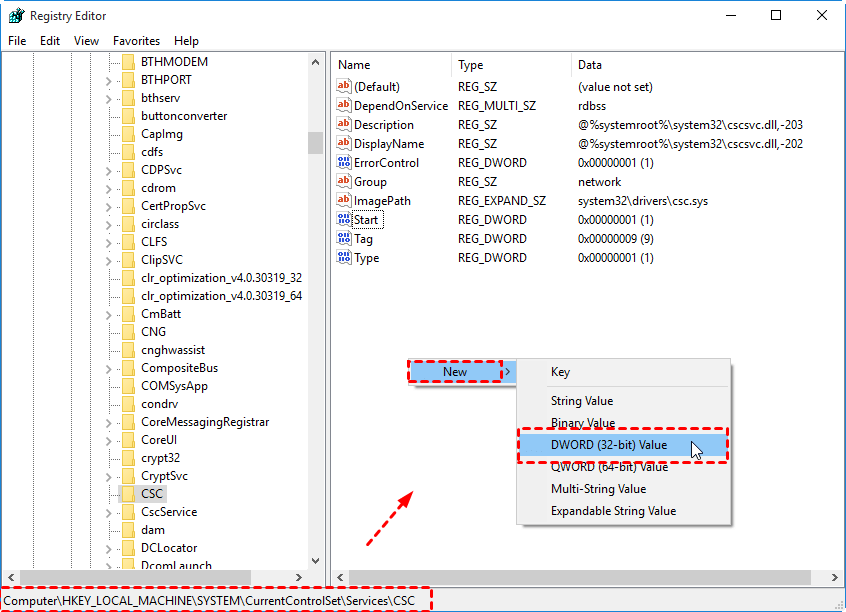
Step 1. Press Win + R to open the Run window, type regedit in it and click OK.
Step 2. Go to the following registry key, double-click the blank space, select New > DWORD (32-BIT) Value, and name it as Start. Then, set the Start value to 4.
HKEY_LOCAL_MACHINE\SYSTEM\CurrentControlSet\Services\CSC
Step 3. Close the registry and restart the computer.
Method 3: Disable Offline Files via Group Policy
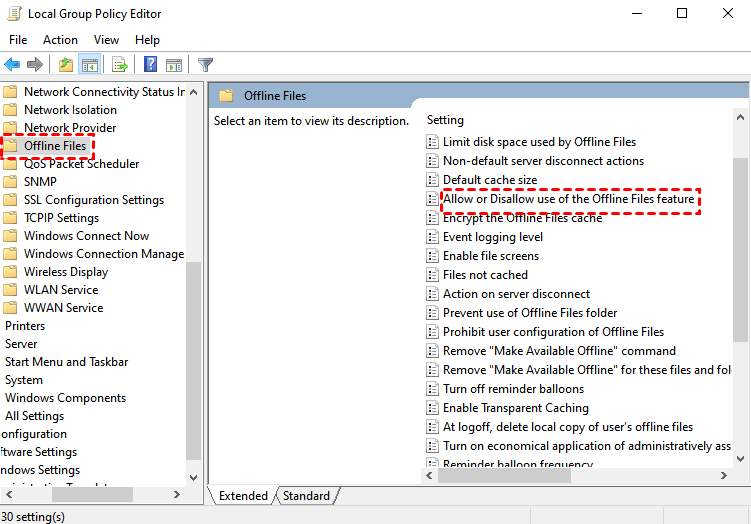
Step 1. Type the local group policy editor in the search box and select the top result. And then, navigate to the following key.
Computer Configuration\Administrative Templates\Network\Offline Files
Step 2. Switch to the right side, double-click the Allow or Disallow use of the Offline Files feature, then select Disabled and click OK to disable offline files using group policy.
Step 3. Close the local group policy editor and start your computer to apply changes.
That's all for how to disable offline files in Windows 7, you can choose one of them or try them one by one until you can disable this feature. Sometimes all the methods are not working, in this case, you can choose to delete all the files under C: Windows\CSC folder and then sync network files with a reliable file sync software, even only certain files. Thus, you can not only to avoid unnecessary network traffic but also manage disk space more flexibly.
Sync Certain Network Files or Folders to Windows 7
Besides Sync Center, you still can use free file sync software - AOMEI Backupper Standard to make network files or folders available offline without taking up a lot of disk space and cutting network traffic to zero.
- You can select all or certain files to sync in Windows 7 or other operating systems (Windows XP/Vista/8/8.1/10/11).
- You can choose to sync deletion or not.
- You can sync your network files and changes on a regular basis, such as daily, weekly, or monthly schedule sync.
- You can sync network files to local drive, eternal drive, USB, etc. Also, it is capable of sync files to Network drive, NAS, cloud drive like OneDrive, Google Drive, or external disk, etc.
- Except for Sync feature, you still can backup certain files with File Backup. It will compress all the files into an image file, so no one can modify it without restoring the image.
To get started, please download the free file sync software and install it on your computer. If you use server systems, try AOMEI Backupper Server!
Detailed steps to sync files
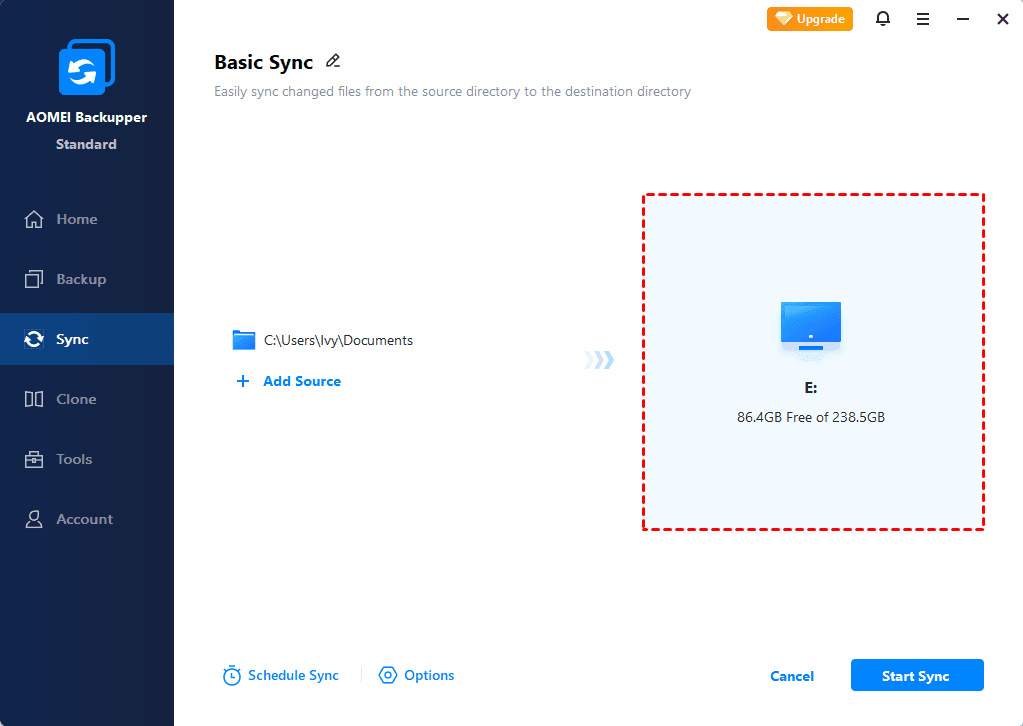
Step 1. Launch free sync software - AOMEI Backupper Standard after installing. And then, click Basic Sync under the Sync tab.

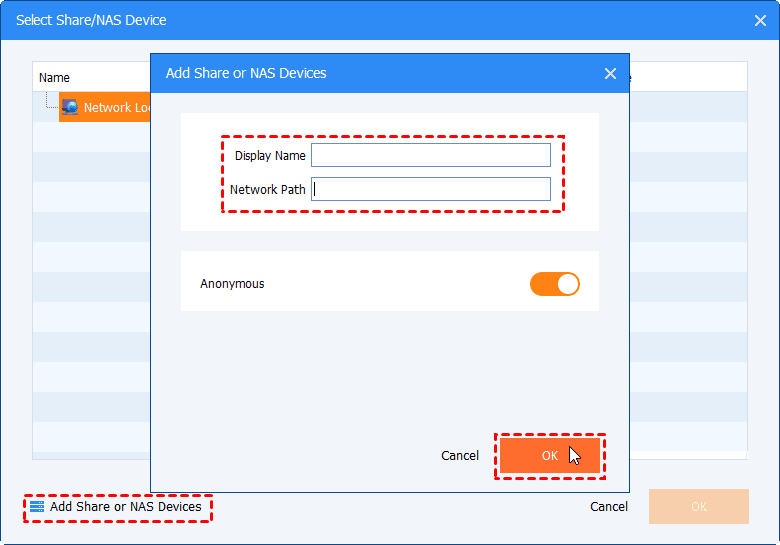
Step 2. Click Add Folder and then Share or NAS Devices.

Step 3. Click Add Share or NAS Device, type network path (IP address of a network drive), and click OK to add it. Then, select the network files or folders you want to sync.
Step 4. Select the local drive in Windows 7 as the sync destination. Also, you can sync network folder to external drive, USB drive, NAS, cloud drive, etc.
Step 5. Click Options to sync deletions if you want. And then, click Schedule Sync and enable daily, weekly, monthly settings. Afterward, back to the Basic Sync window and click Start Sync.

Notes:
- Schedule Sync: Except for the previous three options, you still can use Event triggers and USB plug in on the premium version.
- Sync methods: On the premium version, you still can use Real-Time Sync (to sync files in real-time and minimize data loss in a disaster), Mirror Sync, and Two-Way Sync.
Conclusion
You may already know how to disable offline files in Windows 7, even when this button is greyed out. Since it has many restrictions and may cause unnecessary network traffic, we recommend you use free sync software to make network files or folders available offline.
With it, you can choose different sync methods, frequency, and delete files from the source folder to the destination or not, depending on the version of software you use. Considering data integrity, Real-Time Sync is the safest method to sync files.