How Do I Map a Network Drive in Windows 11/10/8/7?
How to map a network shared drive in Windows 11, 10, 8, or 7? It is a frequently searched question. In fact, this is not a difficult thing at all. This article will present you the specified process of mapping a network drive and offer a free tool to help backup to a mapped drive.
By Lily Updated on January 22, 2024
What is drive mapping?
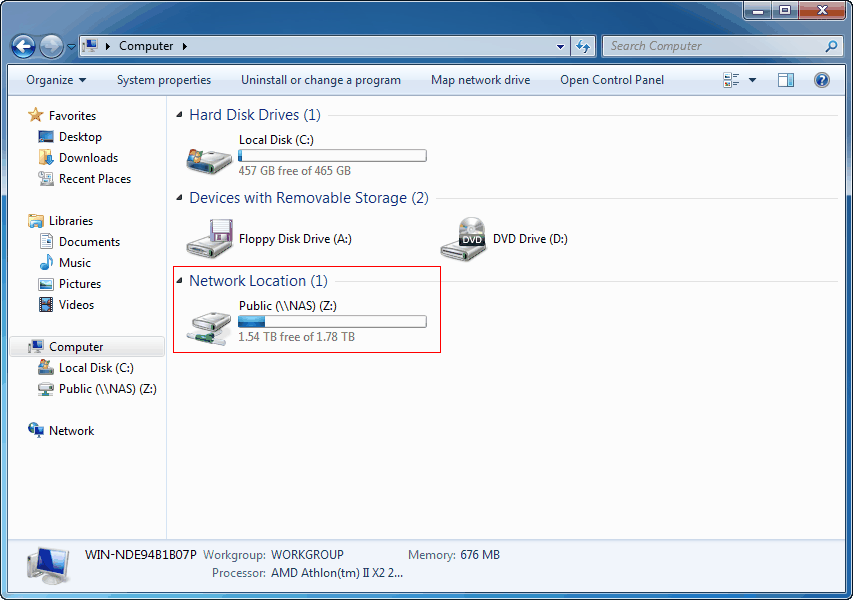
Drive mapping means to associate a drive letter (A through Z) with a shared storage area to another computer over a network. After a drive has been mapped, it looks just like a local hard drive, but all the files in it are actually physically stored on another computer.
A mapped drive enables you to access resources shared on a local network, as well as files on an FTP server or a website. However, the files will be inaccessible when the network is down or the remote computer is turned off.
👉 Preparation: turn on network recovery
👉 How to map a network drive in Windows 7/8/10/11 easily🔥
👉 FAQs about mapping a network drive
👉 Further reading: backup to mapped network drive🔥
Preparation: turn on network recovery
If you want to map a network drive on your Windows PC, you’ll need to enable network discovery first. Follow the guidance below:
1. Search for Control Panel and open it. Then click on Network and Sharing Center.
2. Click on Change advanced sharing settings.
3. Under the "Private" section, make sure that the following options are selected.
- Turn on network discovery
- Turn on automatic setup of network connected devices
- Turn on file and printer sharing;
- Allow Windows to manage homegroup connections (recommended).

4. Click on Save changes and exit the Control Panel.
How to map a network drive in Windows 7/8/10/11 easily
Looking for a way to map a network drive on your computer? I’ll show you how to do it in Windows 7, 8, 10 and 11 respectively.
👉 Map a network drive in Windows 7
👉 Map a network drive on Windows 8
👉 Map a network drive on Windows 10
👉 Map a network drive in Windows 11
Map a network drive in Windows 7
Windows 7 supports mapping a network drive and the procedure of creating a mapped drive is pretty simple. Below are the concrete steps.
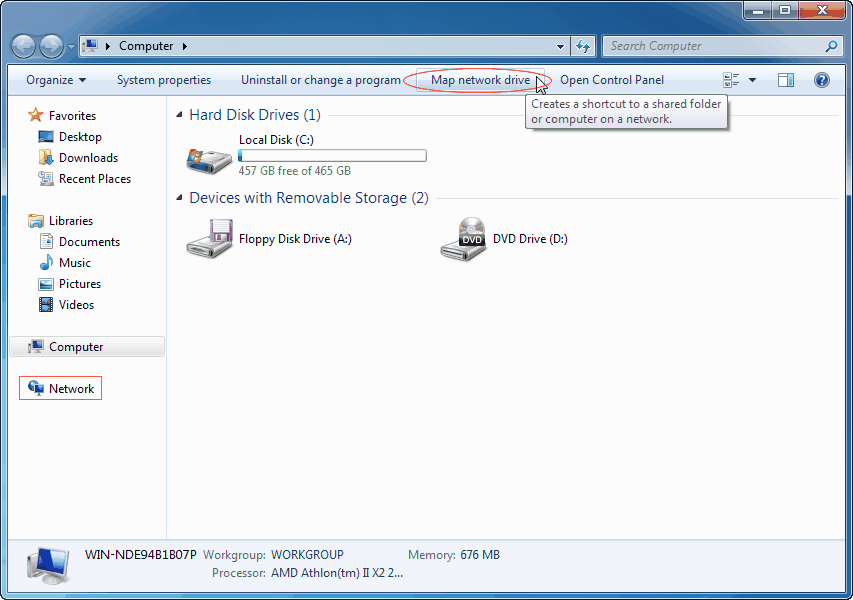
Step 1. Open Windows Explorer or My Computer from the Windows Start Menu. Click Map network drive in the Tools menu.
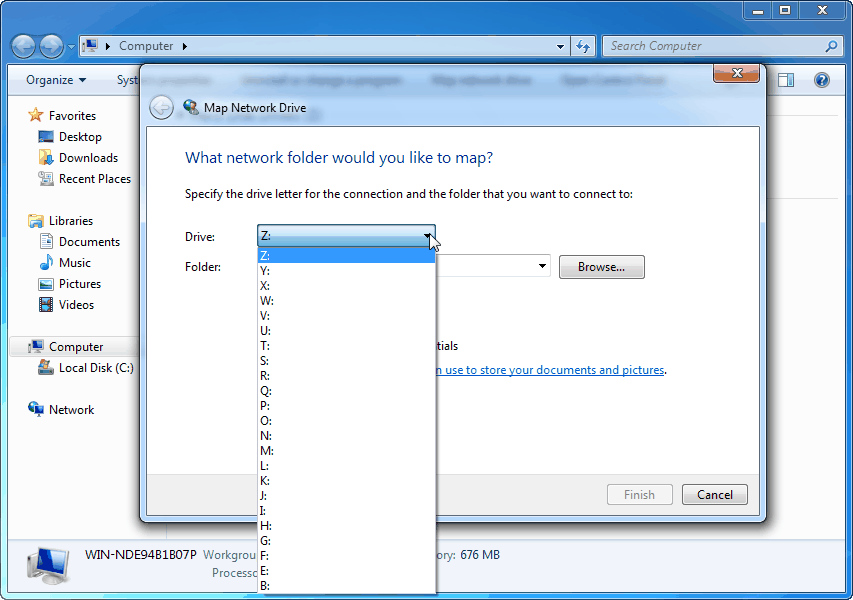
Step 2. A new "Map Network Drive" window opens. In this window, choose an available drive letter from the Drive list.
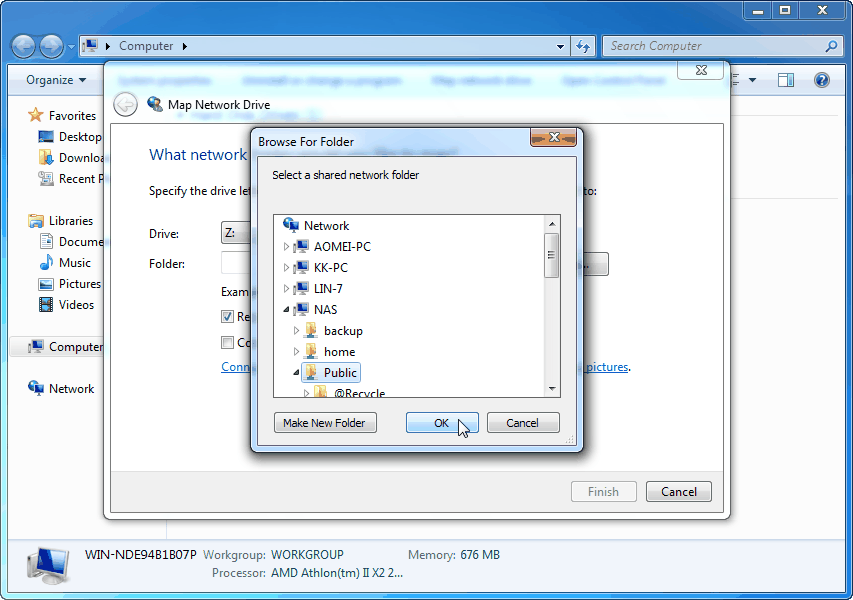
Step 3. In the Folder box, input the name of the folder that is to be mapped. Also, you can click the Browse button to find the target folder. If the target device is encrypted, you are expected to provide its correct username and password.
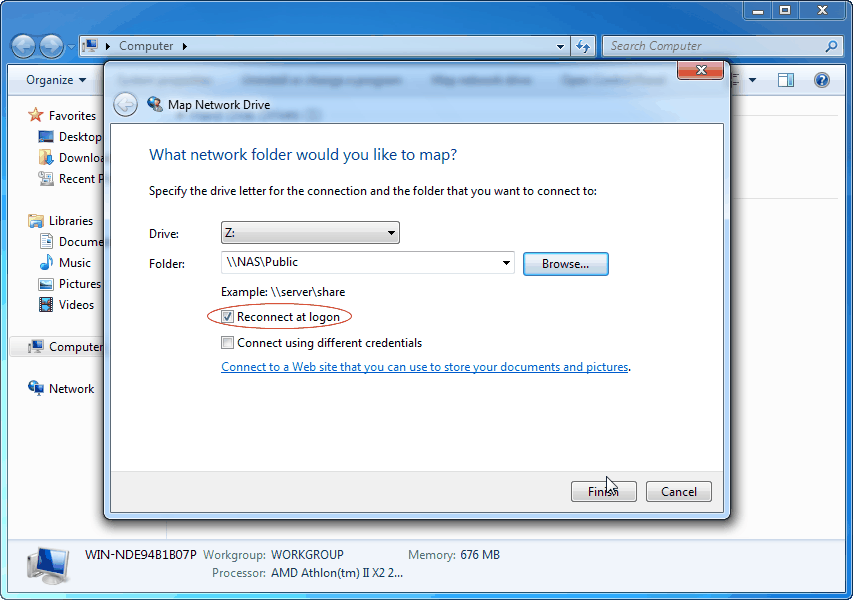
Step 4. Tick Reconnect at logon if you want this network drive to be mapped permanently. Otherwise, this drive won't be mapped once the user logs off this computer. Then click Finish.
Step 5. When you access the Computer again, you will see that a new drive with the letter you assigned is listed there and you can access it at anytime.
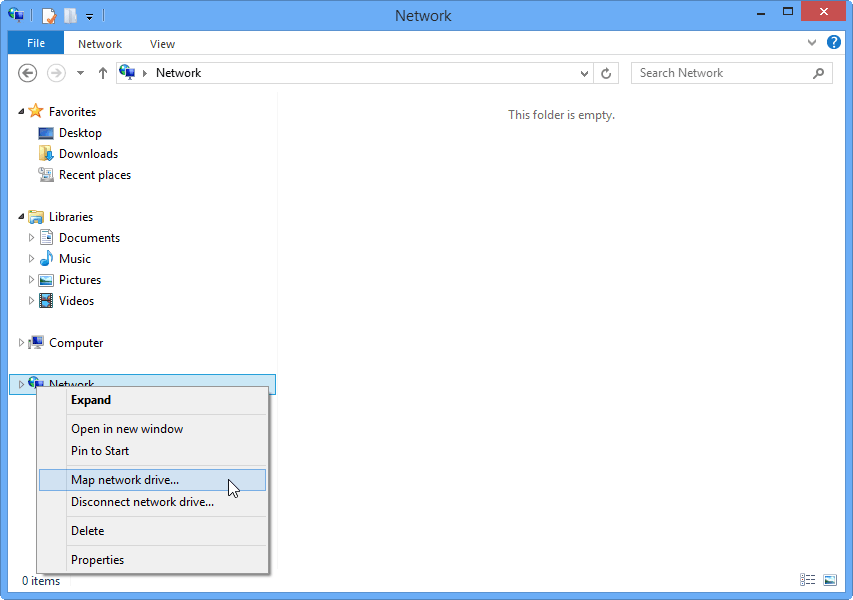
Map a network drive on Windows 8
Windows 8 has made great changes in its appearance. However, the basic operations are still similar to those of Windows 7. In Windows 8, you can map a network drive in the following steps:
Step 1. Click the File Explorer icon from your taskbar.
Step 2. Right click the Network from the left navigation bars. Then just click Map network drive to start the map. The rest steps are the same of those in Windows 7.
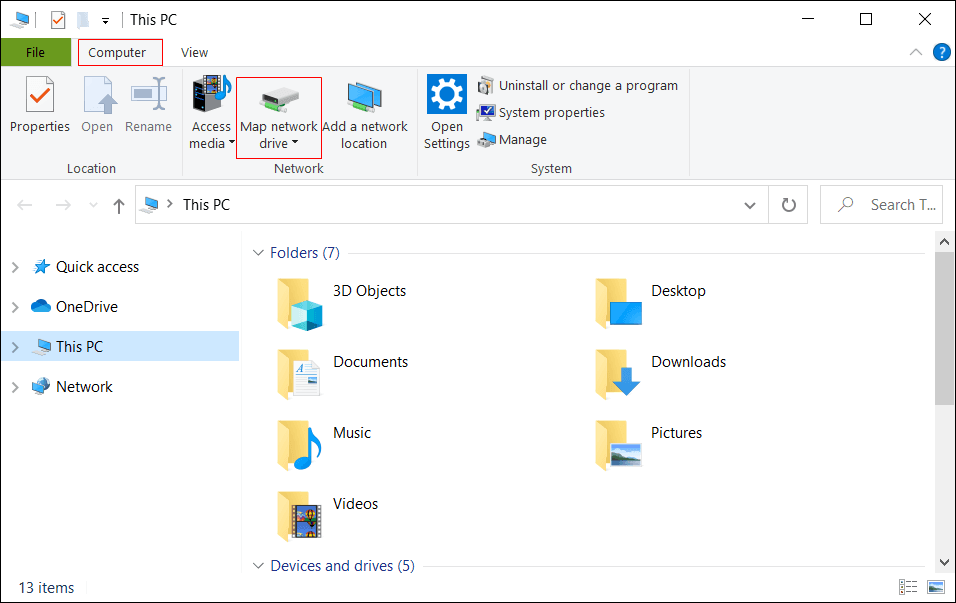
Map a network drive on Windows 10
Windows 10 is the successor to Windows 8.1. It is now the most popular version of Windows worldwide. Follow the instructions below to map a network drive in Windows 10:
Step 1. Open File Explorer from the taskbar and you will get to the This PC interface.
Step 2. On the Computer tab, select Map network drive. When the “Map Network Drive” window appears, the steps are the same as in Windows 7.
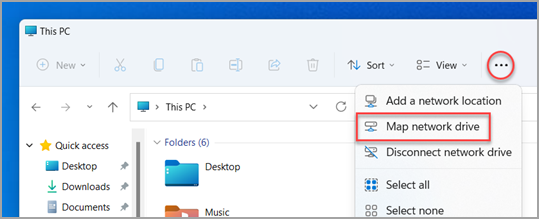
Map a network drive in Windows 11
Windows 11 is the newest Windows OS released in October 2021. If you have installed Windows 11, you can map a network drive in Windows 11 with the following steps:
Step 1. Open File Explorer. If you don’t have a shortcut to File Explorer in your taskbar, right click the Start button and select “File Explorer.”
Step 2. On the File Explorer ribbon, select More (three dots) > Map network drive. The rest steps are the same as in Windows 7.
FAQs about mapping a network drive
1. What is map network drive used for?
Mapping a network drive can be useful in several scenarios. It allows you to easily access files and folders stored on a remote server or computer without having to browse the network each time. It also enables you to work with network resources as if they were local, simplifying file management and enabling applications to interact with remote files seamlessly.
2. What to do if you are unable to map a network drive?
If you fail to map a network drive, you may check the following things and then give it a second try:
-
The folder name is spelled correctly.
-
The folder was already set up for sharing on the remote computer.
-
The remote computer has turned on network discovery.
-
You input the correct username and password.
-
The network connections are proper.
3. How to disconnect a mapped network drive?
To remove a mapped network drive, you can simply right click the mapped network drive and select Disconnect. Or you can right click Network in the left pane and select Disconnect network drive.
Further reading: backup to mapped network drive
So what is the main purpose of mapping network drives? For file sharing? Yes, indeed. This is the main function of mapping network drives. However, there is still another practical function, that is, to backup your data. Regarding to backup, the best free backup software - AOMEI Backupper Standard plays an important role.
-
It enables you to create image backups for your computer operating system, internal/external hard disks, as well as important files or folders.
-
You are allowed to backup to an external HDD/SSD or a USB flash drive. You can also backup to NAS or a cloud service.
-
The backup process will run in the background without interrupting your work.
Download AOMEI Backupper to have a try!
To backup your data to a mapped network drive, you can choose a backup type (System/Disk/Partition/File Backup) and then select the mapped drive as the target location. The backed up data are actually stored on another computer or a NAS device, thus avoiding data loss even if your computer cannot boot.
Bottom line
It can be observed from the above explanations that mapping network drives in Windows 7, 8, 10 and 11 is very easy. By mapping network drive, you can easily access the shared files of other computers in the same LAN, avoiding unnecessary hassles. This is a recommended method for file sharing between computers at home or in a small enterprise.
What's more, the mapped network drive can be regarded as a local hard drive and you can backup your data into it. AOMEI Backupper can help you backup files to a mapped network drive as well as backup files to external hard drive, USB flash drive, etc. Have a try and enjoy all the benefits now!