Best SYSPREP Alternative in Windows 10, 11 - AOMEI Image Deploy
You will learn how to use Sysprep and Sysprep alternative to deploy system image to multiple computers simultaneously. Keep reading and get details below.
by Ivy Updated on December 13, 2023
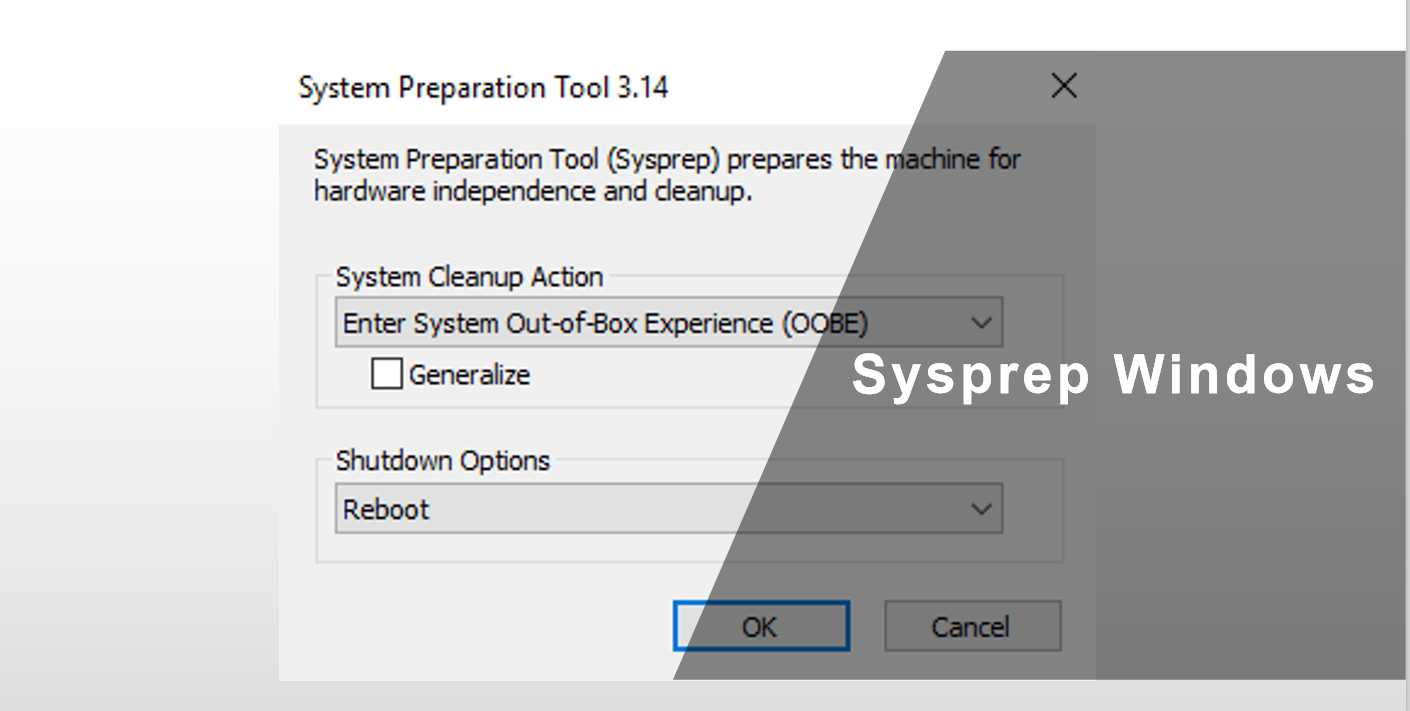
What is Sysprep and how does it work?
SYSPREP is Microsoft’s system preparation tool for Windows installation image deployment, either computer with identical or dissimilar hardware. It resolves a big problem for many users by allowing users to generate new computer names, unique SIDs and custom driver cache database during the Sysprep process. These unique elements are the main cause of system image deployment failure. And you can run from sysprep.exe file, command line or a script.
The official way is to generate an answer file and then use Sysprep /generalize command to generate the image for deployment. Next, customize Windows by adding drivers, changing settings, and installing programs. After that, capture this image with DISM and deploy image to another computer in the OOBE screen.
✎Tip:
- Don't install or update Microsoft Store apps before generalizing image, otherwise the Sysprep process will fail.
- Before you start to deploy image, you should use Sysprep /generalize to generalize a Windows installation. If not, you cannot use Sysprep command-line tool to do image deployment.
Why do you need an alternative to Sysprep?
With Sysprep, you can create a customized image for reuse. It’s convenient. However, some users report that they cannot use Sysprep to deploy image and get failure again and again. There are some reasons for it.
-
It’s difficult to work with an answer file. Users are required to respond to machine-specific questions that arise when the imaged PC is booted and its individual attributes need to be loaded.
-
You need a third-party prep tool, which is used to change SID and prep the machine for imaging. However, it may fail to change SID.
-
Using the same SID on multiple computers will pose a security risk.
Don’t worry about it. you can deploy system image to different computer using sysprep workaround on the internet.
Workaround: Deploy image when SYSPREP not working
Since the sysprep has above limitations, you may want to deploy system image with its alternative. To run this process smoothly on multiple computers, you may need professional image deployment software, AOMEI Image Deploy, for example. It allows you to restore system image to multiple computers over network, even with different hardware.
You can choose to deploy image to multiple computers (Windows 7/8/10/11 supported) and 20 server computers with free version of AOMEI Image Deploy. If you want to deploy image to multiple server computers, you need to use AOMEI Image Deploy Technician. It supports more advanced features, such as, preset client computers IP address, deploy image to different hardware, provide charged technical service to clients and high quality technical support, etc.
In this case, you need to download both system backup software and system deployment tool. If you don't want to install two software simultaneously, you can choose to use AOMEI Backupper Technician or TechPlus. It allows you to create bootable media as well as system image. Also, The system deployment software is also integrated into it. Thus, things will become simpler, because all the tools are in this software and the steps are the same.
Note: The standalone AOMEI Image Deploy only supports BIOS boot while the integrated AOMEI Image Deploy in AOMEI Backupper Technician/Technician Plus supports both BIOS and UEFI boot.
Here take the free way as an example.
Before you start to deploy image with alternative to Sysprep, you need to do some preparation work in the following:
-
Use AOMEI Backupper Standard to create bootable media.
-
Check out if all the client computers support network boot.
-
Make sure the server computer and client computers are in the same network segment.
-
Remove SID before creating system image, otherwise you will encounter the SID related issues after deploying a system image to different computers in the same domain. You can refer to the following steps:
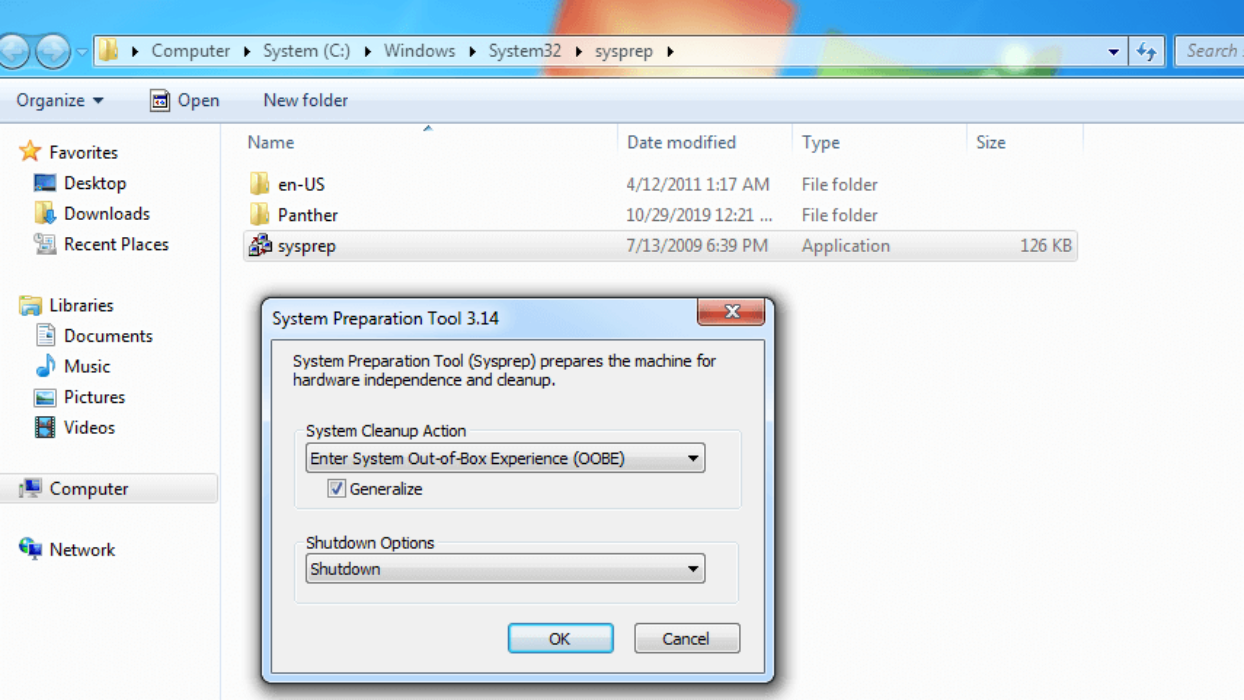
1. Please firstly load the AOMEI Backupper before you use sysprep to remove SID so that the partitions on your PC can be marked and recorded.
2. Type %WINDIR%\system32\sysprep\sysprep.exe to open the Sysprep.exe.
3. In the System Preparation Tool 3.14 window, select "Enter System System OOBE” under the the System Cleanup Action option and tick "Generalize" at the lower location.
4. Then, select "Shutdown" under the Shutdown Options and click "OK" to execute the SID removal operation. After the operation is completed, it will shutdown your computer automatically.
After that, you can boot the syspreped computer with bootable media created by AOMEI Backupper right after running sysprep, otherwise the new SID information will be created. Then, you can create system image and deploy system image to multiple computers.
Deploy system image to multiple computers without SID issue
Step 1. Connect your bootable media to the syspreped computer, set it as the first boot option in the BIOS window, save changes and let your computer boot from it.
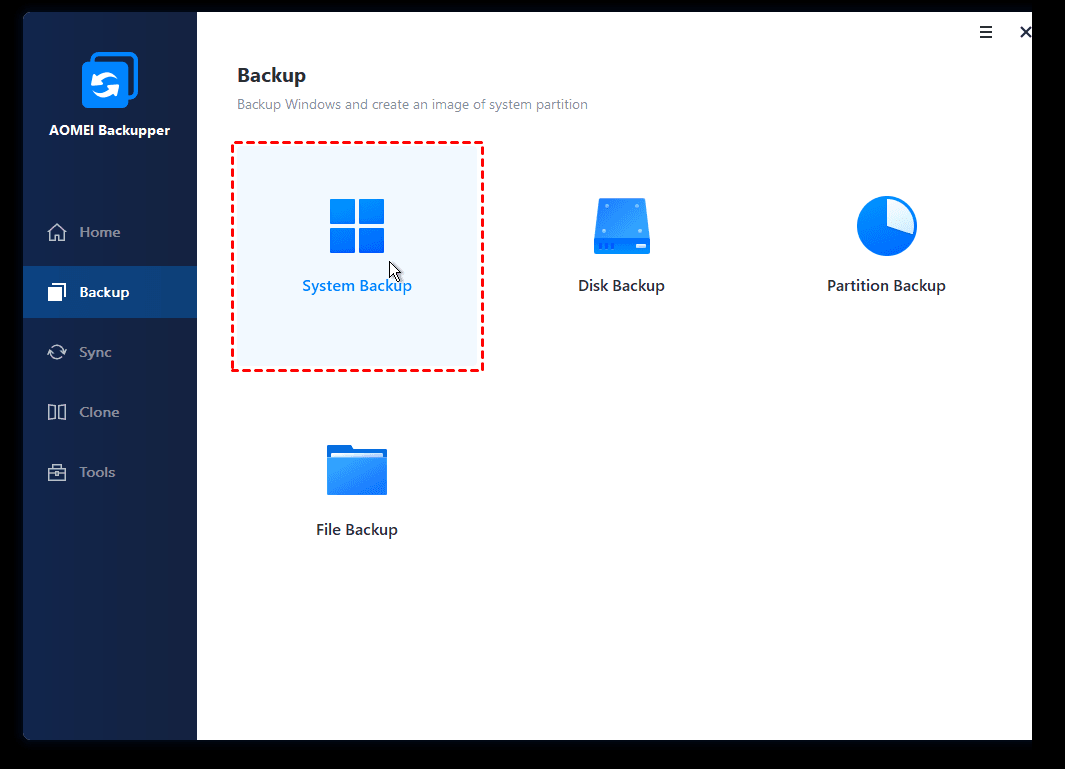
Step 2. Then, after loading, go to "Backup" and "System Backup" to start creating a system image and finish the rest of the steps. You can choose to save this image to network-attached storage. Please make sure the shared folder or NAS as well as client computers are on the same network segment.
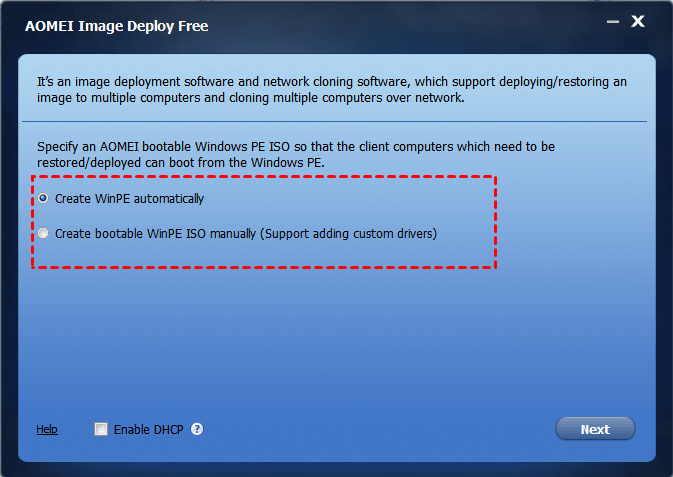
Step 3. Disconnect the bootable media and restart your computer in a normal mode. Download AOMEI Image Deploy Free and open it. Then, select "Create WinPE automatically" and click Next. If you want to add custom drivers, select the second option to continue.
✎Tips:
- If your computer is Windows 7 or lower version, you need to install AIK on the computer first. If your computer is Windows 8 or higher version, you need to install ADK first.
- If there is no DHCP server in the LAN, please tick the checkbox before “Enable DHCP” to ensure that all the client computers can boot normally.
- Please Keep only one DHCP server in the LAN, because many DHCP servers will mess up AOMEI Image Deploy client IP address distribution.
Step 4. After the WinPE environment is created successfully, you will see a message "The service has started, waiting for connect..." on its screen.
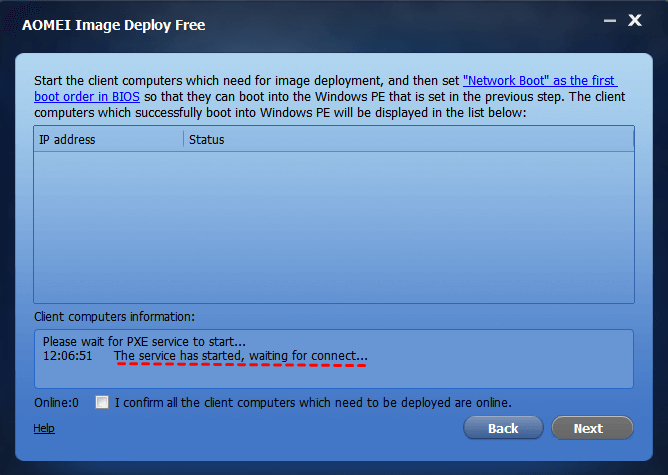
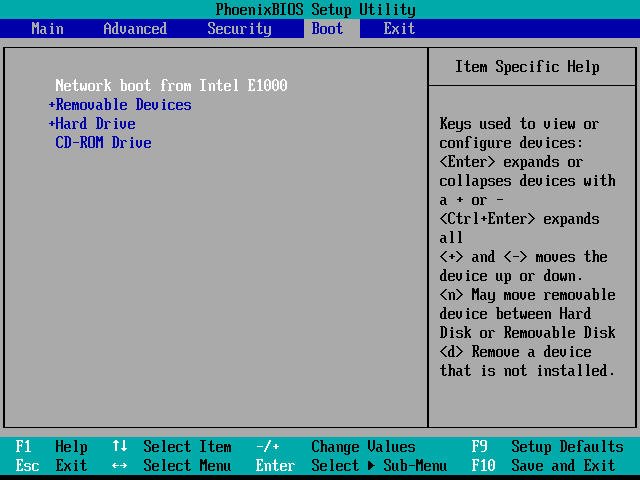
Then, you need to start all the client computers you want to deploy and set its boot priority to network boot, save changes and reboot to WinPE environment.
After that, you will see the booting process of client computers as shown below.
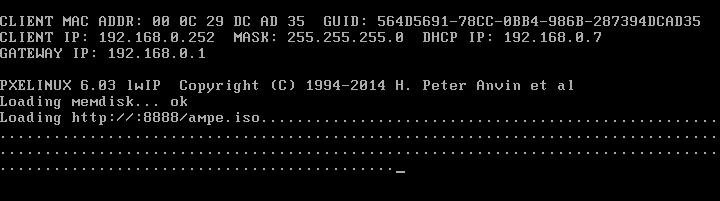
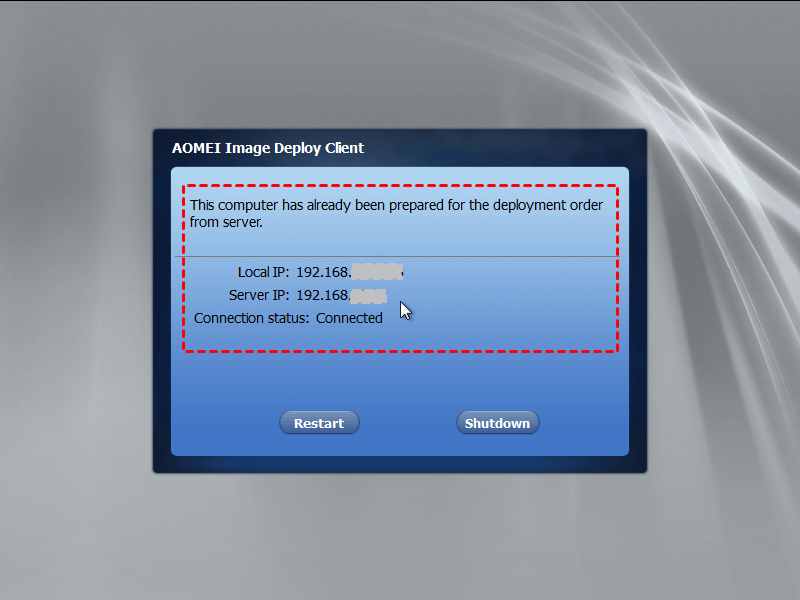
Finally, you will see the IP address and connection status of client computer after connecting to server computer. Also, on the client computers, you can see the local IP, server IP, and connection status.
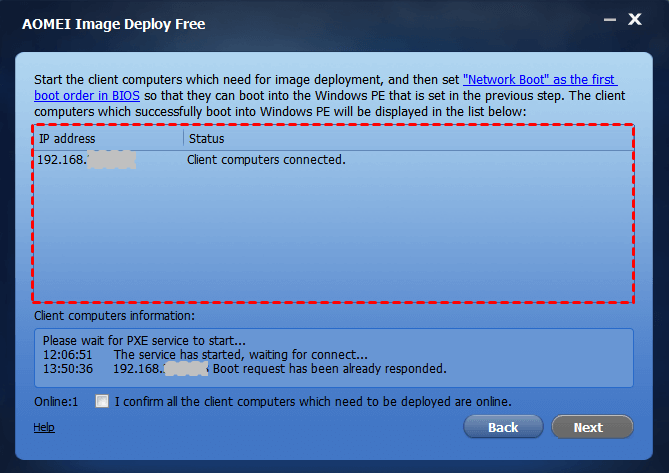
Step 5. Make sure all the client computers are online and tick the checkbox before "I confirm all the client computers ..." below. Then, click "Next" to move on.

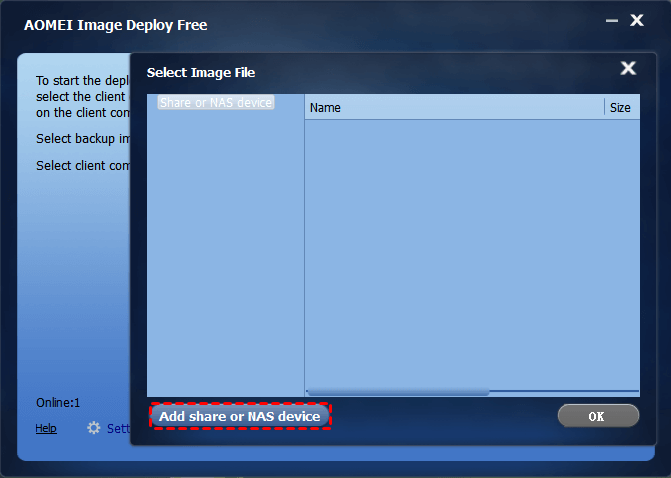
Step 6. To select system image created before, click "Browse" > "Add share or NAS device" and then type display name, path, username and password. Later, look for the system image from the network share or NAS after it’s connected.
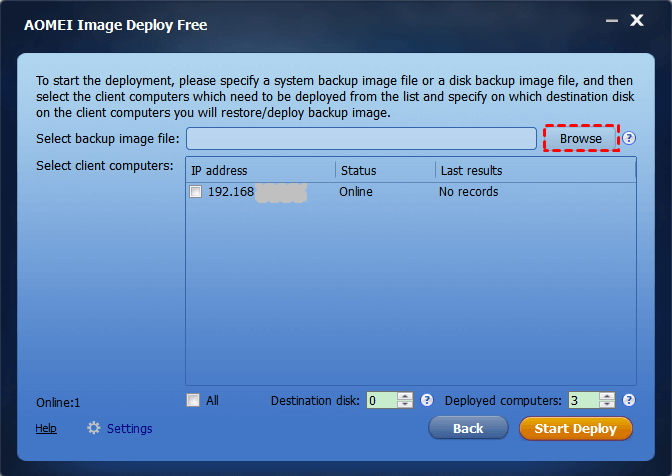
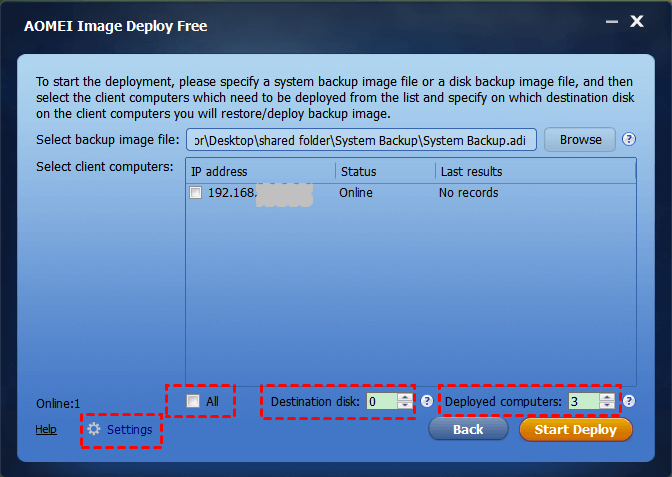
Step 7. Select the client computer, input destination disk number, modify the deployed computer and set up settings for imaging. Then, click "Start Deploy" to deploy system image to multiple computers.
✎Tips:
- If there is only one computer, the destination disk number is 0. If you are not sure, you can remove other disks temporarily.
- The number of deployed computers is at least 1, up to 33. If you set it as 3, AOMEI Image Deploy will automatically deploy image with 3 computers every time. You can fill in different quantities depending on your own needs. The more computers you deploy at once, the longer it will take.
- There are 3 settings in the above picture, including Set computer name, Set IP, Universal Restore. Just set up settings according to your needs. If the main computer’s hardware is different from the client computers, you need to tick Universal Restore. However, this feature is only available on Technician AOMEI Image Deploy.
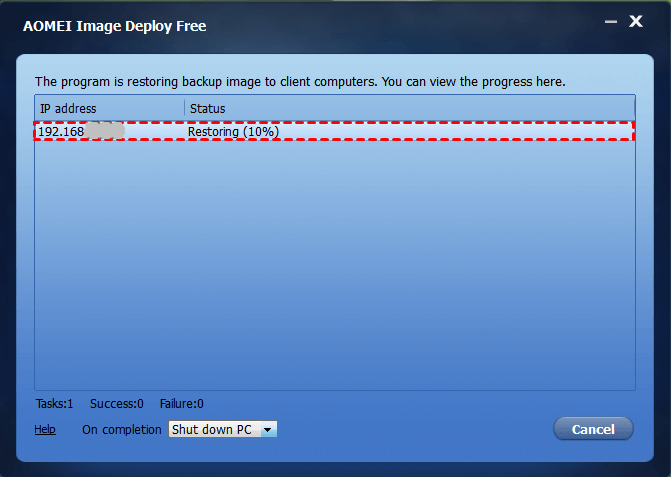
Step 8. Now, you can see the restore process on both server computer and client computer similar to the following picture.
Supplement: Best enterprise backup and recovery solution
After deploying system image to multiple computers, you’d better create a backup for each computer regularly. AOMEI Cyber Backup, the best backup software for businesses of all sizes, can give you a hand.
- It enables you to create system/disk/partition backup for a bunch of Windows PCs and Servers from one central console.
- You can schedule a backup task to run daily/weekly/monthly using the full/incremental/differential backup method.
- You are allowed to restore the backup image to the same computer or different computer.
- If your backup has multiple versions, you can choose to restore from any point you want.
Download this powerful enterprise backup software now!
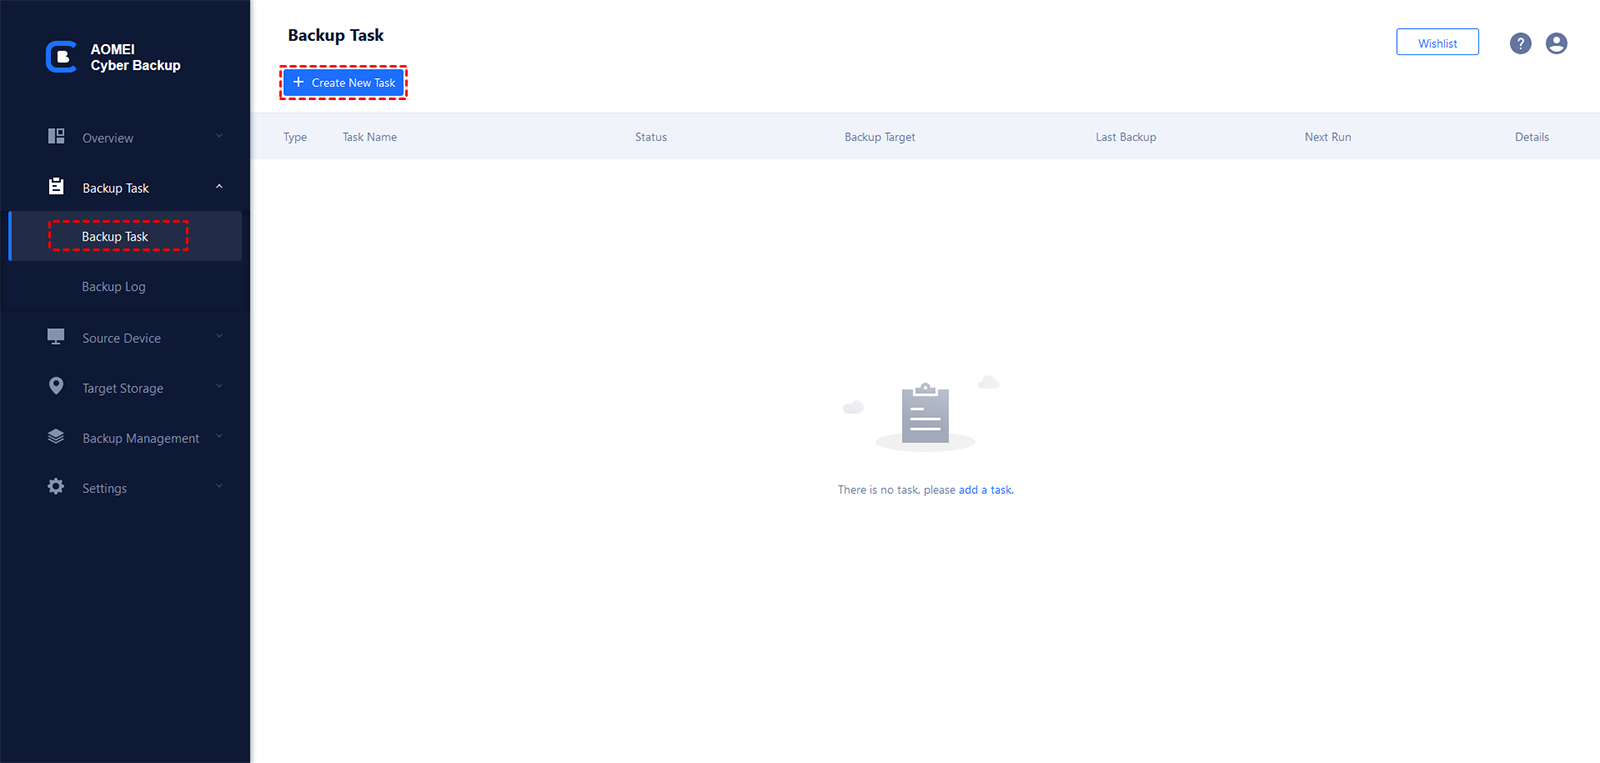
To make backups for client computers, just log in AOMEI Cyber Backup, and add the Windows device that you want to backup. Then click Backup Task on the left menu bar and select Backup Task > Create New Task.
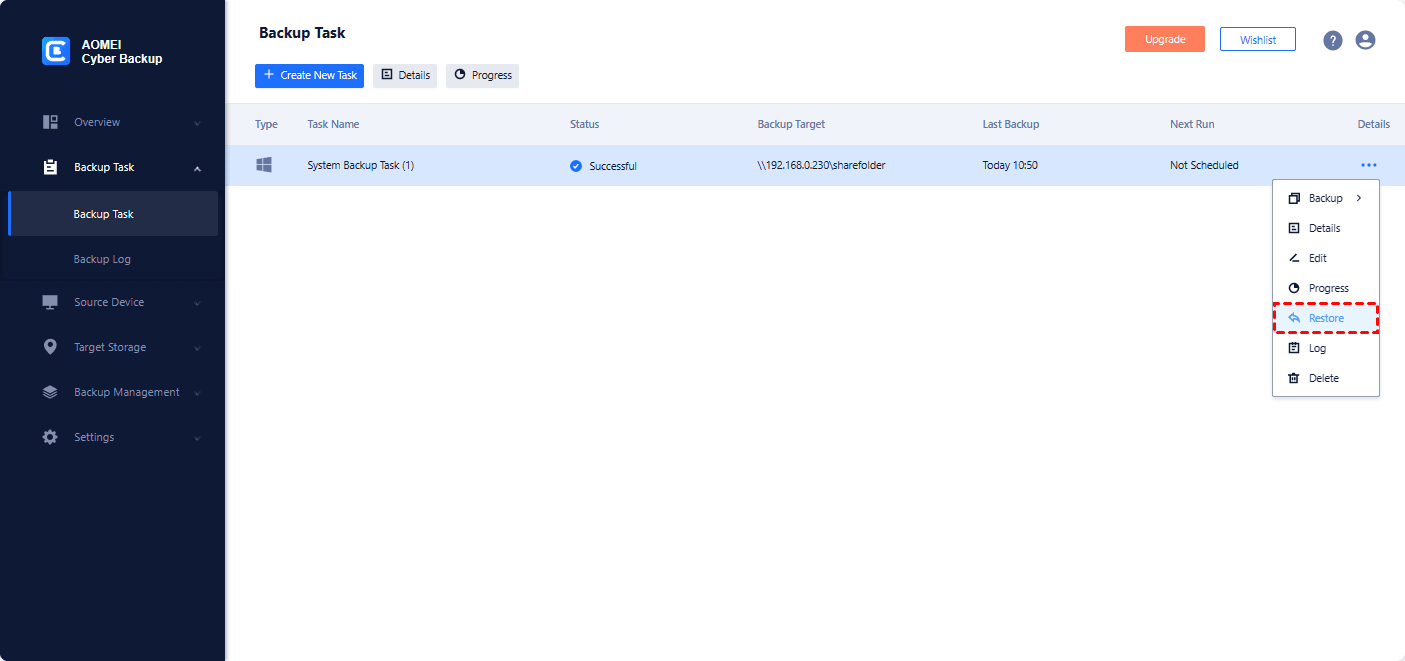
To restore data on client computers, you need to click Backup Task on the left menu bar and click the three dots icon on the task you want to restore. Then select Restore from the drop-down menu.
Note: AOMEI Cyber Backup can not only help you backup physical machines but also virtual machines. It enables you to backup VMware and Hyper-V easily.
Summary
Reading here, you may finish the image deployment with Sysprep alternative. Compared with Sysprep, AOMEI Image Deploy is very easy to operate. You just need to follow the steps above and click the corresponding button.
If you have many computers, AOMEI Image Deploy is suitable for you. If you only have one or two computers, you can try AOMEI Backupper Standard. It allows you to clone system and install the cloned disk on another computer. Also, you can try to backup system to external hard drive and then restore system image from external hard drive. Download this software to discover more useful features.