Cloned Hard Drive Shows Wrong Size - Quick Fix Once For All
If the cloned hard drive displays an incorrect size in Windows 11/10/8.1/8/7, it's possible that the cloning process was not executed correctly. To learn how to clone a hard drive to a larger drive without leaving unallocated space, follow the steps provided here.
By Teresa Updated on November 15, 2023
🌟 Video Guide: How to Fix Cloned SSD Not Showing Full Capacity
Why is my cloned showing wrong size?
When you upgrade to a larger hard disk drive (HDD) or solid-state drive (SSD) by cloning the old drive, you may find the size of the partition on the destination disk remains unchanged. In other words, the cloned drive not showing full capacity after clone.
The reason behind this issue is that when you clone a hard drive, not only the data but also the partition size gets duplicated. Consequently, if the cloned drive is larger than the original one, many cloning programs will leave the additional space as unallocated. As a result, the HDD/SSD may incorrectly display its capacity.
In Windows File Explorer, this unallocated space remains hidden from view, leading some users to believe that they have lost disk space after the hard drive cloning process. However, you can resolve this by accessing Disk Management, where you can check for any unallocated space on your cloned hard drive.
How to fix cloned hard drive shows wrong size
There are two alternative solutions to resolve the issue of HDD/SSD shows wrong capacity. After completing the hard drive cloning process, you can access Disk Management to manage the unallocated space.
Alternatively, if you want a comprehensive and swift fix, you can use specialized cloning software that enables you to clone to a larger drive without experiencing any loss of disk capacity.
👉 1. How to use full capacity of cloned hard drive
👉 2. How to avoid cloned hard drive shows wrong size
1. How to use full capacity of cloned hard drive
Expanding partitions after cloning in Windows 11/10/8/7 can be achieved by adding the unallocated space on the cloned hard drive into the contiguous partition. Follow the steps below to perform this task using Disk Management:
1. Press Windows + R key to open the Run window. Type “diskmgmt.msc” and press Enter to open Disk Management in Windows 11/10/8/7.
2. In Disk Management, right-click on the partition before the unallocated space, and select Extend Volume.
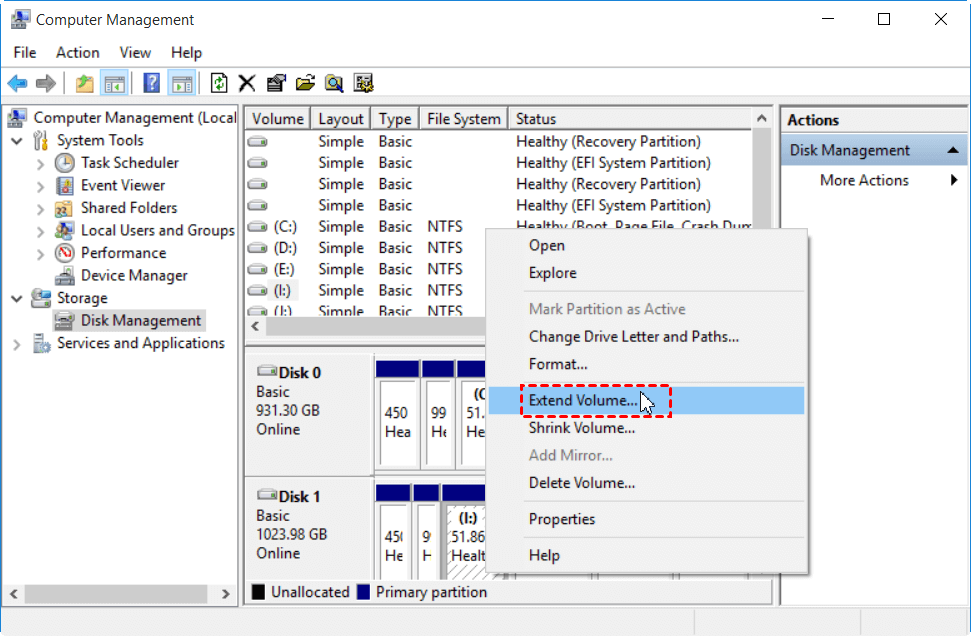
3. Follow the Extend Volume Wizard to add unallocated space to this partition.
✍ Tips:
● If the partition and the unallocated space are not contiguous, you may encounter the issue “Extend Volume greyed out”.
● Besides extending volume, you can also use the unallocated space to create one or more new partitions. Just right-click on the unallocated space and select New Simple Volume.
If you find yourself unable to utilize the unallocated space to extend the adjacent partition or create a new partition on your cloned hard drive, it is likely that the hard drive is larger than 2TB and is using the MBR (Master Boot Record) partition style. Unfortunately, on MBR disks, any space beyond the 2TB limit becomes unusable.
Consequently, after cloning, you won't be able to utilize the full capacity of your HDD unless you convert it to the GPT (GUID Partition Table) disk style. However, converting a disk from MBR to GPT using Disk Management entails deleting all existing partitions on the hard drive.
Alternatively, if you want to avoid encountering the issue of the cloned hard drive not showing its full capacity in the first place, there are preventative measures you can take. Keep reading to learn more about these preventive steps.
2. How to avoid cloned drive shows wrong size
The key to cloning hard drives of different sizes without leaving unallocated space is to choose a proper cloning software. There is specialized hard disk cloning software called AOMEI Backupper Professional that can help you clone hard drive to a larger one without causing disk capacity loss.
-
For cloning to a much larger HDD or SSD, AOMEI Backupper gives you two options to manage the partition size. You can manually edit the partition size on the clone disk or let the program automatically adjust the partition size to fit up the entire hard drive.
-
When cloning MBR disk to GPT disk larger than 2TB, you will not lose disk space beyond 2TB because the program takes care of it. The cloned hard drive can still be used as GPT disk and remains bootable.
-
When you upgrade to an SSD, it provides an option to align partitions to optimize for SSD.
-
It will not interrupt your work while cloning because of the volume shadow copy service (VSS) technology.
Download AOMEI Backupper Pro now to have a try.
★ Step-by-step guide to clone to a larger SSD without cloned SSD not showing full capacity issue
AOMEI Backupper provides an intuitive interface, which makes all operations in AOMEI Backupper quite easy. To clone hard drive to larger SSD or HDD, you can follow the steps below.
✎ Note: Cloning HDD to SSD will delete everything on the target SSD first and then migrate all the data on the HDD to SSD. Thus, if there are important data on the target SSD, do backup files before cloning, or you will lose them.
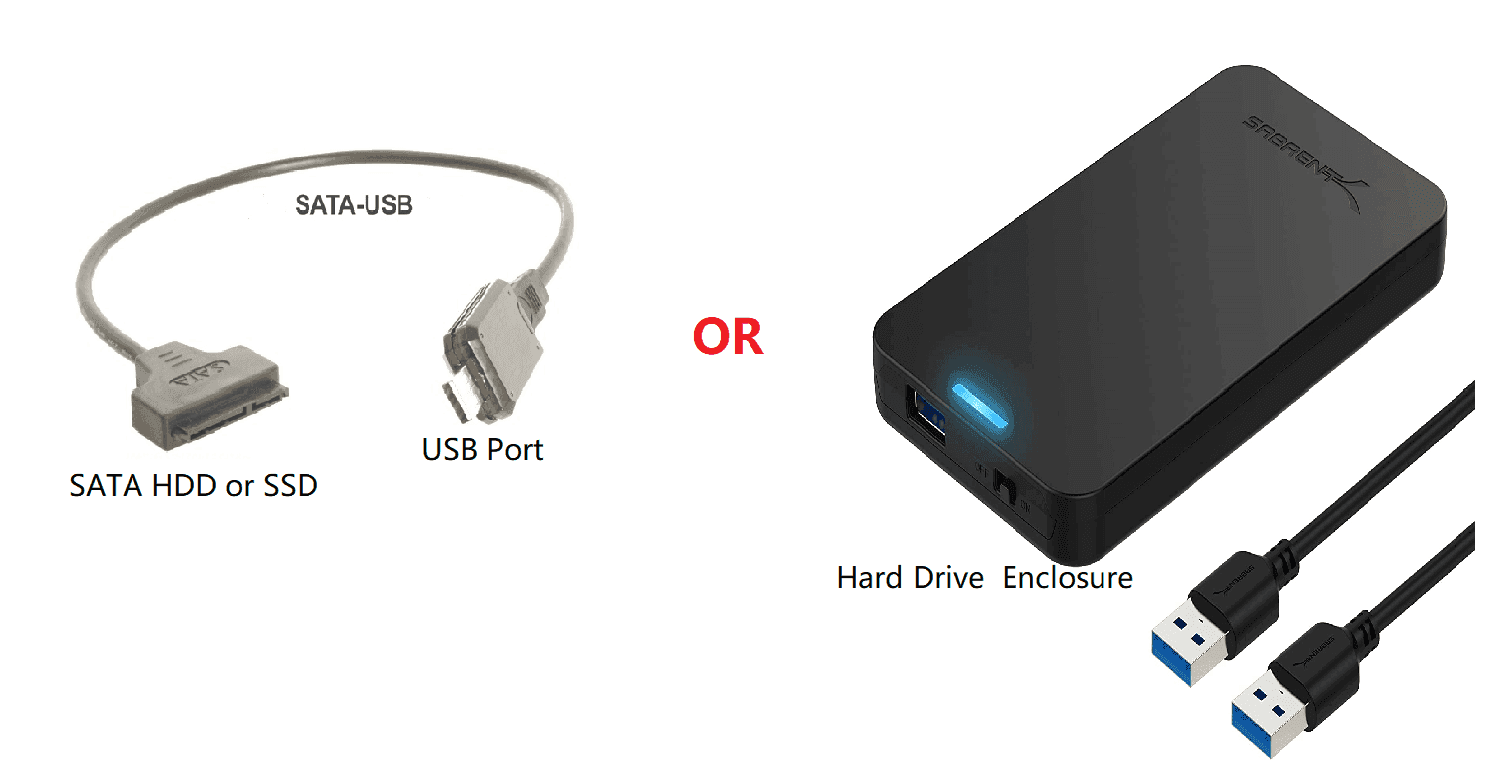
1. Connect the target SSD to your computer and make sure it is detected.
2. Install this program on your computer, and open it. Select “Disk Clone” under "Clone" tab.

3. Click on the current drive to select it as the source disk, and click on "Next". Then click on the larger SSD to set it as the destination disk, and click “Next”.

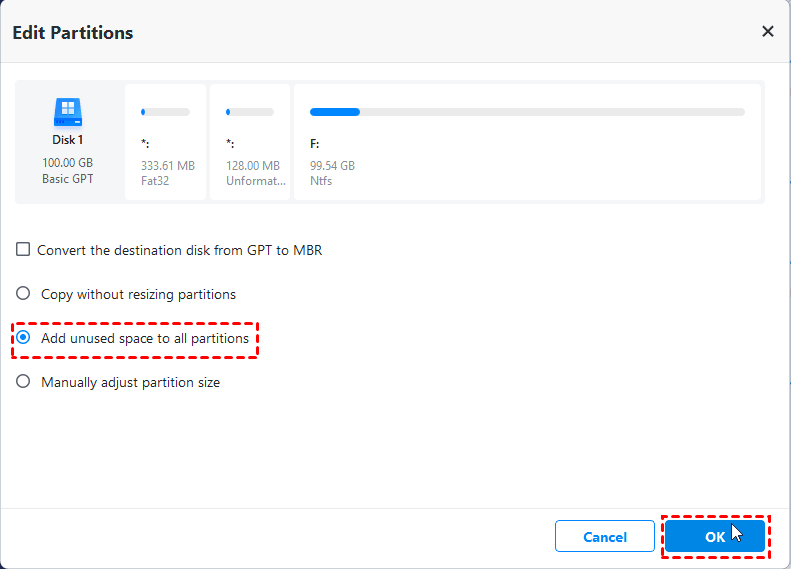
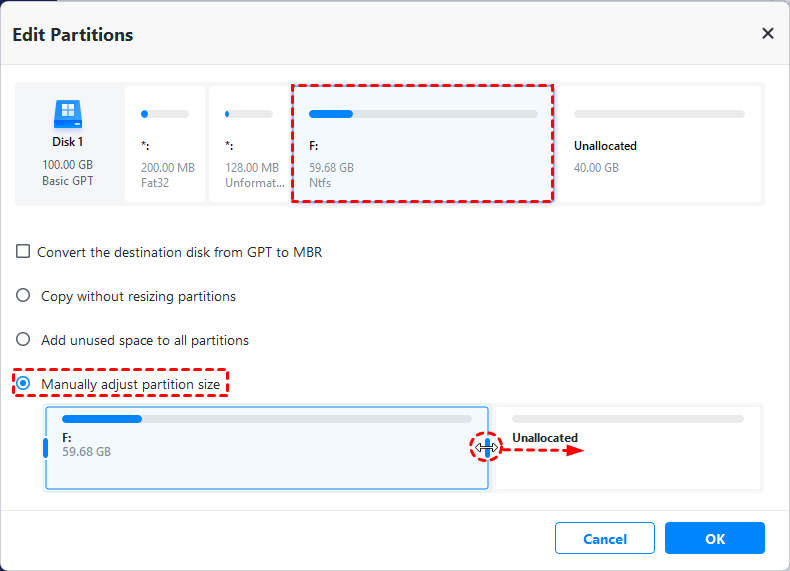
4. In the Operation Summary page, click on “Edit partitions” and then use the following two options to deal with SSD not showing full capacity after clone:
- Add unused space to all partitions: the program will automatically extend all existing partitions with unallocated space.
- Manually adjust partition size: you can click on each partition and drag the sidebar to edit the partition size.
5. Check the option “SSD Alignment”, which is important for keeping the SSD at its best performance. Then click “Start Clone” to execute this operation.

In this way, a cloned hard drive will not show wrong size no matter how larger your destination disk is. It also applies to new hard drive showing wrong size, external hard drive not showing full capacity PS4, etc.
Additionally, you can clone HDD to smaller SSD with the same steps above. If you want to get the best performance from the new SSD, cloning boot drive to NVMe will be a great choice.
💛 Tips on what to do after cloning hard drive to SSD:
1. Boot from the cloned SSD and see if it's bootable.
2. If the cloned SSD is bootable, wipe HDD and use it to store data. Just go to Tools > Disk Wipe.

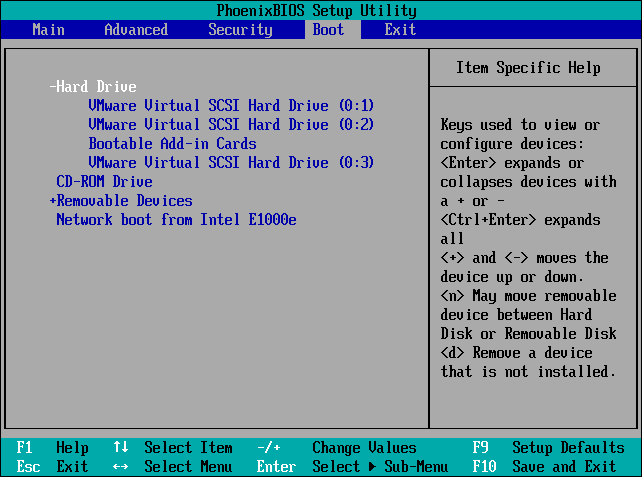
3. If the cloned SSD is not bootable, you should first check whether it's the first boot option in the BIOS. If not, change it to the first one. For more troubleshooting, please refer to the cloned SSD won't boot guide.
Conclusion
That’s all for how to fix the cloned hard drive shows wrong size problem. You can go to Disk Management to extend a partition or create a partition with unallocated space. Or you can simply clone hard drive and resize partitions with AOMEI Backupper to avoid cloned drive not showing full capacity issue. And it also applies to clone all kinds of SSDs, such as clone SATA SSD, clone NVMe SSD, clone hard drive to WD SSD, clone PCIe SSD, etc.
Besides the clone feature, AOMEI Backupper has excellent backup and restore features. You can use it to backup operating system and restore your computer to a normal state when problems occur. Try it now to discover more!
