Best Dell Data Migration Tool - Dell Migrate or AOMEI Backupper
Dell Data Assist and AOMEI Backupper are both good Dell data migration tools that allow you to migrate files and settings to a new computer quickly, even for the operating system.
by Ivy Updated on November 17, 2022
In Need of Dell Data Migration Tool
Dell computers serve thousands of users around the world due to their great performance and properties. Users would like to perform a direct file transfer from PC to PC in different situations. In general, here are some common reasons.
-
Simply transfer files old PC to new PC for upgrading.
-
Share files between computers. For example, transfer files between laptop and desktop.
-
Make duplications as backups in case data loss unexpectedly.
-
Transfer operating system to new computer without reinstalling.
-
...
Many other reasons may not be listed here because causes are different under all kinds of conditions. Anyway, compared with reasons, you may be more concerned about how to perform Dell data migration easily.
What Is the Dell Data Migration Tool?
Like other brands of computers, Dell also provides you with a data migration tool, it's called Dell Data Assistant. With it, you can easily move important files and personal settings from your old PC to your new Dell PC.
Note that it is available only for Inspiron, Inspiron G Series, XPS, and Alienware PCs in certain regions. And you need to purchase it before migrating files and settings in your computers and it charges $49. For details, please refers to the official document of Dell.
Besides, you could consider using a powerful dell data transfer tool from a third-party company, such as AOMEI Backupper Professional provided by AOMEI, not only files but also the operating system or everything on the disk. And it also helps protect data continuously.
How to Perform Dell Transfer Data to New Computer
In this part, we will introduce you to two helpful ways to perform Dell transfer data to new computer, namely using Dell Data Assistant and AOMEI Backupper. Both of them help you migrate files, but if you want to transfer operating system, use AOMEI Backupper instead and follow the stepwise guide in the next part.
Perform Dell Migrate and Erase Process with Data Assistant
Here you will use Dell Data Assistant to migrate data to new computer and erase them on the old one. Before starting, please check the notifications in the following:
- Dell Data Assistant only moves files and settings, not including applications.
- The old computer must be Windows 7 or later and the new computer must be Windows 10 or later.
- You need to sign in with the administrator on both computers and be sure they are connected to the same local network.
- Close applications like Browsers, Control Panel, System Settings etc before migrating.
Then, follow the steps to perform Dell migrate and erase process:
1. Type SupportAssist in the search box and select it from the result lists.
2. Click Yes to start using Dell Migrate and then Let's get started, it will start to search for your files and settings on the old PC.

3. Click Trust network if you recognize and trust the network. It will try to look for your old PC and show you the instructions to download and install Dell Data Assistant on the old computer. Just follow it.
4. Run Dell Data Assistant on the old computer and it will check if your computer meets all the pre-requisites. Click Trust Network > Let's get started to connect both computers. After identifies, it will generate a verification code, which is required on the new computer for secure data migration.
5. Enter the verification code on the new computer, once paired, it will become green. And it will go to the next step if the user profiles are the same and search for files and settings to be migrated. If not, you need to choose to continue or login with the same Windows user profile.
6. After searching, click Move everything for me and Migrate now on the new computer. And you can also select Let me choose what to move instead.
7. Just wait until the Dell Migrate is complete and check the summary of your migration results. If you want to give away your old computer or sell it, click Erase this PC and follow the instructions to complete the rest of steps.
Dell Transfer Files from Old to New Computer with AOMEI Backupper
Here you will use the Basic Sync feature in AOMEI Backupper Professional to perform Dell transfer files from an old to a new computer. And you can choose the way to transfer files in the following:
- Share or NAS device: It allows you to directly transfer files to a new computer as long as you create a shared folder on it. If you use NAS, it requires you to download files from it.
- External Disk or USB drive: In this way, you need to transfer files to external devices and then new computer.
- Cloud Drive: Similar to NAS, you need to download files to new computer after transferring to the cloud drive.
Here take network share as an example to perform Dell transfer data new computer. Please download its free trial and have a try. Windows 11, 10, 8.1/8, 7, XP, and Vista are supported.
(PS: Compared with Dell Data Assistant, it is more flexible and comprehensive, since it not only helps users transfer user profile from old computer to new computer but also migrate the operating system or entire disk in simple steps. To move system, go to the next part.)
Preparations:
-
Make sure the involved computers are in the same network segment in LAN.
-
A shared folder on the new computer is necessary. If there is no network shared folder, please refer to the shared folder synchronization page to create one.
Detailed steps:
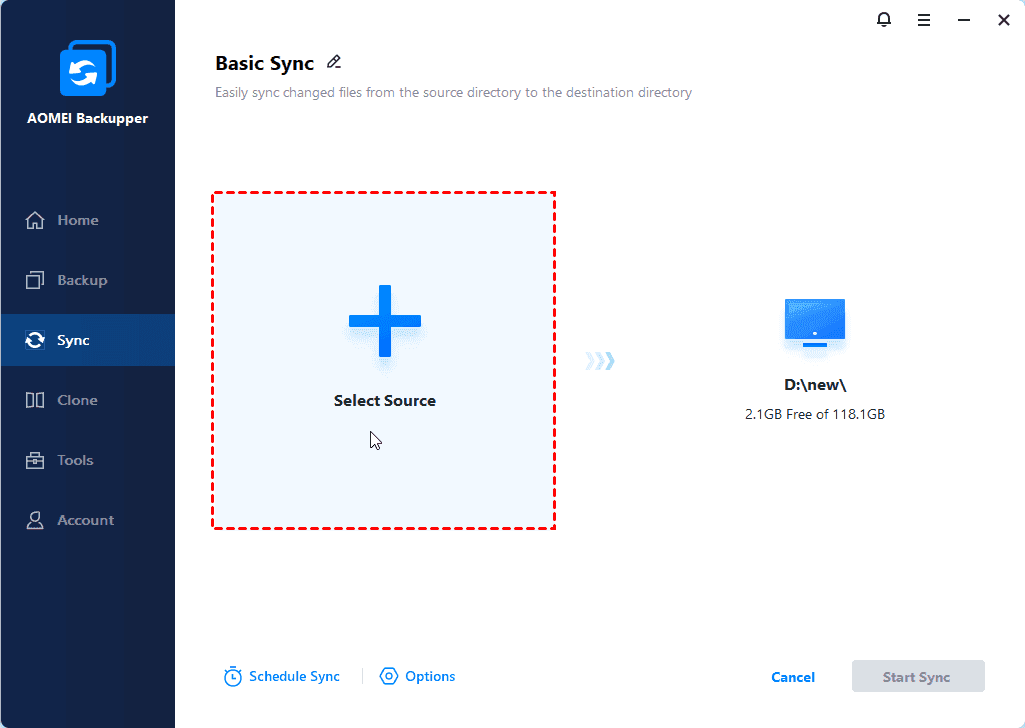
1. Install AOMEI Backupper Professional on the old computer you’ll transfer files from. Go to the Sync tab and scroll down to find Basic Sync. Click it to continue Dell transfer data new computer.

2. Click Add Folder and then Computer (or This PC) to find the local files you’d like to transfer.
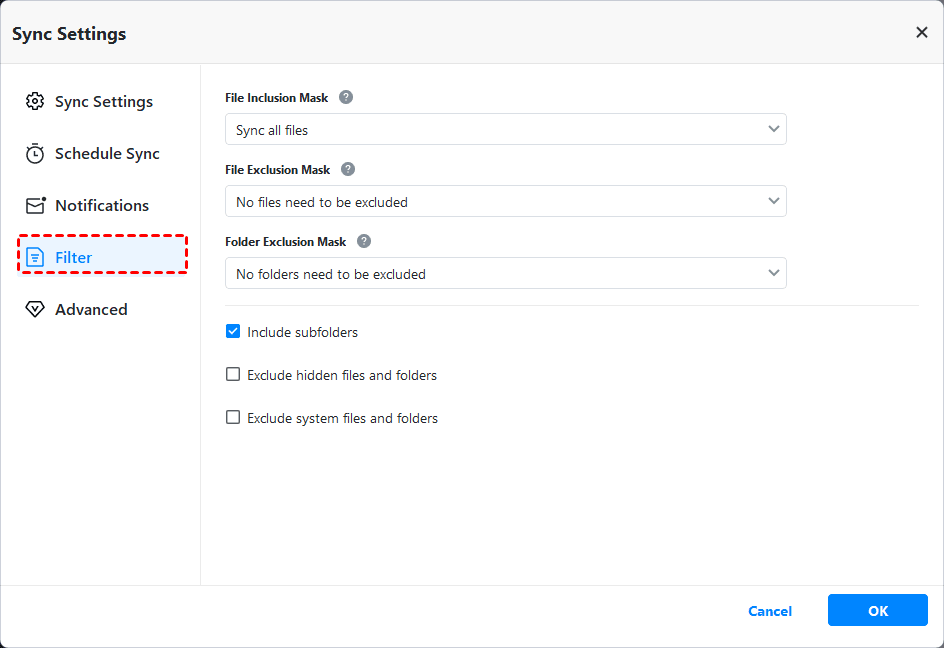
3. Click the folder you select > the funnel-shaped button at the right side, you are able to include or exclude certain files from selected folders.
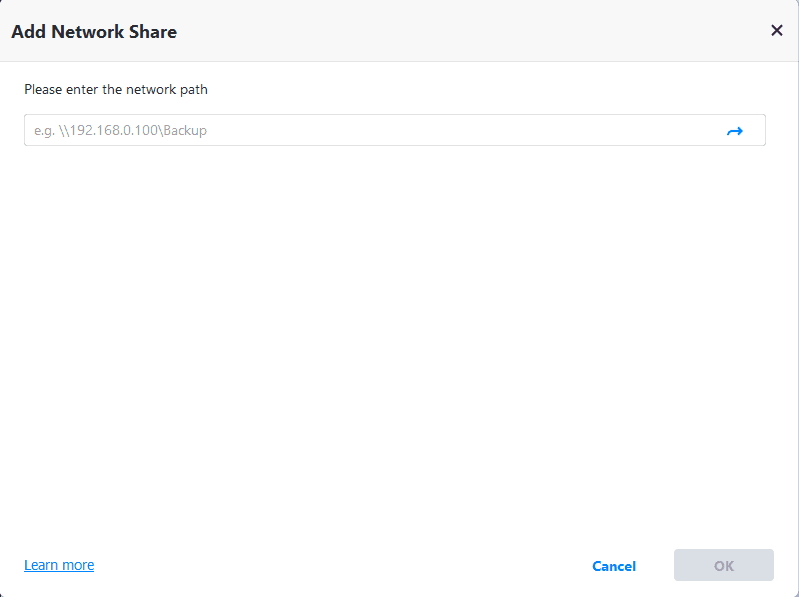
4. Click where the arrow points on the interface, then select Add Share or NAS Device and input the network path of the shared folder on the new computer. Select it and click OK to confirm the path.
5. Confirm you add all the files and folders you want and click Start Sync to perform Dell data migration.
Tips:
- If you want to share files to multiple computers that are in the same LAN using this way, just use the new computer as a centralized computer and allow other users to access it.
- You can also keep this software for continuous data protection, and you can configure the sync task more flexible with its Options or Schedule Sync feature. Daily, Weekly, Monthly, event-trigger, or USB plug-in are supported.
- Except for Sync feature, you still can transfer data with the File Backup or Cloud Backup feature. It compresses all the data into an image file, so no one can modify it before restoring it.
How to Transfer Dell Operating System (OS) to New Computer
If you’d like to move operating system and other data on the disk, you would consider using Disk Backup and Restore feature in AOMEI Backupper. That way works perfectly, especially moving hard drive to new computer with dissimilar hardware. Here are specific steps.
Step 1. Create Image for Dell Hard Drive
You need to create a backup image for a current hard drive with Windows installed. It is suggested to save the backup image on an external hard drive or network path which can be accessed in WinPE on bare metal. Connect the external drive if necessary.
1. In AOMEI Backupper, click Backup and then Disk Backup. To migrate the operating system only, please select System Backup at this step.
2. Select the hard drive you’d like to backup by clicking Add Disk and then a path (external drive recommended) to store the disk image backup. Click Next in order.
3. In the Operation Summary window, confirm you select the right disk and click Start Backup. Otherwise, there is a risk of data loss.
Step 2. Create A Bootable Device
1. Insert a USB flash drive (more than 13GB in size) or CD/DVD disc into your Dell computer.
2. In AOMEI Backupper, click Tools > Create Bootable Media.

3. Choose bootable disc type (Windows PE recommended) and select the storage media - USB Boot Device. Click Next to start the creation of a bootable device. Wait for it to complete.
Step 3. Restore Image to New Computer
Now you need to restore the disk image to new machine. Shut it down in the first place. Note that the target hard drive will be overwritten, so back up important files in advance.
1. Insert the bootable media you created and the external storage with backup image.
2. Power it on, then press Del or F2 to enter BIOS, and change boot priority for the bootable media here. Press F10 to save and exit BIOS.
3. Once logged in, you’ll see a loaded AOMEI Backupper right now. Click Restore and then Select Image File to select the disk image.

4. Select restore the entire disk and then the hard drive on the new computer as the destination.
5. Confirm that you select the correct disks and be sure the Universal Restore option is checked by default if your new computer has dissimilar hardware. Click Start Restore to perform Dell OS migration.
Tips:
-
By default, the Universal Restore feature in AOMEI Backupper only installs drivers required for system startup. For other drivers, such as video/sound card drivers, NIC drivers, display drivers, etc, you need to install them manually after restoring.
-
If your Dell computer using Windows Server 2008, 2012, 2012 R2, 2016, 2019, 2022, etc, please turn to AOMEI Backupper Server. And the Dell data and OS migration steps are exactly the same as shown above.
Verdict
As for Dell data migration tool, both Dell Data Assist and AOMEI Backupper are good choices, but the second one is more flexible and comprehensive, since it not only helps you transfer files with different methods but also partition, system, disk.
And you still can use it for continuous data protection on the new computer. It is suggested to follow the 3-2-1 backup strategy and keep multiple backups for disaster recovery. So you no longer need to worry about data loss and system downtime.