Backup Data to Drobo NAS with Best Free Backup Software
This article provides users like you with two useful method to backup data to Drobo NAS in simple steps. You could use Drobo DR or AOMEI Backupper.
By Delia Updated on November 10, 2022
Quick navigation
Why backup data to Drobo NAS?
Drobo, founded in 2007, makes award-winning data storage products for both small and medium-sized enterprises(SMEs) and professional consumers. Based on their patented BeyondRAID technology, Drobo's direct-attached and network-attached storage units are quite popular in the market.
It not only protects from drive failures, but also includes a battery backup system that protects all data in memory or cache. Currently, Drobo devices can house up to four, five, eight, or twelve 3.5" or 2.5" Serial SATA or Serial Attached SCSI hard disk drives and connect with a computer or network via USB 2.0, USB 3.0, FireWire 800, eSATA, Gigabit Ethernet or Thunderbolt. The Drobo 5N and Drobo B810n are the leading welcome network-attached storage for SMEs. Thus, Drobo network-attached storage (NAS) device is ideal for giving multiple users remote access to large amounts of data.

From Then you may ask how to backup data to Drobo NAS in case of data loss, such as, Drobo 5N or Drobo B810n. You can learn the best free backup software for Drobo NAS backup and its detailed steps.
How to backup data to Drobo NAS easily
As a matter of fact, Drobo DR comes along with Drobo NAS for file sharing and data replication activities. It requires a Drobo Dashboard management software 2.0.0 or higher, and both Drobo system setup and runing on the network whether on the same network or remote. That's to say, you need to configure both source and destination system.
In addition, you still can use third-party free backup software like AOMEI Backupper Standard. It works well in Drobo NAS backup for Windows users and you can backup any files between both systems. The operation can be manual or schedule, but the later option is recommended. Because a regular backup based on daily/weekly/monthly can enhance the security of data. It only requires both Drobo system at the same network location.
By comparison, you may understand it's a wise choice to use AOMEI Backupper Standard due to its ease of operation and rich features. And I'll introduce you both ways, but simple takes precedence.
Method 1: Backup data to Drobo NAS with AOMEI Backupper
Before backing up with AOMEI Backuper Standard, you need to download and install it on your computer. It applies to Windows 11/10/8/7/XP/Vista. For server users, try AOMEI Backupper Server.
Step 1. Launch AOMEI Backupper Standard and then select File Backup under the Backup tab.

Step 2. In the next screen, add the network location of source system and select the files you want to backup.
First of all, click Add Folder in the main page of file backup.

Then, select Share/NAS to move on.

Next, click Add Share or NAS devices and type the required info, display name, IP address, user name and password of the source Drobo system.
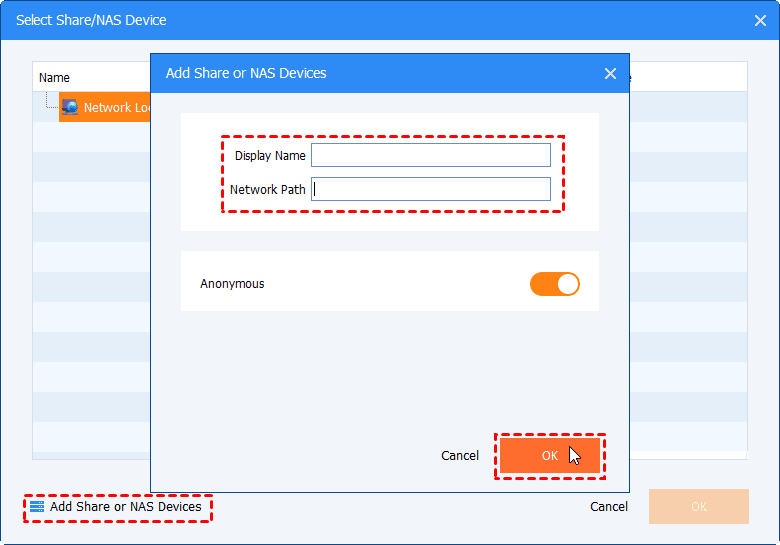
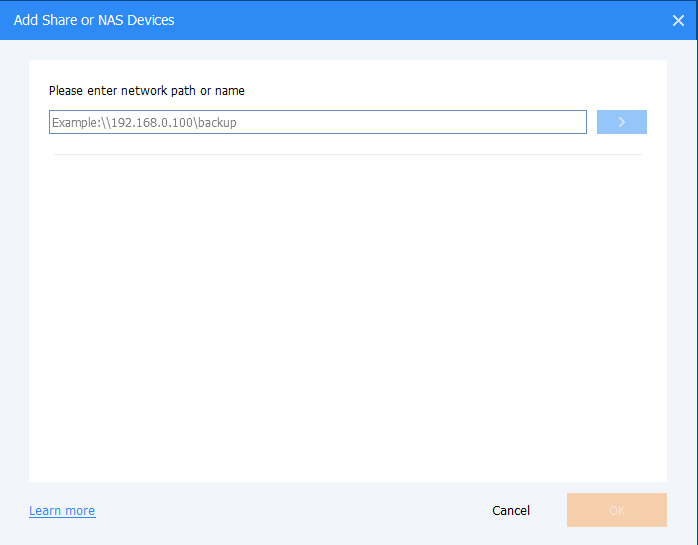
Step 3. Click the folder-shapped button > select Add Share or NAS devices > type the network path or name of destination Drobo system and click OK to confirm.
Step 4. Click Schedule Backup > Enable Schedule Backup and OK to enable automatic backup, it's daily incremental backup. Then, confirm if everything goes smoothly and click Start Backup to backup data.

Tips:
-
If you think daily backup interval is too short, you could change it to weekly or monthly. In addition, the incremental backup requires all backup to be intact while differential backup (supported by AOMEI Backupper Professional) does not. Thus, it's a better choice.
-
If you don’t want to affect work efficiency due to the scheduled backup task, you can set the backup time to off-peak hours, such as, midnight. Then, tick "Wake the computer to run scheduled tasks" to start the program 2 minutes before the task runs.
-
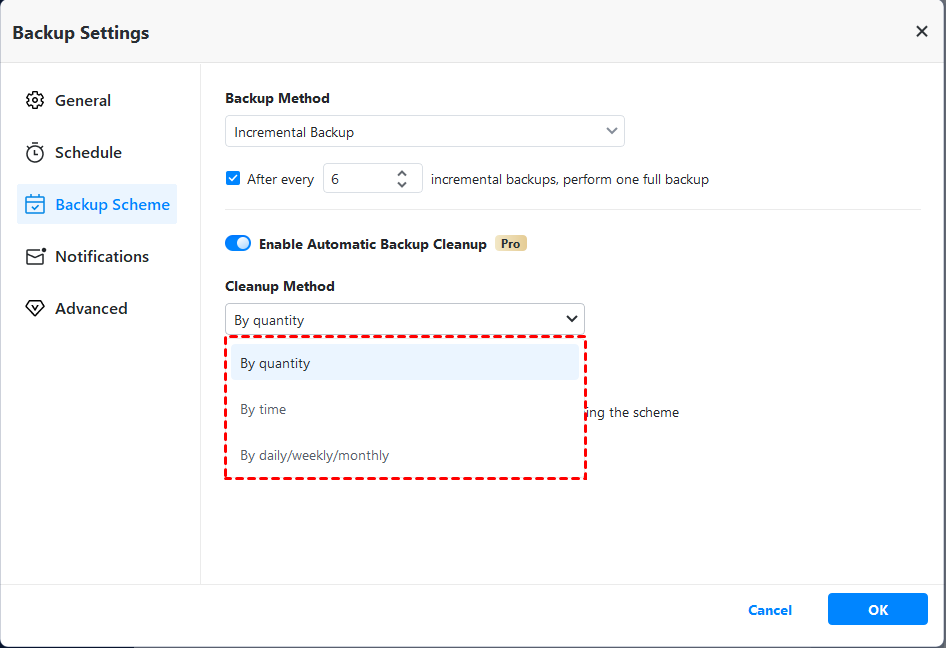
To ensure your backup disk always have enough space for new backups, the most effective way is to delete old backup with cleanup methods. You need to enable Backup Scheme and it requires an upgrade.
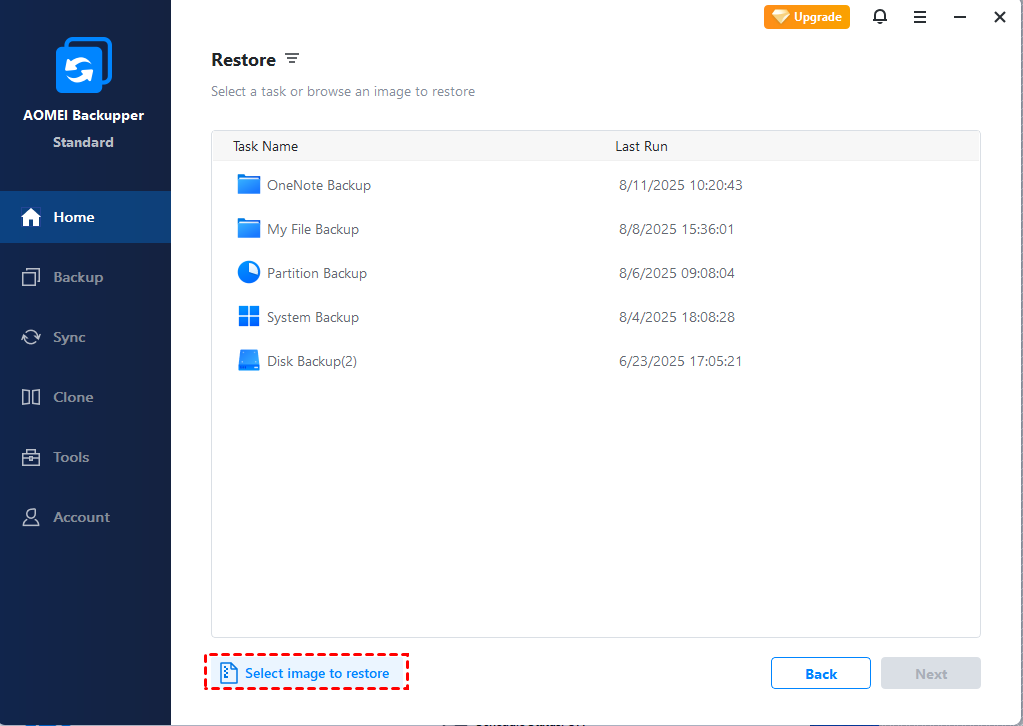
This is how to backup data to Drobo NAS with AOMEI Backupper Standard. Then, you can restore files from backup when something goes wrong.
To make it, click Restore and Select Image Files to find your backup image, then select the item you want to restore and destination, at last click Start Restore.
Method 2: Create Drobo offsite backup with Drobo DR
Step 1. Open Drobo Dashboard. Then, go to Status and ensure the source system is connected.
Step 2. Click Drobo DR to set up the source system. Just pitch on Setup DroboDR and select Sync as source in the next window. Then, type password twice and IP address.
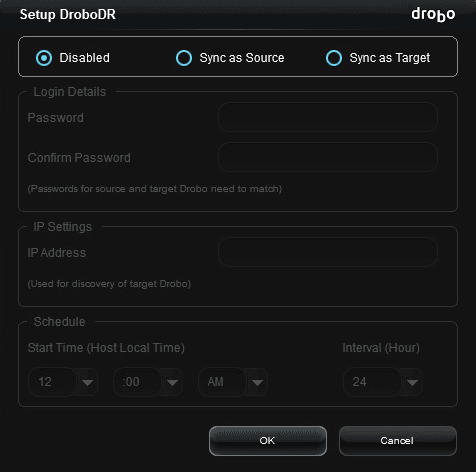
Step 3. Go to Schedule and set a backup interval as you like.
Step 4. Select your target system and ensure it's connected. Then, set it as the sync target and type password previously entered in the source system.
Step 5. Finally, it will run at the scheduled time. or you can go to the source system and click Start DroboDR Now to run this operation manually.
Written in the end
That's all for how to backup data to Drobo NAS with the best free backup software. You could use Drobo DR or AOMEI Backupper. The first option is suitable for users who have several Drobo family products and need to manage them simultaneously. The last one is more versatile. It not only supports Drobo NAS and different NAS devices, such as, Synology NAS, QNAP NAS, Buffalo NAS, but also support cloud drives like Microsoft OneDrive, Google Drive, AOMEI Cloud, etc.
In addition, it still can be used to protect data and system of a Windows computer by its all-around backup solutions, file backup, system backup, disk backup, partition backup, cloud backup, file sync, create bootable media, file restore, universal restore, event triggers, USB plug in, incremental & differential backup etc. Any interest? Please download the freeware or its free trial to enjoy these features.