Backup Laptop to External Hard Drive in Windows 10/8/7 for Free
To protect your laptop from data loss, you can backup laptop to external hard drive with Windows Backup tool or freeware.
by Delia Updated on October 18, 2022
An external hard drive is the best for laptop backup
When it comes to backup, one cannot be more serious considering all the reasons behind data loss, such as, virus attack, accidental file deletion, hardware failure, and update error. Unlike desktops, usually laptops have only one port to connect one internal hard drive. Then it is recommended to backup laptop to an eternal hard drive, so you can restore system when your computer is unbootable in case anything unexpected happens to your hard drive.
How to back up laptop on external hard drive?
In Windows 10/8/7, you use Windows built-in backup to create backups to external hard drive. Here will show you how to create backup in Windows 7 using Backup and Restore, which is also available in Windows 10.
1. Connect an external hard drive to your laptop. The backup drive is better to have twice as much space as your hard drive of your computer, because Windows backup will take a lot of space.
2. Open the backup tool. You can type “backup and restore” in the search box and then select Backup and Restore from the listed results.
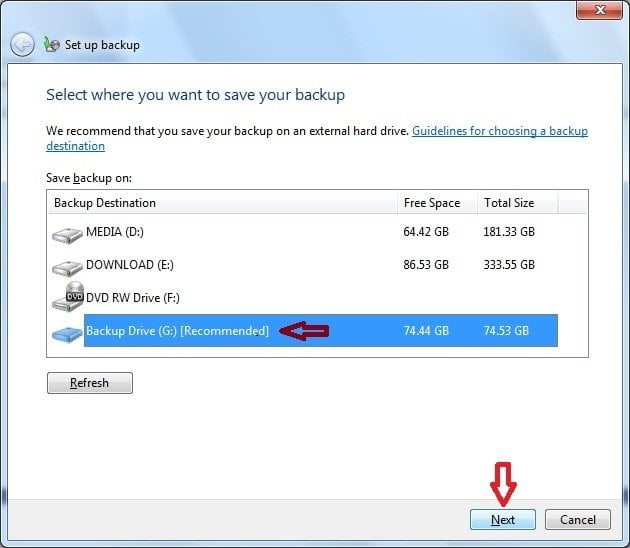
3. Click the "Set up Backup" button. In the next screen, select the external drive you prepared and click Next.
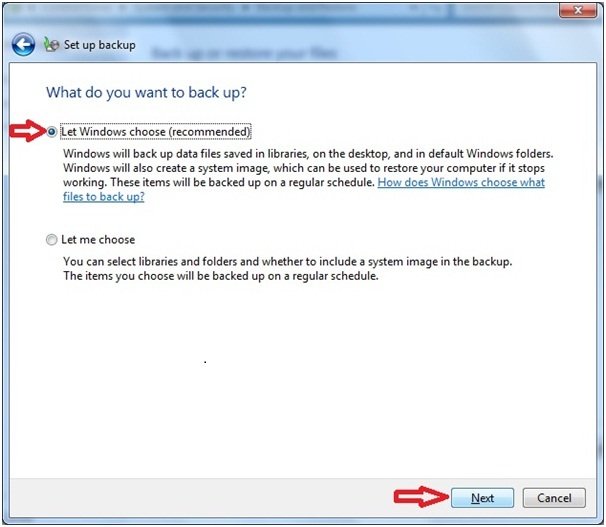
4. When choosing what to include in the backup, you can using Windows' default settings by selecting Let Windows choose. Then click Next.
5. On the next screen, Windows will set a schedule at 7:00 PM to run the backup. If you do not want to change it, click "Save Settings and Run Backup" to run the backup.
While the backup is in process, do not turn off your computer until the backup finishes. If any of your files get lost, you can open the Backup and Restore and then click the "Restore My Files" or "Restore all Users’ Files" to restore your files back.
Backup laptop to external hard drive with freeware
If you are not content with the functions of Windows Backup, you can use third party backup software. AOMEI Backupper Standard is a fully free backup and recovery software that gives you more options when configuring a backup than Windows Backup does. It supports incremental/differential backup to backup changed files only, which will reduce the time and disk space consumed. What’s more, it comes with an intuitive interface that makes everything you do with it really simple. Let’s see how it works:
To backup laptop to USB drive with AOMEI Backupper:
1. Download this freeware and run it. Also, make sure your external hard drive is well connected to your laptop.
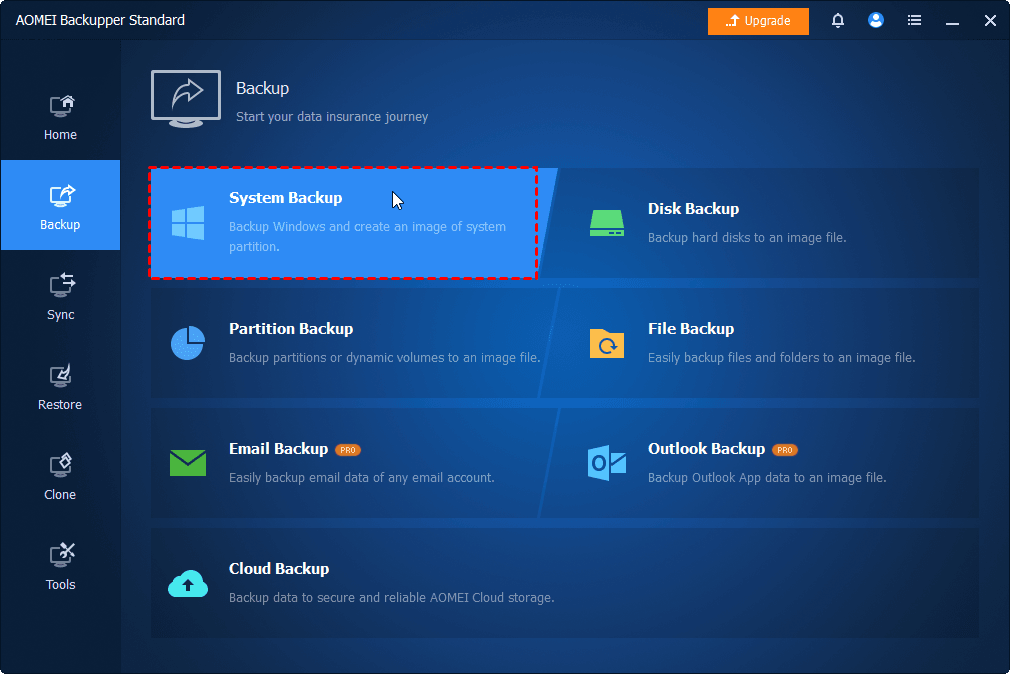
2. Click “Backup” and then select “System Backup”. You can also select “Disk Backup”, “Partition Backup”, and “File Backup” according to what you want to include in the backup.
3. For system backup, it will automatically include all the necessary files for offline system restore, which is similar to Let Windows choose of Backup and Restore. You need to just click to select the destination where you want to save the image backup.
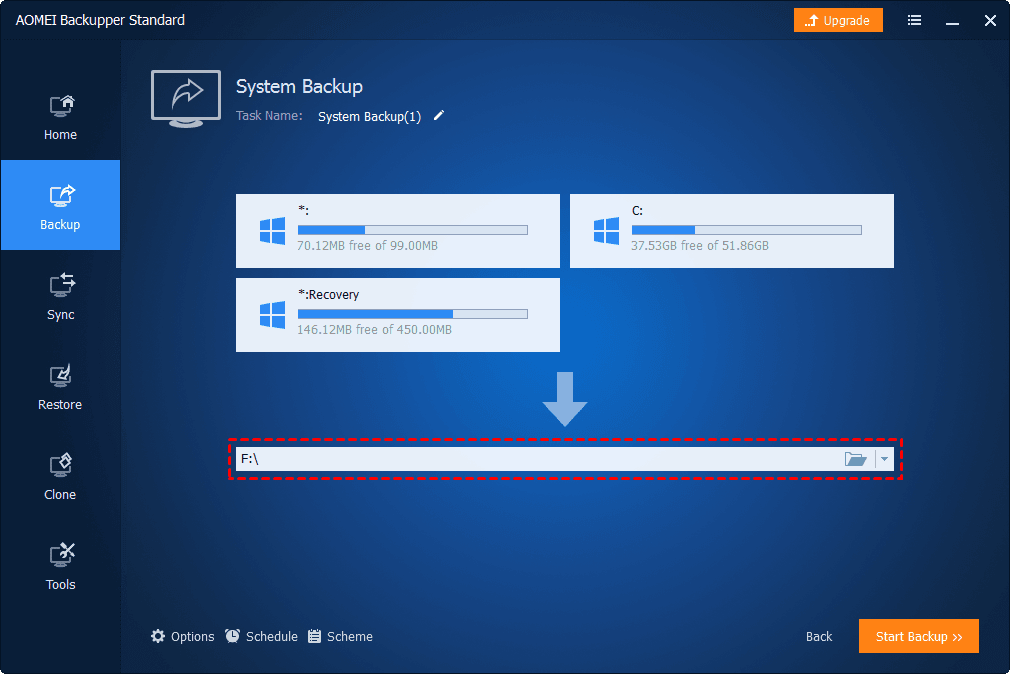
4. At the next screen, you will see a windows like Windows File Explorer. Click Computer, and then select the external hard drive. You can also double click to select any sub-folders as the destination.

5. Click “Schedule” option to set up a schedule to perform the backup at a specific time if needed. Then click “Start Backup” to run the backup.
By default, the scheduled backup will be performed as incremental backup. After the backup is complete, you can also manually start an incremental backup or differential backup in the Home screen. Additionally, to backup laptop to external hard drive with AOMEI Backupper will not take much space as it support high level image file compression.
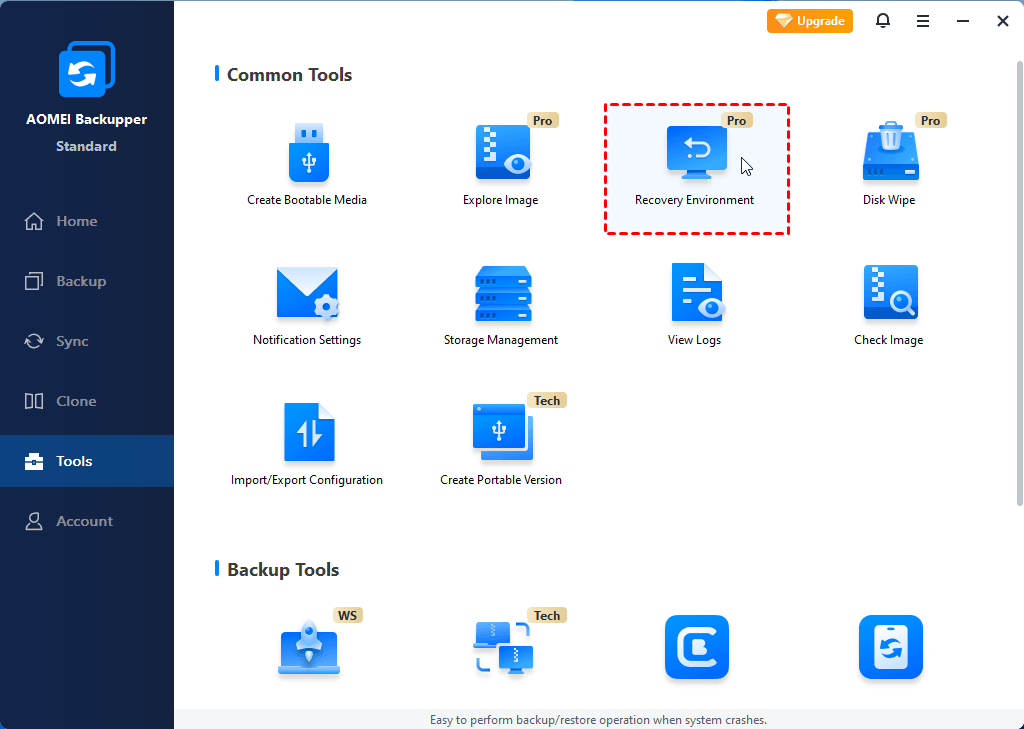
If your Windows computer won't boot, you need to boot your computer with the bootable disk you created earlier. In addition to creating bootable media, if you don't want to burn it to an ISO file and you don't have a USB or CD/DVD, you can also choose to create Recovery Environment in Windows system. This allows you to access the software and perform any operation directly in the recovery environment without the device at the next system boot.